Arduino Nano 33 IoT - Electromagnetic Lock
The electromagnetic lock (also called magnetic lock, maglock, or EM lock) is an important part of the door locking system. This guide shows how to use the Arduino Nano 33 IoT to control the electromagnetic lock.
Hardware Preparation
Or you can buy the following kits:
| 1 | × | DIYables Sensor Kit (18 sensors/displays) |
Additionally, some of these links are for products from our own brand, DIYables .
Overview of Electromagnetic Lock
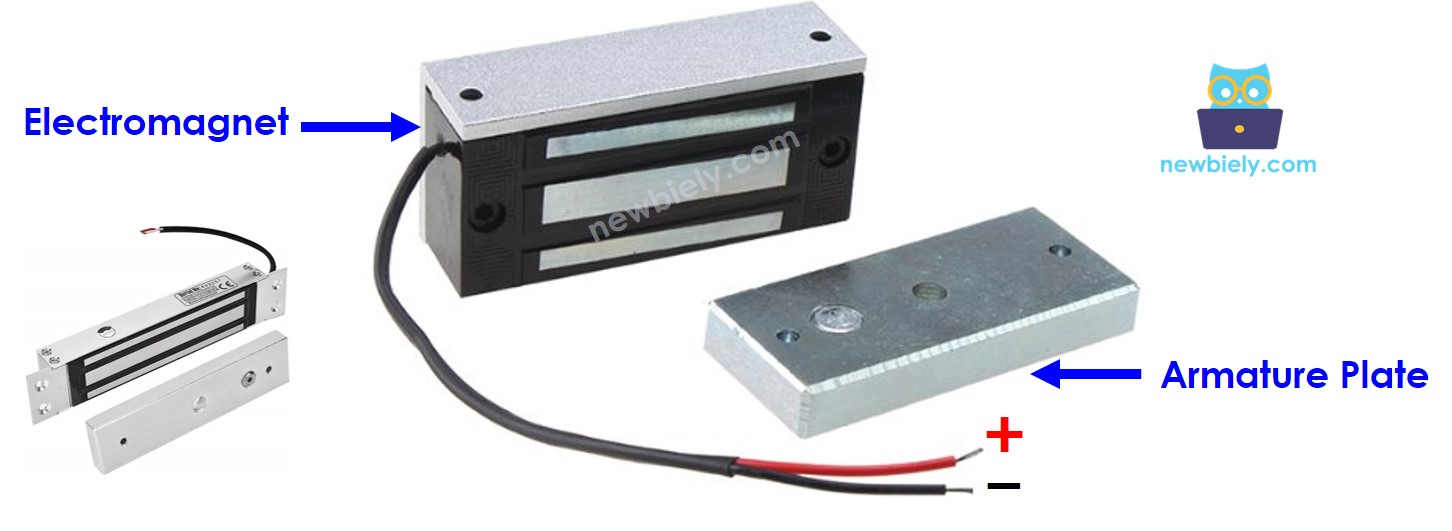
Electromagnetic Lock Pinout
The electromagnetic lock is made up of two parts:
- Armature plate: This part is fixed to the door’s moving section.
- Electromagnet: This part is mounted on the door frame. It has two wires that connect to a power source.
When the door is shut, two parts touch each other.
How Electromagnetic Lock Works
- When the electromagnet is turned on, it pulls the armature plate and locks. When it is turned off, it does not pull the armature plate and stays unlocked.
The electromagnetic lock runs on high power (12V, 24V, or 48V, for example). Because of this, we need to add a relay between the lock and the Arduino Nano 33 IoT pin. Check out the Arduino Nano 33 IoT Relay tutorial.
If we attach the electromagnetic lock to a relay that is normally open and use an Arduino Nano 33 IoT pin to control it:
- When the Arduino Nano 33 IoT pin is low, the relay is turned off and the door stays unlocked.
- When the Arduino Nano 33 IoT pin is high, the relay is turned on and the door becomes locked.
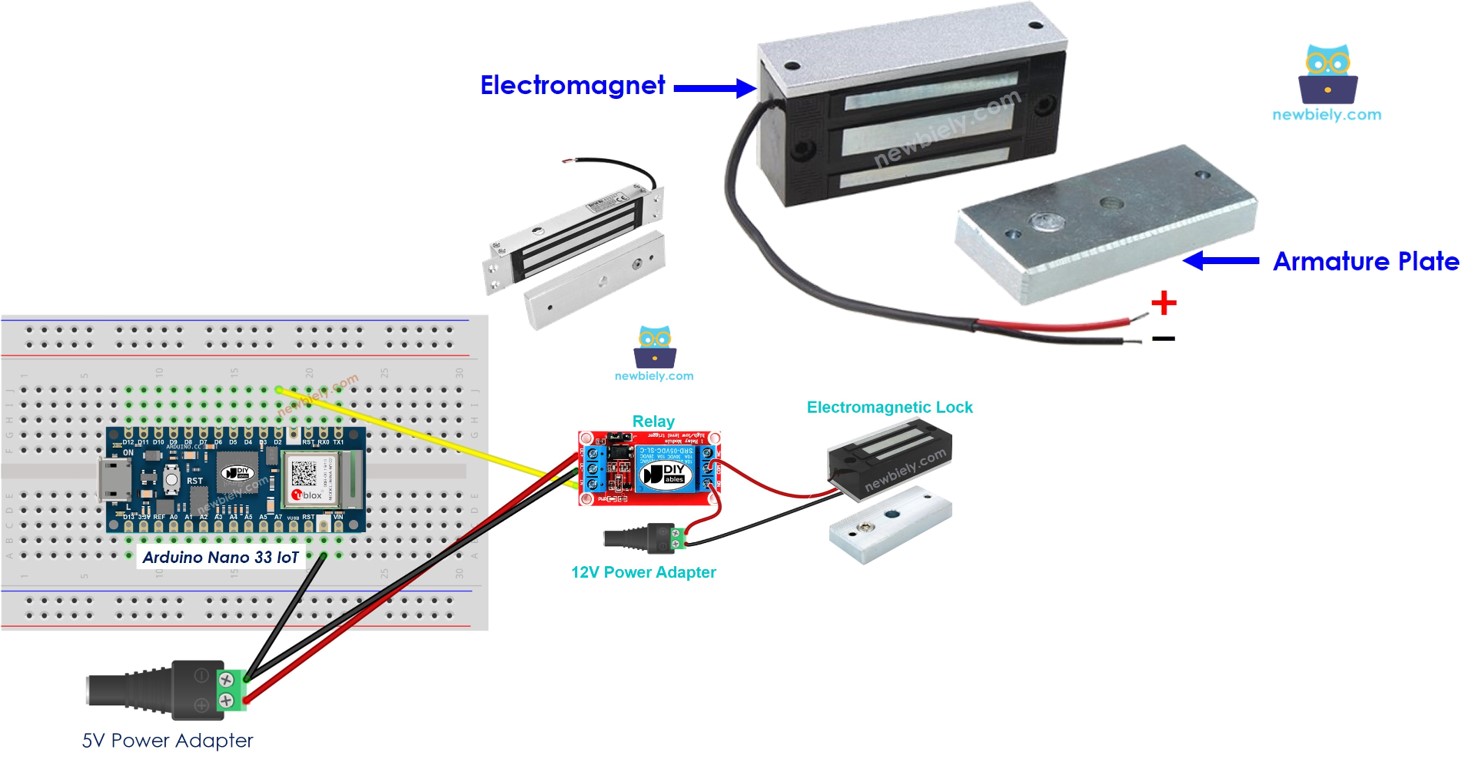
Wiring Diagram between Electromagnetic Lock and ES32
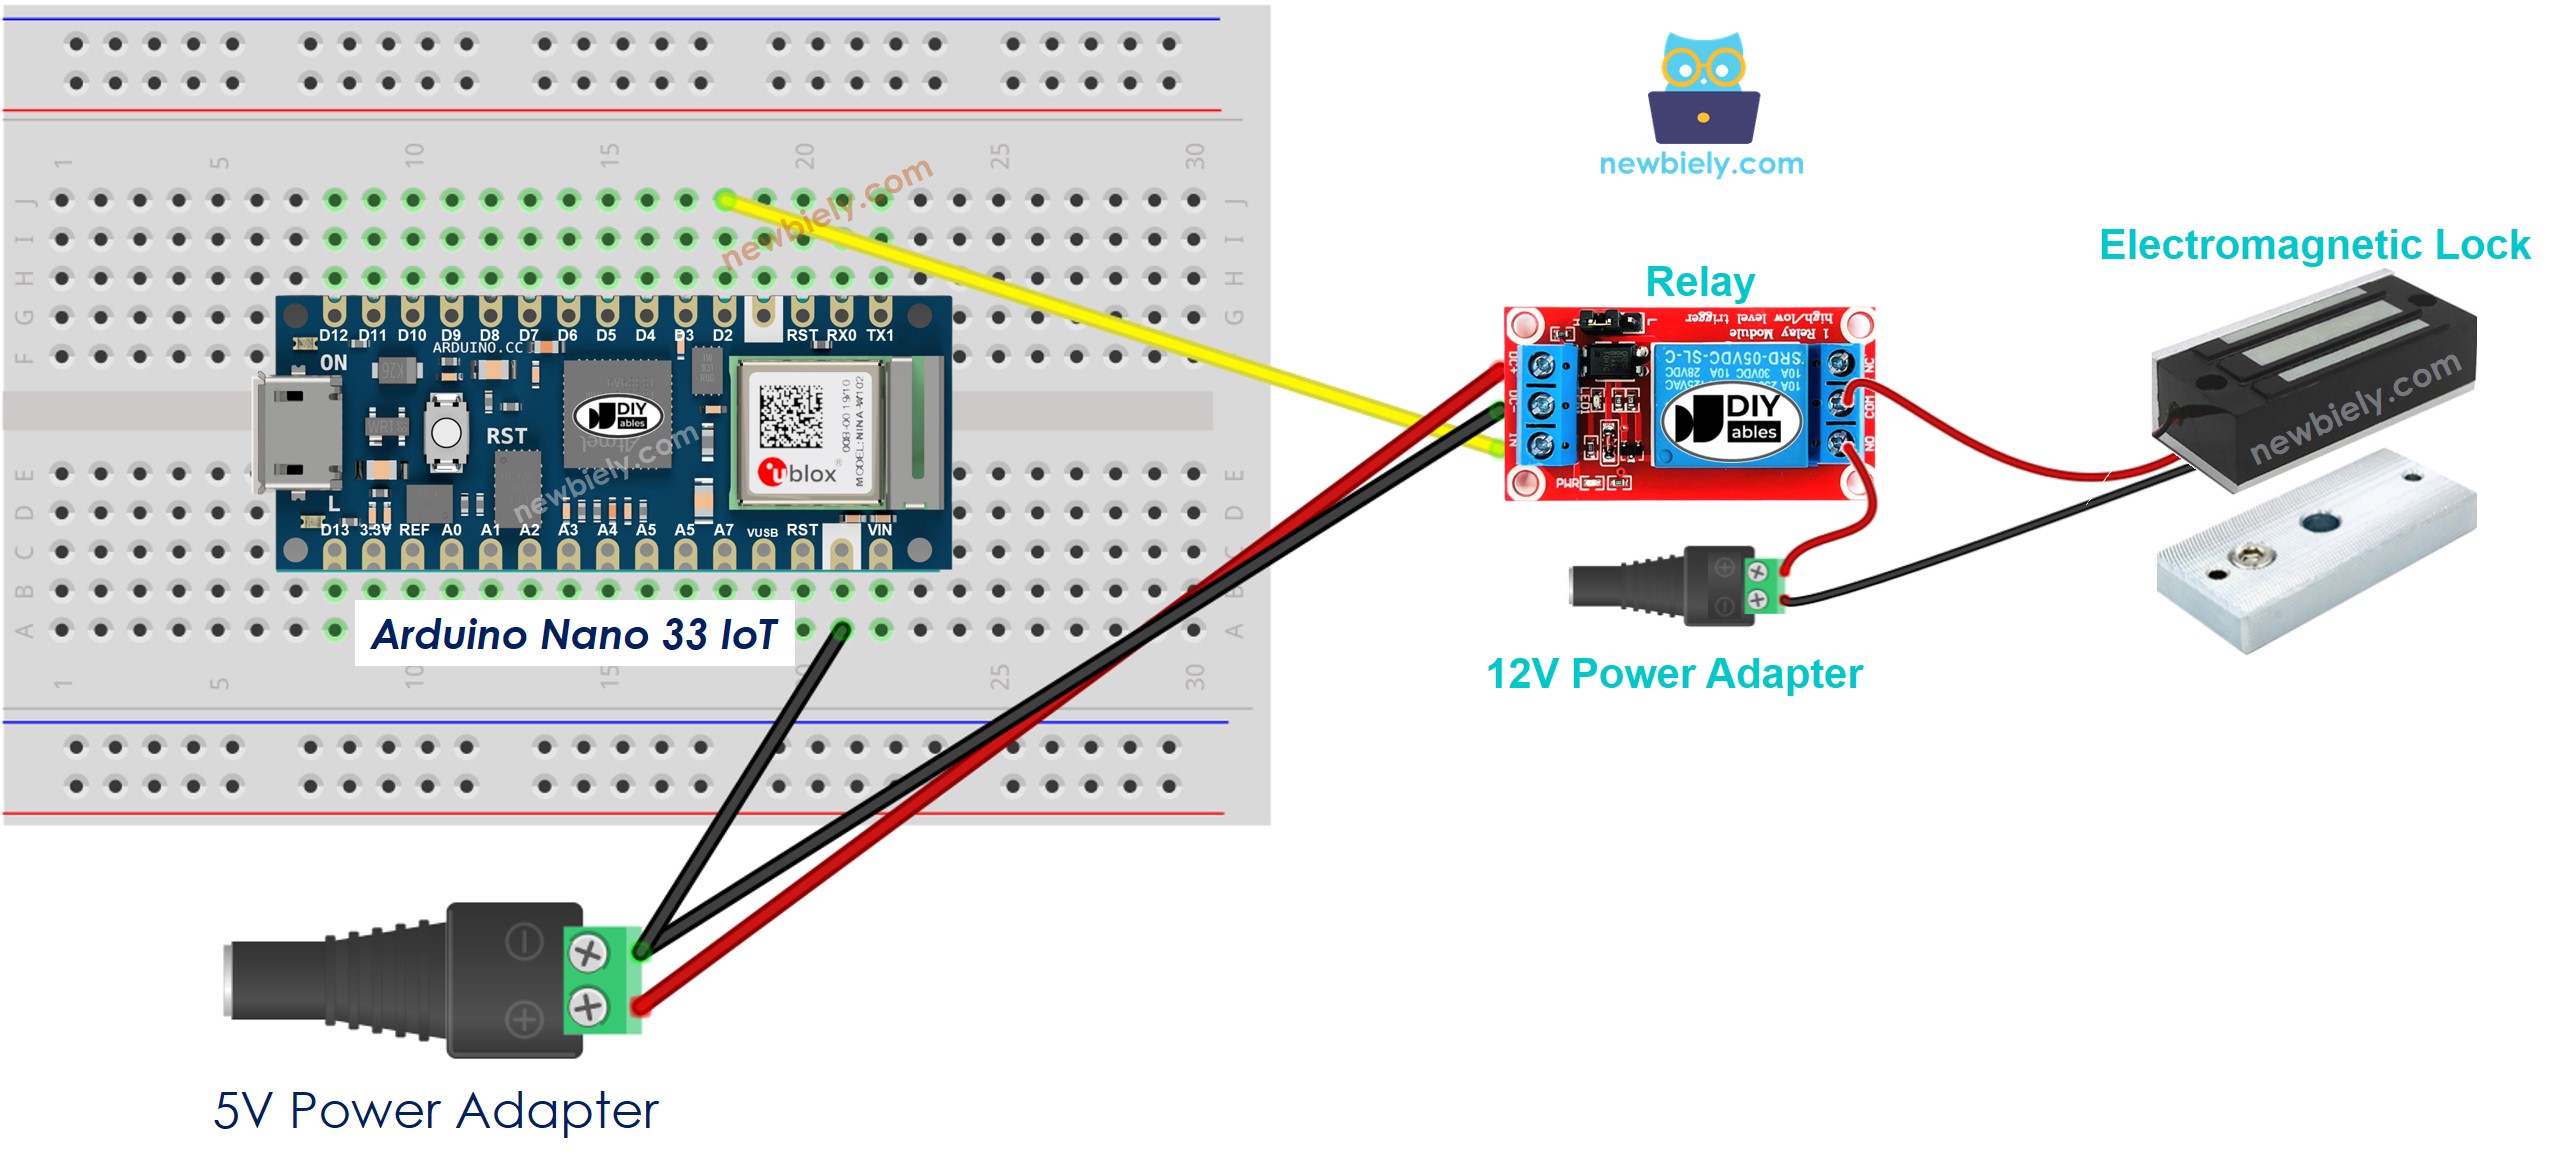
This image is created using Fritzing. Click to enlarge image
Arduino Nano 33 IoT Code
The code below locks and unlocks the door every five seconds.
Detailed Instructions
If you are new to the Arduino Nano 33 IoT, be sure to check out our Getting Started with Arduino Nano 33 IoT tutorial. Then, follow these steps:
- Connect the components to the Arduino Nano 33 IoT board as depicted in the diagram.
- Use a USB cable to connect the Arduino Nano 33 IoT board to your computer.
- Launch the Arduino IDE on your computer.
- Select the Arduino Nano 33 IoT board and choose its corresponding COM port.
- Copy the code above and paste it into the Arduino IDE.
- Click the Upload button to compile and send the code to the Arduino Nano 33 IoT board.
- Bring the armature plate close to the electromagnet.
- Watch how the armature plate is pulled toward the electromagnet.