Arduino Nano 33 IoT - Temperature Sensor
This guide explains how to use the Arduino Nano 33 IoT to read temperature from the DS18B20 sensor and display it on the Serial Monitor.
Hardware Preparation
Or you can buy the following kits:
| 1 | × | DIYables Sensor Kit (18 sensors/displays) |
Additionally, some of these links are for products from our own brand, DIYables .
Buy Note: Many DS18B20 sensors available in the market are unreliable. We strongly recommend buying the sensor from the DIYables brand using the link provided above. We tested it, and it worked reliably.
Overview of One Wire Temperature Sensor - DS18B20
DS18B20 Temperature Sensor Pinout
The DS18B20 sensor for measuring temperature has three connection points.
- GND pin: Connect this pin to the ground (0V).
- VCC pin: Connect this pin to the power supply (5V or 3.3V).
- DATA pin: This is the 1-Wire data line. Connect it to any digital pin on the Arduino Nano 33 IoT.
The DS18B20 sensor comes in two types:
- TO-92 case (it looks a bit like a transistor)
- Waterproof sensor. We use this type in our guide.

When you connect a DS18B20 temperature sensor to an Arduino, you usually need a pull-up resistor. This extra part can be tricky to handle. However, some companies have made it easier by offering a wiring adapter that has a built-in pull-up resistor and a screw terminal block for a simple connection.
Wiring Diagram between DS18B20 Temperature Sensor and Arduino Nano 33 IoT
- Using a breadboard
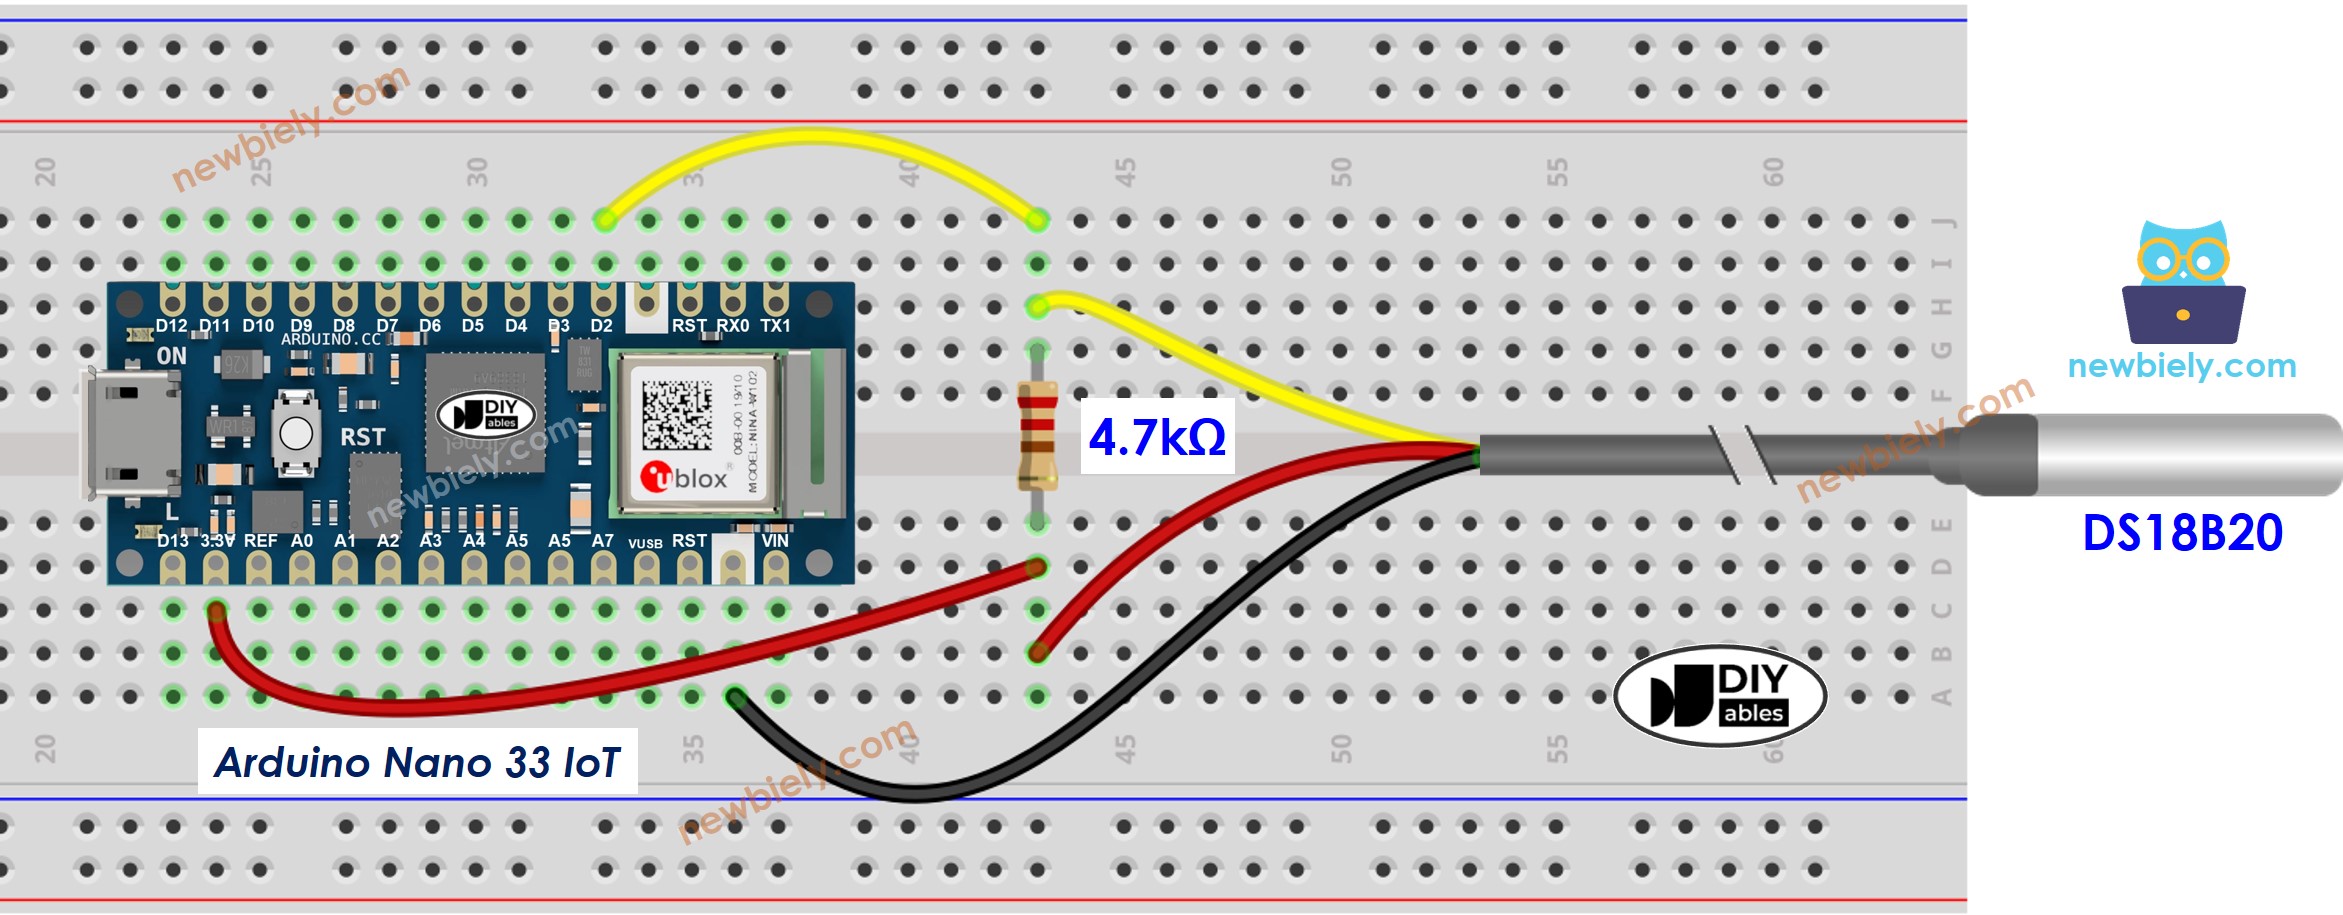
This image is created using Fritzing. Click to enlarge image
- Wiring picture with adapter (we recommend this option)
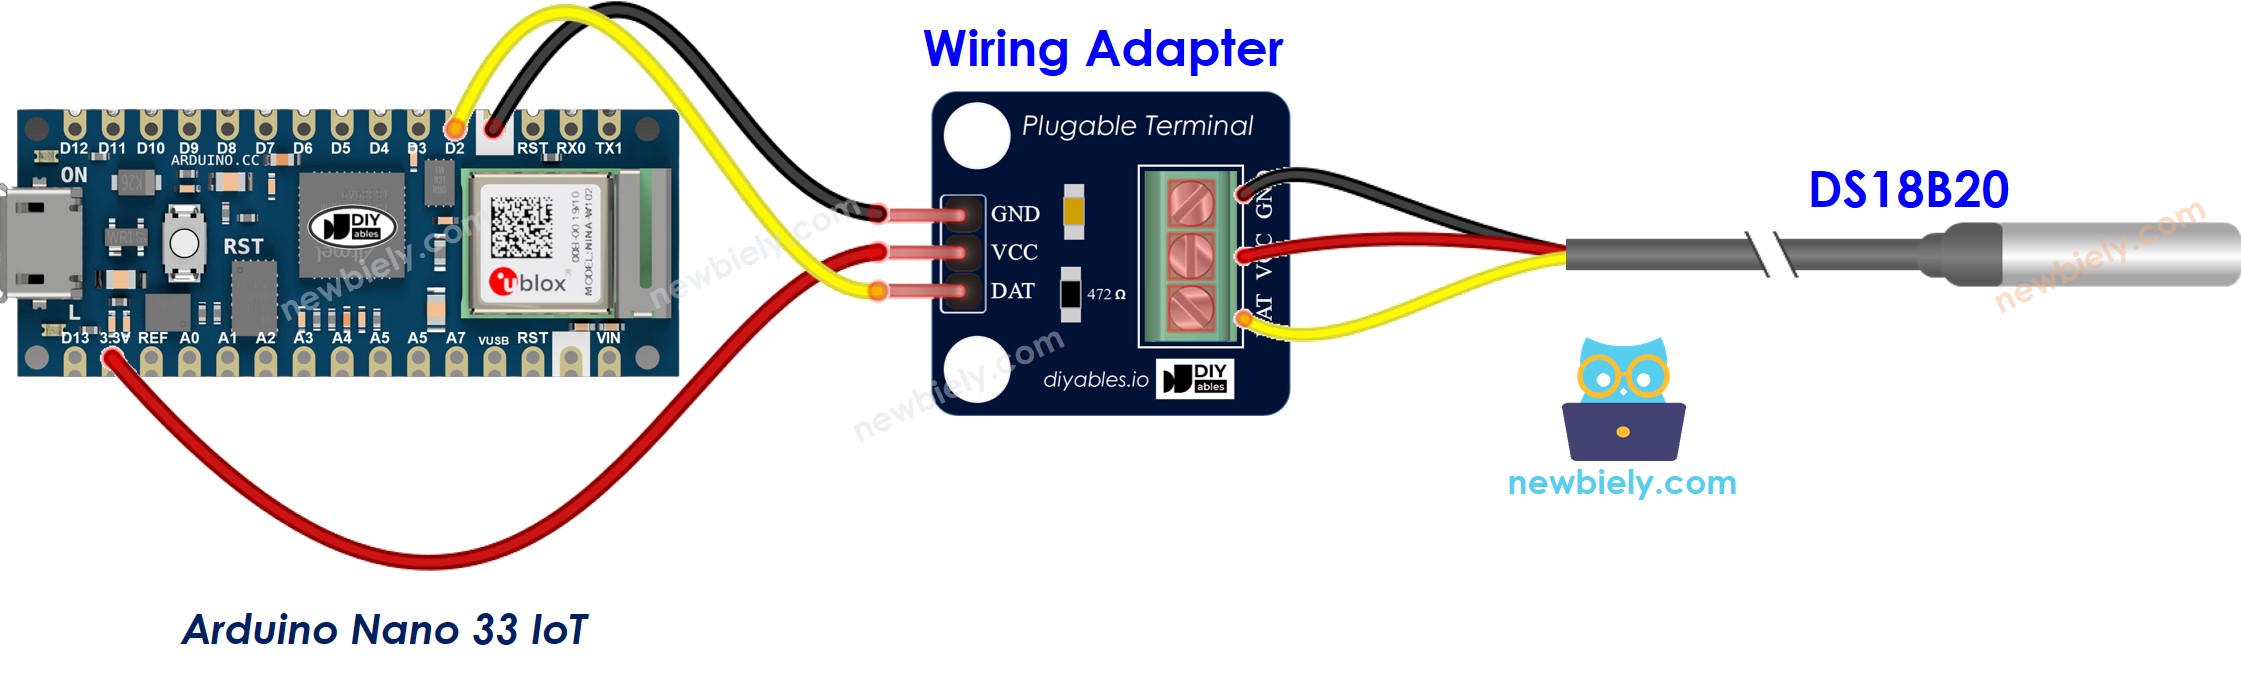
This image is created using Fritzing. Click to enlarge image
To make connecting easier, it's a good idea to buy the DS18B20 sensor with a wiring adapter that already includes a resistor. This way, you don't have to add another resistor when you set it up.
Arduino Nano 33 IoT Code
Detailed Instructions
If you are new to the Arduino Nano 33 IoT, be sure to check out our Getting Started with Arduino Nano 33 IoT tutorial. Then, follow these steps:
- Connect the components to the Arduino Nano 33 IoT board as depicted in the diagram.
- Use a USB cable to connect the Arduino Nano 33 IoT board to your computer.
- Launch the Arduino IDE on your computer.
- Select the Arduino Nano 33 IoT board and choose its corresponding COM port.
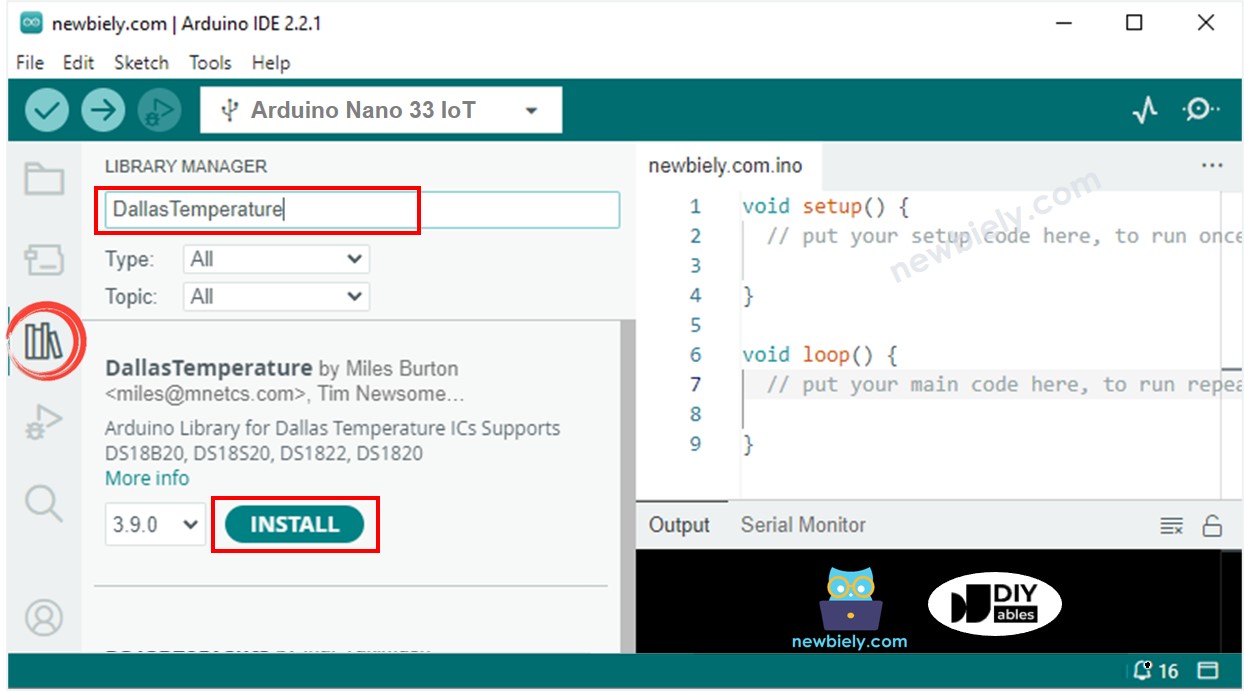
- Open the Library Manager by clicking the Library Manager icon on the left side of the Arduino IDE.
- Type DallasTemperature into the search box and find the DallasTemperature library by Miles Burton.
- Click the Install button to add the DallasTemperature library.
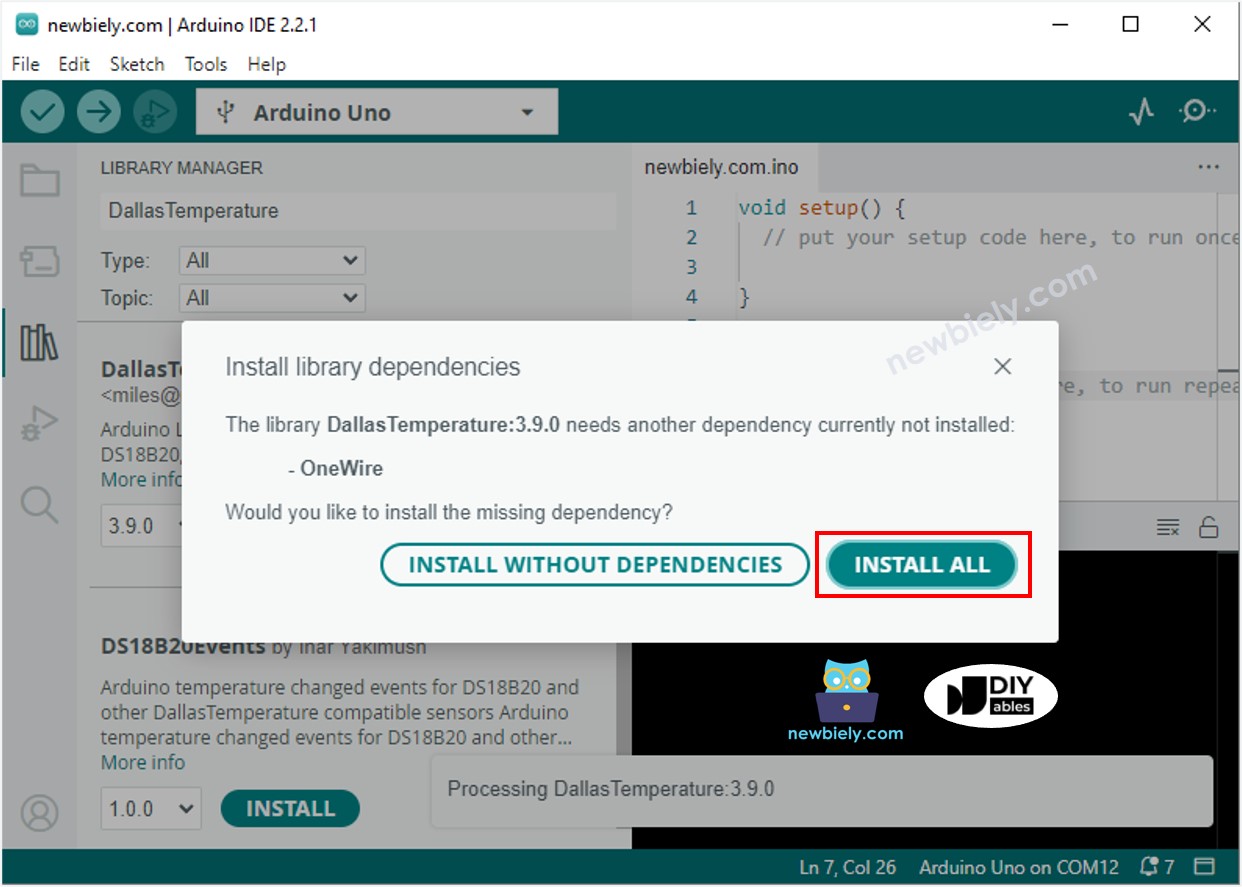
- You might be asked to add a required part. Click the Install All button to add the OneWire library.
- Copy the code above and paste it into the Arduino IDE.
- Click the Upload button in the Arduino IDE to compile the code and send it to the Arduino Nano 33 IoT board.
- Change the sensor's temperature by either holding the DS18B20 temperature sensor in your hand or putting it into hot or cold water.
- Open the Serial Monitor to see the result. It will look like the example below.