
Arduino Mega - SCD40 CO2 Sensor
This tutorial instructs you how to use the Arduino Mega 2560 to measure the amount of carbon dioxide (CO2) in a room with the Sensirion SCD40 sensor. A stuffy classroom, office or bedroom is often a sign of too much CO2, and the SCD40 shows it as a real number in ppm. In detail, we will learn:
- How to connect the SCD40 module to the I2C pins of the Arduino Mega 2560
- How to program the Arduino Mega 2560 to read the CO2 level and rate the air as Good, Moderate or Poor
- How to read the temperature and humidity that the same sensor also measures
We suggest:
- Utilizing an MQ2 gas sensor if you need to detect smoke or gas leaks such as LPG. The SCD40 measures CO2 only.
- Utilizing a DHT22 sensor if you are only looking to measure temperature and humidity.
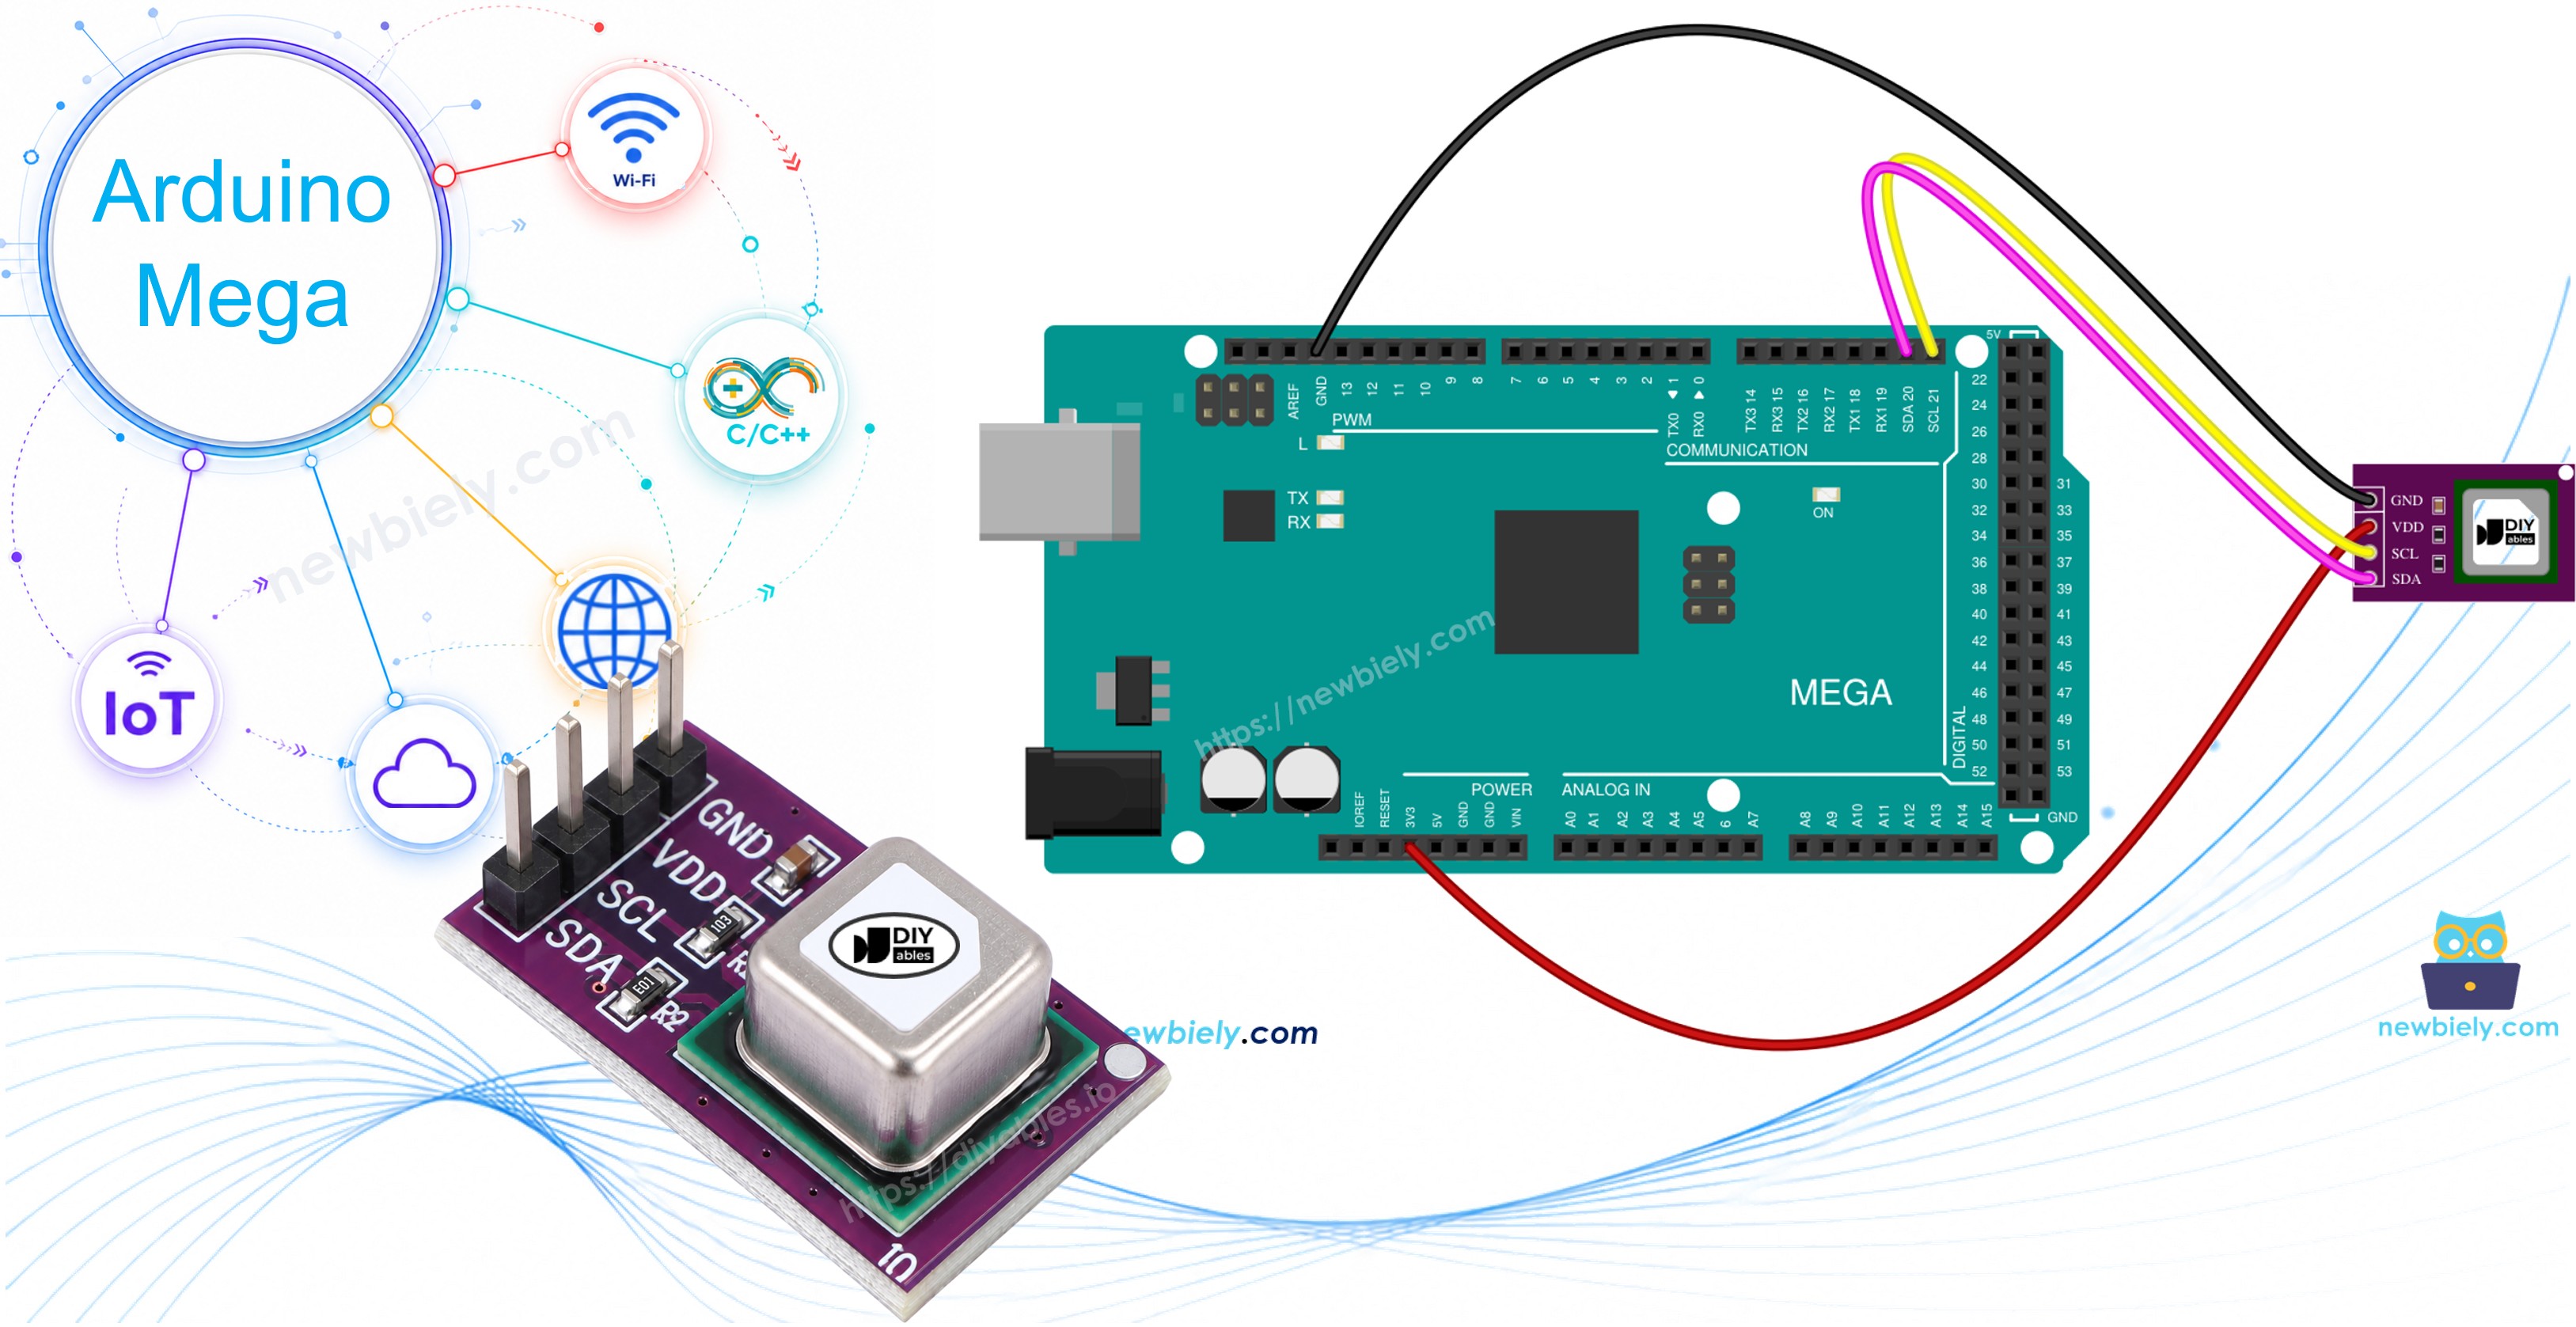
Hardware Preparation
Or you can buy the following kits:
| 1 | × | DIYables Sensor Kit (18 sensors/displays) |
Additionally, some of these links are for products from our own brand, DIYables .
Overview of SCD40 CO2 Sensor
The SCD40 from Sensirion is a tiny sensor that measures real CO2. Many cheap "air quality" sensors, like the MQ135 or CCS811, only guess an "eCO2" value from other gases. The SCD40 does not guess. It uses photoacoustic NDIR sensing: a small infrared light flashes inside the sensor chamber, the CO2 molecules absorb some of that light and make a very faint pressure "sound", and a tiny microphone hears it. More CO2 means a louder signal.
| SCD40 | |
|---|---|
| Supply voltage | 2.4V to 5.5V |
| Interface | I2C, address 0x62 |
| Output range | 0 to 40,000 ppm |
| Accuracy | ±(50 ppm + 5% of reading) from 400 to 2,000 ppm |
| Measurement interval | 5 seconds (30 seconds in low power mode) |
| Temperature accuracy | ±0.8°C (from 15°C to 35°C) |
| Humidity accuracy | ±6 %RH (from 15°C to 35°C, 20 to 65 %RH) |
| Average current | about 15 mA at 3.3V |
The sensor also has a built-in temperature and humidity sensor. It uses them to correct the CO2 value, and the Arduino Mega can read them too (see the end of this tutorial).
The SCD40 CO2 Sensor Pinout
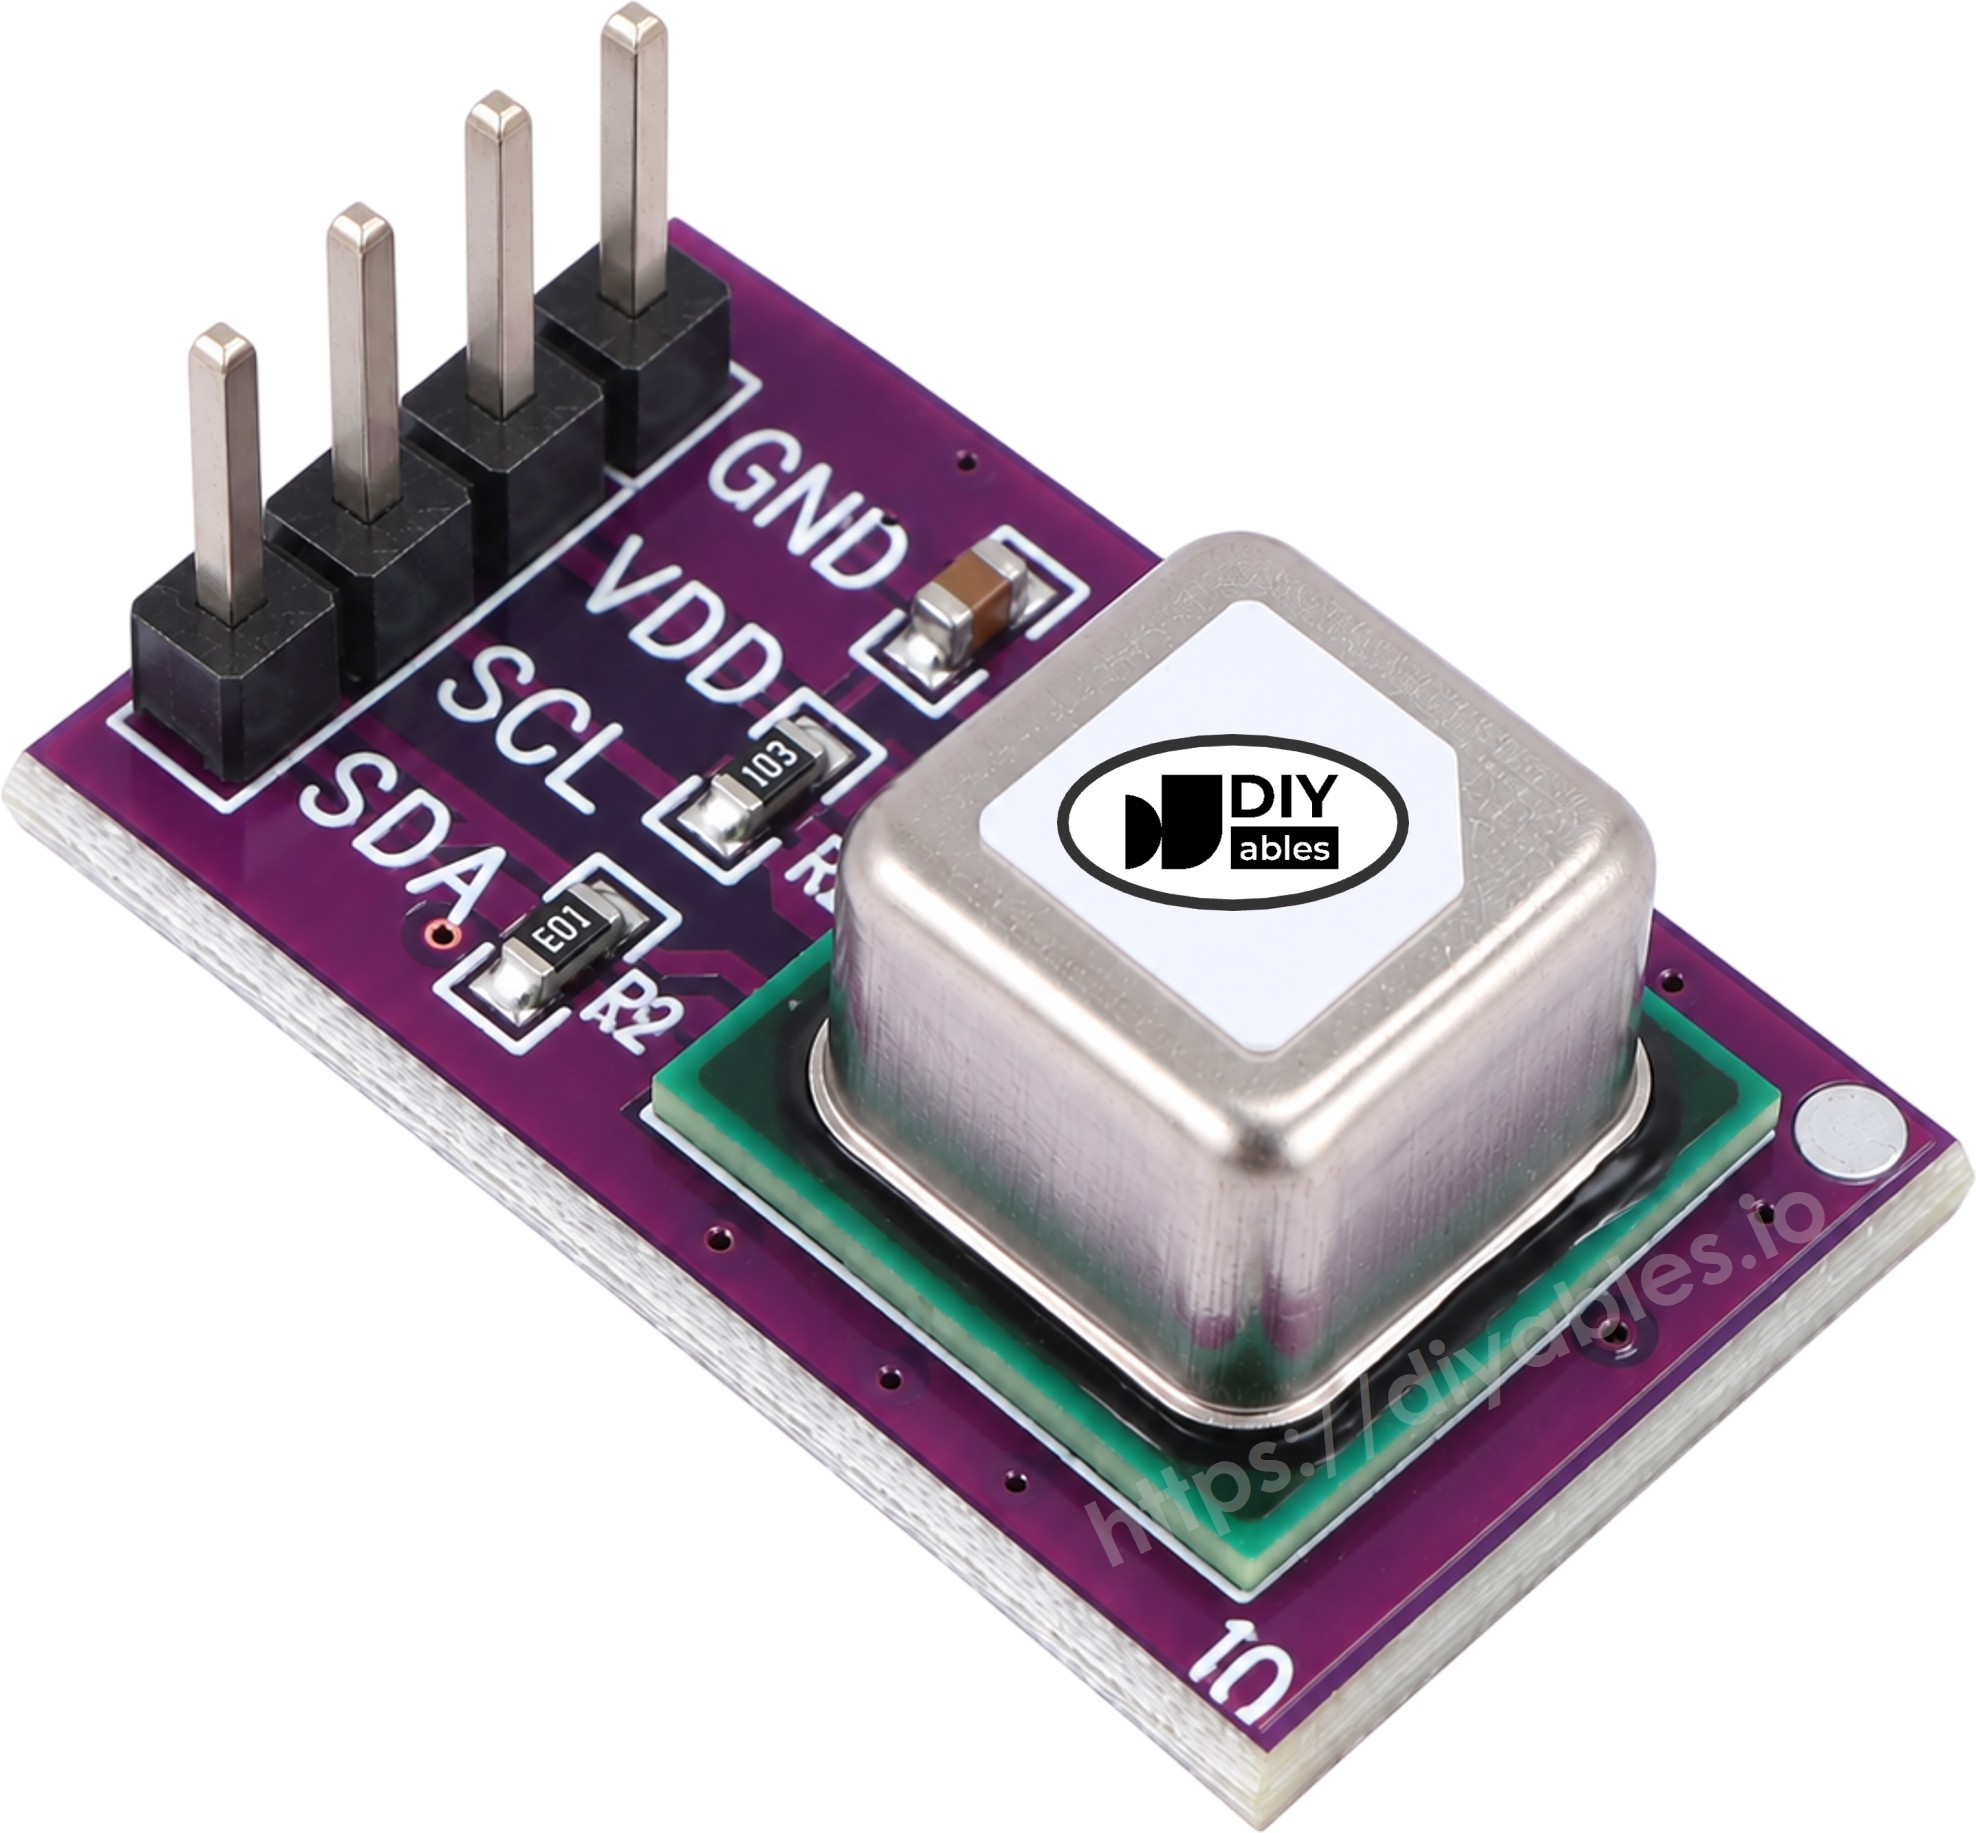
The SCD40 module has four pins:
- VCC pin: must be connected to the 5V pin of the Arduino Mega (3.3V also works).
- GND pin: must be connected to GND (0V).
- SDA pin: the I2C data line. It must be connected to pin 20 (SDA) of the Arduino Mega.
- SCL pin: the I2C clock line. It must be connected to pin 21 (SCL) of the Arduino Mega.
Some boards label the VCC pin as VIN. Most modules already include the I2C pull-up resistors, so no extra resistors are needed.
※ NOTE THAT:
The arrangement of pins on a module may differ from one manufacturer to another. It is essential to always refer to the labels printed on the module when using it. Take a close look!
What the CO2 Value Means
Fresh outdoor air has about 400 ppm of CO2. Indoors, every person breathes out more CO2, so the level climbs when the windows are closed.
| CO2 level | Air quality | What to do |
|---|---|---|
| About 400 ppm | Outdoor air | Nothing |
| 400 to 1,000 ppm | Good indoor air | Nothing |
| 1,000 to 2,000 ppm | Stuffy | Open a window |
| Above 2,000 ppm | Poor | Ventilate now, headache and sleepiness are possible |
Self-Calibration and Warm-Up
Automatic self-calibration (ASC) is ON by default. The sensor expects to see fresh, outdoor-level air (about 400 ppm) at least once a week, ideally for an hour or more. It uses the lowest value it sees as its 400 ppm reference. So, open a window from time to time near the sensor. Also, the first few readings after power-on can be less accurate. Give it a few minutes before trusting the numbers.
Wiring Diagram
The SCD40 talks over I2C, so it goes to the dedicated I2C pins of the Arduino Mega: pin 20 (SDA) and pin 21 (SCL). Note that this is different from the Arduino Uno, which uses A4 and A5.
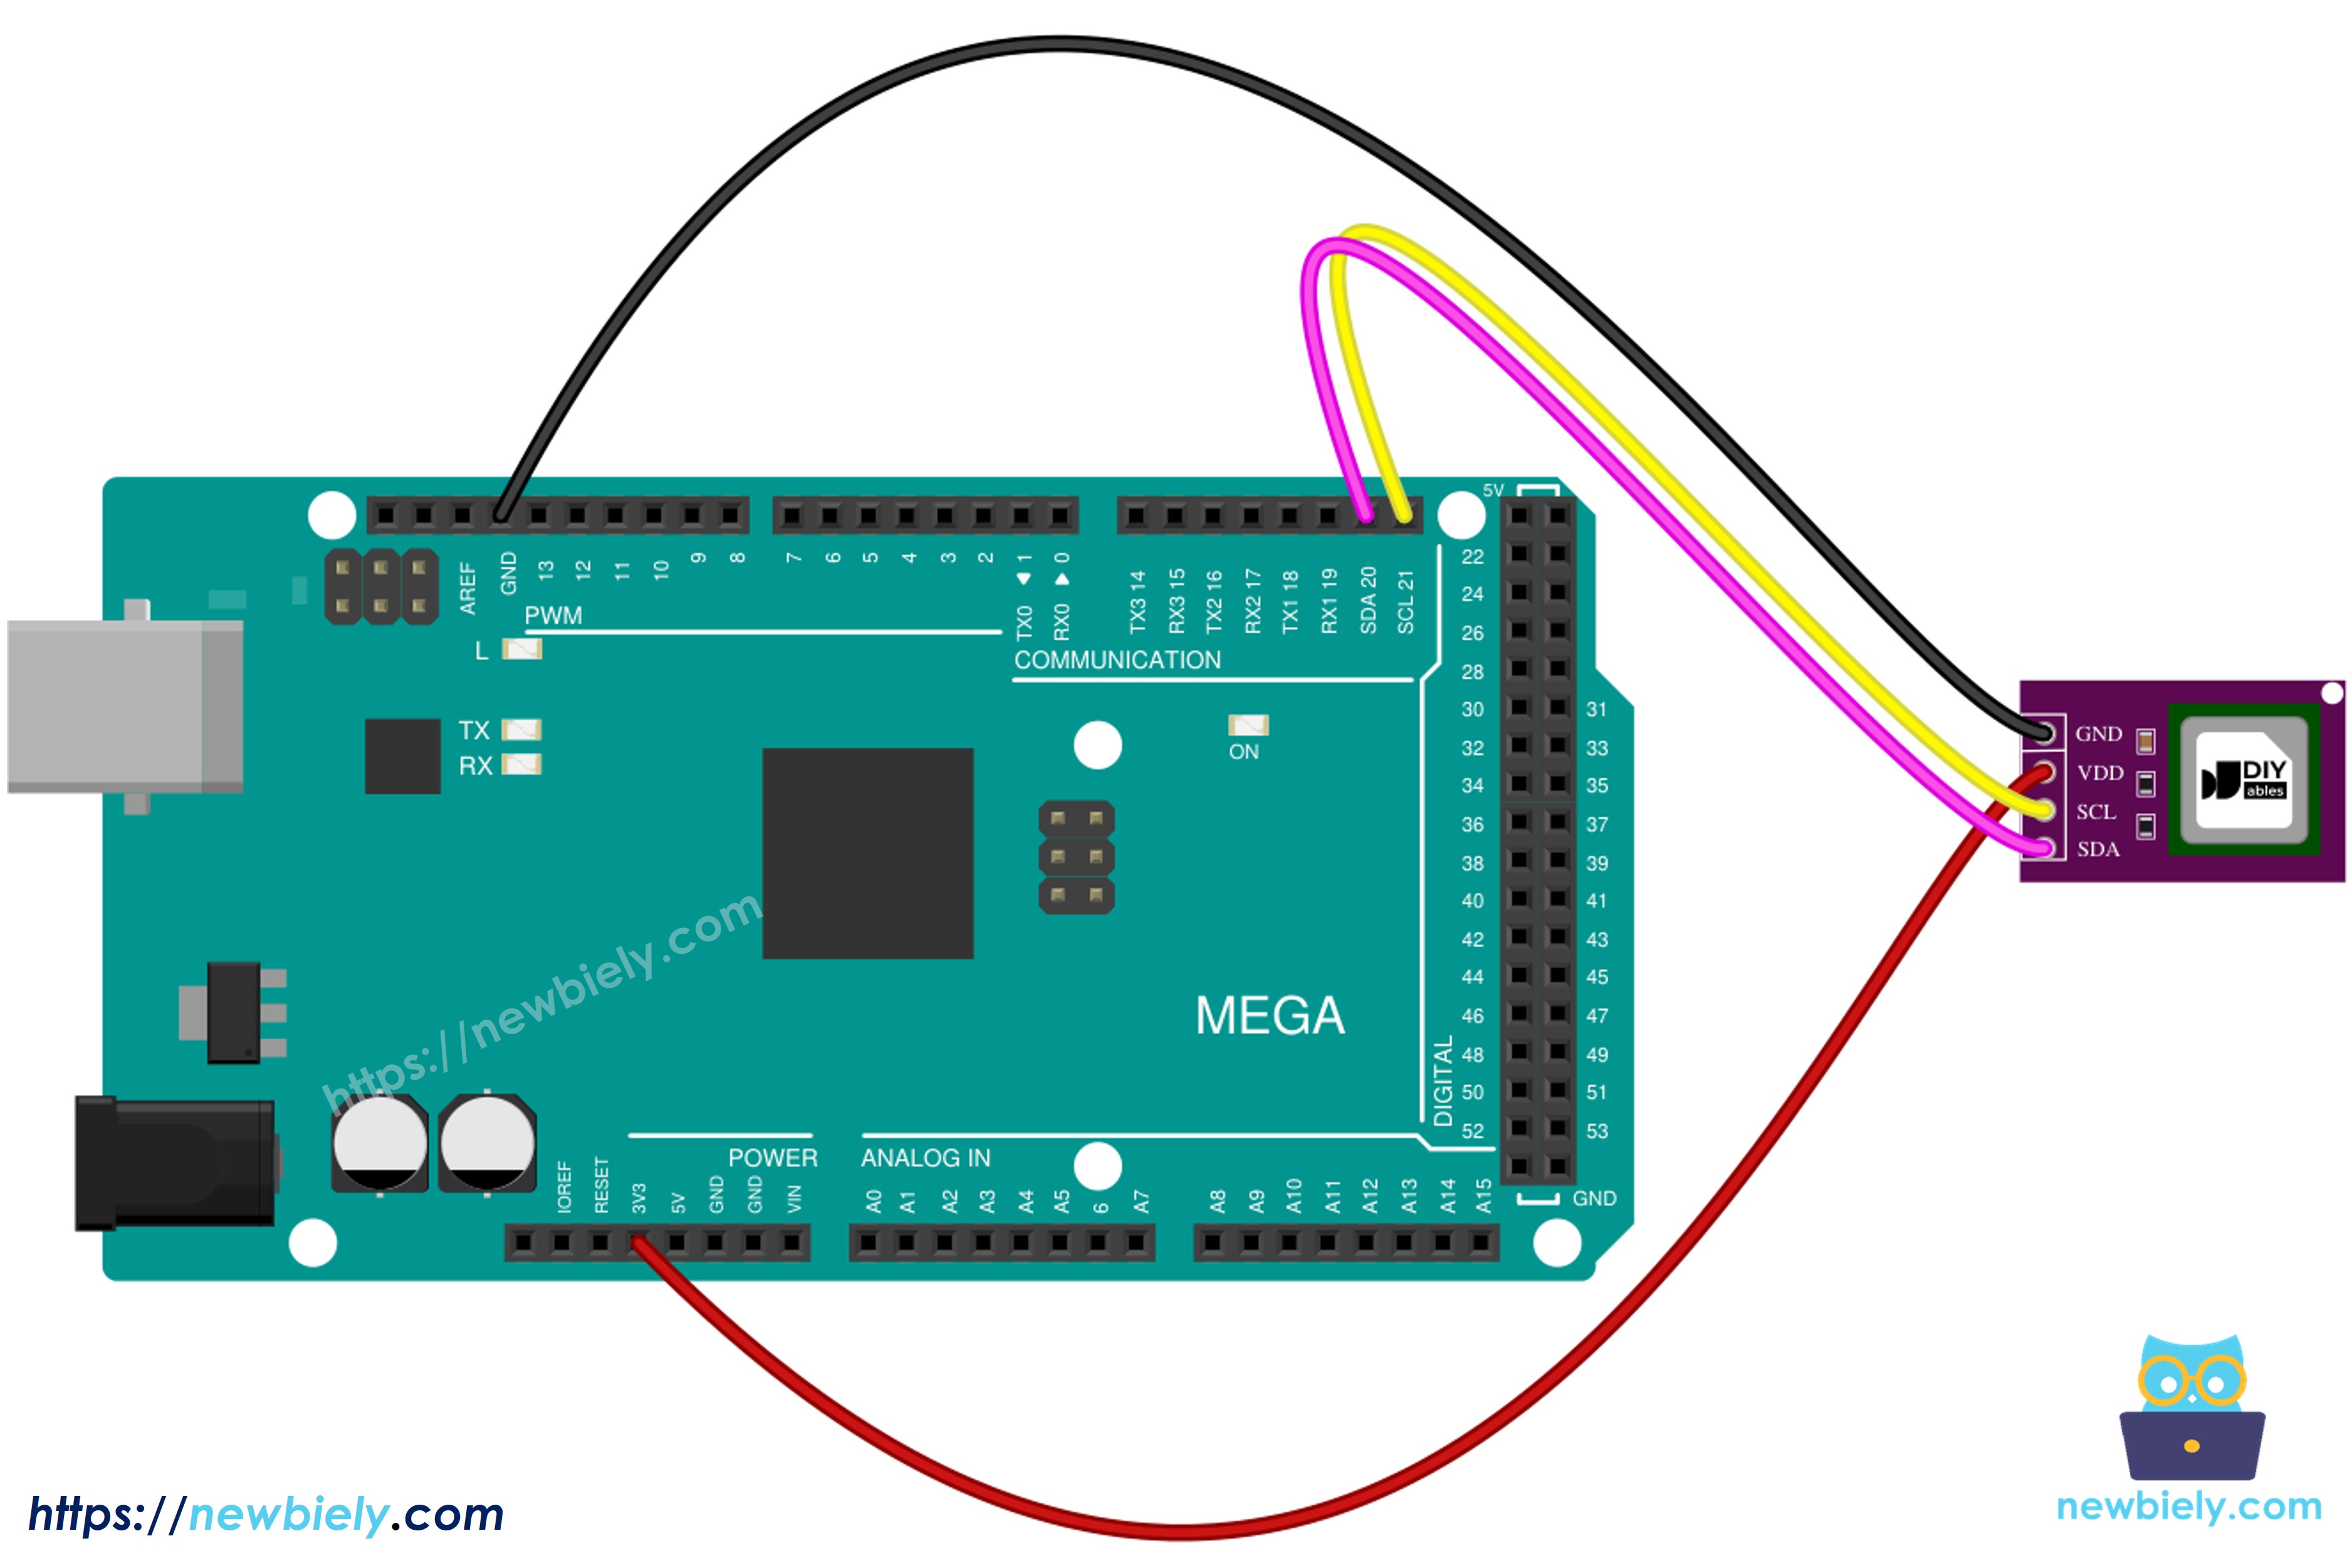
This image is created using Fritzing. Click to enlarge image
| SCD40 Module | Arduino Mega |
|---|---|
| VCC | 5V |
| GND | GND |
| SDA | Pin 20 (SDA) |
| SCL | Pin 21 (SCL) |
The Arduino Mega also has SDA and SCL header pins next to the AREF pin. They are the same signals as pins 20 and 21, so you can use either one.
How To Program For SCD40 CO2 Sensor
- The first step is to include the Sensirion library and the Wire library:
- A sensor object is declared:
- In setup(), the I2C bus is started on the Mega's default pins, and the sensor is attached at address 0x62:
- The sensor is given a clean start, then periodic measurement is started (one new value every 5 seconds):
- In loop(), the code first asks if a new value is ready, then reads it:
Every function returns an error code. If it is not 0, the code turns it into a text message with errorToString() and prints it, which helps a lot when the wiring is wrong.
Arduino Mega 2560 Code for SCD40 CO2 Sensor
The code below reads the CO2 value every time a new measurement is ready, prints it in ppm, and adds an air quality word based on the table above.
Detailed Instructions
- If this is the first time you use Arduino Mega 2560, see how to setup environment for Arduino Mega on Arduino IDE.
- Wire the components as shown in the diagram.
- Connect the Arduino Mega board to your computer using a USB cable.
- Open Arduino IDE on your computer.
- Select the Arduino Mega or Mega 2560 board and the correct COM port.
- Click the Libraries icon on the left side of the Arduino IDE.
- Type SCD4x in the search box, then find the Sensirion I2C SCD4x library by Sensirion.
- Click the Install button.
- Search for Sensirion I2C SCD4x created by Sensirion and click the Install button.
- A window appears and asks to install the dependency Sensirion Core. Click the Install All button.
- Copy the above code and paste it into the Arduino IDE.
- Click the Upload button to upload the code to the Arduino Mega.
- Open the Serial Monitor and set the baud rate to 9600.
- Wait about 5 seconds for the first value. Then breathe gently toward the sensor, or close the door of a small room for a while.
- See the result on the Serial Monitor:
Your breath has a lot of CO2, so the value jumps quickly and then falls back as the air mixes. A new line appears about every 5 seconds, because that is how often the SCD40 makes a new measurement.
※ NOTE THAT:
If the Serial Monitor shows an error message, check that SDA goes to pin 20 and SCL goes to pin 21. Swapping these two wires is the most common mistake.
Reading Temperature and Humidity from the SCD40
Every measurement from the SCD40 already contains three values: CO2, temperature and humidity. The first code read all three but printed only the CO2. To show the other two, we only need to print the temperature and humidity variables as well. No extra wiring is needed.
Arduino Mega 2560 Code for CO2, Temperature and Humidity
Detailed Instructions
- Copy the code above and paste it into the Arduino IDE.
- Click the Upload button to upload the code to the Arduino Mega.
- Open the Serial Monitor and check the result:
The sensor heats itself a little while it works, so the temperature can read slightly higher than a room thermometer. The CO2 value stays the main job of the SCD40; the temperature and humidity are a nice bonus.
Additional Knowledge
SCD40 vs MQ135 and Other Gas Sensors
| SCD40 | MQ135 / MQ-series | |
|---|---|---|
| What it measures | real CO2 (NDIR) | mix of gases, CO2 is only estimated |
| Output | CO2 in ppm, digital (I2C) | analog voltage |
| Needs calibration in code | no, self-calibration built in | yes |
| Warm-up | a few minutes | minutes to hours |
| Extra values | temperature and humidity | none |
It is evident that the SCD40 is the better choice when you need a trusted CO2 number, for example to decide when to open a window. An MQ-series sensor is cheaper and is still useful to detect smoke or a gas leak.