Raspberry Pi - BLE
This tutorial instructs you how to use Raspberry Pi to control BLE HM-10 Module. In detail, we will learn:
- The utilization of Bluetooth Low Energy (BLE) technology with Raspberry Pi
- Sending data from Raspberry Pi to a smartphone app via BLE
- Receiving data on Raspberry Pi from a smartphone app via BLE
- Controlling Raspberry Pi from a smartphone app through BLE.
The purpose of this tutorial:
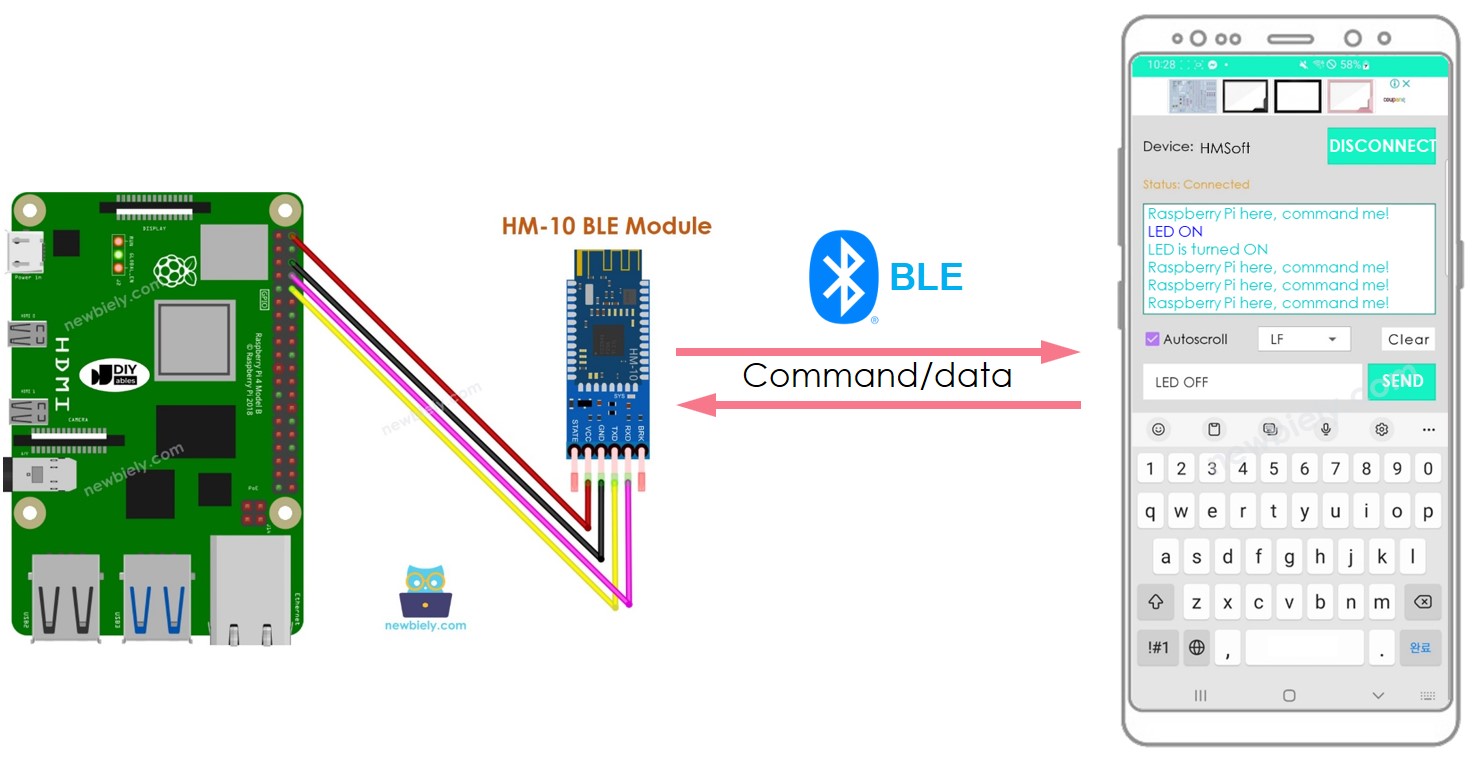
- To show how to exchange data between a Raspberry Pi and a smartphone app through BLE.
- To use the HM-10 Bluetooth Low Energy module.
- To demonstrate the Bluetooth Serial Monitor app on Android, but any Android/iOS app can be used.
- To illustrate the control of various devices connected to Raspberry Pi through the smartphone app, with examples including an LED and servo motor.
It is important to be aware that this tutorial focuses on Bluetooth Low Energy (BLE, Bluetooth 4.0). If you need information on Classic Bluetooth (Bluetooth 2.0), please consult a similar tutorial Raspberry Pi - Bluetooth.
Hardware Preparation
Or you can buy the following kits:
| 1 | × | DIYables Sensor Kit (18 sensors/displays) |
Additionally, some of these links are for products from our own brand, DIYables .
Overview of HM-10 Bluetooth Module
The HM-10 is a Serial BLE module that works as a Serial to Bluetooth Low Energy converter. It carries out the following tasks:
- Taking data from the Serial RX pin and sending it to a paired device like a smartphone via BLE
- Receiving data from BLE (from the paired device) and transmitting it to the Serial TX pin.
When a Raspberry Pi is used to communicate with a smartphone app (Android/iOS), the following steps take place:
- Establishing a connection between the Raspberry Pi and the HM-10 Bluetooth module through the Serial pins
- Pairing the HM-10 Bluetooth module with the smartphone app
- Sending data from the Raspberry Pi to the smartphone app by writing it to the Serial
- Receiving data from the smartphone app by reading it from the Serial
- No extra BLE code is needed on the Raspberry Pi.
The BLE HM-10 Module Pinout

The HM-10 BLE Module has 6 pins:
- BKR pin: This pin is used to control the behavior of the module. If you are a beginner, you can ignore this pin.
- RX pin: This is the serial data pin and it should be connected to the TX pin of Raspberry Pi. The data received from this pin will be sent to Bluetooth.
- TX pin: This is the serial data pin and it should be connected to the RX pin of Raspberry Pi. The data received via BLE will be sent to this pin as serial data.
- GND pin: This is the power pin and it should be connected to the GND of the power source.
- VCC pin: This is the power pin and it should be connected to 3.3V of Supply voltage.
- STATE pin: This pin indicates the working states. It will blink in standby mode with a 500ms pulse, and will be on in connection state at a high level.
※ NOTE THAT:
- -
- Only four pins are required to be used with the HM-10, which some manufacturers produce.
- VCC, GND, RX, and TX are the four pins in question.
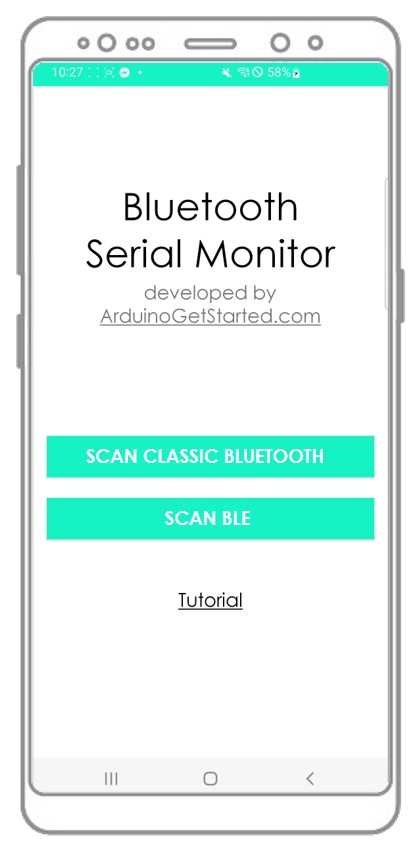
Overview of Bluetooth Serial Monitor App
To use the Bluetooth Serial Monitor App, you must first connect the Raspberry Pi to an HM-10 Bluetooth module. Then, download and install the app on your smartphone. Finally, open the app and connect it to the HM-10 Bluetooth module.
Once you have finished these steps, you will be able to send and receive data from the Raspberry Pi.
Wiring Diagram
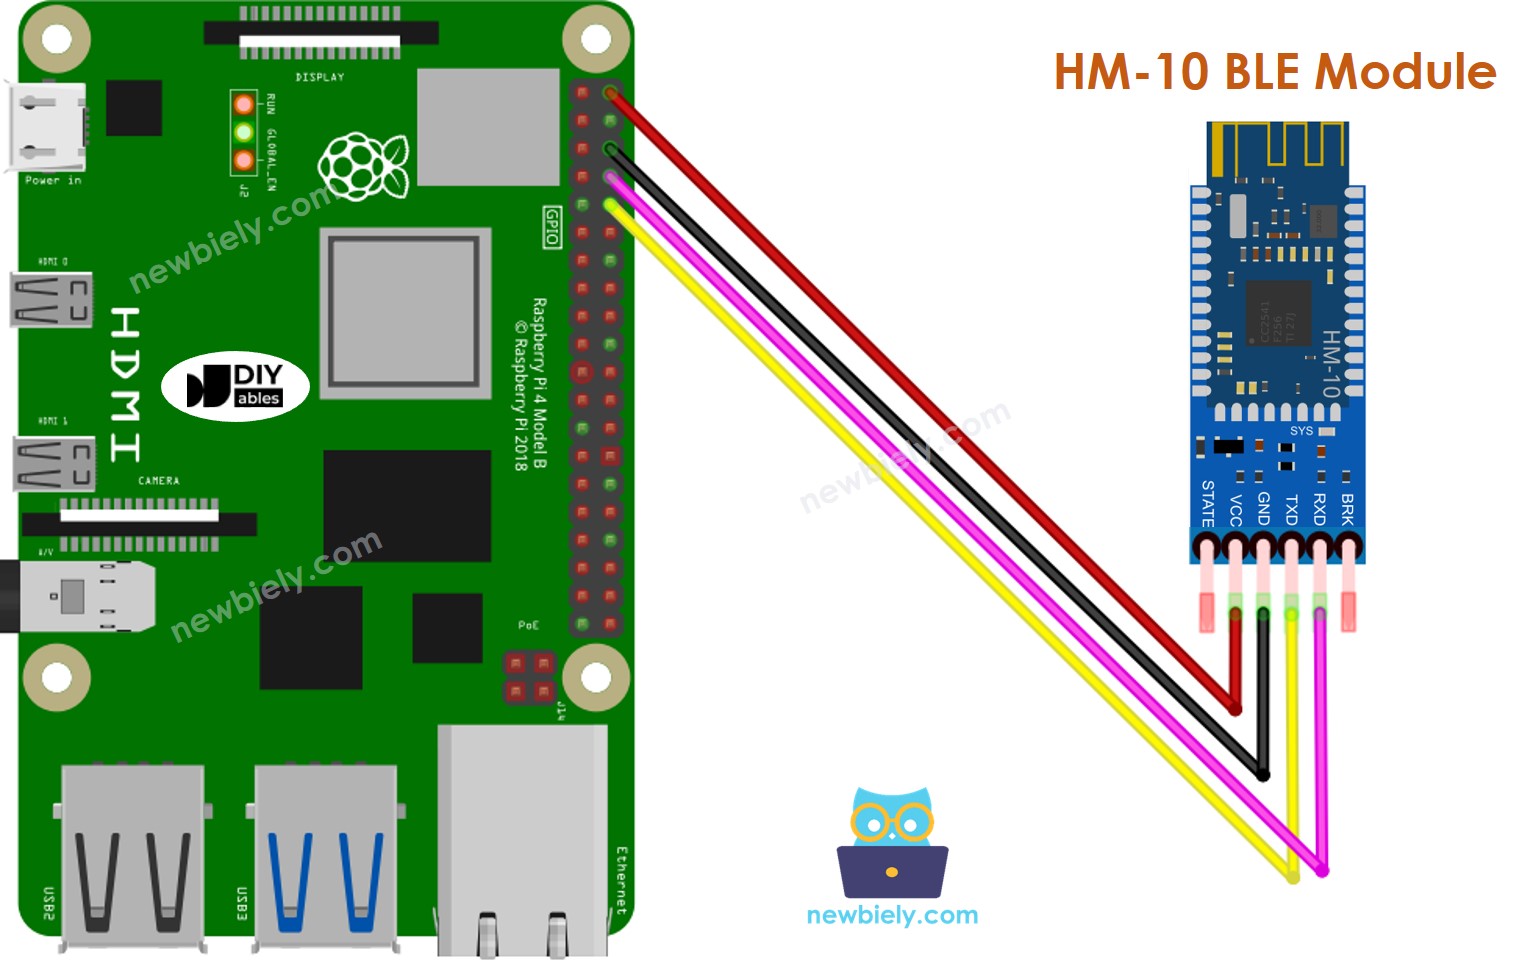
This image is created using Fritzing. Click to enlarge image
To simplify and organize your wiring setup, we recommend using a Screw Terminal Block Shield for Raspberry Pi. This shield ensures more secure and manageable connections, as shown below:

Table of Wiring. This table shows the wiring connections. 1. The Wiring Table:. A listing of the wiring connections. 2. Table of Wiring:. A diagram displaying the wiring connections.
| Raspberry Pi Pins | HM-10 Bluetooth Pins |
|---|---|
| RX (GPIO15) | TX |
| TX (GPIO14) | RX |
| 5V | VCC |
| GND | GND |
| BKR (NOT connected) | |
| STATE (NOT connected) |
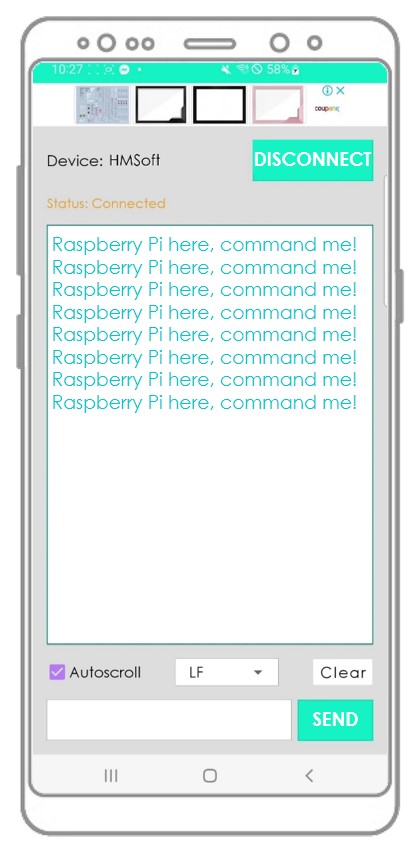
Raspberry Pi sends data to Bluetooth App on Smartphone
In order to send data from a Raspberry Pi board to a Bluetooth application on a smartphone, the following code can be used. This example shows how to transmit the message “Raspberry Pi here, command me!” from the Raspberry Pi to the app every one second.
Detailed Instructions
- Make sure you have Raspbian or any other Raspberry Pi compatible operating system installed on your Pi.
- Make sure your Raspberry Pi is connected to the same local network as your PC.
- Make sure your Raspberry Pi is connected to the internet if you need to install some libraries.
- If this is the first time you use Raspberry Pi, See how to set up the Raspberry Pi
- Connect your PC to the Raspberry Pi via SSH using the built-in SSH client on Linux and macOS or PuTTY on Windows. See to how connect your PC to Raspberry Pi via SSH.
- Make sure you have the RPi.GPIO library installed. If not, install it using the following command:
- Enable the Serial interface on Raspberry Pi by following the instruction on Raspberry Pi - how to enable Serial inteface
- Install the pyserial library for communication with bluetooth module:
- Create a Python script file bluetooth_send.py and add the following code:
- Save the file and run the Python script by executing the following command in the terminal:
The script runs in an infinite loop continuously until you press Ctrl + C in the terminal.
To use the code and connect a Raspberry Pi board to a smartphone via BLE, follow these steps:
- Download and install the Bluetooth Serial Monitor App on your smartphone.
- Connect the HM-10 Bluetooth module to the Raspberry Pi board as per the wiring diagram.
- On your smartphone, open the Bluetooth Serial Monitor App and select the BLE mode.
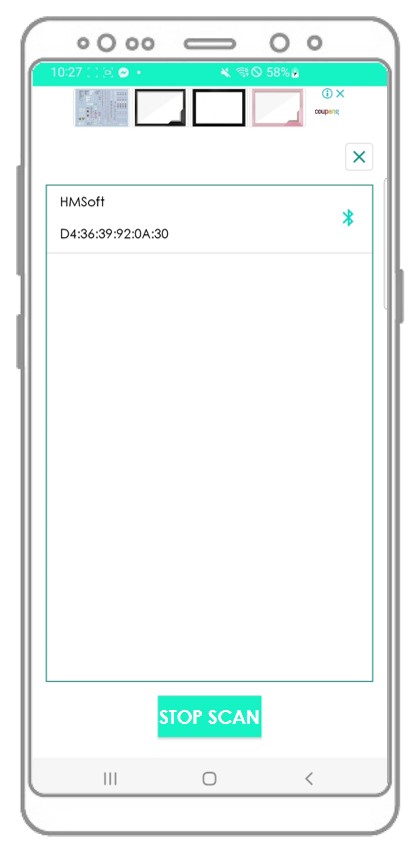
- Connect the smartphone to the HM-10 Bluetooth module.
- Take a look at the outcome on the Android App.
- Take a look at the outcome displayed on the Terminal.
If you take the necessary steps and execute the code, you will see that the data shown on the Android app are the same.
Bluetooth App Send data To Raspberry Pi
The code executes the following:
- Transmit data from the Bluetooth application to the Raspberry Pi board
- The Raspberry Pi board reads the incoming data and then sends a response to the Bluetooth device.
Detailed Instructions
- Create a Python script file bluetooth_send_receive.py and add the following code:
- Save the file and run the Python script by executing the following command in the terminal:
The script runs in an infinite loop continuously until you press Ctrl + C in the terminal.
These are the instructions to use the code with Raspberry Pi and an Android app:
- Start the Android App and pair it with the HM-10 Bluetooth module using the steps from a prior example.
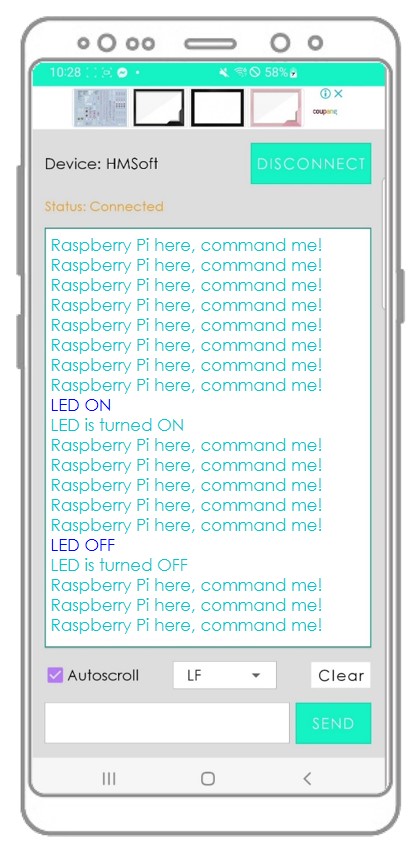
- After connecting, type "LED ON" or "LED OFF" in the Android app and press the "SEND" button.
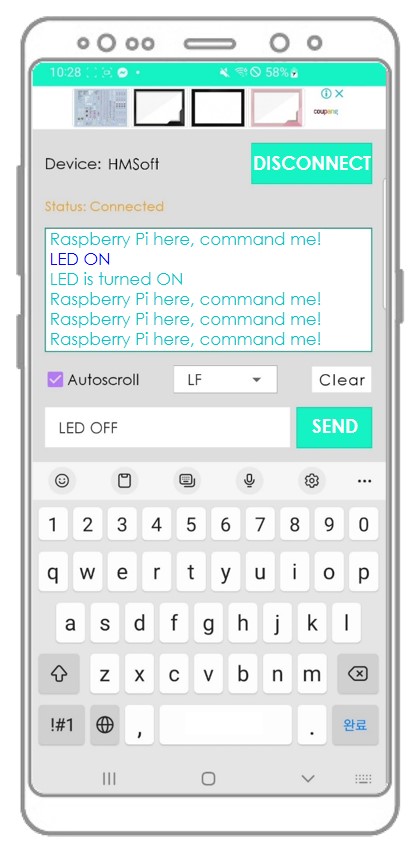
- The Raspberry Pi board will receive the data and print a response to the Serial port. Afterwards, this data will be sent to the Bluetooth app. Finally, the result can be checked on the Android app.
- Check out the output on the Terminal.
Once you have finished the steps mentioned above,. you will observe that the data displayed on the Android app are identical.
Raspberry Pi Code - Control LED with smartphone App via BLE
Please refer to the Raspberry Pi controls LED via BLE tutorial.
Raspberry Pi Code - Control Servo Motor with smartphone App via BLE
Please refer to the Raspberry Pi controls Servo Motor via BLE tutorial.