Raspberry Pi - Button - Pump
This tutorial instructs you how to use Raspberry Pi to turn on a pump for a few seconds when a button is pressed and then turns it off.
Hardware Preparation
Or you can buy the following kits:
| 1 | × | DIYables Sensor Kit (30 sensors/displays) | |
| 1 | × | DIYables Sensor Kit (18 sensors/displays) |
Disclosure: Some of the links provided in this section are Amazon affiliate links. We may receive a commission for any purchases made through these links at no additional cost to you.
Additionally, some of these links are for products from our own brand, DIYables .
Additionally, some of these links are for products from our own brand, DIYables .
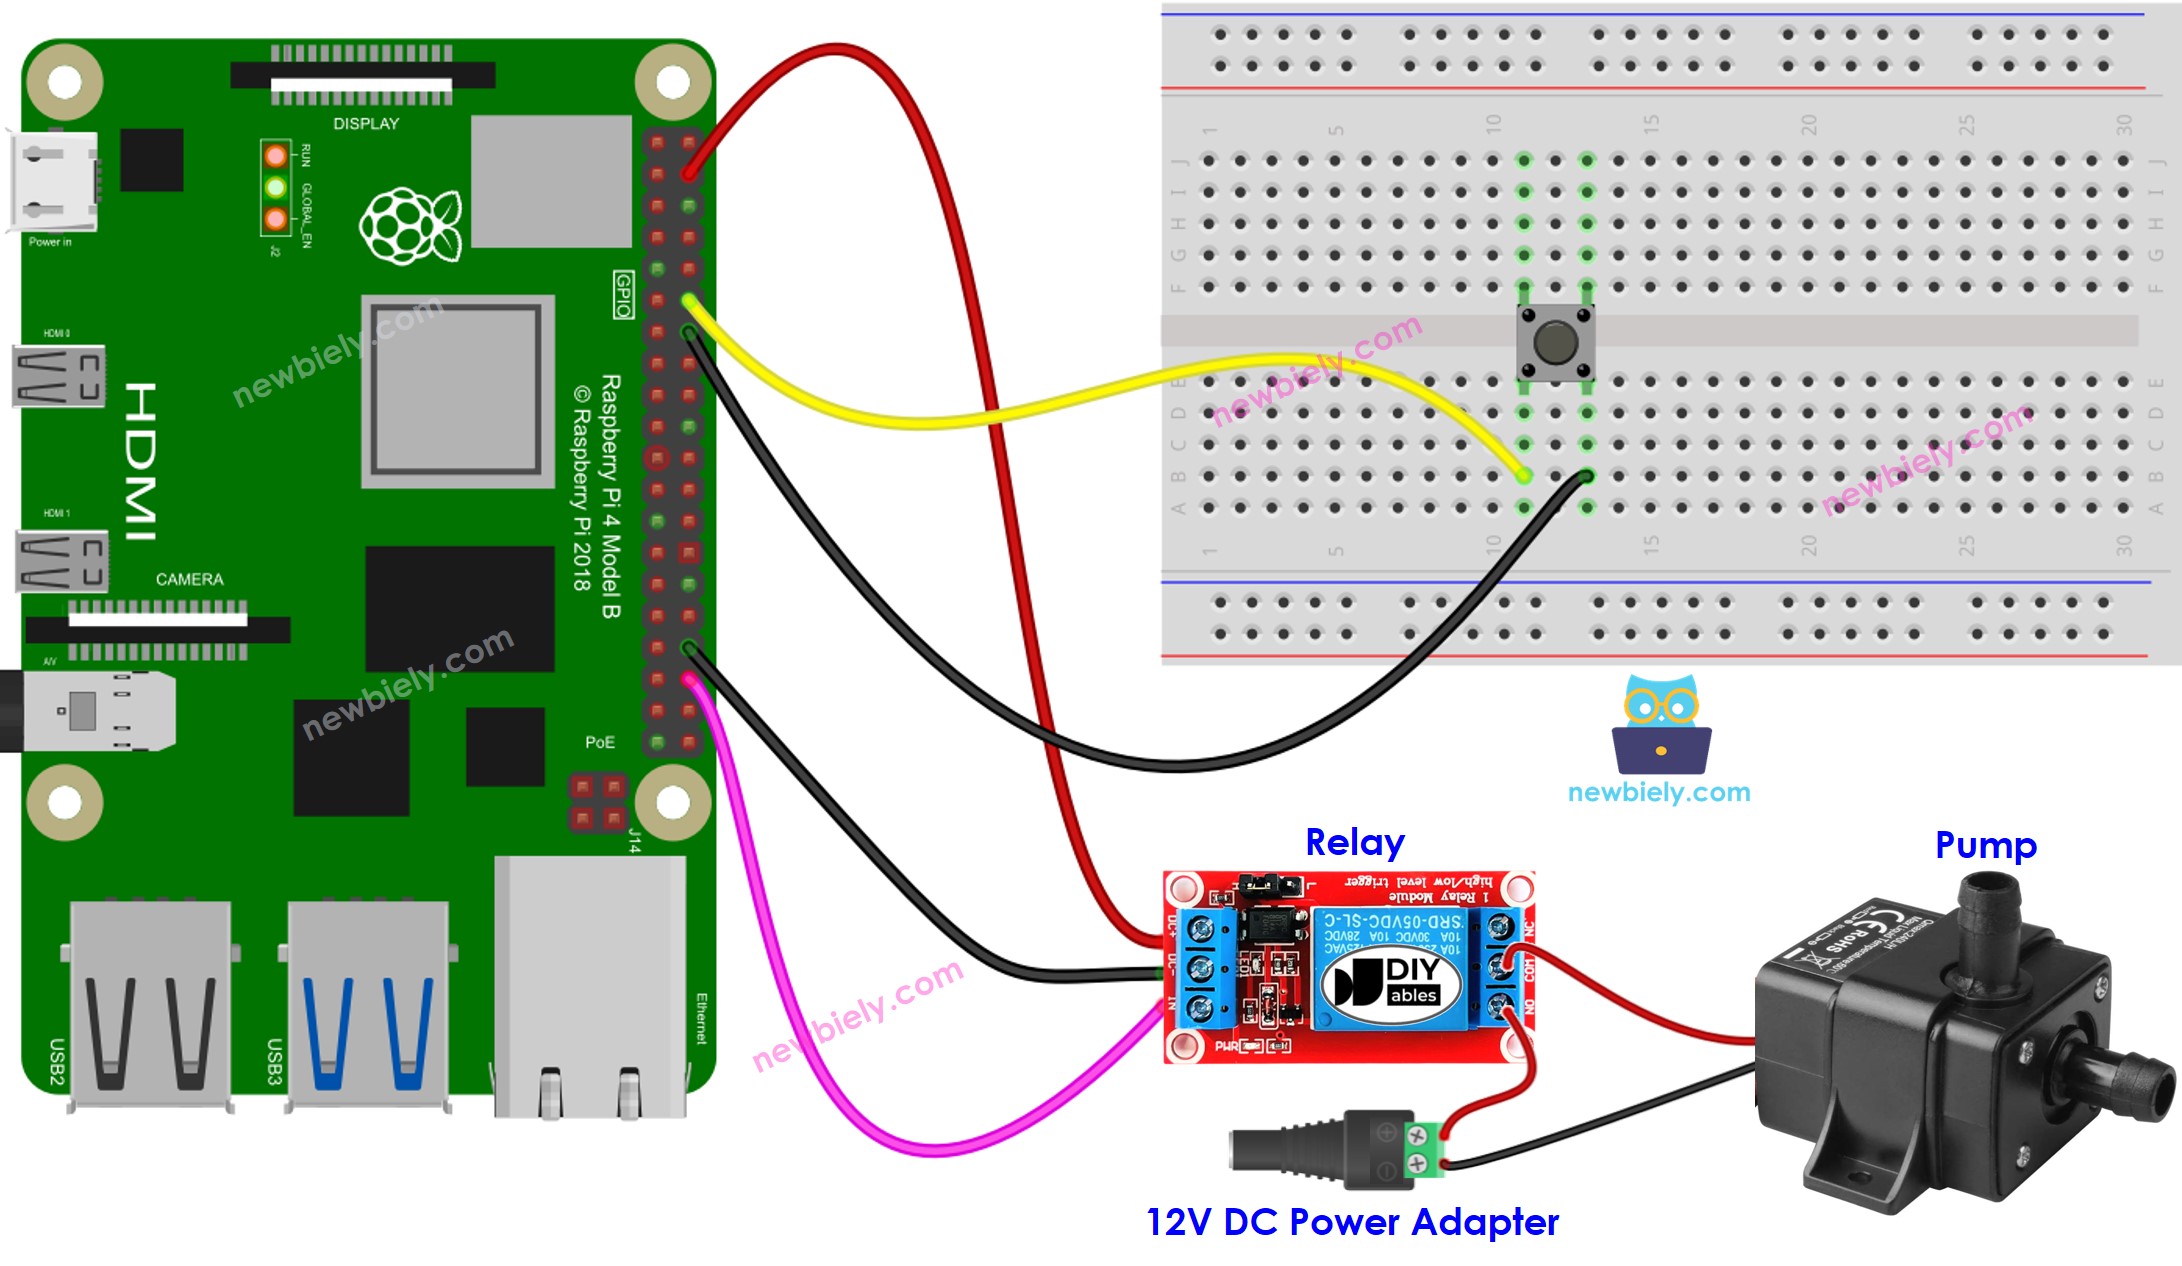
Wiring Diagram

This image is created using Fritzing. Click to enlarge image
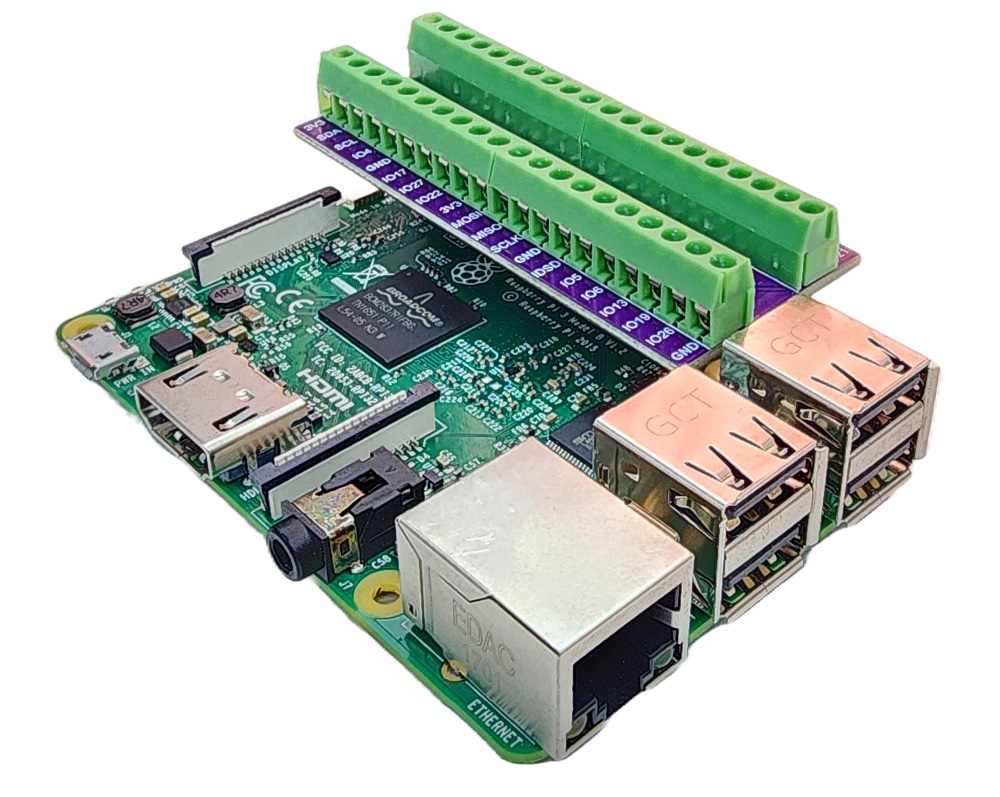
To simplify and organize your wiring setup, we recommend using a Screw Terminal Block Shield for Raspberry Pi. This shield ensures more secure and manageable connections, as shown below:

Raspberry Pi Code
Detailed Instructions
- Make sure you have Raspbian or any other Raspberry Pi compatible operating system installed on your Pi.
- Make sure your Raspberry Pi is connected to the same local network as your PC.
- Make sure your Raspberry Pi is connected to the internet if you need to install some libraries.
- If this is the first time you use Raspberry Pi, See how to set up the Raspberry Pi
- Connect your PC to the Raspberry Pi via SSH using the built-in SSH client on Linux and macOS or PuTTY on Windows. See to how connect your PC to Raspberry Pi via SSH.
- Make sure you have the RPi.GPIO library installed. If not, install it using the following command:
sudo apt-get update
sudo apt-get install python3-rpi.gpio
- Create a Python script file button_pump.py and add the following code:
"""
This Raspberry Pi code was developed by newbiely.com
This Raspberry Pi code is made available for public use without any restriction
For comprehensive instructions and wiring diagrams, please visit:
https://newbiely.com/tutorials/raspberry-pi/raspberry-pi-button-pump
"""
import RPi.GPIO as GPIO
import time
BUTTON_PIN = 18 # GPIO pin connected to the button
RELAY_PIN = 16 # GPIO pin controls the pump via the relay module
# Set up the GPIO pins
GPIO.setmode(GPIO.BCM)
GPIO.setup(BUTTON_PIN, GPIO.IN, pull_up_down=GPIO.PUD_UP)
GPIO.setup(RELAY_PIN, GPIO.OUT)
prev_button_state = GPIO.HIGH # HIGH means the button is not pressed initially
try:
# Lock the door initially
GPIO.output(RELAY_PIN, GPIO.HIGH)
while True:
button_state = GPIO.input(BUTTON_PIN)
if button_state == GPIO.LOW and prev_button_state == GPIO.HIGH:
# Button is pressed (LOW means pressed due to pull-up resistor)
print("The button is pressed")
GPIO.output(RELAY_PIN, GPIO.HIGH) # turn pump on
print("The door is unlocked")
time.sleep(5) # Wait for 5 seconds
GPIO.output(RELAY_PIN, GPIO.LOW) # turn pump off
print("The door is locked again")
# Update the previous button state
prev_button_state = button_state
except KeyboardInterrupt:
print("Exiting...")
GPIO.cleanup()
- Save the file and run the Python script by executing the following command in the terminal:
python3 button_pump.py
- Press the button
- Check out the pump's condition
The script runs in an infinite loop continuously until you press Ctrl + C in the terminal.
Code Explanation
Check out the line-by-line explanation contained in the comments of the source code!
