Raspberry Pi - Soil Moisture Sensor
This tutorial instructs you how to use a moisture sensor with Raspberry Pi. Specifically, we will look at:
- The differences between a resistive and capacitive moisture sensor
- How to program Raspberry Pi to read the value of the moisture sensor using Raspberry Pi
- How to use Raspberry Pi to calibrate the moisture sensor
- How Raspberry Pi determines if the soil is wet or dry
Hardware Preparation
Or you can buy the following kits:
| 1 | × | DIYables Sensor Kit (18 sensors/displays) |
Additionally, some of these links are for products from our own brand, DIYables .
Buy Note: Many soil moisture sensors available in the market are unreliable, regardless of their version. We strongly recommend buying the sensor with TLC555I Chip from the DIYables brand using the link provided above. We tested it, and it worked reliably.
Overview of Soil Moisture Sensor Sensor
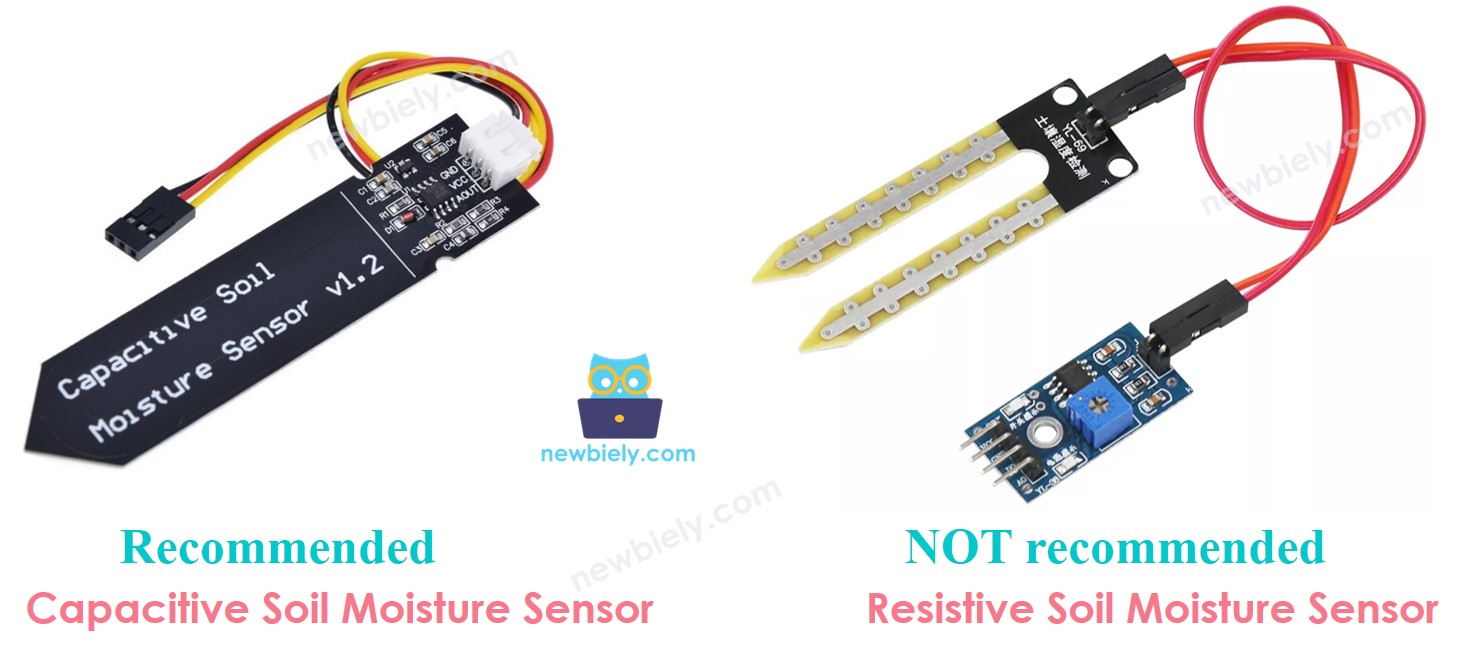
There are two types of moisture sensors: the resistive moisture sensor and the capacitive moisture sensor.
Both sensors offer soil moisture information. However, their methods of operation are not similar. We strongly suggest utilizing the capacitive moisture sensor, due to the following:
- The resistive soil moisture sensor is prone to corrosion over time. This is because electrical current passes between its probes, which leads to electrochemical corrosion.
- The capacitive soil moisture sensor does corrode with time much slower than the resistive soil moisture sensor. This is because its electrodes are not exposed and are comparatively resistant to corrosion.
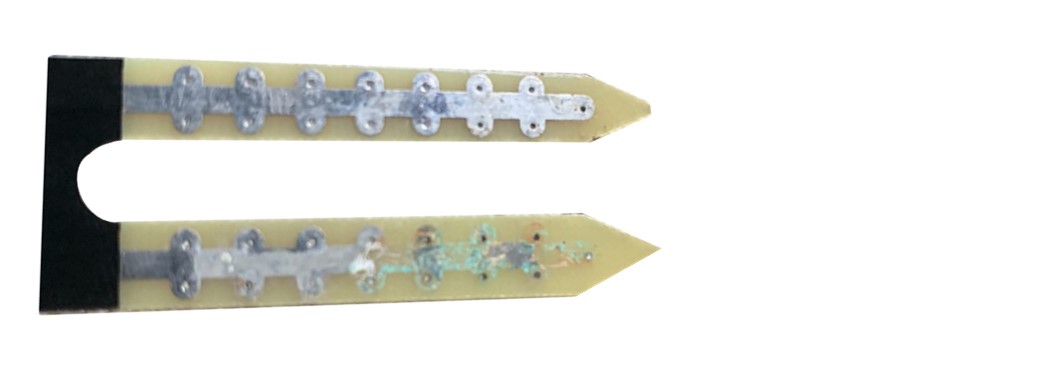
This is a picture of a resistive soil moisture sensor that has been damaged due to corrosion.
The remainder of this tutorial will utilize the capacitive soil moisture sensor.
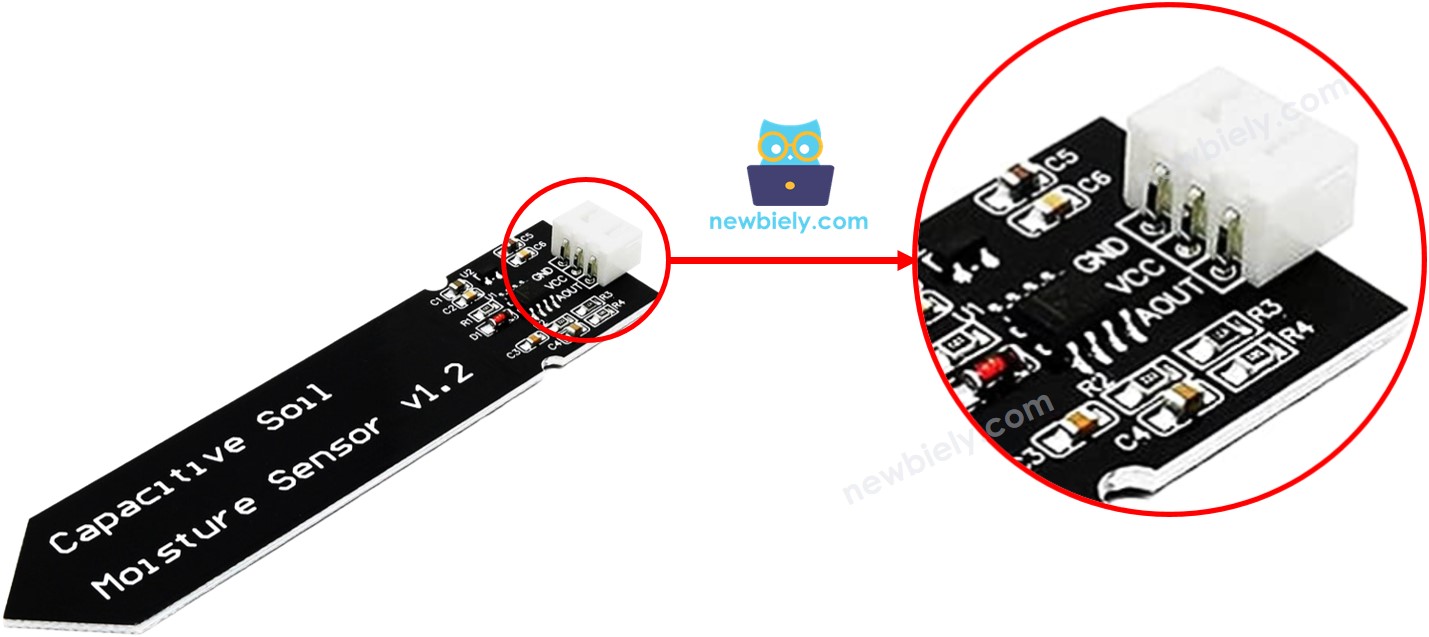
Capacitive Soil Moisture Sensor Pinout
The capacitive soil moisture sensor has three pins:
- GND pin: This should be connected to the GND (0V)
- VCC pin: This should be connected to VCC (5V or 3.3v)
- AOUT pin: This is the analog signal output pin which produces a voltage that is proportional to the soil moisture level. This should be connected to a Raspberry Pi's analog input pin.
How It Works
The amount of water in the soil has an effect on the voltage in the AOUT pin; the greater the water content, the lower the voltage will be.
Wiring Diagram
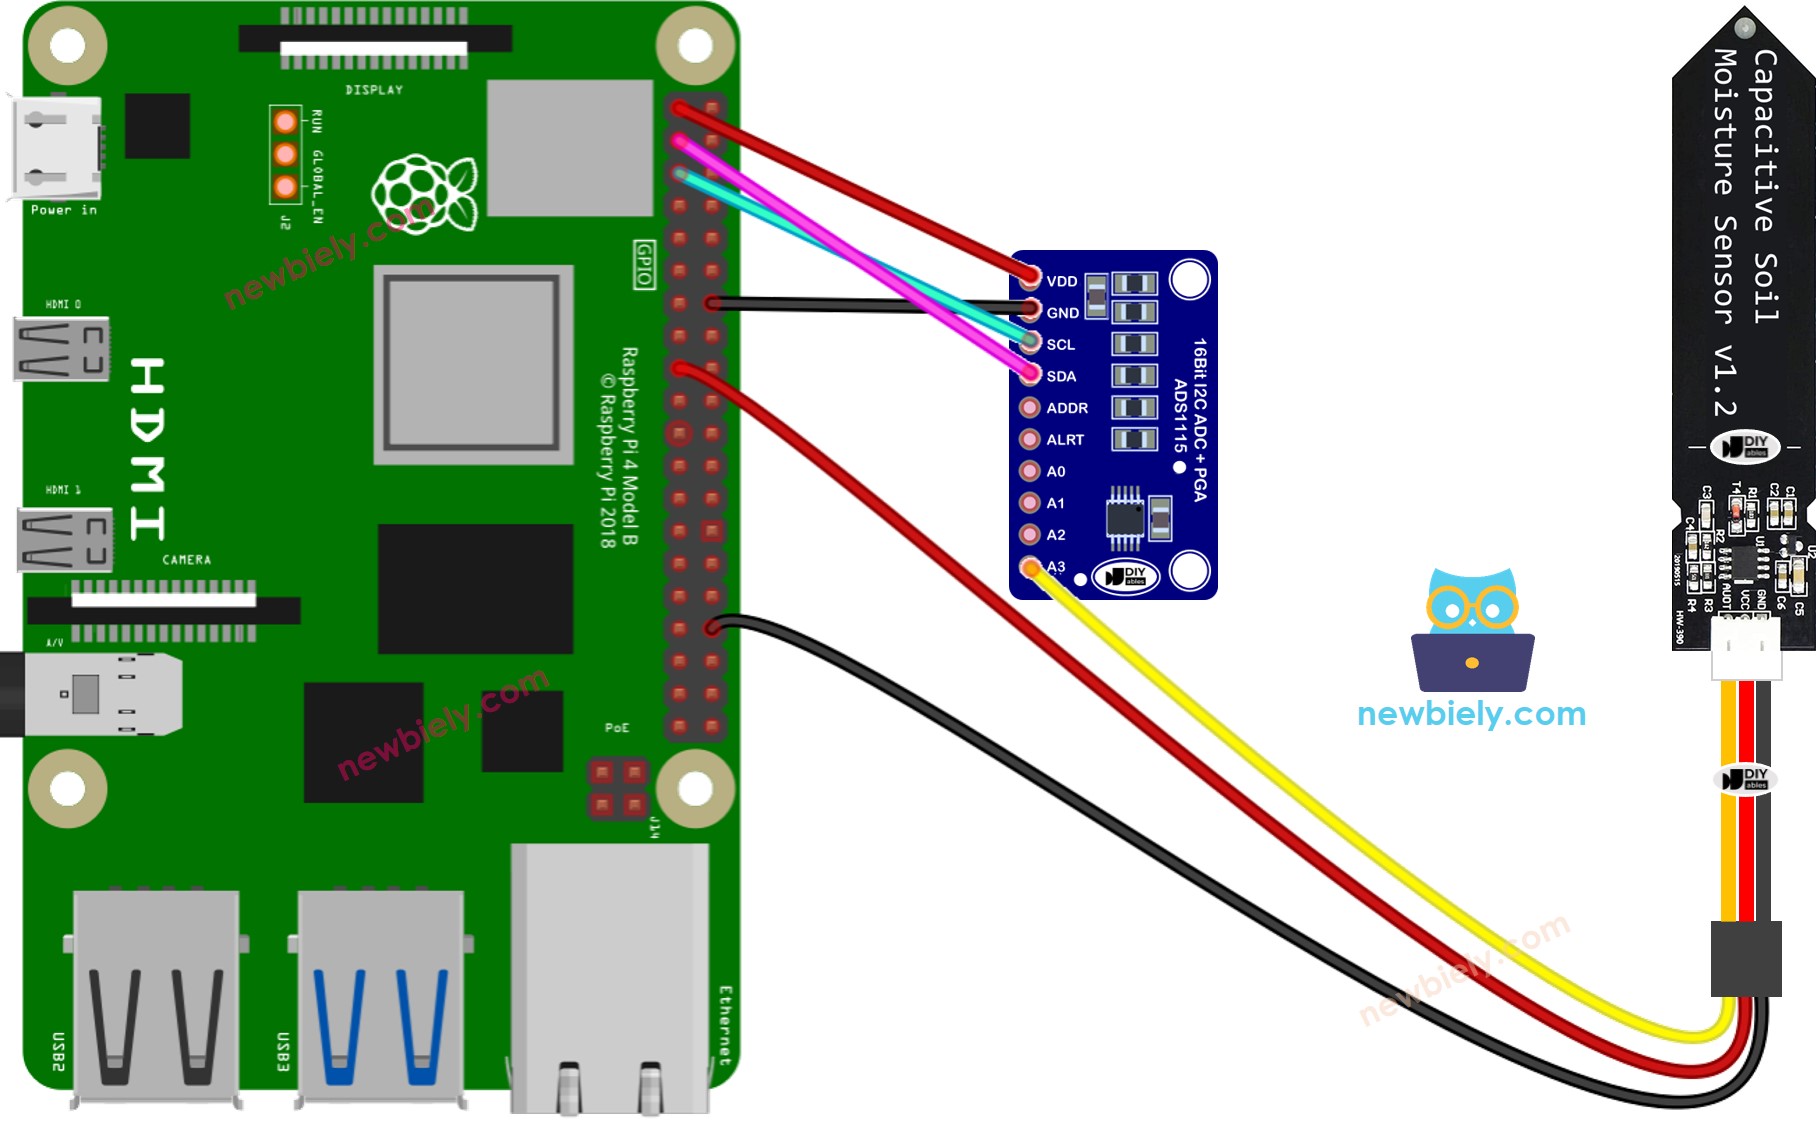
This image is created using Fritzing. Click to enlarge image
To simplify and organize your wiring setup, we recommend using a Screw Terminal Block Shield for Raspberry Pi. This shield ensures more secure and manageable connections, as shown below:

Raspberry Pi Code reads value from soil moisture sensor.
Detailed Instructions
- Make sure you have Raspbian or any other Raspberry Pi compatible operating system installed on your Pi.
- Make sure your Raspberry Pi is connected to the same local network as your PC.
- Make sure your Raspberry Pi is connected to the internet if you need to install some libraries.
- If this is the first time you use Raspberry Pi, See how to set up the Raspberry Pi
- Connect your PC to the Raspberry Pi via SSH using the built-in SSH client on Linux and macOS or PuTTY on Windows. See to how connect your PC to Raspberry Pi via SSH.
- Make sure you have the RPi.GPIO library installed. If not, install it using the following command:
- Install the Adafruit_ADS1x15 library by running the following commands on your Raspberry Pi terminal:
- Create a Python script file soil_moisture.py and add the following code:
- Save the file and run the Python script by executing the following command in the terminal:
- Bury the sensor in soil, then pour water into the soil. Or slowly submerge it into a cup of salt water.
- Check the result on the Terminal.
※ NOTE THAT:
- Do NOT use the pure water for testing since it doesn't conduct electricity, which means it won't impact the sensor readings.
- The sensor readings typically don't drop to zero. It's normal for them to stay within the range of 40000 to 50000, but this might change based on factors such as how deep the sensor is placed, the type of soil or water, and the voltage of the power supply.
- Never bury the circuit part (found on top of the sensor) in soil or water, as this could harm the sensor.
The script runs in an infinite loop continuously until you press Ctrl + C in the terminal.
Calibration for Capacitive Soil Moisture Sensor
The value obtained from the moisture sensor is not absolute. It varies depending on the soil's composition and water content. Therefore, it is necessary to carry out calibration in order to determine a boundary between wet and dry conditions.
Instructions for Calibration for Capacitive Soil Moisture Sensor:
- Run the code on Raspberry Pi
- Place the moisture sensor into the soil
- Gradually add water to the soil
- Monitor the values on the Terminal
- Note the value when you feel the soil changes from dry to wet, for example: 45000. This is referred to as the THRESHOLD.
Determine if the soil is wet or dry
- Create a Python script file soil_moisture_dry_wet.py and add the following code:
- Update the THRESHOLD value that was noted in the calibration to the code.
- Save the file and run the Python script by executing the following command in the Terminal:
The output displayed on the Terminal.