Raspberry Pi - Heating Element
This tutorial instructs you how to use Raspberry Pi to control a heating element. Additionally, we will use this knowledge to create a heating system in a subsequent tutorial.
Hardware Preparation
Or you can buy the following kits:
| 1 | × | DIYables Sensor Kit (30 sensors/displays) | |
| 1 | × | DIYables Sensor Kit (18 sensors/displays) |
Additionally, some of these links are for products from our own brand, DIYables .
Overview of Heating Element
The Heating Element Pinout

The heating element typically has two pins:
- The Positive (+) pin (red) should be connected to the 12V of a DC power supply
- The Negative (-) pin (black) should be connected to the GND of a DC power supply
How to Control Heating Element using Raspberry Pi
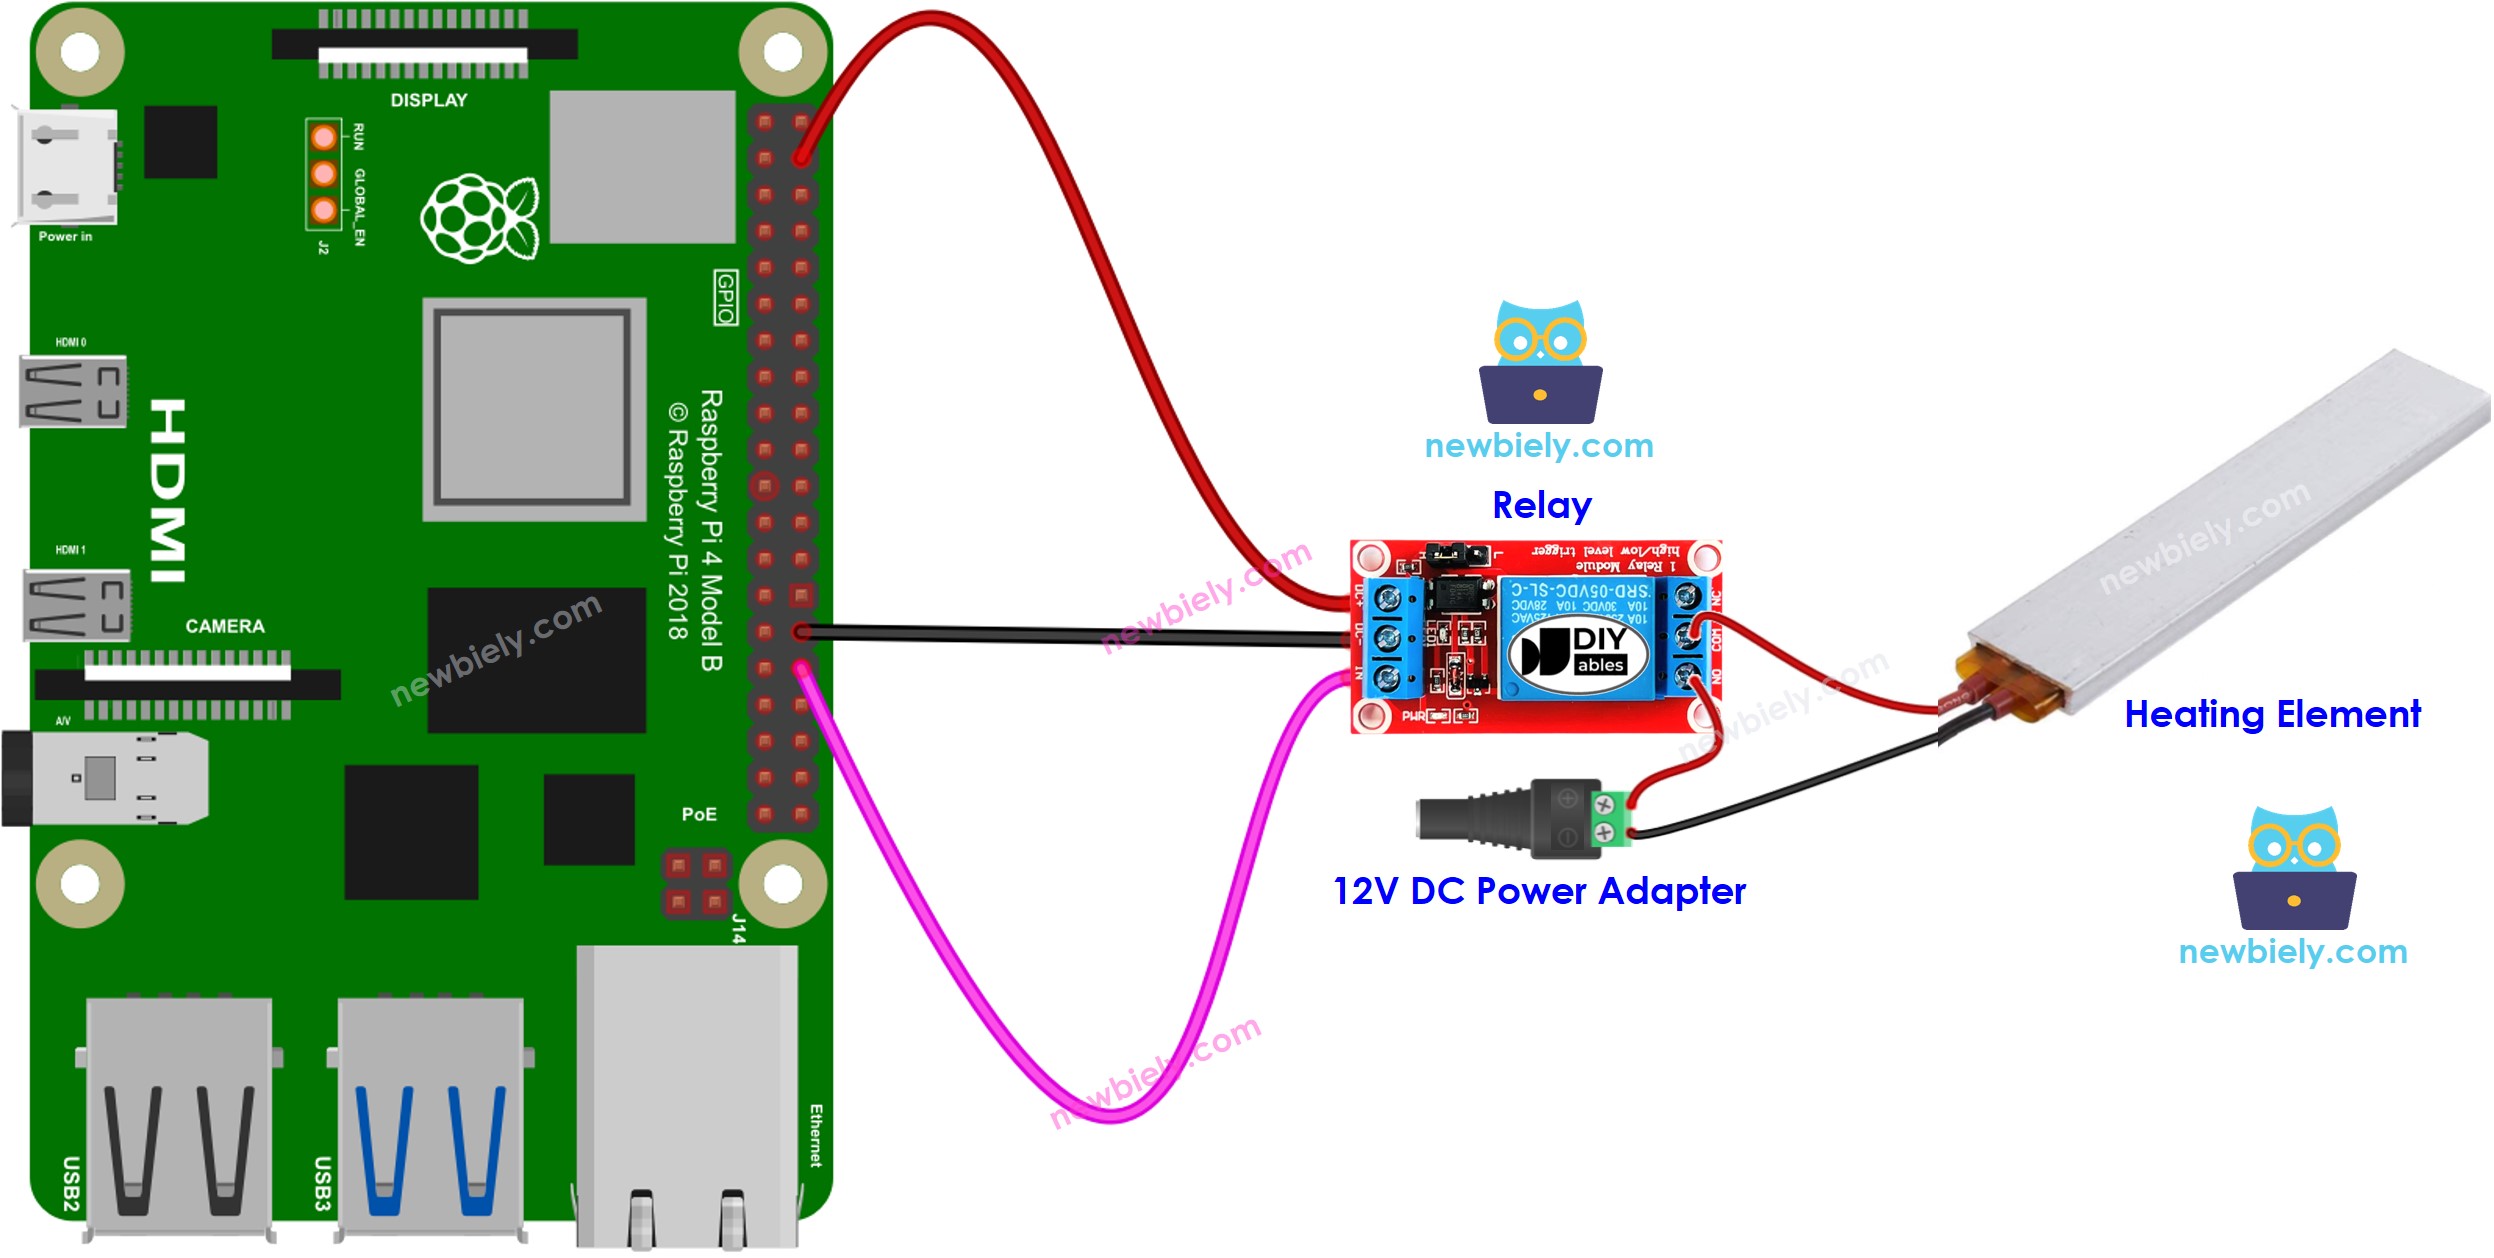
If a 12V heating element is supplied with 12V power, it will produce heat. To manage the heating element, a relay must be used between the Raspberry Pi and the heating element. The Raspberry Pi can then control the heating element through the relay.
If you are unfamiliar with relays (pinout, functioning, programming, etc.), you can find out more in the Raspberry Pi - Relay tutorial.
Wiring Diagram

This image is created using Fritzing. Click to enlarge image
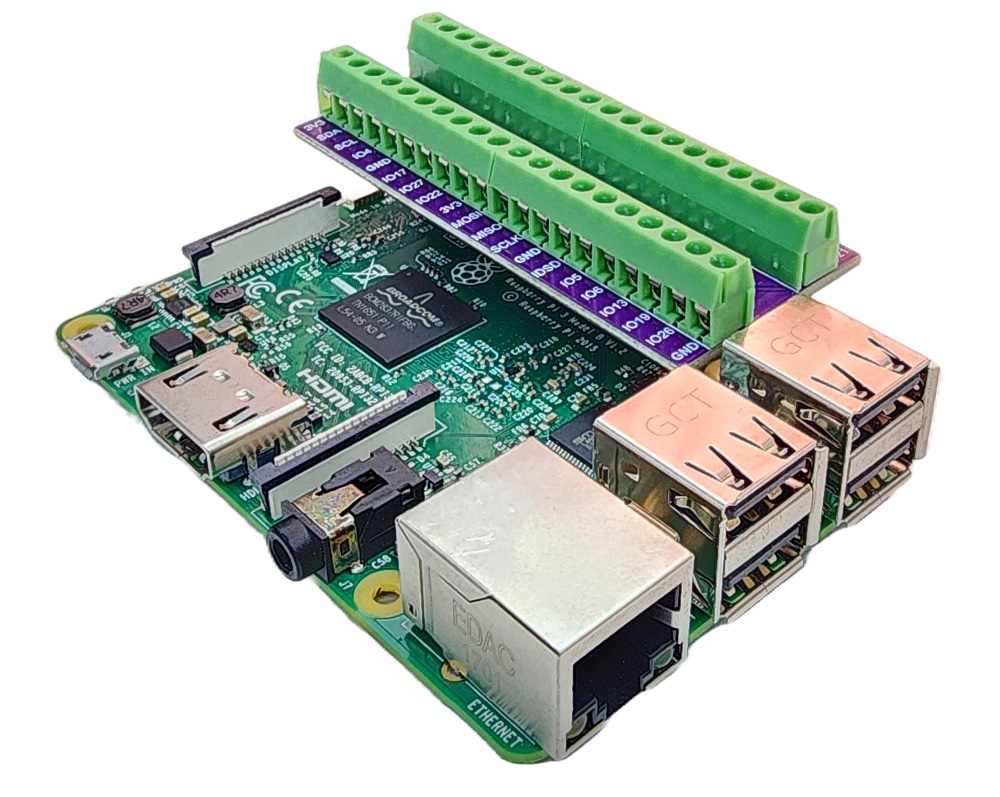
To simplify and organize your wiring setup, we recommend using a Screw Terminal Block Shield for Raspberry Pi. This shield ensures more secure and manageable connections, as shown below:

Raspberry Pi Code
The code below will turn the heating element ON every five seconds and OFF every five seconds.
Detailed Instructions
- Make sure you have Raspbian or any other Raspberry Pi compatible operating system installed on your Pi.
- Make sure your Raspberry Pi is connected to the same local network as your PC.
- Make sure your Raspberry Pi is connected to the internet if you need to install some libraries.
- If this is the first time you use Raspberry Pi, See how to set up the Raspberry Pi
- Connect your PC to the Raspberry Pi via SSH using the built-in SSH client on Linux and macOS or PuTTY on Windows. See to how connect your PC to Raspberry Pi via SSH.
- Make sure you have the RPi.GPIO library installed. If not, install it using the following command:
- Create a Python script file heating_element.py and add the following code:
- Save the file and run the Python script by executing the following command in the terminal:
- Check out the temperature of the heating element.
WARNING
Take caution. It can cause harm to you and your residence. This is a serious matter, and we want you to be secure. If you are not absolutely certain of what you are doing, do yourself a favor and don't meddle with anything. Seek help from someone who is knowledgeable! We are not accountable for your safety.
The script runs in an infinite loop continuously until you press Ctrl + C in the terminal.
Code Explanation
Check out the line-by-line explanation contained in the comments of the source code!
