Raspberry Pi - Door Sensor
The door sensor is a common feature in security systems. It is used to detect and monitor entrances, such as doors and windows. This device is also referred to as an contact sensor, entry sensor, or window sensor.
This tutorial instructs you how to use Raspberry Pi with the door sensor. In detail, we will learn:
- How to connect the Raspberry Pi to the door sensor.
- How to program the Raspberry Pi to read the state of door sensor.
- How to program the Raspberry Pi to check if the door is open or closed.
Hardware Preparation
Or you can buy the following kits:
| 1 | × | DIYables Sensor Kit (30 sensors/displays) | |
| 1 | × | DIYables Sensor Kit (18 sensors/displays) |
Additionally, some of these links are for products from our own brand, DIYables .
Overview of Door Sensor
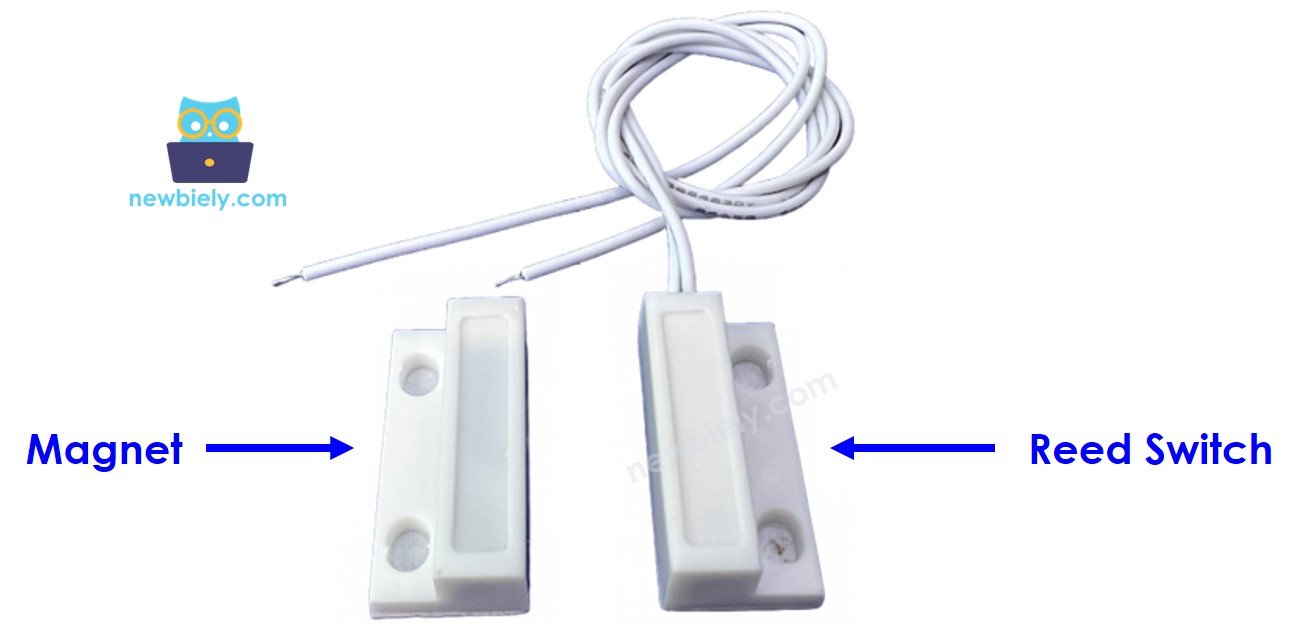
The Door Sensor Pinout
A door sensor consists of two parts:
- A reed switch with two pins
- A magnet

Similar to a typical switch/button, there is no requirement to differentiate between the two pins of the reed switch.
How It Works
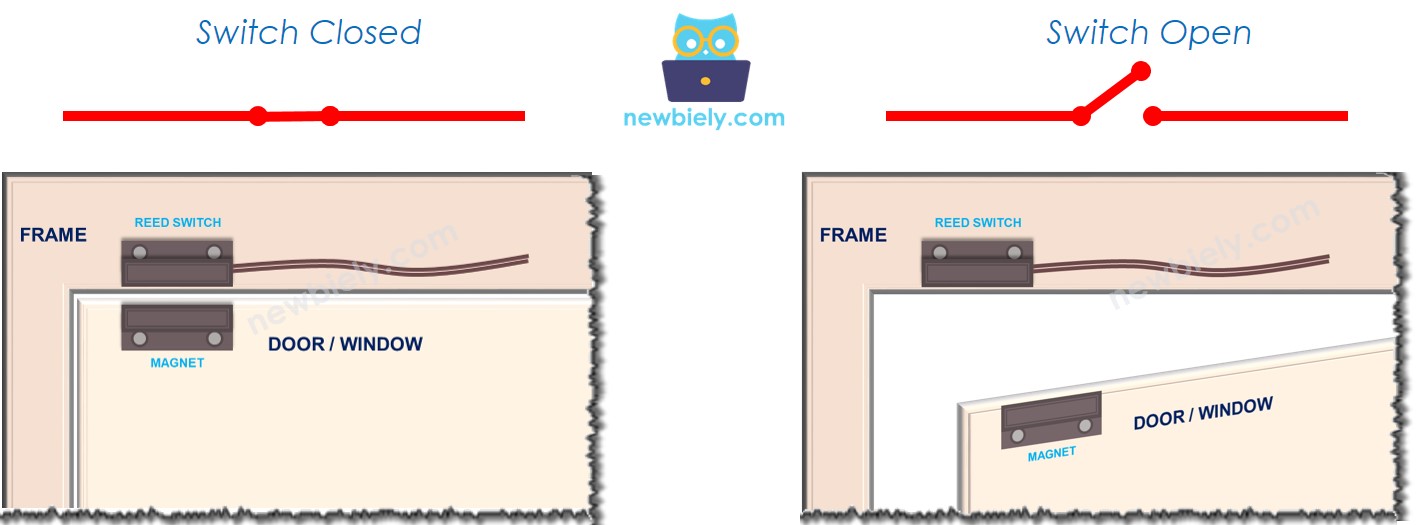
The magnet is affixed to the door/window, which is the movable element, and the reed switch is attached to the door frame, which is the stationary element. When the door is shut, the two components are in contact:
- When the magnet is close to the reed switch, the reed switch circuit is closed
- When the magnet is distant from the reed switch, the reed switch circuit is open

※ NOTE THAT:
The reed switch does not provide LOW or HIGH values on its pins. It is either closed or open. The value of the pin connected to Raspberry Pi can be LOW, HIGH, or a floating (unpredictable) value. To prevent the floating value, we must use a pull-up or pull-down resistor on the Raspberry Pi pin.
If we connect one pin of the reed switch to GND and the other pin of the reed switch to a Raspberry Pi input pin with a pull-up resistor (internal or external):
- When the magnet is close to the reed switch, the value in the Raspberry Pi input pin is LOW
- When the magnet is distant from the reed switch, the value in the Raspberry Pi input pin is HIGH
To find out the status of the door, we merely need to check the state of Raspberry Pi's input pin:
- If the state is LOW, the door is closed
- If the state is HIGH, the door is opened
To detect the door-opening/door-closing events, we can monitor the state change on the Raspberry Pi input pin:
- If the state transitions from LOW to HIGH, the door-opening event is detected
- If the state transitions from HIGH to LOW, the door-closing event is detected
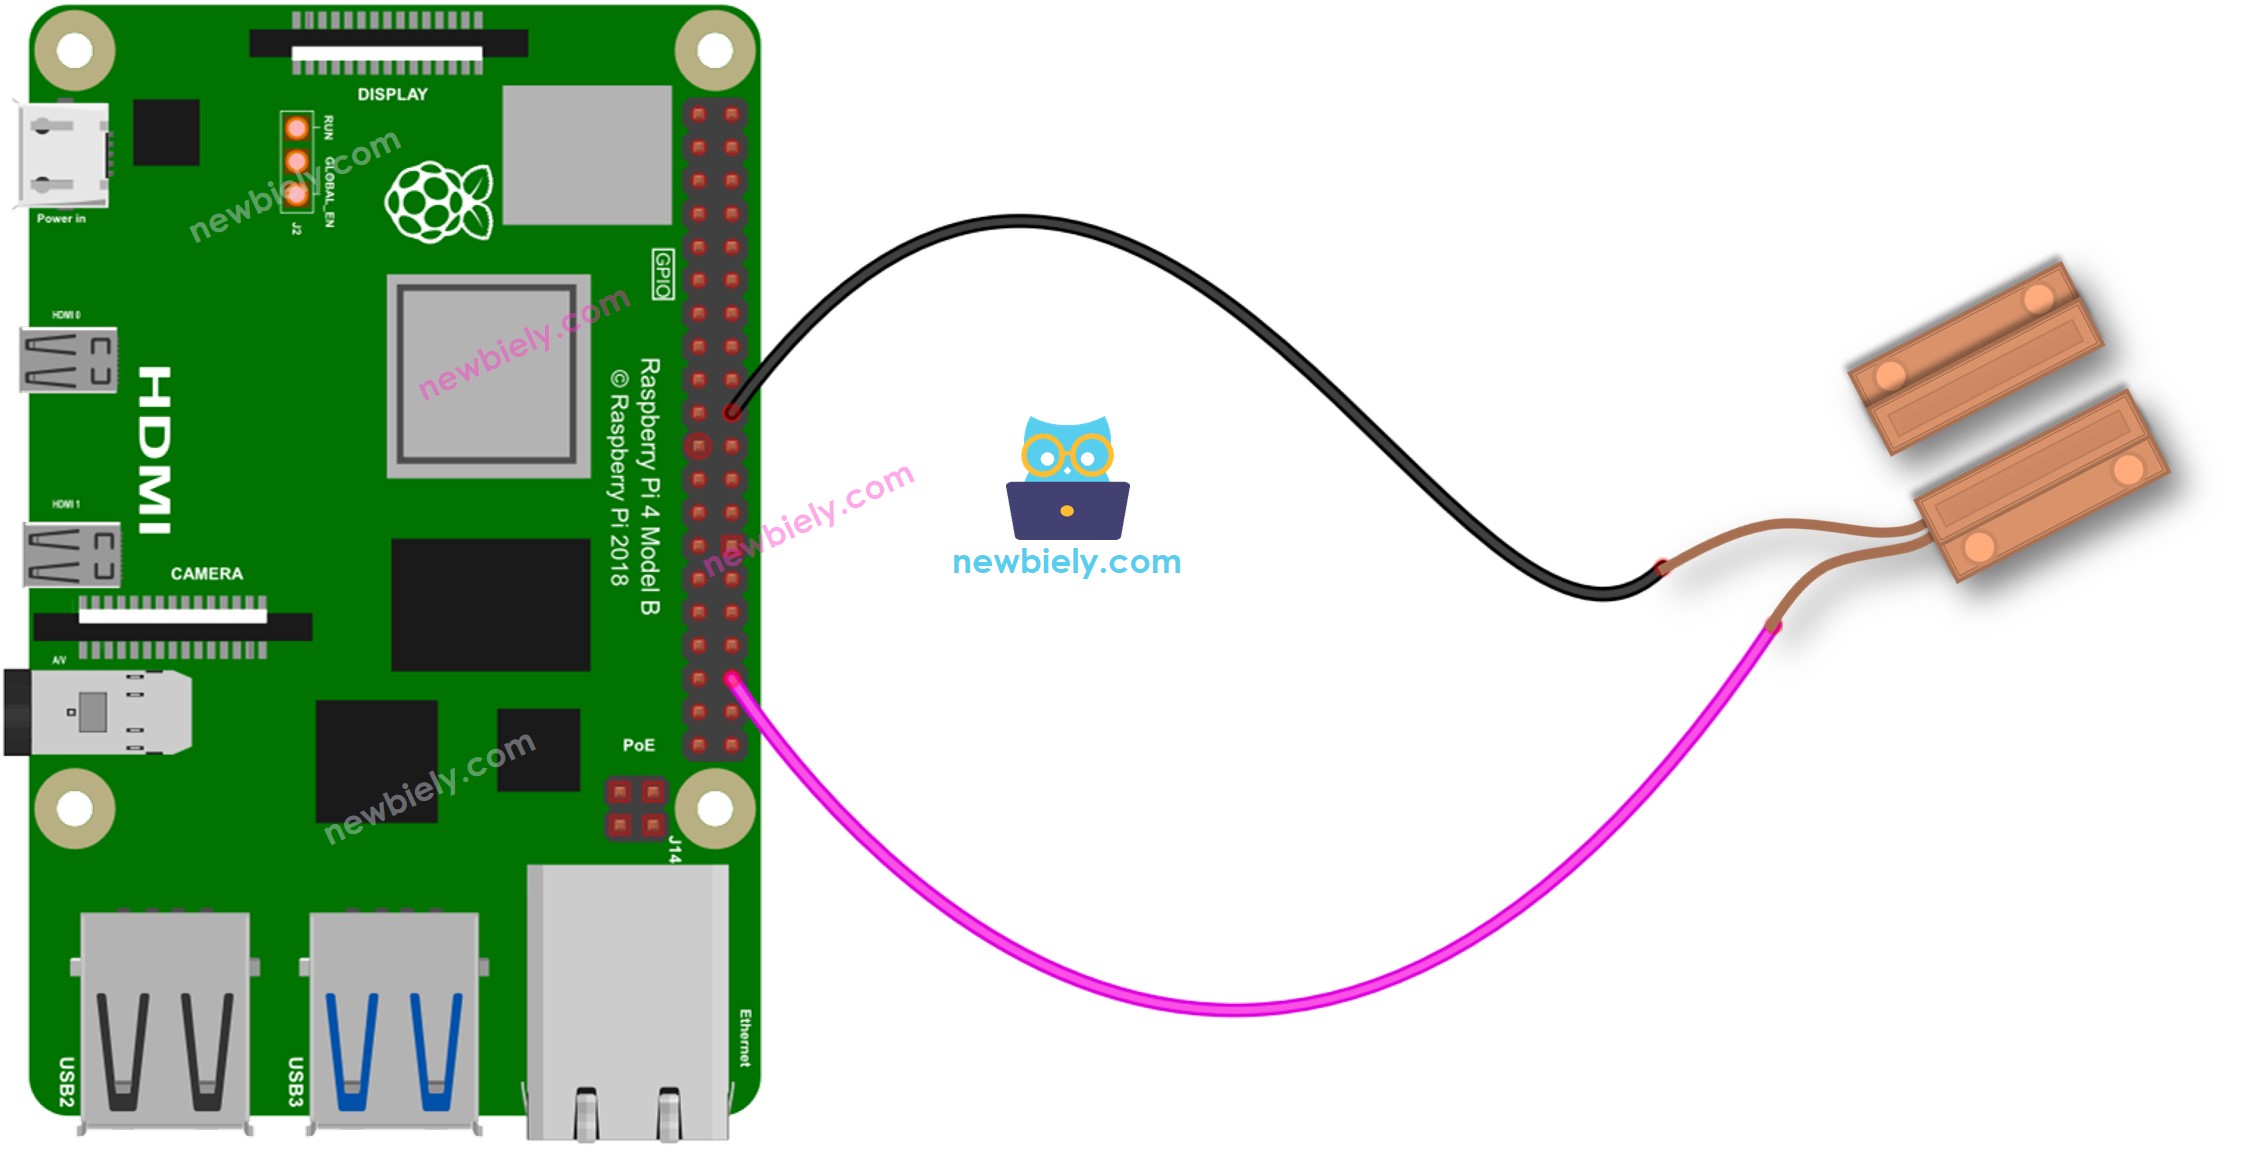
Wiring Diagram

This image is created using Fritzing. Click to enlarge image
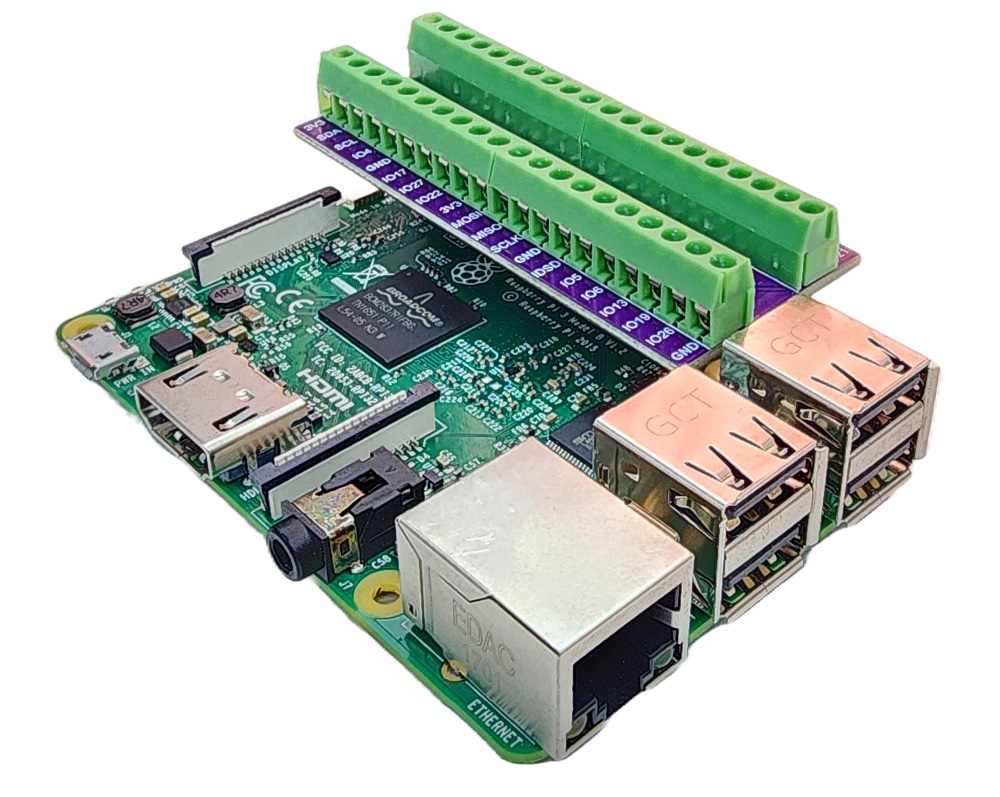
To simplify and organize your wiring setup, we recommend using a Screw Terminal Block Shield for Raspberry Pi. This shield ensures more secure and manageable connections, as shown below:

How To Program For Door Sensor
- Initialize the Raspberry Pi pin to digital input mode by utilizing the GPIO.setup() function. As an example, the following code can be used to initialize pin 13 as an input:
- Utilizes the GPIO.input() function to ascertain the status of the Raspberry Pi pin.
Raspberry Pi Code - Check Door Open and Close State
Detailed Instructions
- Make sure you have Raspbian or any other Raspberry Pi compatible operating system installed on your Pi.
- Make sure your Raspberry Pi is connected to the same local network as your PC.
- Make sure your Raspberry Pi is connected to the internet if you need to install some libraries.
- If this is the first time you use Raspberry Pi, See how to set up the Raspberry Pi
- Connect your PC to the Raspberry Pi via SSH using the built-in SSH client on Linux and macOS or PuTTY on Windows. See to how connect your PC to Raspberry Pi via SSH.
- Make sure you have the RPi.GPIO library installed. If not, install it using the following command:
- Create a Python script file door_sensor.py and add the following code:
- Save the file and run the Python script by executing the following command in the terminal:
- Bring the magnet close to the reed switch, then move it away.
- Check the result on the Terminal.
The script runs in an infinite loop continuously until you press Ctrl + C in the terminal.
You will be noticed that the code keeps printing the current state of the door. If you want to print the door state only when it changes, check out the next session.
Raspberry Pi Code - Detect Door-opening and Door-closing Events
- Create a Python script file door_sensor_events.py and add the following code:
- Save the file and run the Python script by executing the following command in the terminal:
- Bring the magnet close to the reed switch, then move it away.
- Check the result on the Terminal.
- You will see that the state of the door is printed only when the state changes
