Raspberry Pi - Button - Debounce
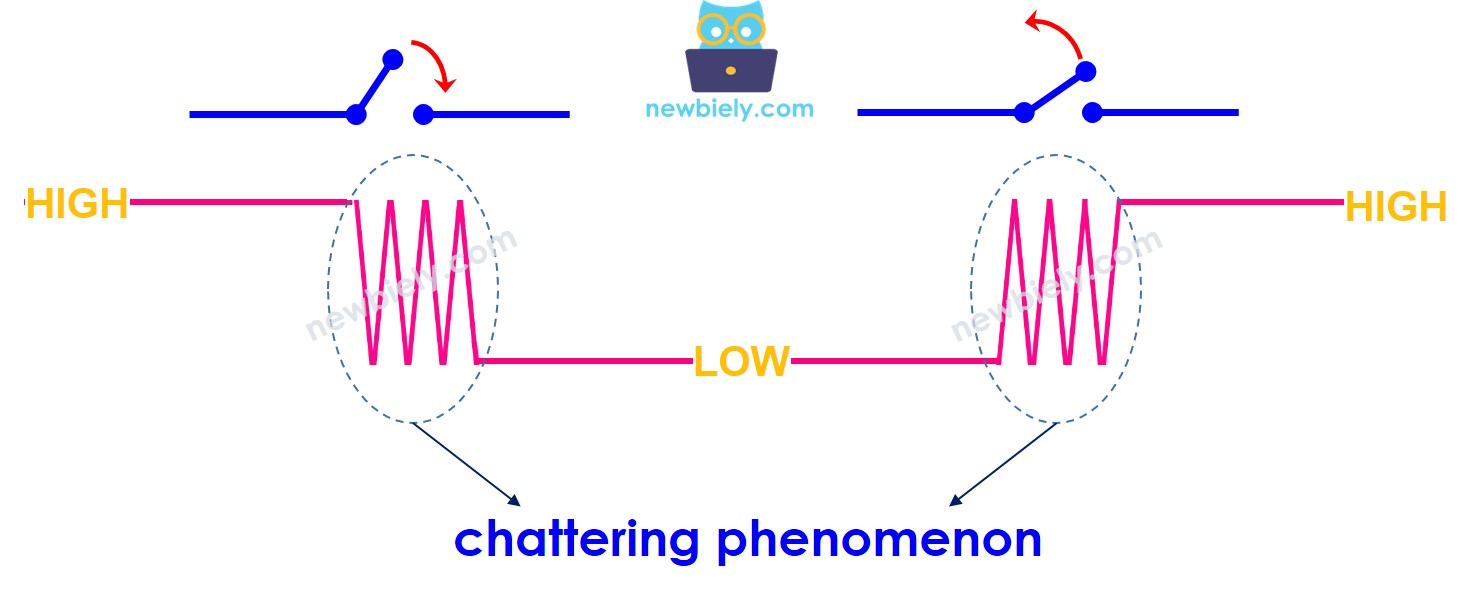
When a button is pressed or released, or when a switch is toggled, newbies often assume that its state is simply changed from LOW to HIGH or HIGH to LOW. In reality, this is not the case. Due to mechanical and physical characteristics, the state of the button (or switch) may be toggled between LOW and HIGH multiple times. This phenomenon is known as chattering. Chattering can cause a single press to be read as multiple presses, leading to malfunction in certain applications.
The method to prevent this problem is referred as debouncing or debounce. This tutorial instructs you how to do it when using the button with Raspberry Pi. We will learn though the below steps:
Raspberry Pi code without debouncing a button.
Raspberry Pi code with debouncing a button.
Raspberry Pi code with debouncing for multiple buttons.
Or you can buy the following kits:
Disclosure: Some of the links provided in this section are Amazon affiliate links. We may receive a commission for any purchases made through these links at no additional cost to you.
Additionally, some of these links are for products from our own brand,
DIYables .
If you are unfamiliar with buttons, including their pinouts, how they work, and how to program them, the following tutorials can provide you with more information:

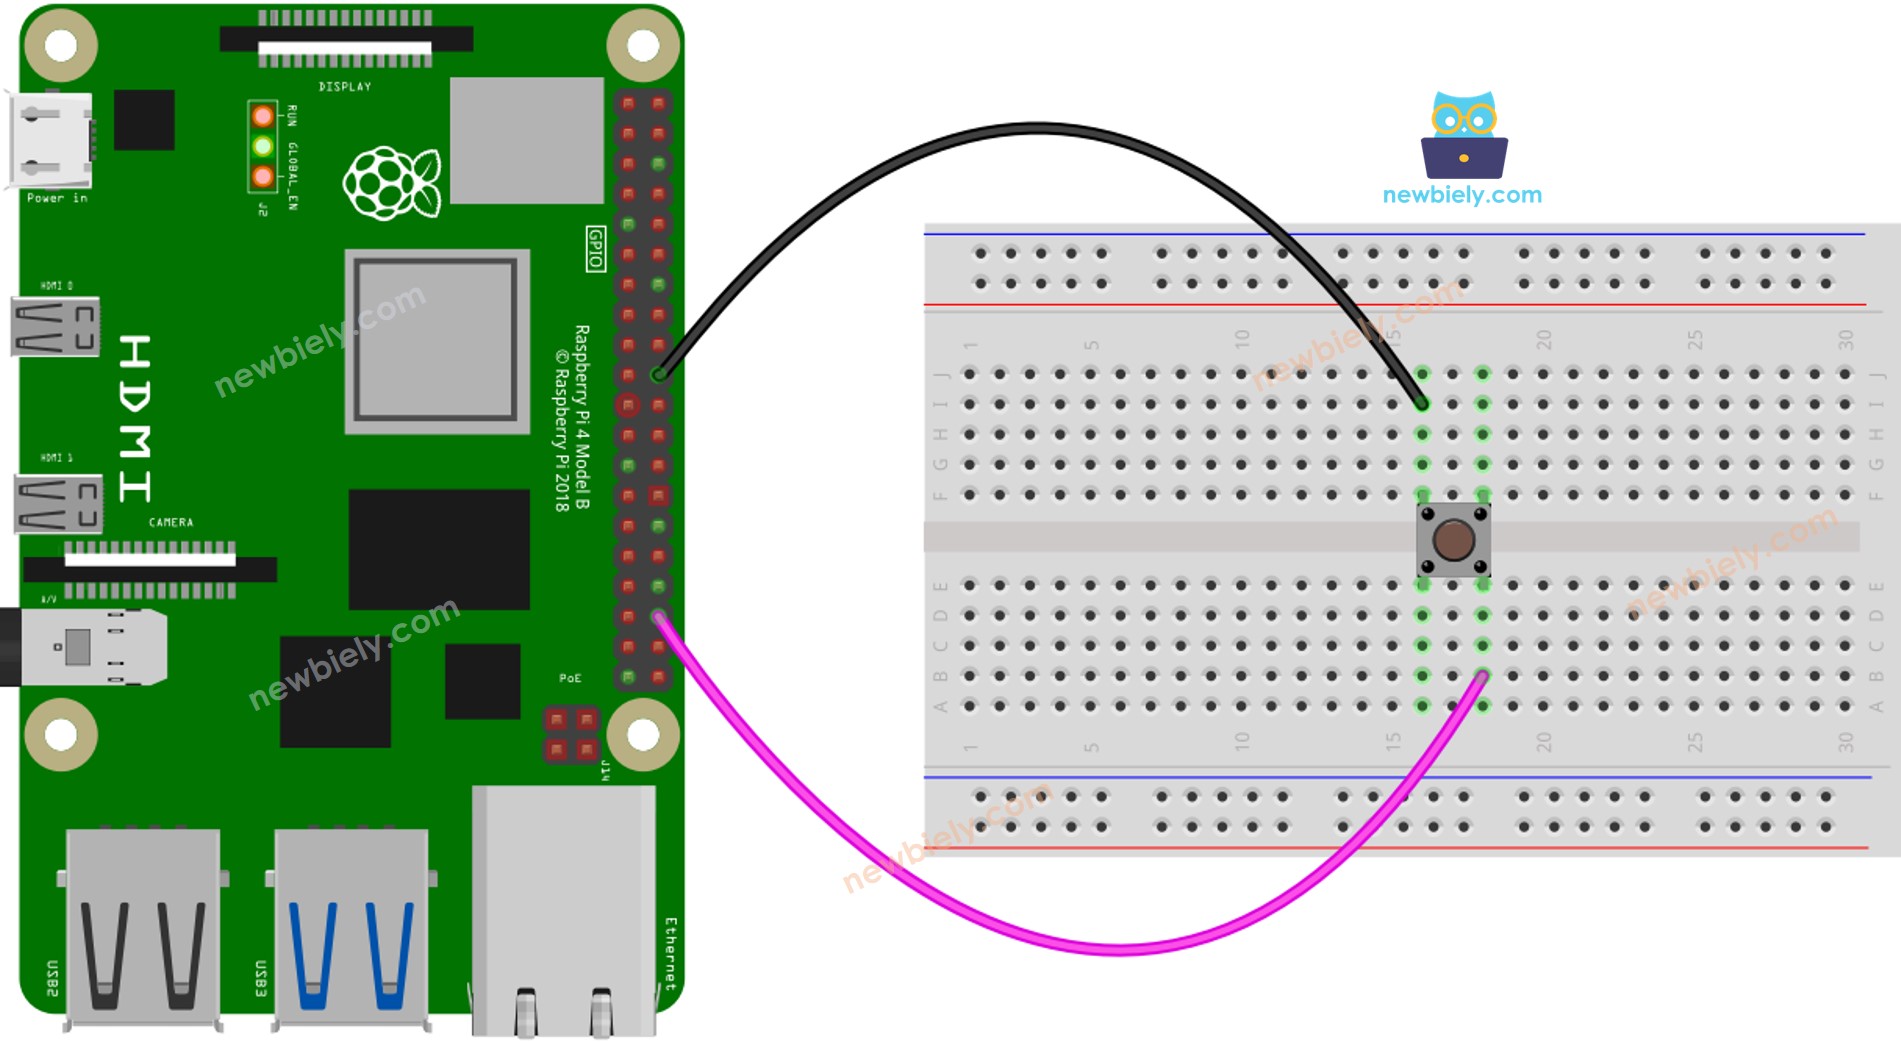
This image is created using Fritzing. Click to enlarge image
Let's take a look at the differences between Raspberry Pi code WITH and WITHOUT debounce, as well as their respective behaviors.
Before understanding debouncing, take a look at the code without it and observe its behavior.
Make sure you have Raspbian or any other Raspberry Pi compatible operating system installed on your Pi.
Make sure your Raspberry Pi is connected to the same local network as your PC.
Make sure your Raspberry Pi is connected to the internet if you need to install some libraries.
Make sure you have the RPi.GPIO library installed. If not, install it using the following command:
sudo apt-get update
sudo apt-get install python3-rpi.gpio
import RPi.GPIO as GPIO
import time
GPIO.setmode(GPIO.BCM)
BUTTON_PIN = 16
GPIO.setup(BUTTON_PIN, GPIO.IN, pull_up_down=GPIO.PUD_UP)
button_state = GPIO.input(BUTTON_PIN)
try:
while True:
current_state = GPIO.input(BUTTON_PIN)
if current_state != button_state:
if current_state == GPIO.HIGH:
print("Button released")
else:
print("Button pressed")
button_state = current_state
time.sleep(0.1)
except KeyboardInterrupt:
GPIO.cleanup()
python3 button_without_debounce.py
The script runs in an infinite loop continuously until you press Ctrl + C in the terminal.
Button pressed
Button pressed
Button pressed
Button released
Button released
Sometime, you only pressed and released the button once. Nevertheless, Raspberry Pi recognizes it as multiple presses and releases. This is the chattering phenomenon mentioned at the beginning of the tutorial. Let's see how to fix it in the next part.
import RPi.GPIO as GPIO
GPIO.setmode(GPIO.BCM)
BUTTON_PIN = 16
DEBOUNCE_TIME_MS = 200
GPIO.setup(BUTTON_PIN, GPIO.IN, pull_up_down=GPIO.PUD_UP)
button_state = GPIO.input(BUTTON_PIN)
prev_button_state = button_state
def button_callback(channel):
global button_state
button_state = GPIO.input(BUTTON_PIN)
GPIO.add_event_detect(BUTTON_PIN, GPIO.BOTH, callback=button_callback, bouncetime=DEBOUNCE_TIME_MS)
try:
while True:
if button_state != prev_button_state:
if button_state == GPIO.HIGH:
print("Button released")
else:
print("Button pressed")
prev_button_state = button_state
except KeyboardInterrupt:
GPIO.cleanup()
python3 button_debounce.py
Button pressed
Button released
As you can observe, you only pressed and released the button once. Raspberry Pi detects it as a single press and release, thus eliminating any unnecessary noise.
import RPi.GPIO as GPIO
GPIO.setmode(GPIO.BCM)
BUTTON_PIN_1 = 14
BUTTON_PIN_2 = 15
BUTTON_PIN_3 = 18
DEBOUNCE_TIME_MS = 200
GPIO.setup(BUTTON_PIN_1, GPIO.IN, pull_up_down=GPIO.PUD_UP)
GPIO.setup(BUTTON_PIN_2, GPIO.IN, pull_up_down=GPIO.PUD_UP)
GPIO.setup(BUTTON_PIN_3, GPIO.IN, pull_up_down=GPIO.PUD_UP)
button_state_1 = GPIO.input(BUTTON_PIN_1)
button_state_2 = GPIO.input(BUTTON_PIN_2)
button_state_3 = GPIO.input(BUTTON_PIN_3)
prev_button_state_1 = button_state_1
prev_button_state_2 = button_state_2
prev_button_state_3 = button_state_3
def button_callback_1(channel):
global button_state_1
button_state_1 = GPIO.input(BUTTON_PIN_1)
def button_callback_2(channel):
global button_state_2
button_state_2 = GPIO.input(BUTTON_PIN_2)
def button_callback_3(channel):
global button_state_3
button_state_3 = GPIO.input(BUTTON_PIN_3)
GPIO.add_event_detect(BUTTON_PIN_1, GPIO.BOTH, callback=button_callback_1, bouncetime=DEBOUNCE_TIME_MS)
GPIO.add_event_detect(BUTTON_PIN_2, GPIO.BOTH, callback=button_callback_2, bouncetime=DEBOUNCE_TIME_MS)
GPIO.add_event_detect(BUTTON_PIN_3, GPIO.BOTH, callback=button_callback_3, bouncetime=DEBOUNCE_TIME_MS)
try:
while True:
if button_state_1 != prev_button_state_1:
if button_state_1 == GPIO.HIGH:
print("Button 1 released")
else:
print("Button 1 pressed")
prev_button_state_1 = button_state_1
if button_state_2 != prev_button_state_2:
if button_state_2 == GPIO.HIGH:
print("Button 2 released")
else:
print("Button 2 pressed")
prev_button_state_2 = button_state_2
if button_state_3 != prev_button_state_3:
if button_state_3 == GPIO.HIGH:
print("Button 3 released")
else:
print("Button 3 pressed")
prev_button_state_3 = button_state_3
except KeyboardInterrupt:
GPIO.cleanup()
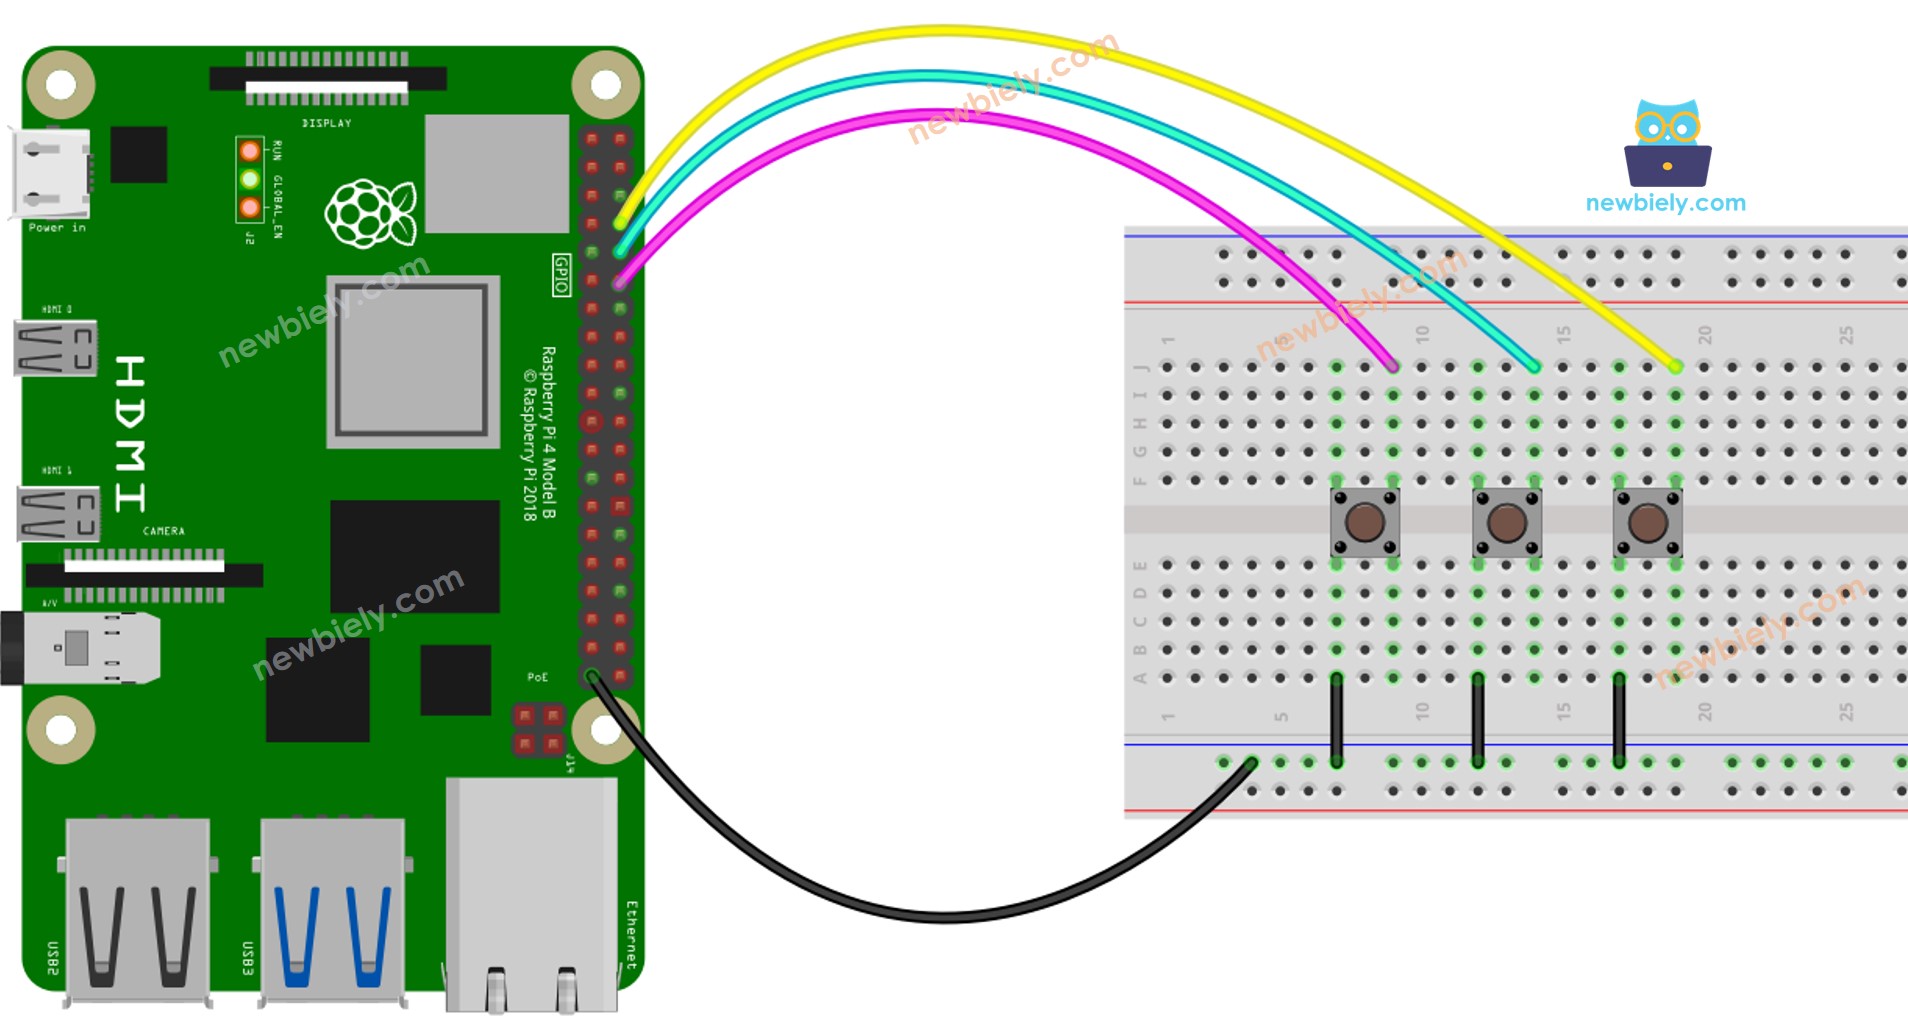
The diagram that illustrates the wiring for the code mentioned:

This image is created using Fritzing. Click to enlarge image
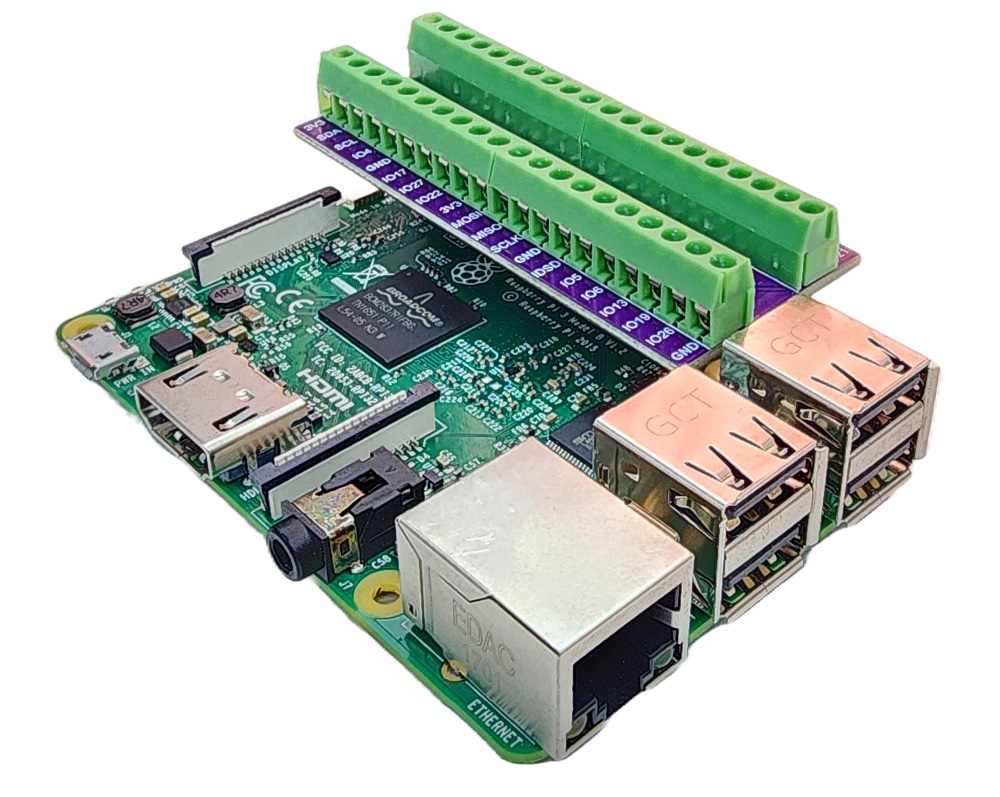
To simplify and organize your wiring setup, we recommend using a Screw Terminal Block Shield for Raspberry Pi. This shield ensures more secure and manageable connections, as shown below:


