Raspberry Pi Control LED via Bluetooth
This tutorial instructs you how to program Raspberry Pi to control a LED through either Bluetooth or BLE.
- To control the LED via Bluetooth, the HC-05 Bluetooth module should be used.
- To control the LED via BLE, the HM-10 BLE module should be used.
This tutorial supplies guidance for both modules.
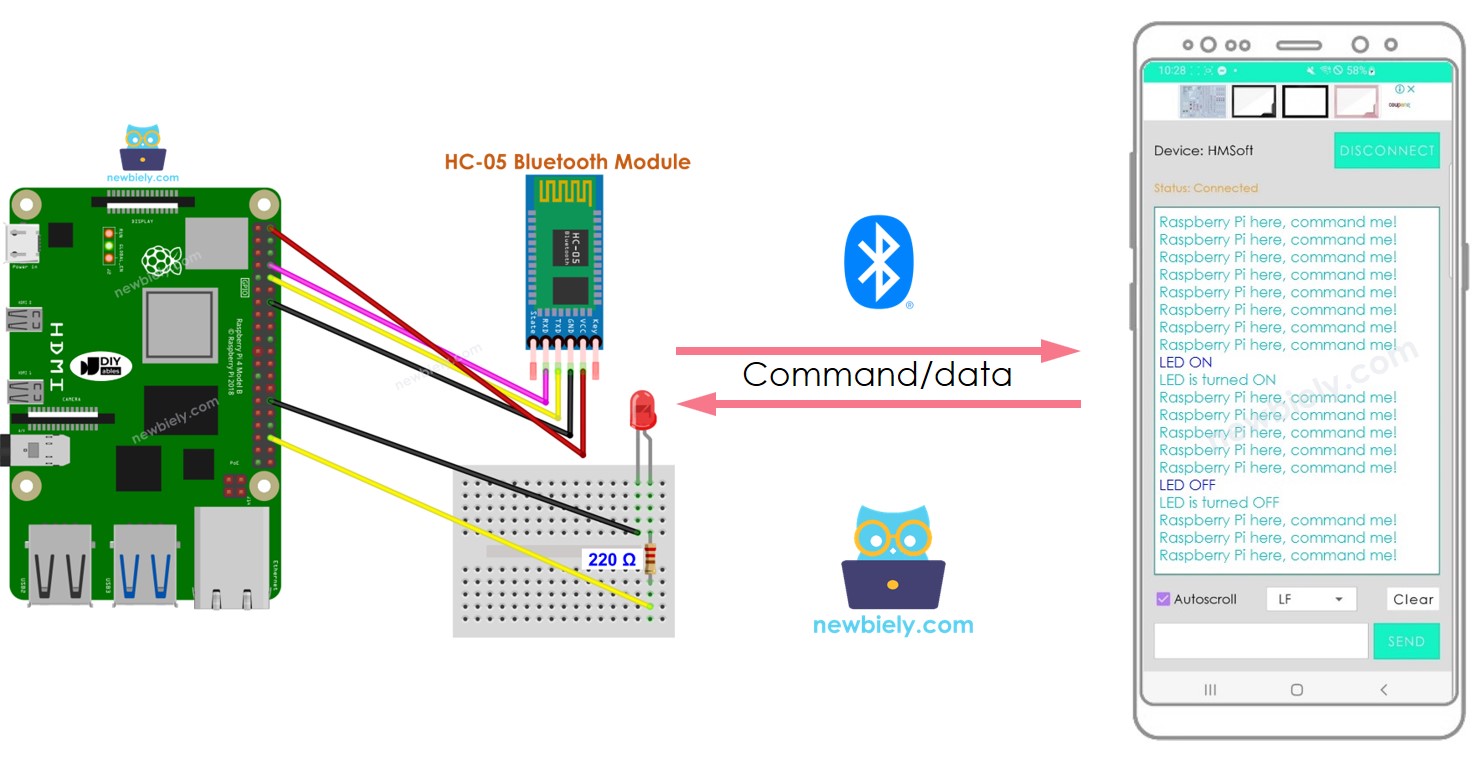
We will use the Bluetooth Serial Monitor App on a smartphone to send commands to Raspberry Pi.
These commands include:
- ON which will turn on the LED
- OFF which will turn off the LED
Hardware Preparation
Or you can buy the following kits:
| 1 | × | DIYables Sensor Kit (30 sensors/displays) | |
| 1 | × | DIYables Sensor Kit (18 sensors/displays) |
Additionally, some of these links are for products from our own brand, DIYables .
Buy Note: Use the LED Module for easier wiring. It includes an integrated resistor.
Overview of LED and Bluetooth Module
If you are unfamiliar with LED and Bluetooth Module (pinout, how it works, how to program ...), the following tutorials can help you learn:
Wiring Diagram
- If you desire to manage LED through Bluetooth, the HC-05 Bluetooth module should be utilized in conjunction with the wiring diagram below.
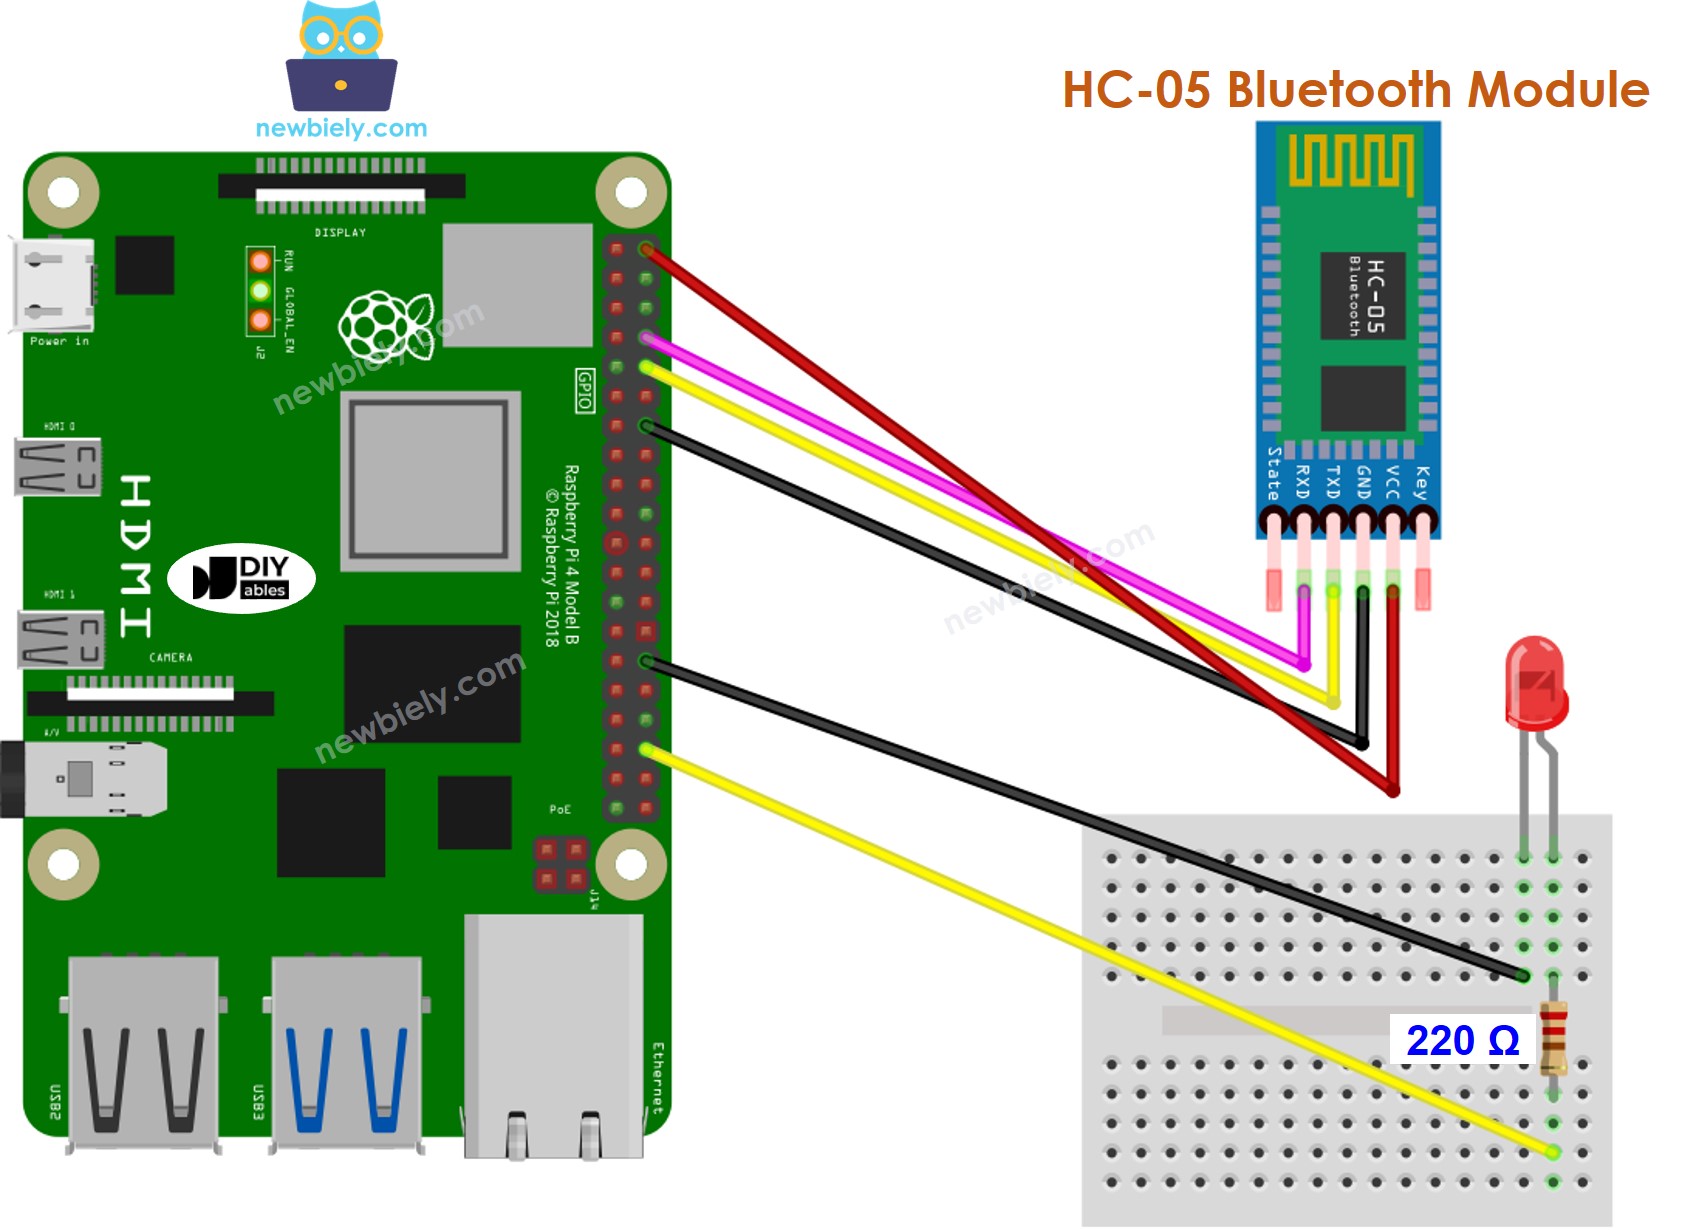
This image is created using Fritzing. Click to enlarge image
- If you desire to manipulate LED through BLE, the HM-10 BLE module should be used in conjunction with the wiring diagram given below.
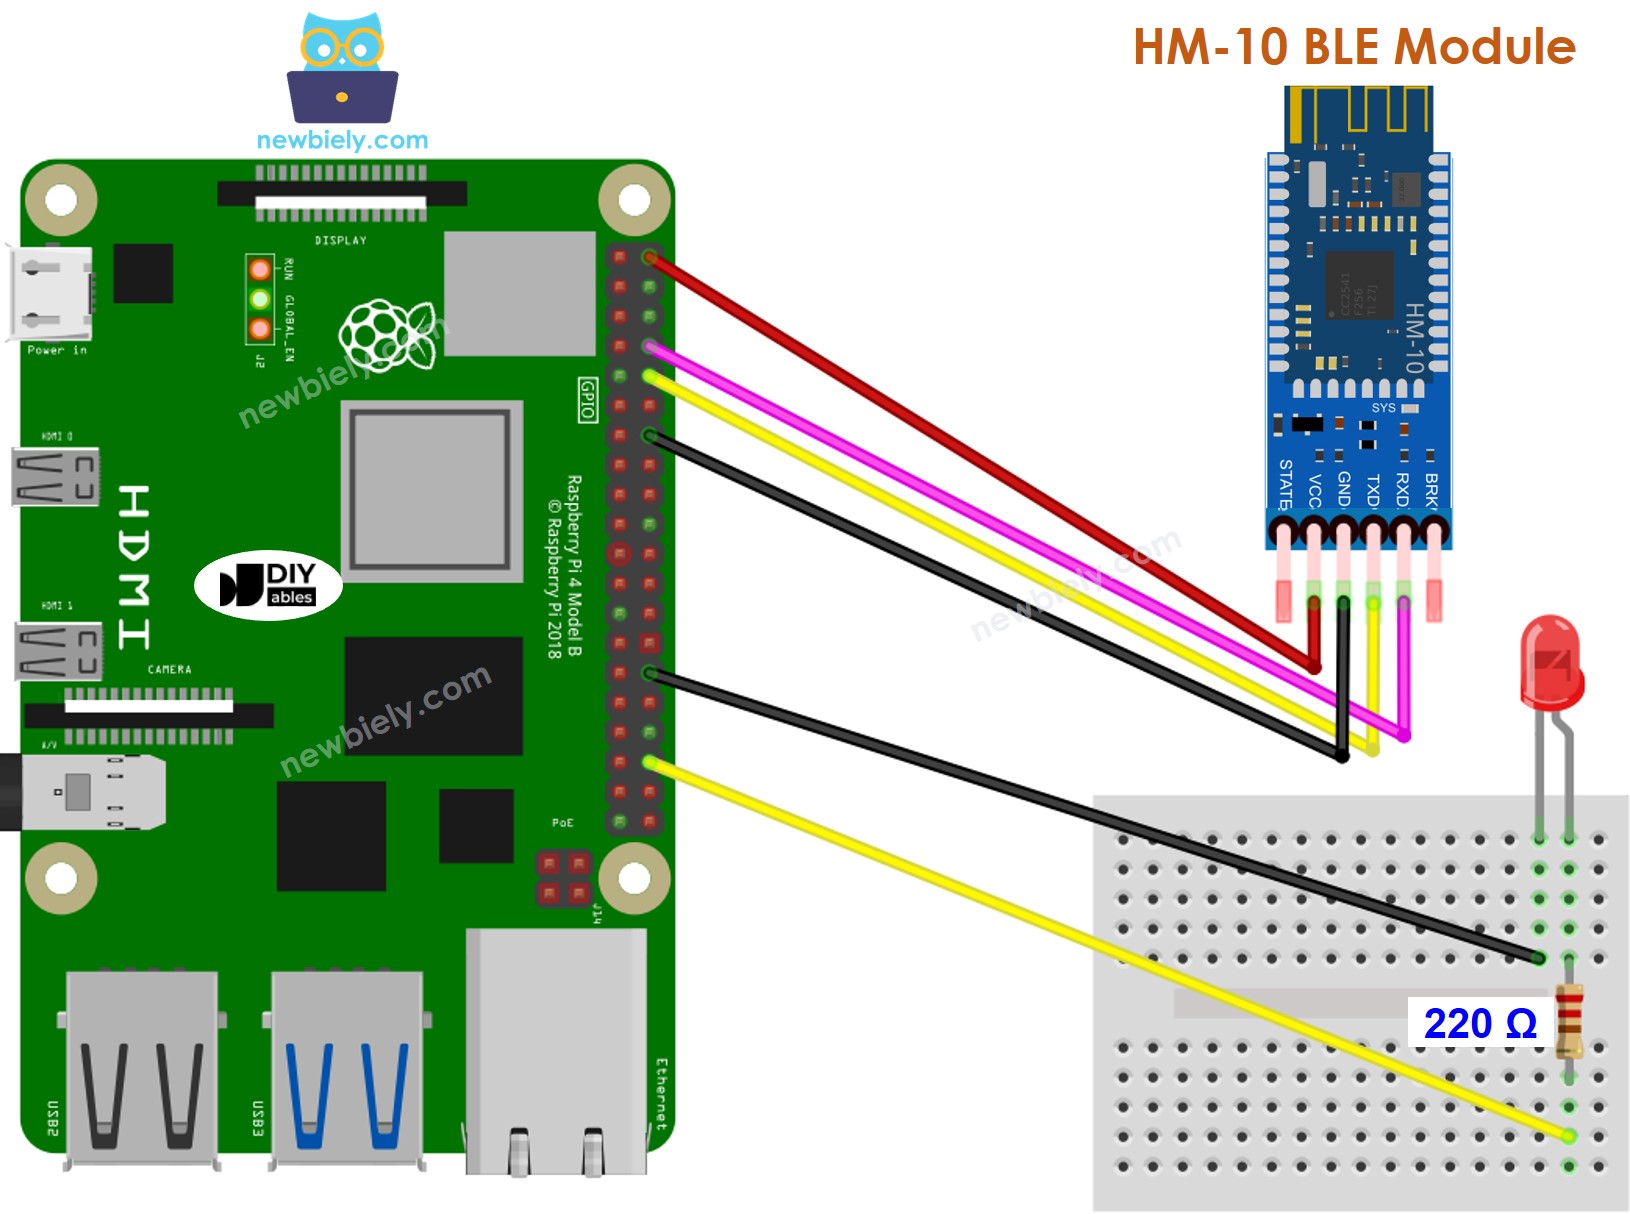
This image is created using Fritzing. Click to enlarge image
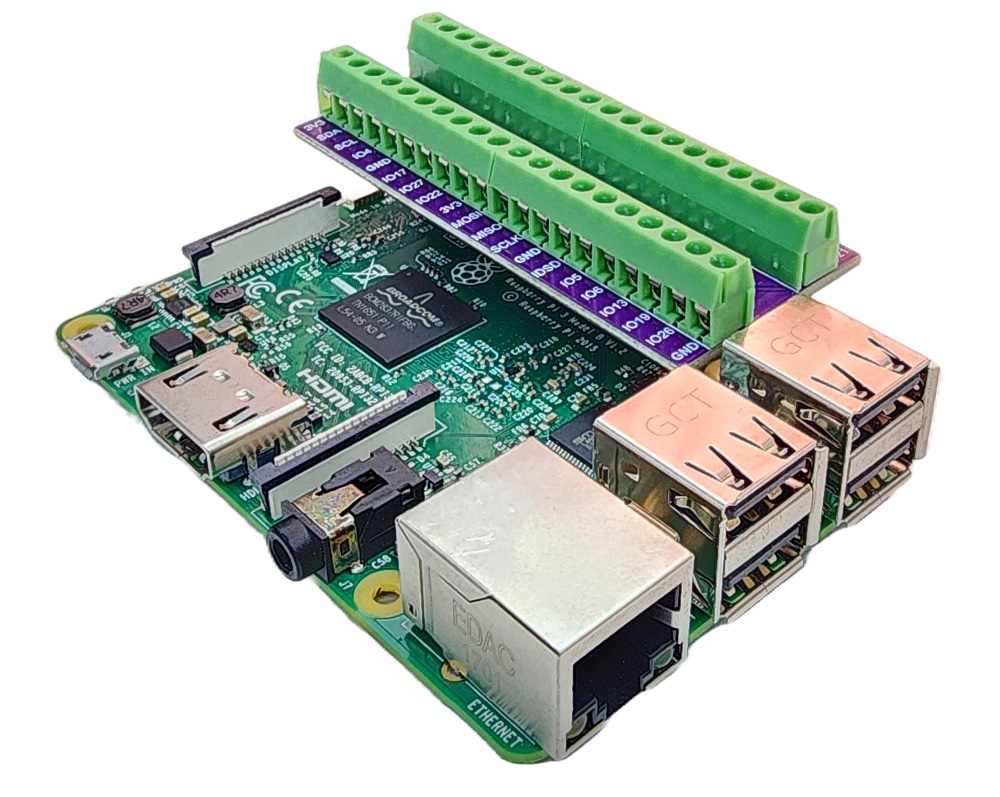
To simplify and organize your wiring setup, we recommend using a Screw Terminal Block Shield for Raspberry Pi. This shield ensures more secure and manageable connections, as shown below:
Raspberry Pi Code - controls LED via Bluetooth/BLE
The code functions for both the HC-10 Bluetooth module and the HM-10 BLE module. It is applicable to both.
Detailed Instructions
- Make sure you have Raspbian or any other Raspberry Pi compatible operating system installed on your Pi.
- Make sure your Raspberry Pi is connected to the same local network as your PC.
- Make sure your Raspberry Pi is connected to the internet if you need to install some libraries.
- If this is the first time you use Raspberry Pi, See how to set up the Raspberry Pi
- Connect your PC to the Raspberry Pi via SSH using the built-in SSH client on Linux and macOS or PuTTY on Windows. See to how connect your PC to Raspberry Pi via SSH.
- Make sure you have the RPi.GPIO library installed. If not, install it using the following command:
- Enable the Serial interface on Raspberry Pi by following the instruction on Raspberry Pi - how to enable Serial inteface
- Install the pyserial library for communication with bluetooth module:
- Create a Python script file bluetooth_led.py and add the following code:
- Save the file and run the Python script by executing the following command in the terminal:
- Download and install the Bluetooth Serial Monitor App on your smartphone.
- Once the code is uploaded, open the Bluetooth Serial Monitor App on your smartphone and select either Classic Bluetooth or BLE depending on the module you are using.
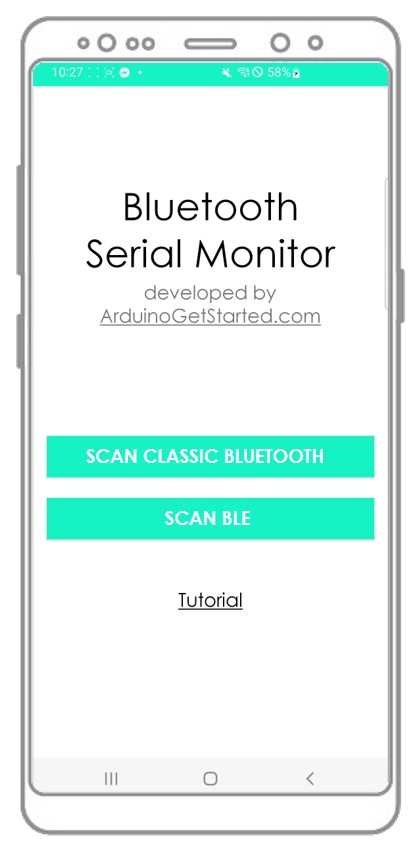
- Connect the Bluetooth App to the HC-05 Bluetooth module or HM-10 BLE module.
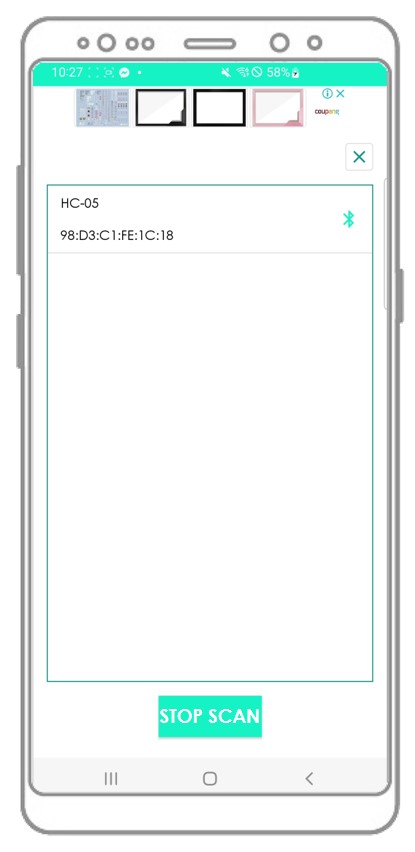
- Enter either “ON” or “OFF” and press the Send button.
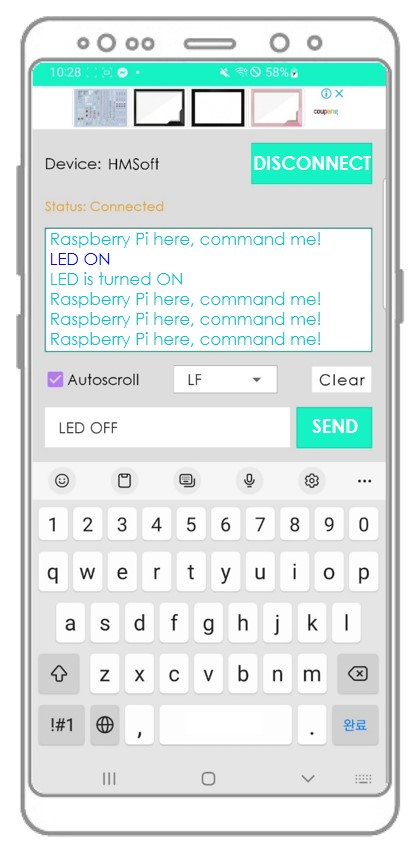
- Check the LED's state on the Raspberry Pi board. It will be either ON or OFF.
- We can also observe the LED's state through the Bluetooth App.
- View the outcome on the Android App.

You may ponder how Raspberry Pi can comprehend an entire command? For instance, when we send “OFF” command, how ca Raspberry Pi distinguish if the command is “O”, “OF” or “OFF”?
When sending a command, The bluetooth App adds a newline character ('\n') by choosing the “newline” option on the App. Raspberry Pi will read data until it encounters the newline character. The newline character serves as a command separator.
If you find the Bluetooth Serial Monitor app helpful, please consider giving it a 5-star rating on Play Store. We would really appreciate it! Thank you!
