Raspberry Pi - Keypad - LCD
This tutorial instructs you how to use Raspberry Pi to display the input from keypad on LCD display.
Hardware Preparation
Or you can buy the following kits:
| 1 | × | DIYables Sensor Kit (30 sensors/displays) | |
| 1 | × | DIYables Sensor Kit (18 sensors/displays) |
Additionally, some of these links are for products from our own brand, DIYables .
Overview of Keypad and LCD
If you are unfamiliar with keypad and LCD (including pinout, functionality, programming, etc.), the following tutorials can help:
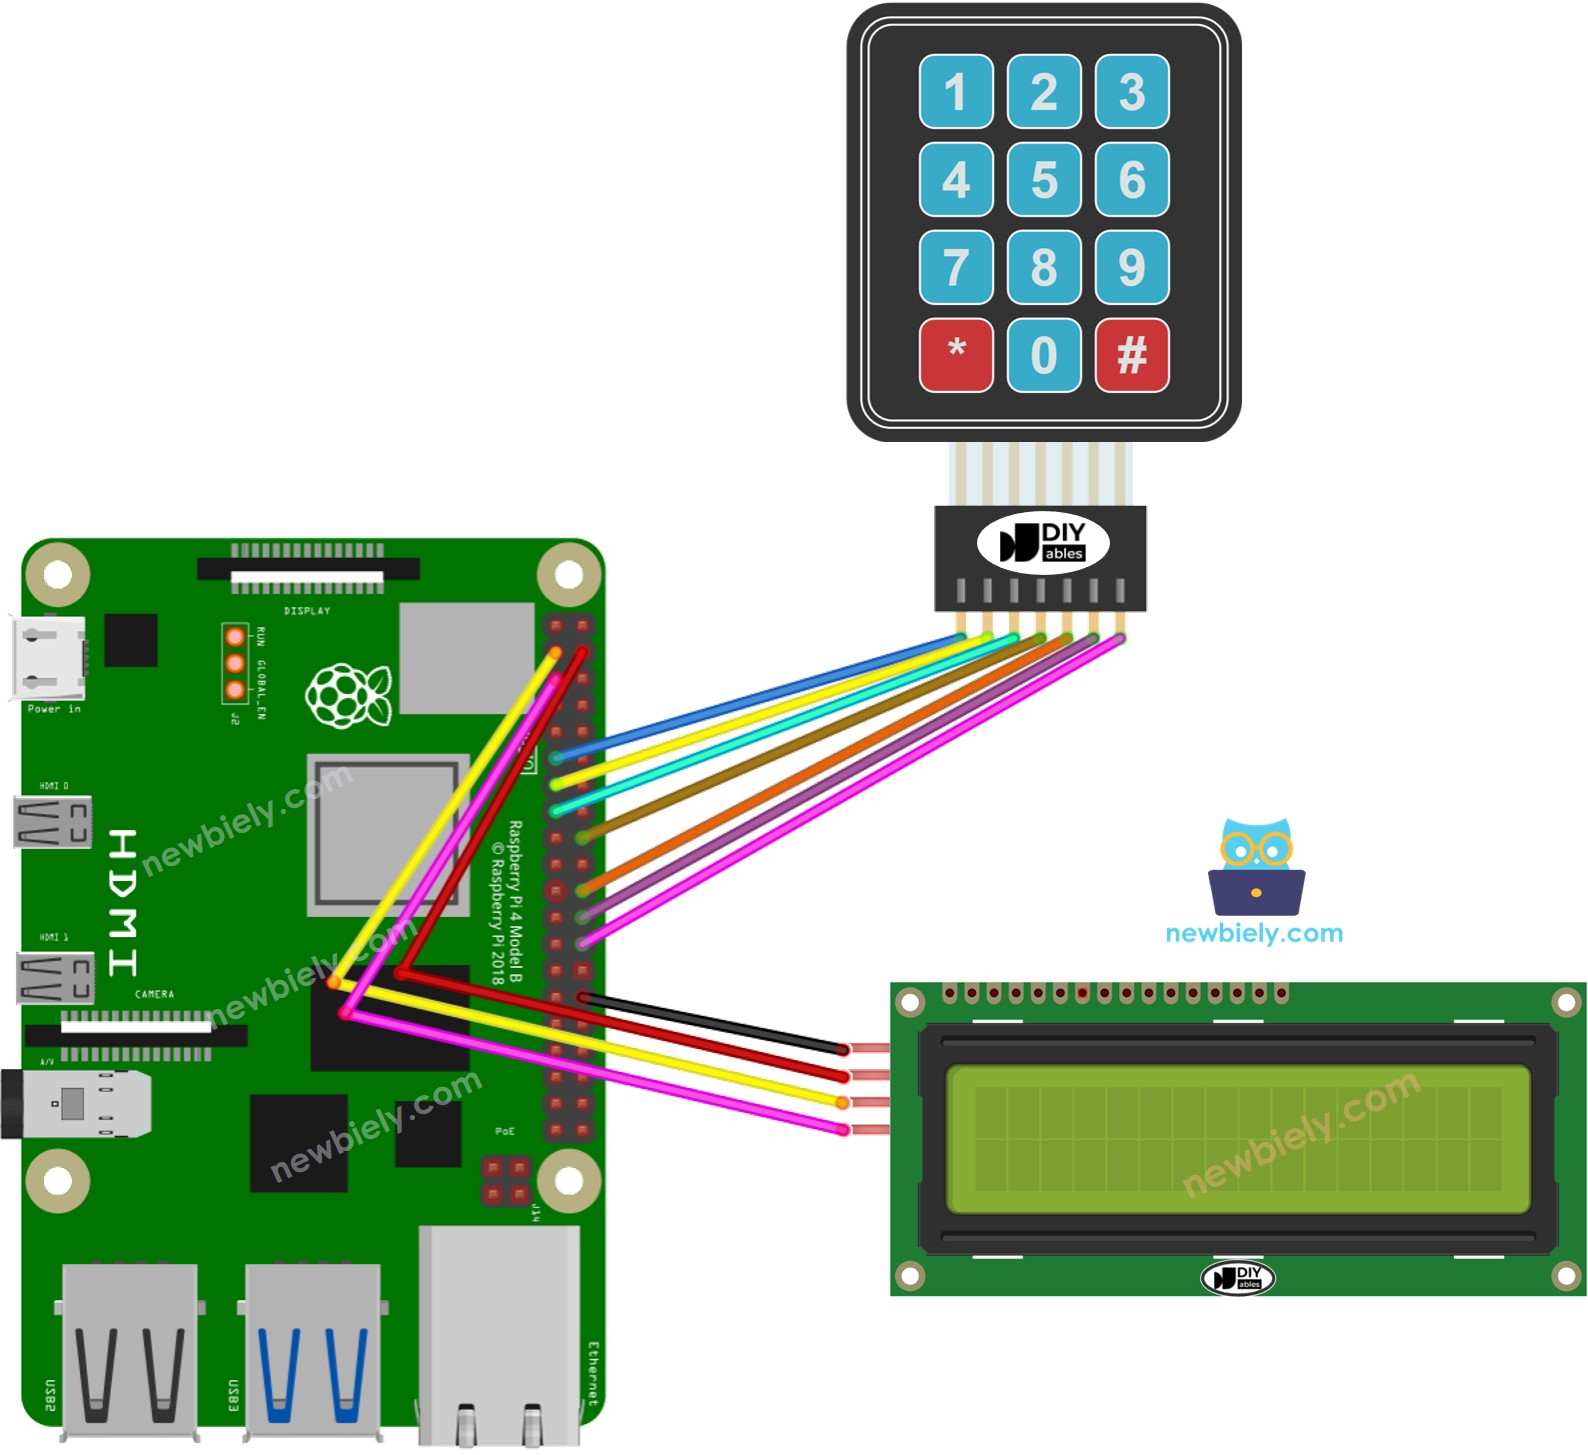
Wiring Diagram

This image is created using Fritzing. Click to enlarge image
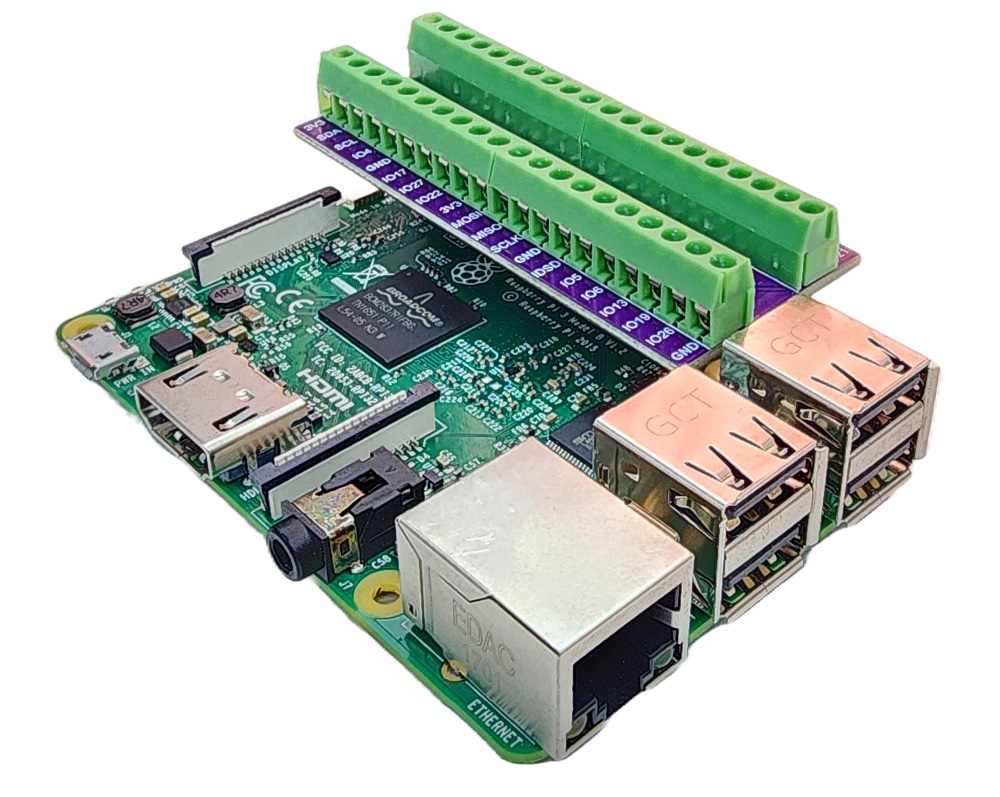
To simplify and organize your wiring setup, we recommend using a Screw Terminal Block Shield for Raspberry Pi. This shield ensures more secure and manageable connections, as shown below:

Raspberry Pi Code
Detailed Instructions
- Make sure you have Raspbian or any other Raspberry Pi compatible operating system installed on your Pi.
- Make sure your Raspberry Pi is connected to the same local network as your PC.
- Make sure your Raspberry Pi is connected to the internet if you need to install some libraries.
- If this is the first time you use Raspberry Pi, See how to set up the Raspberry Pi
- Connect your PC to the Raspberry Pi via SSH using the built-in SSH client on Linux and macOS or PuTTY on Windows. See to how connect your PC to Raspberry Pi via SSH.
- Make sure you have the RPi.GPIO library installed. If not, install it using the following command:
- Prior to utilizing the LCD I2C with a Raspberry Pi, we need to enable I2C interface on Raspberry Pi. See How to enable I2C interface on Raspberry Pi
- Install the LCD I2C library by running the following command:
- Create a Python script file keypad_lcd.py and add the following code:
- Save the file and run the Python script by executing the following command in the terminal:
The script runs in an infinite loop continuously until you press Ctrl + C in the terminal.
- Press certain keys on the keypad
- Check out the outcome on the LCD display
If the LCD display is not showing anything, check out Troubleshooting on LCD I2C . for assistance.
Code Explanation
Check out the line-by-line explanation contained in the comments of the source code!
