Raspberry Pi - Potentiometer
This tutorial instructs you how to use Raspberry Pi with a potentiometer, which is also known as pot, trimmer, variable resistor, rheostat, or rotary angle sensor. In detail, we will learn:
- How potentiometer works.
- How to connect a potentiometer to Raspberry Pi.
- How to program Raspberry Pi to read the value from the potentiometer
- How to convert the read value to another value such as voltage, angle of servo motor, speed of motor, brightness of LED...
Hardware Preparation
Or you can buy the following kits:
| 1 | × | DIYables Sensor Kit (18 sensors/displays) |
Additionally, some of these links are for products from our own brand, DIYables .
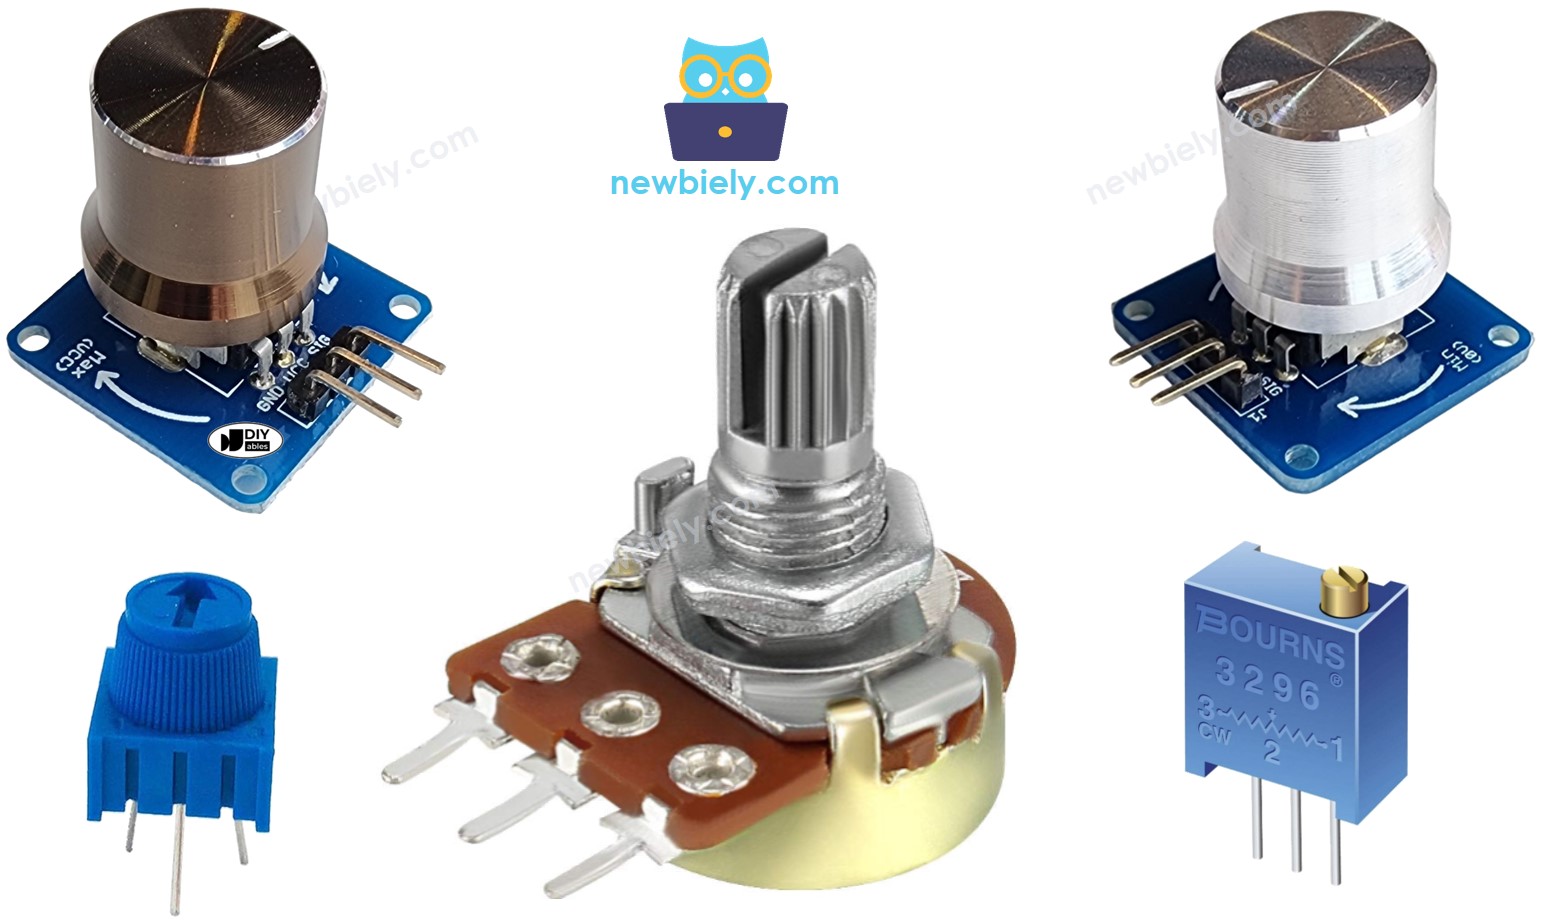
Overview of Potentiometer
A rotary potentiometer, also known as a rotary angle sensor, is utilized to manually modify the value of an item. Examples include the volume of a stereo, the brightness of a lamp, and the zoom level of an oscilloscope.
The Potentiometer Pinout
A potentiometer typically has three pins:
- The GND pin should be connected to ground (0V)
- The VCC pin should be linked to VCC (5V or 3.3v)
- The output pin sends the voltage to the Raspberry Pi's input pin.
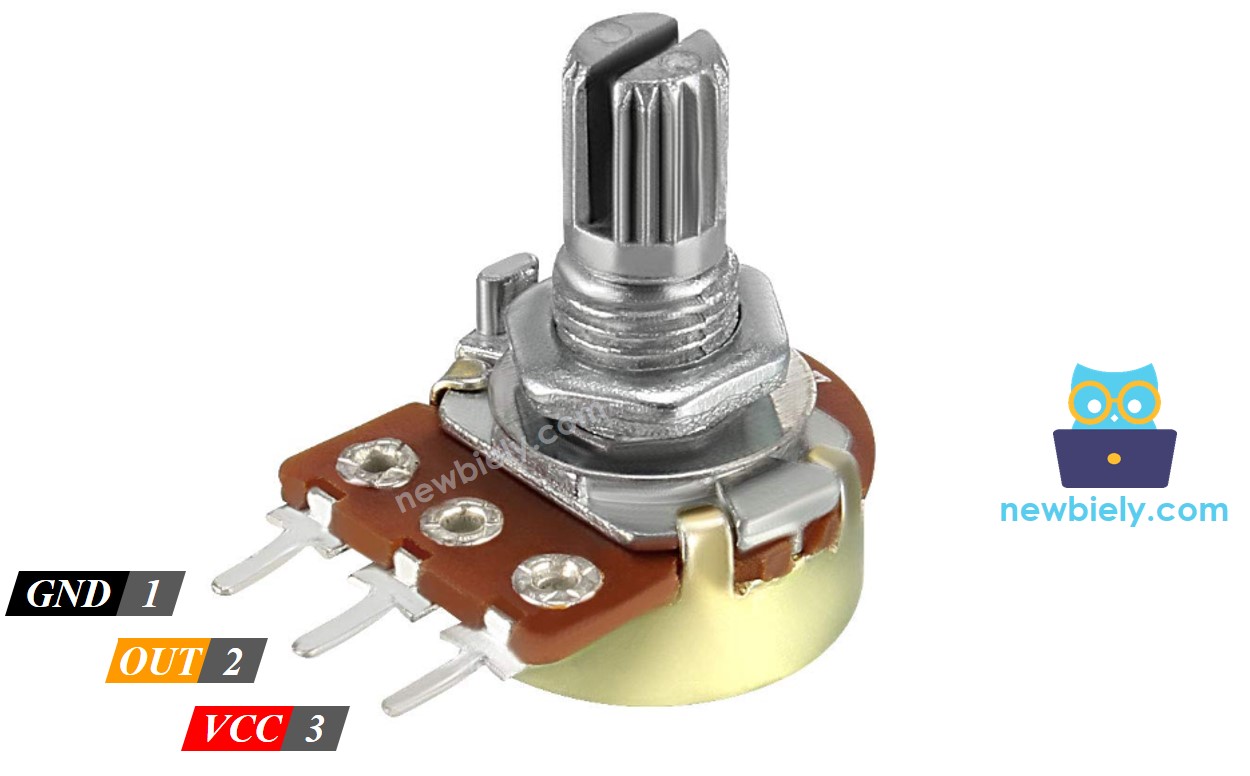
※ NOTE THAT:
The GND pin and the VCC pin can be swapped.
How It Works
The rotatable shaft of the potentiometer can be moved from 0°, which is closest to GND, to a maximum angle, which is closest to the VCC pin. This maximum angle is referred to as ANGLE_MAX.
※ NOTE THAT:
The value of ANGLE_MAX is determined by the manufacturer. Generally, we do not pay attention to it, except when we need to compute the angle of rotation (see the use cases section).
The working principle:
- An user rotates shaft of the potentiometer
- ⇒ The angle of the potentiometer is changed
- ⇒ The resistance of the potentiometer is changed
- ⇒ The voltage in the output pin of the potentiometer is changed
- ⇒ The analog value read by Raspberry Pi is changed
Raspberry Pi - Potentiometer
Raspberry Pi board does not have ADC built-in. We need to use an external ADC module (e.g ADS1115 module) to read the analog voltage from potentiometer.
- The potentiometer is connected to the ADS1115 module.
- The ADS1115 module converts the voltage from the potentiometer to the ADC value
- The Raspberry Pi connects to the ADS1115 module and read the ADC value via I2C interface.
The ADS1115 module is a high-resolution 16-bit ADC converter module. It converts a voltage range from 0V to 3.3V into an ADC value range from 0 to 65535.
Once we have obtained the ADC value, we can rescale this value to a different one. Let us consider to some example applications
- Rescale to back to the voltage of the potentiometer.
- Rescale to the volume of a stereo
- Rescale to the brightness of LED
- Rescale to the speed of a DC motor
- Rescale to the angle of the servo motor.
Rescale Range
| FROM | TO | |||
|---|---|---|---|---|
| Angle | rotated by user | 0° | → | ANGLE_MAX |
| Voltage | from potentiometer's pin | 0V | → | 3.3 |
| ADC value | read by Raspberry Pi | 0 | → | 65536 |
| Other value | converted by Raspberry Pi | VALUE_MIN | → | VALUE_MAX |
Wiring Diagram
- Raspberry Pi Potentiometer wiring diagram without breadboard
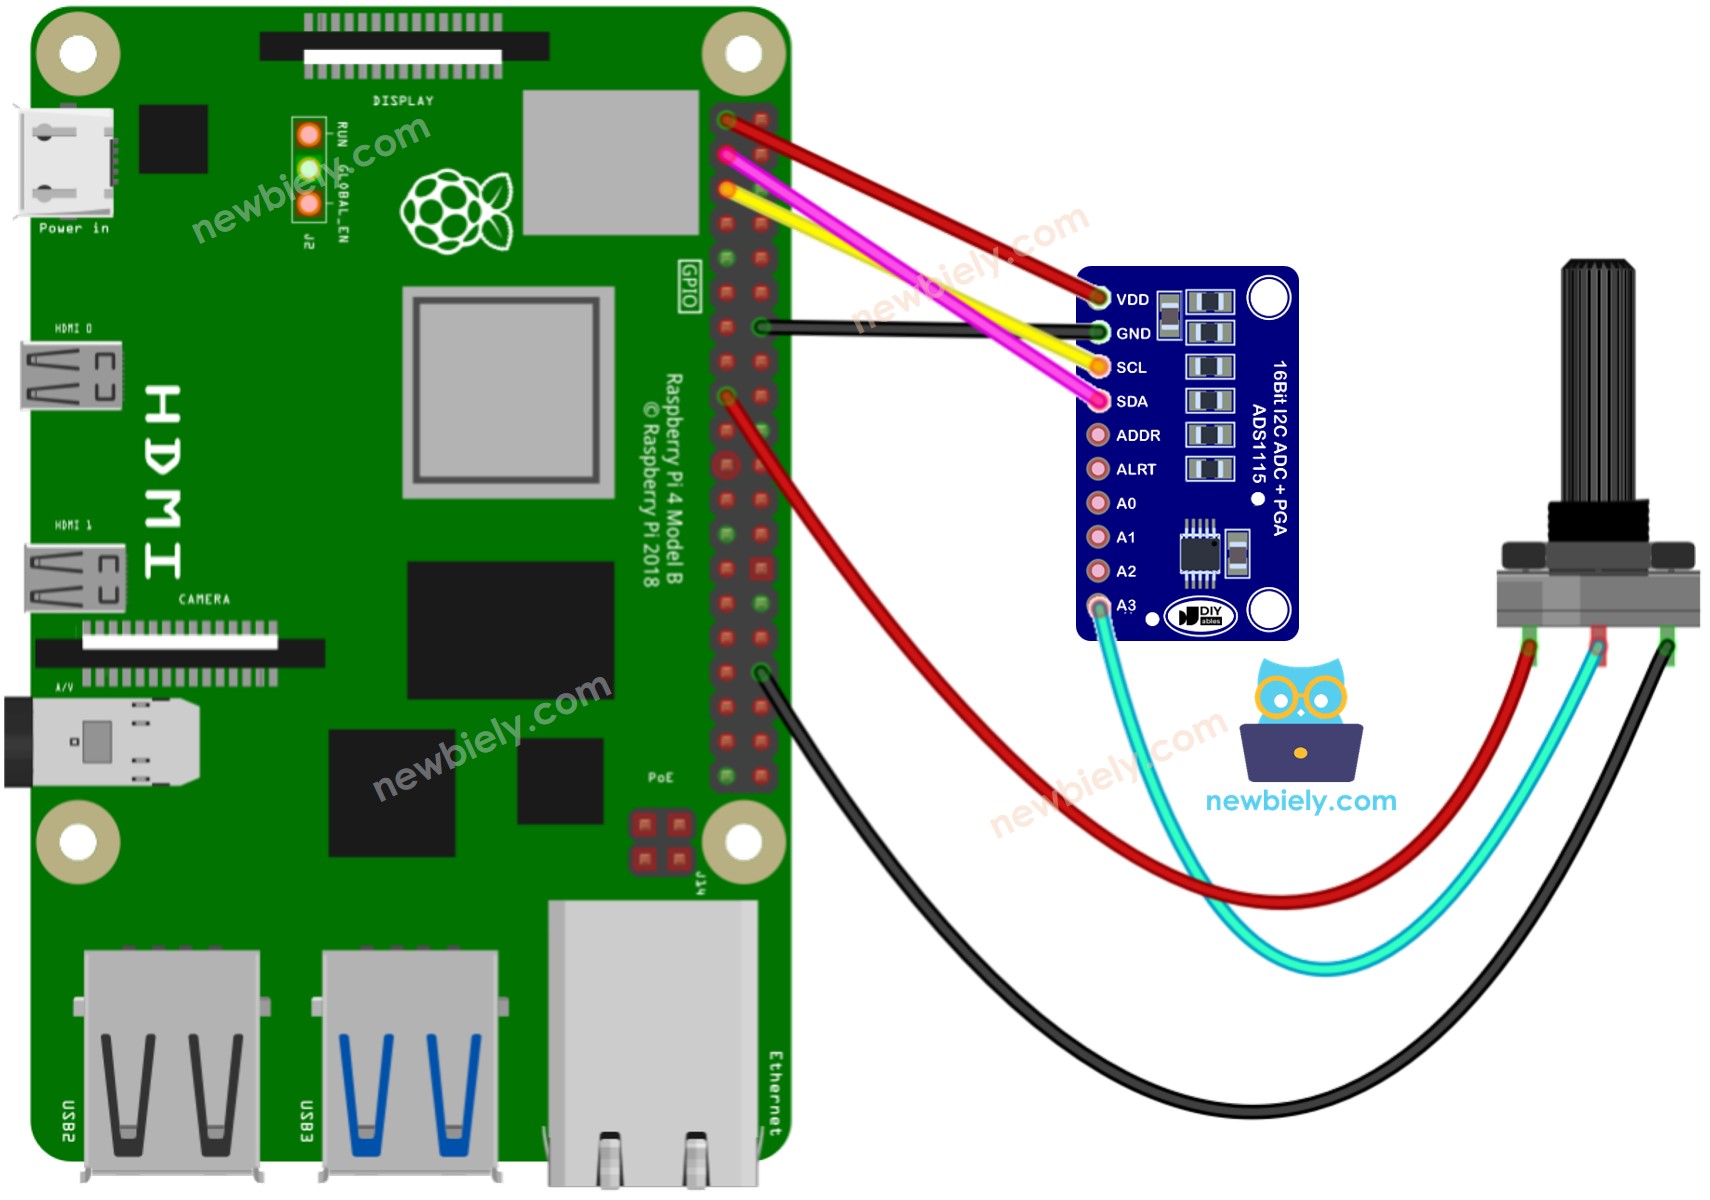
This image is created using Fritzing. Click to enlarge image
- Raspberry Pi Potentiometer wiring diagram with breadboard
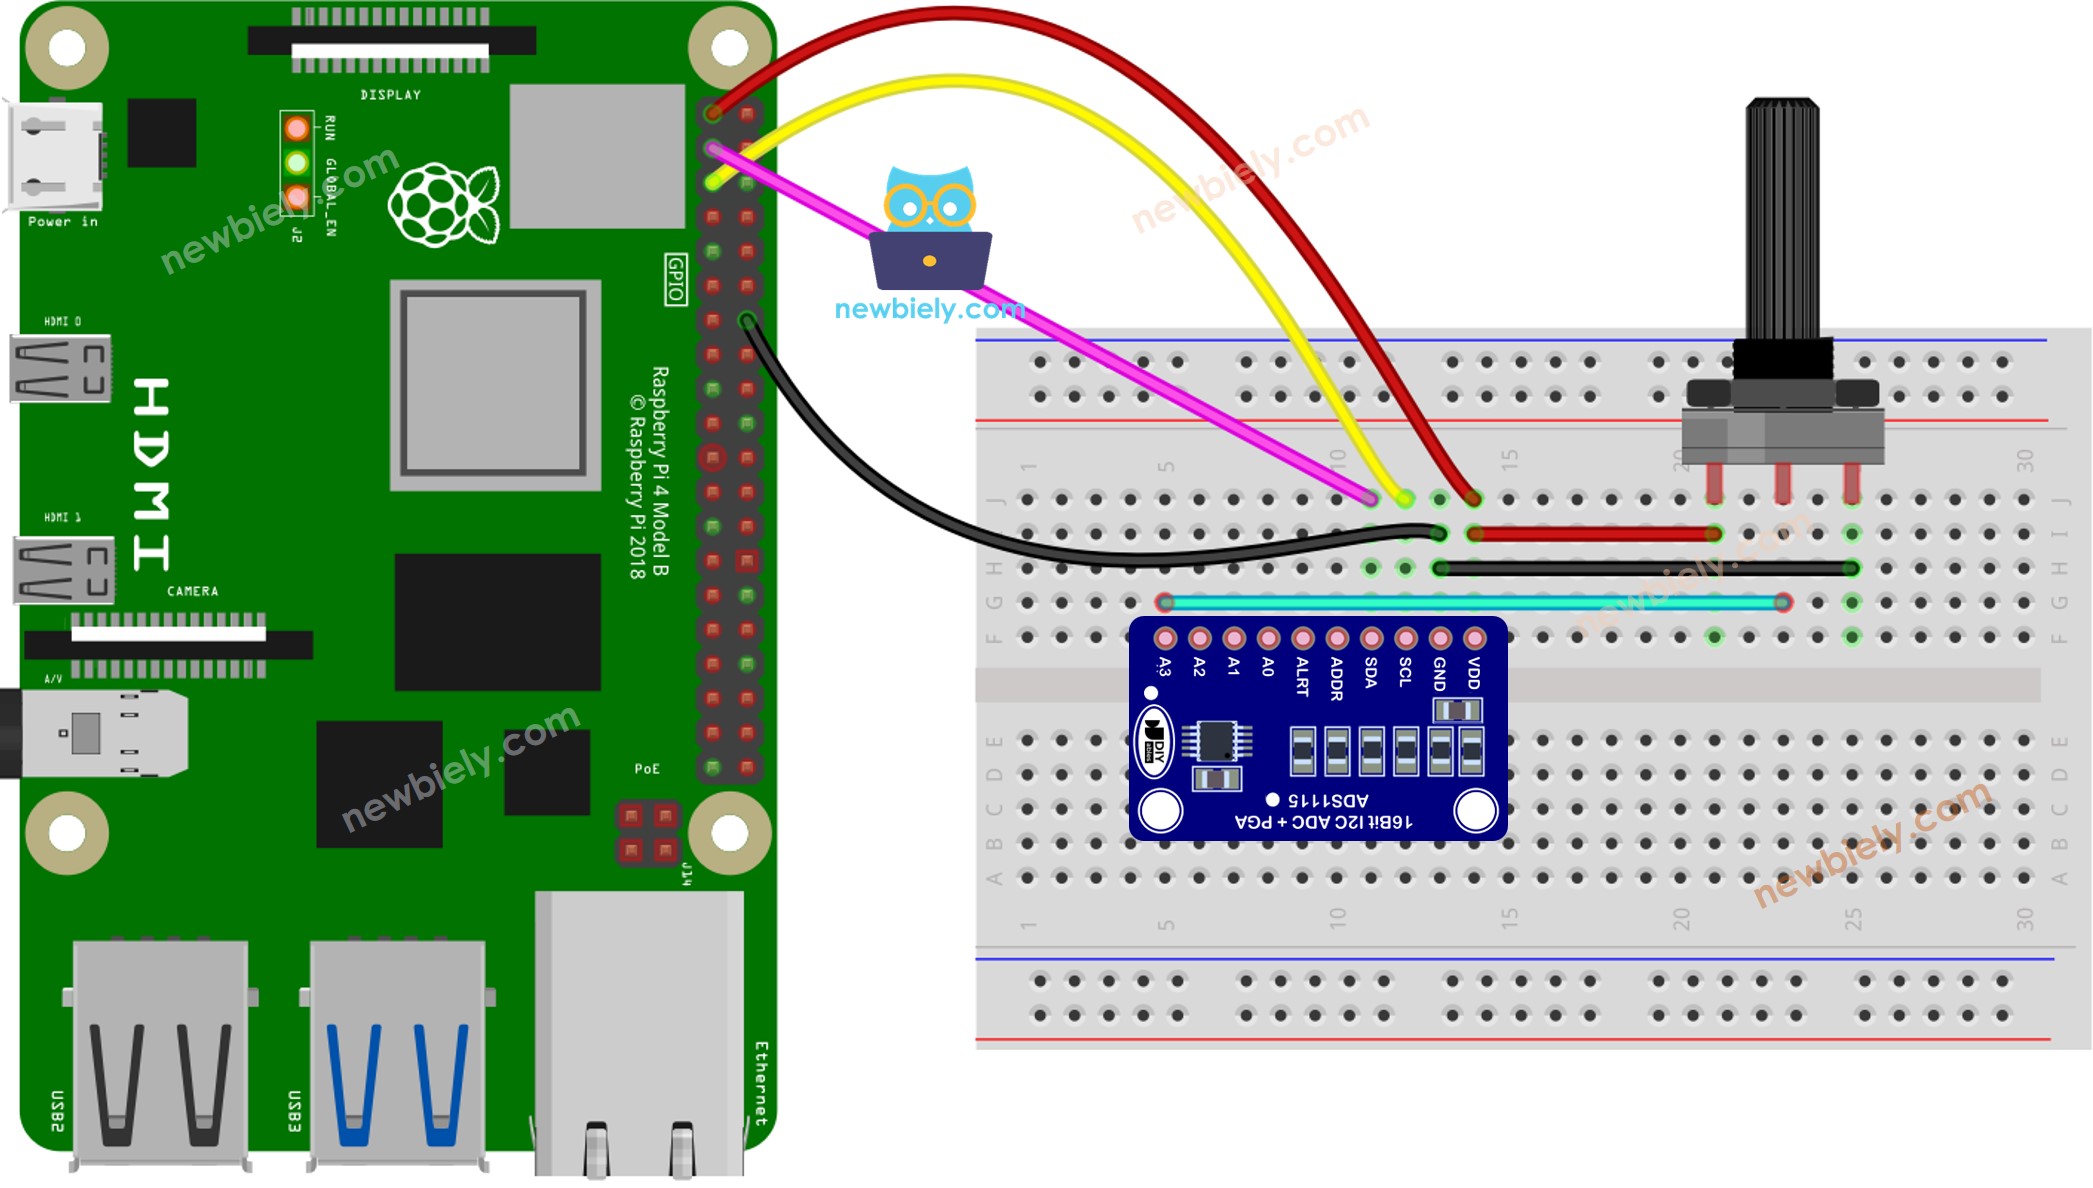
This image is created using Fritzing. Click to enlarge image
To simplify and organize your wiring setup, we recommend using a Screw Terminal Block Shield for Raspberry Pi. This shield ensures more secure and manageable connections, as shown below:

How To Program Raspberry Pi Code to read value from Potentiometer
Detailed Instructions
- Make sure you have Raspbian or any other Raspberry Pi compatible operating system installed on your Pi.
- Make sure your Raspberry Pi is connected to the same local network as your PC.
- Make sure your Raspberry Pi is connected to the internet if you need to install some libraries.
- If this is the first time you use Raspberry Pi, See how to set up the Raspberry Pi
- Connect your PC to the Raspberry Pi via SSH using the built-in SSH client on Linux and macOS or PuTTY on Windows. See to how connect your PC to Raspberry Pi via SSH.
- Make sure you have the RPi.GPIO library installed. If not, install it using the following command:
- Install the Adafruit_ADS1x15 library by running the following commands on your Raspberry Pi terminal:
- Create a Python script file potentiometer.py and add the following code:
- Save the file and run the Python script by executing the following command in the Terminal:
- Turn the potentiometer.
- Check out the outcome in the Terminal.
The script runs in an infinite loop continuously until you press Ctrl + C in the terminal.