Raspberry Pi - Rain Sensor
The rain sensor detects and measures rain/snow levels, offering both digital (LOW/HIGH) and analog outputs. This tutorial guides you in using a Raspberry Pi and a rain sensor to detect and measure rain, covering:
- Connecting the rain sensor to a Raspberry Pi.
- Programming the Raspberry Pi to detect rain by reading the digital signal from the sensor.
- Programming the Raspberry Pi to measure rain levels by reading the analog signal from the sensor.
You can then customize the code to activate a motor or warning when rain/snow is detected.
Hardware Preparation
Or you can buy the following kits:
| 1 | × | DIYables Sensor Kit (18 sensors/displays) |
Additionally, some of these links are for products from our own brand, DIYables .
Overview of Rain Sensor
The rain sensor serves to detect rain presence or measure water level from rainfall. It offers options through a digital output pin and an analog output pin.
Components of the rain sensor include: sensing pad and electronic module
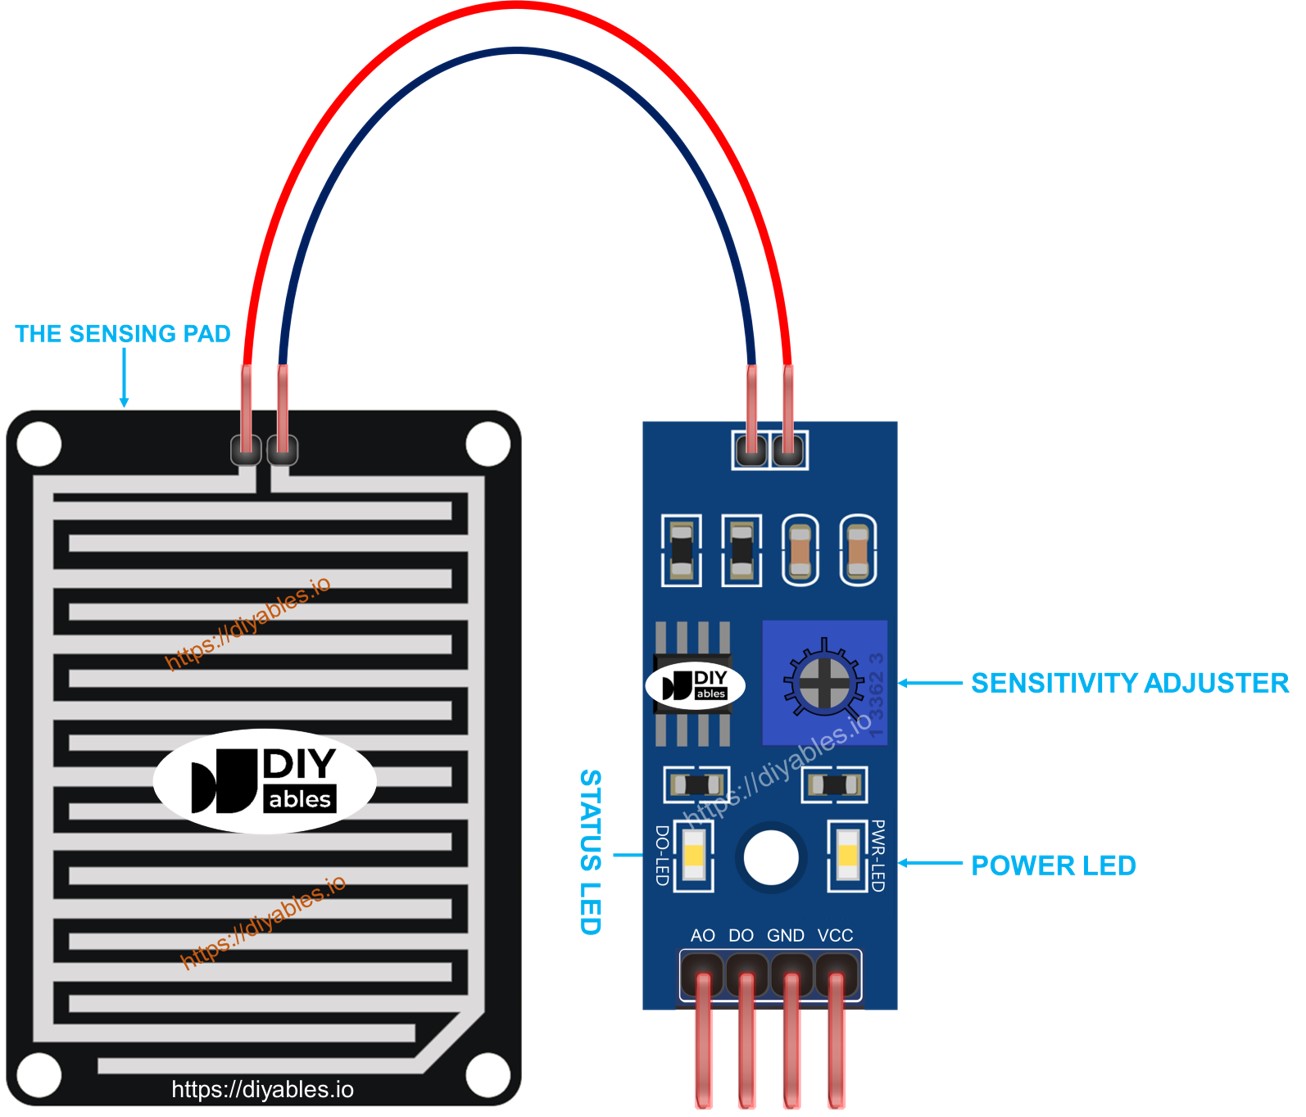
The sensing pad
The sensing pad, positioned outdoors to encounter rain/snow (e.g., on the roof), features exposed copper traces divided into two groups: power traces and sense traces. These traces remain unconnected unless bridged by water or snow. Power and sense traces are interchangeable, allowing you to designate one as the power trace and the other as the sense trace.
The electronic module
The electronic module of the rain sensor transforms signals from the sensing pad into analog or digital values readable by the Raspberry Pi. It includes four pins:
- VCC pin: Connects to VCC (3.3V to 5V).
- GND pin: Connects to GND (0V).
- DO pin: Digital output pin; it is HIGH when rain is not detected and LOW when detected. The rain detection threshold is adjustable with a built-in potentiometer.
- AO pin: Analog output pin; the value decreases with increased water on the sensing pad and increases as water decreases.
Furthermore, it features two LED indicators:
- PWR-LED indicator: Indicates power status.
- DO-LED indicator: Represents the rain state on the DO pin, illuminating when rain is present.
How It Works
Regarding the DO pin:
- The module is equipped with a built-in potentiometer to set the sensitivity threshold.
- When the intensity surpasses the threshold, rain is detected, the sensor's output pin is LOW, and the DO-LED illuminates.
- When the intensity falls below the threshold, no rain is detected, the sensor's output pin is HIGH, and the DO-LED turns off.
Concerning the AO pin:
- The AO pin's reading is inversely proportional to the water level in the sensing pad.
- More water results in a lower AO pin value, while less water leads to a higher AO pin value.
Note: The potentiometer does not influence the value on the AO pin.
Wiring Diagram
As previously noted, connecting the VCC pin of the sensor directly to the 3.3V or 5V pins on the Raspberry Pi can reduce the sensor's lifespan due to electrochemical corrosion. A recommended alternative is to connect the VCC pin of the rain sensor to an output pin on the Raspberry Pi. By programming that pin, the rain sensor can be powered only during readings, effectively minimizing the impact of electrochemical corrosion.
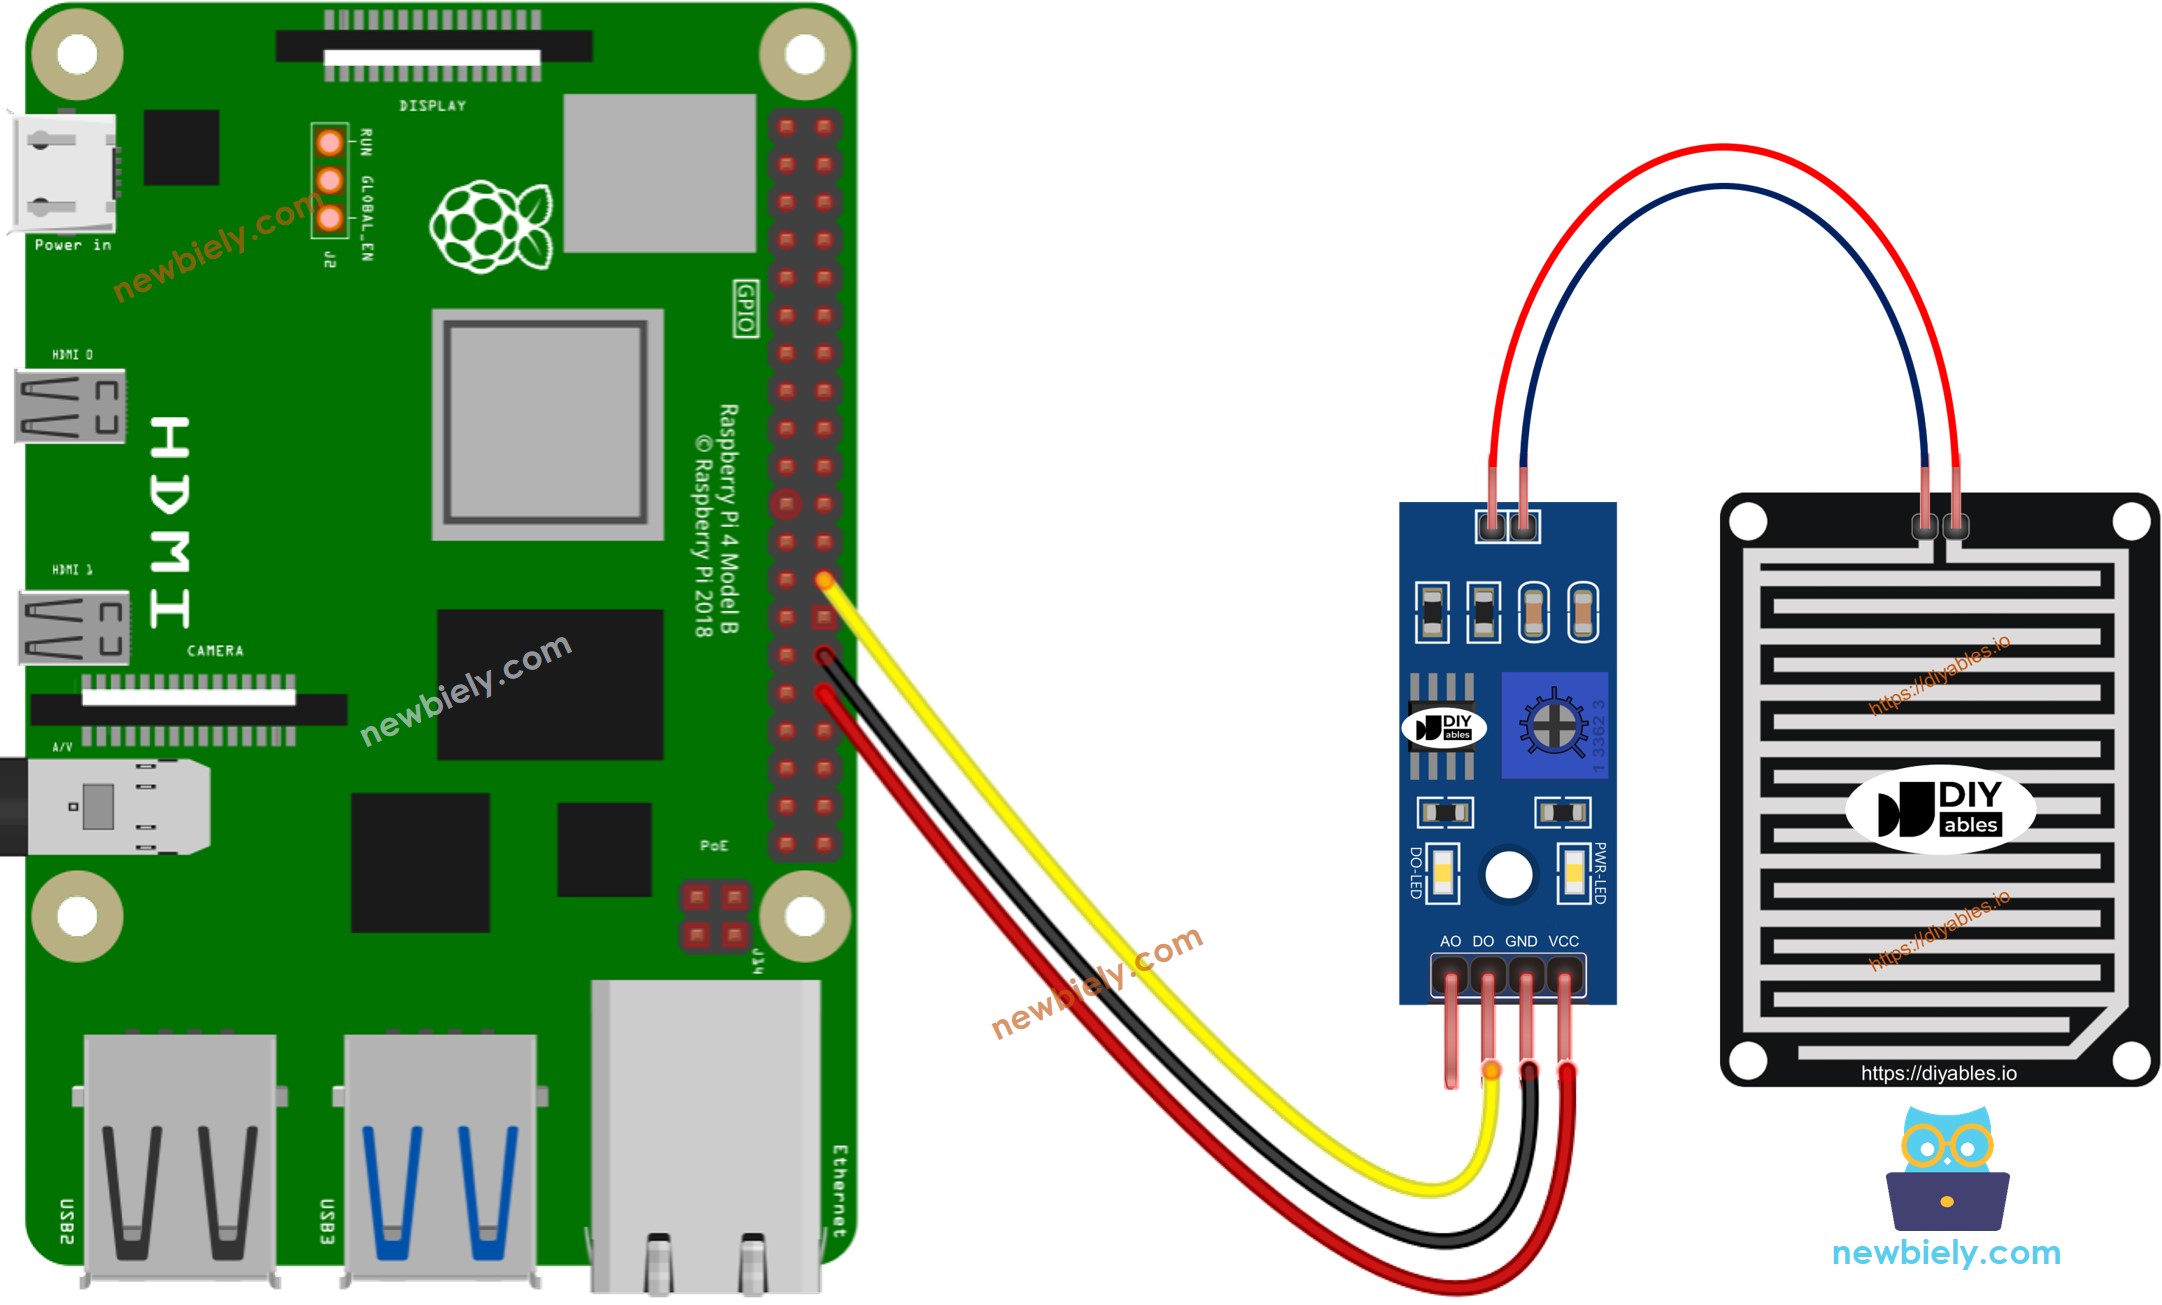
This image is created using Fritzing. Click to enlarge image
To simplify and organize your wiring setup, we recommend using a Screw Terminal Block Shield for Raspberry Pi. This shield ensures more secure and manageable connections, as shown below:

NOTE THAT:
- Since Raspberry Pi has no analog input capability, the AO pin can be left disconnected. To measure analog values from the sensor, you will need an external ADC module. For further details, visit How to use Raspberry Pi with ADC module
Raspberry Pi Code
Detailed Instructions
- Make sure you have Raspbian or any other Raspberry Pi compatible operating system installed on your Pi.
- Make sure your Raspberry Pi is connected to the same local network as your PC.
- Make sure your Raspberry Pi is connected to the internet if you need to install some libraries.
- If this is the first time you use Raspberry Pi, See how to set up the Raspberry Pi
- Connect your PC to the Raspberry Pi via SSH using the built-in SSH client on Linux and macOS or PuTTY on Windows. See to how connect your PC to Raspberry Pi via SSH.
- Make sure you have the RPi.GPIO library installed. If not, install it using the following command:
- Create a Python script file rain_sensor.py and add the following code:
- Save the file and run the Python script by executing the following command in the terminal:
- Drop some water to the rain sensor
- Check out the result on the Serial Monitor.
Please keep in mind that if you notice the LED status remaining on constantly or off even when the sensor faces to a rain, you can adjust the potentiometer to fine-tune the sensitivity of the sensor.