Raspberry Pi - ADC
The Raspberry Pi does not have built-in analog input pins, so it cannot directly read values from analog sensors like potentiometers, thermistors, and gas sensors. To solve this problem, we use an Analog-to-Digital Converter (ADC). This tutorial will show you how to use an ADS1115 ADC module to read analog sensor values with a Raspberry Pi.
This tutorial covers:
- How to connect an analog sensor to a Raspberry Pi using the ADS1115 module.
- How to program the Raspberry Pi to read values from the analog sensor.
Hardware Preparation
Or you can buy the following kits:
| 1 | × | DIYables Sensor Kit (18 sensors/displays) |
Additionally, some of these links are for products from our own brand, DIYables .
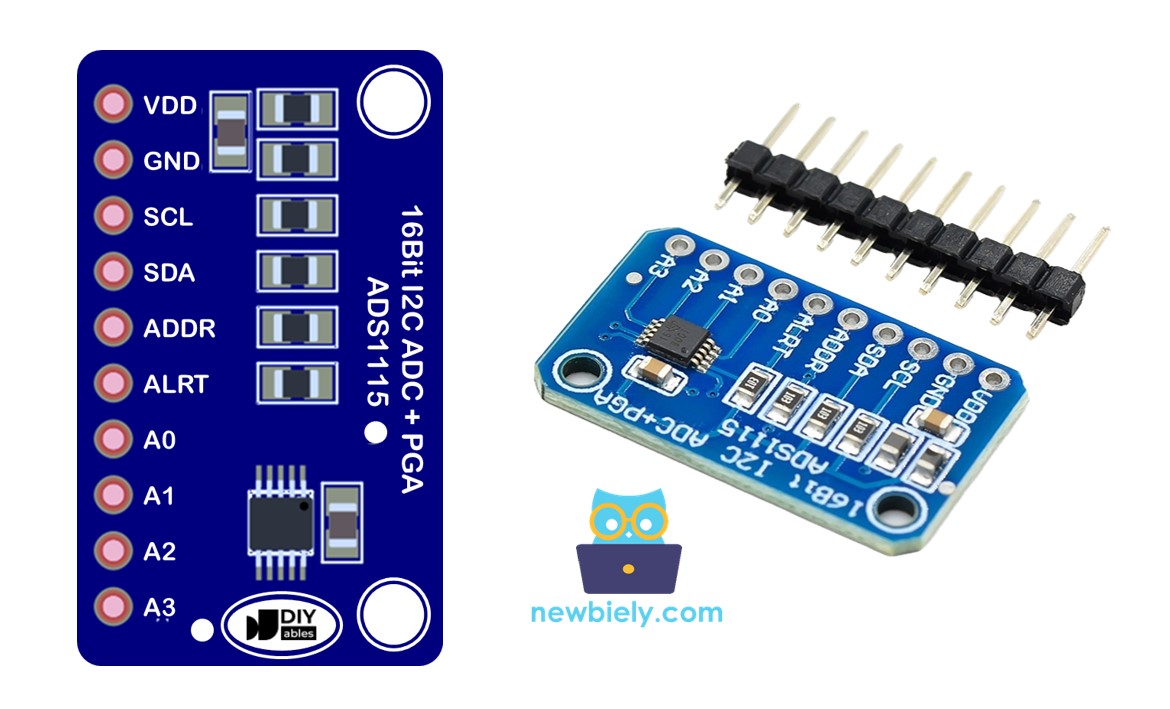
Understanding the ADS1115 Module
The ADS1115 is a 16-bit ADC with 4 channels and communicates with the Raspberry Pi using I2C (Inter-Integrated Circuit). It can read analog signals (0-3.3V) and provides a resolution of 16 bits.
The ADS1115 module has 4 analog input channels, meaning you can connect up to 4 different analog sensors to a single ADS1115 module at the same time. This allows you to measure multiple sensor values simultaneously using just one ADC module.
ADS1115 Pinout
| Pin | Name | Description |
|---|---|---|
| VDD | Power supply (3.3V or 5V) | |
| GND | Ground | |
| SCL | I2C clock (connect to Raspberry Pi GPIO3) | |
| SDA | I2C data (connect to Raspberry Pi GPIO2) | |
| A0-A3 | Analog input channels | |
| ADDR | I2C address selection | |
| ALERT/RDY | Alert/Ready output (optional) |
Wiring the ADS1115 to Raspberry Pi
| ADS1115 Pin | Raspberry Pi Pin |
|---|---|
| VDD | 3.3V (Pin 1) |
| GND | GND (Pin 6) |
| SCL | GPIO3 (Pin 5) |
| SDA | GPIO2 (Pin 3) |
Below are several examples of how to wire a Raspberry Pi, an ADS1115 module, and various analog sensors:
- The wiring between Raspberry Pi, ADS1115 module, and potentiometer
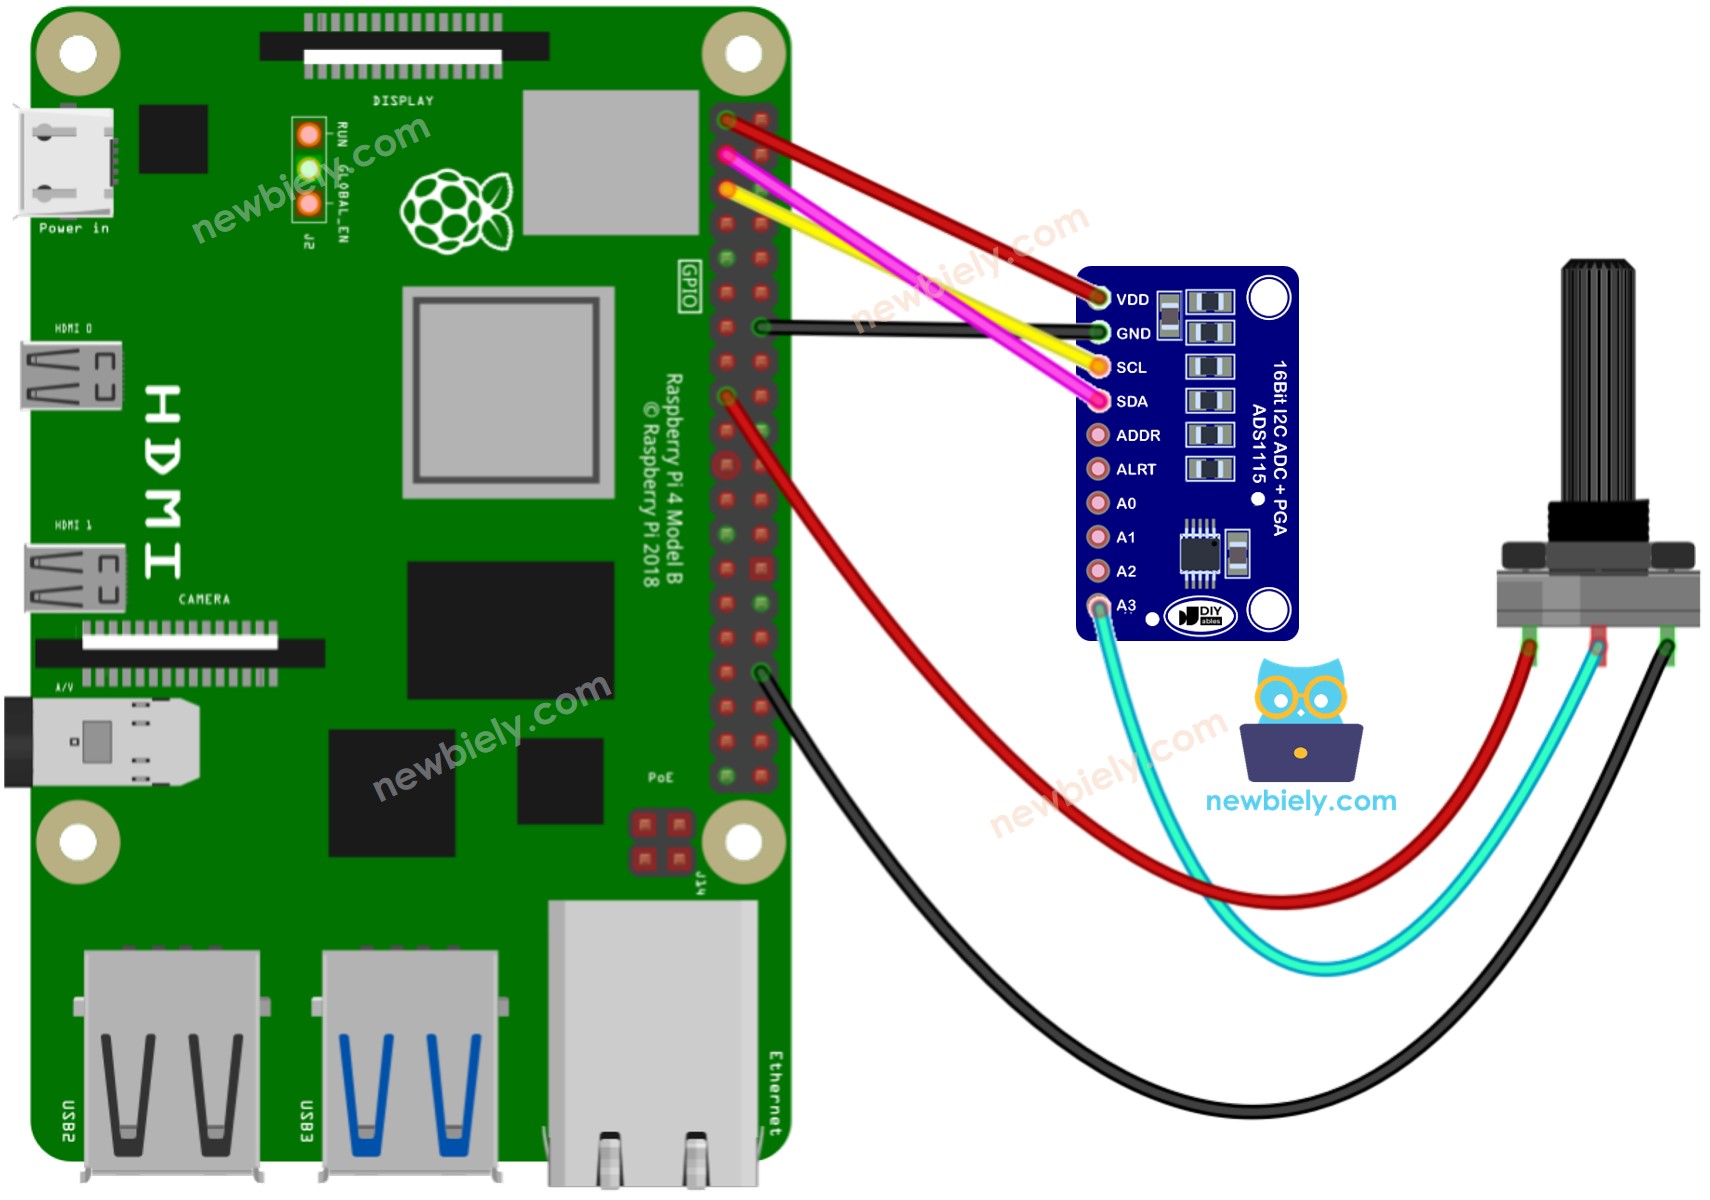
This image is created using Fritzing. Click to enlarge image
- The wiring between Raspberry Pi, ADS1115 module, and light sensor
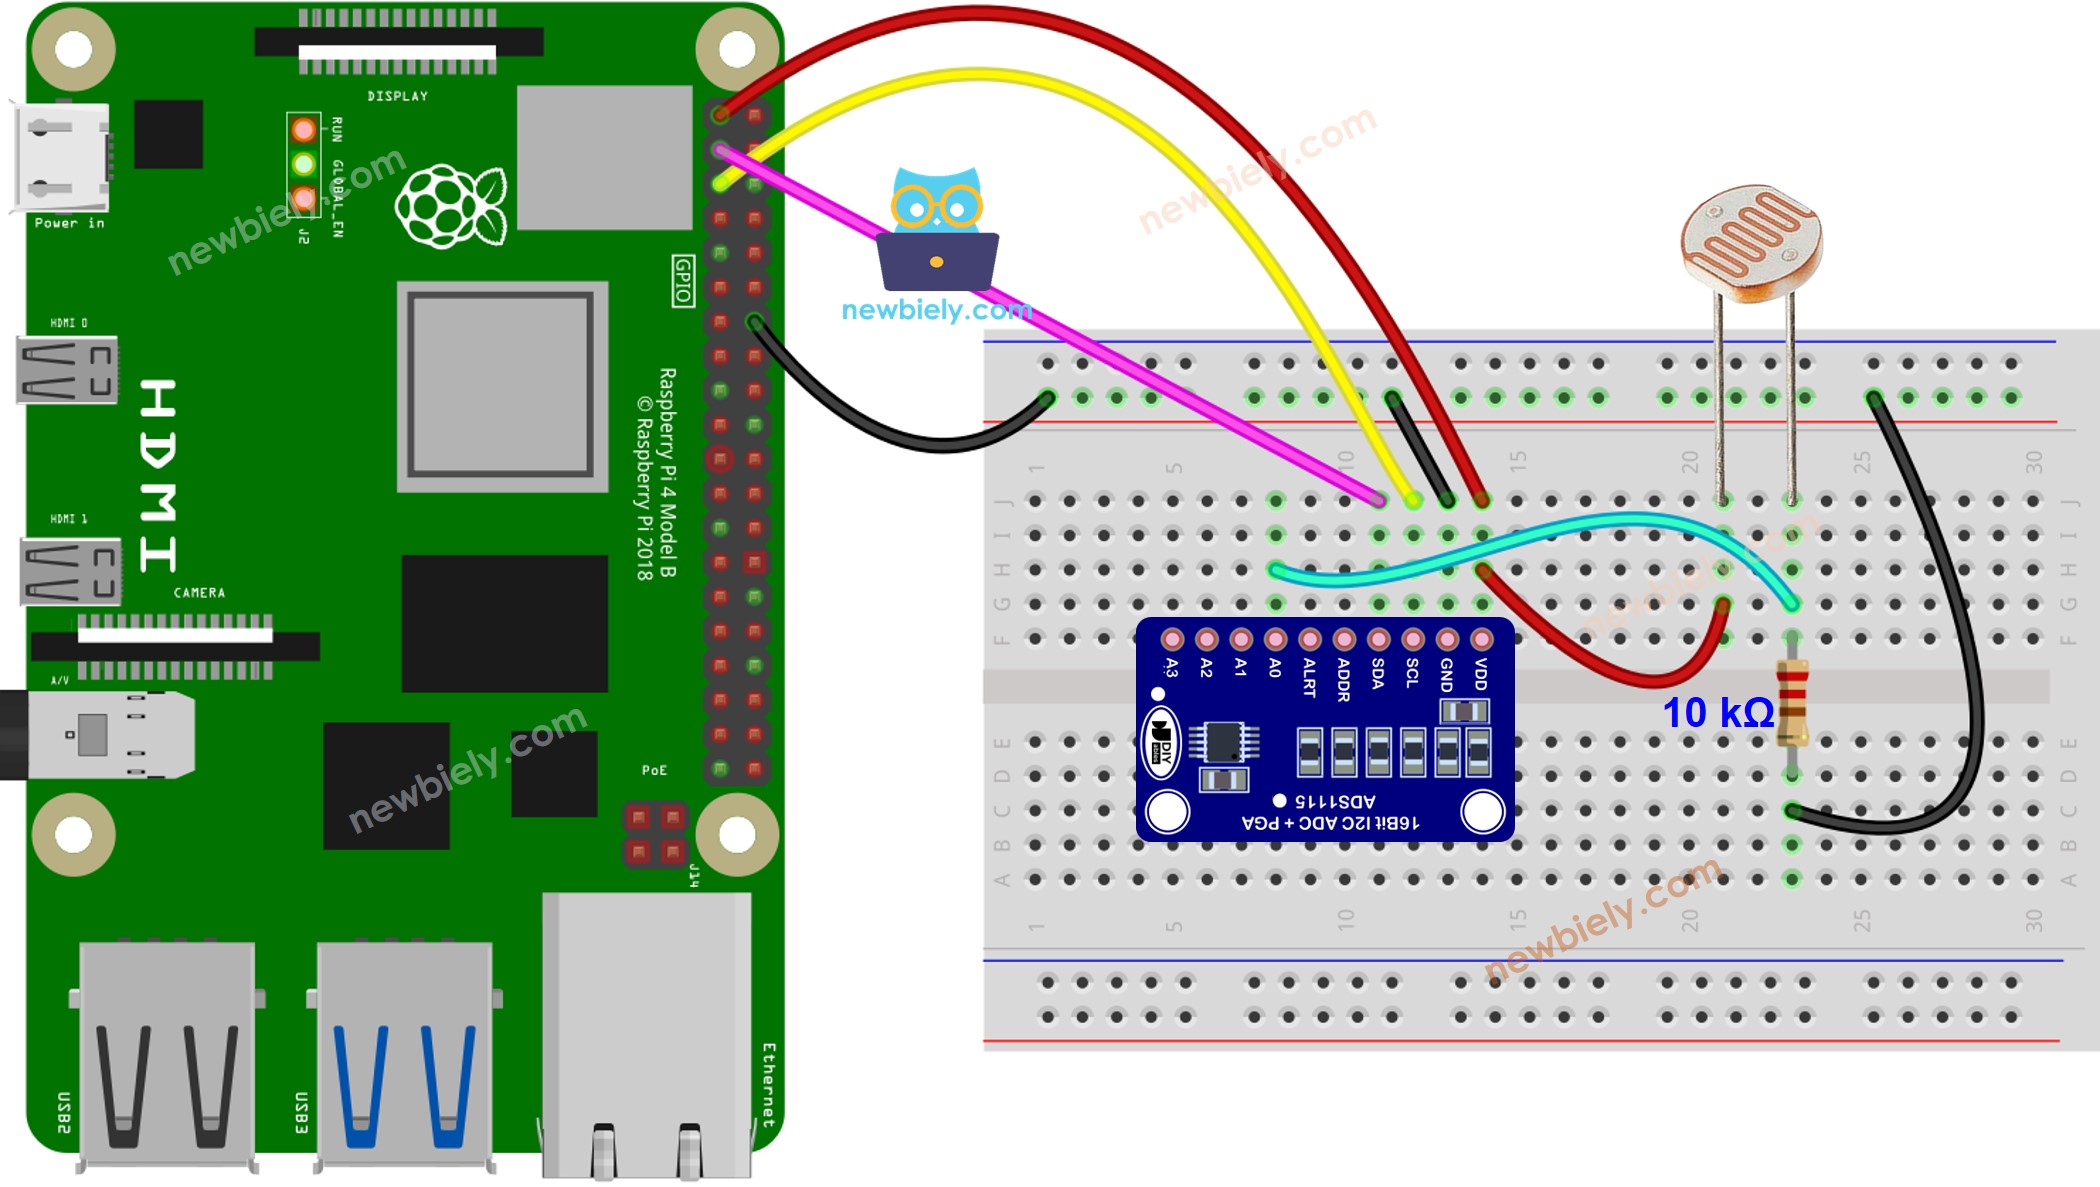
This image is created using Fritzing. Click to enlarge image
- The wiring between Raspberry Pi, ADS1115 module, and water sensor
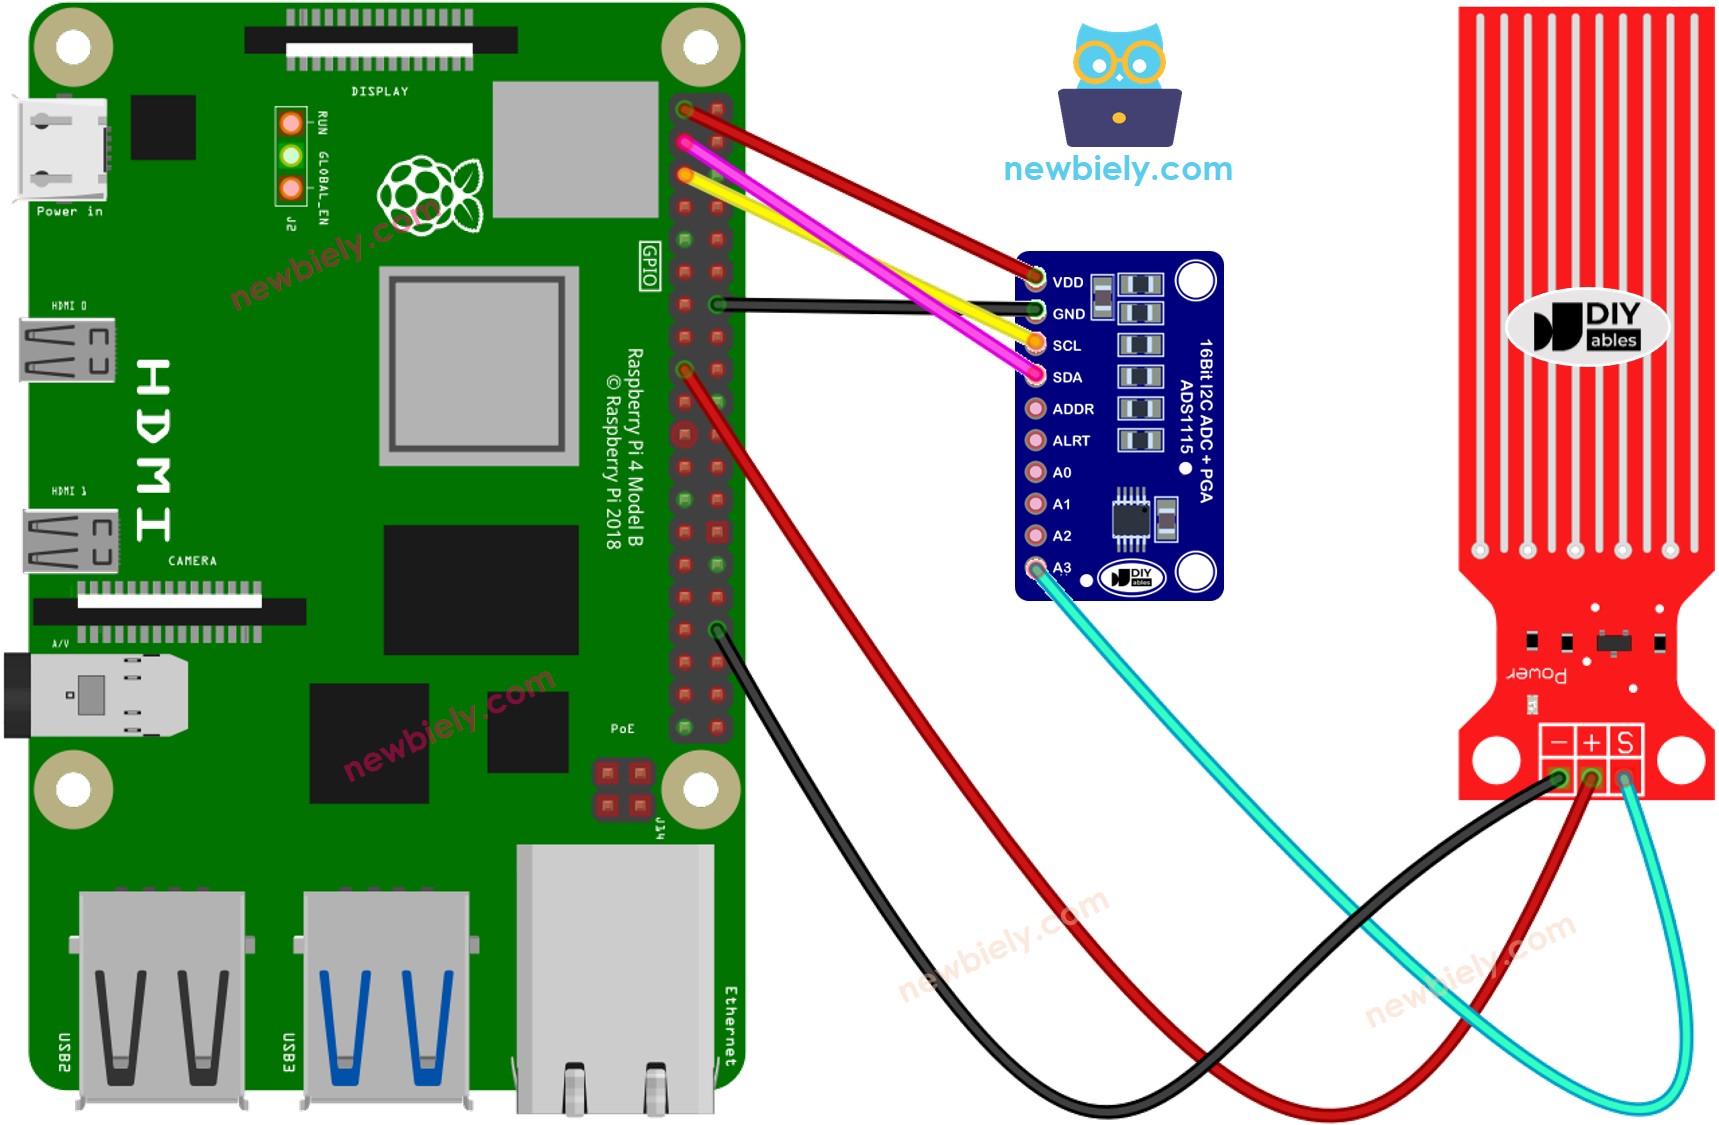
This image is created using Fritzing. Click to enlarge image
- The wiring between Raspberry Pi, ADS1115 module, and soil moisture sensor
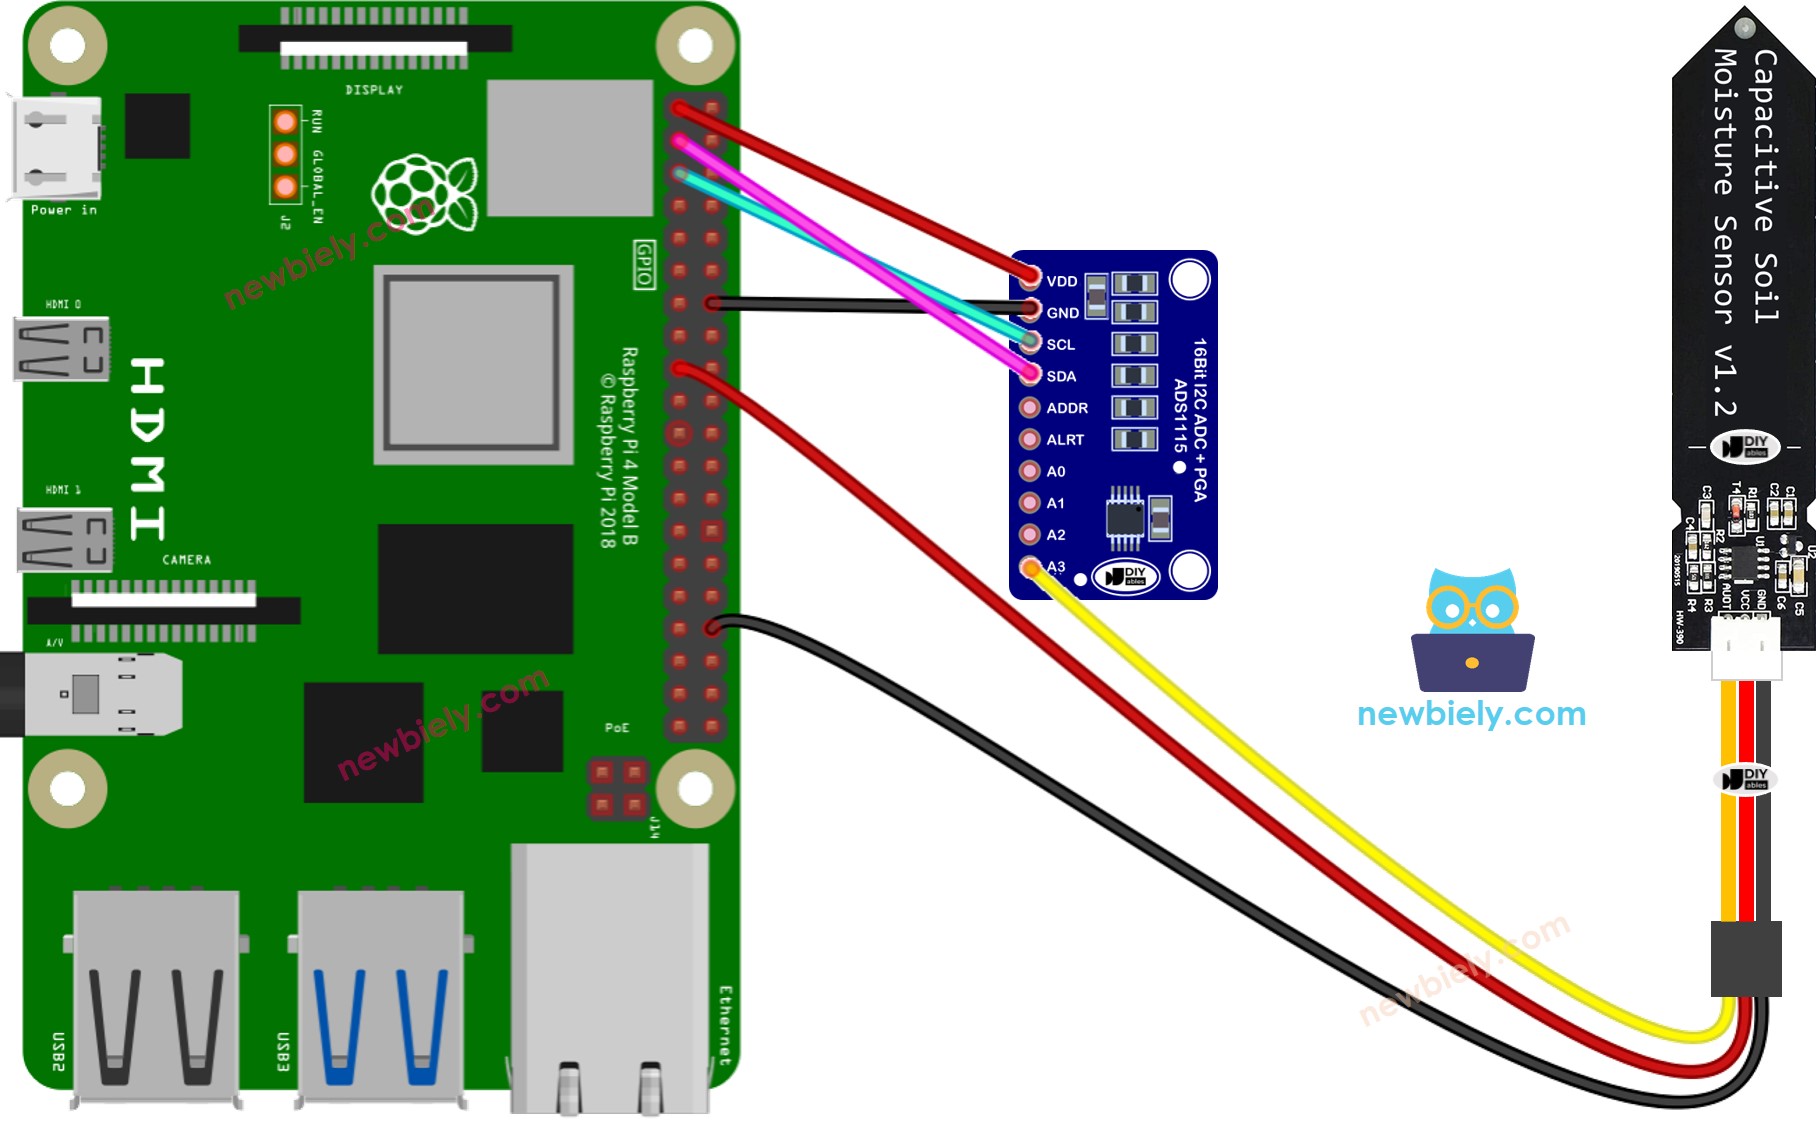
This image is created using Fritzing. Click to enlarge image
To simplify and organize your wiring setup, we recommend using a Screw Terminal Block Shield for Raspberry Pi. This shield ensures more secure and manageable connections, as shown below:

As mentioned earlier, the ADS1115 module can connect up to four analog sensors simultaneously. This tutorial demonstrates how to use it with one sensor, but you can easily adapt it for multiple sensors.
How to Use ADC with Raspberry Pi
- Make sure you have Raspbian or any other Raspberry Pi compatible operating system installed on your Pi.
- Make sure your Raspberry Pi is connected to the same local network as your PC.
- Make sure your Raspberry Pi is connected to the internet if you need to install some libraries.
- If this is the first time you use Raspberry Pi, See how to set up the Raspberry Pi
- Connect your PC to the Raspberry Pi via SSH using the built-in SSH client on Linux and macOS or PuTTY on Windows. See to how connect your PC to Raspberry Pi via SSH.
- Run the following command to open the Raspberry Pi configuration tool:
- Navigate to Interfacing Options > I2C and enable it to enable I2C interface on Raspberry Pi.
- Reboot the Raspberry Pi:
- Reconnect your PC to the Raspberry Pi via SSH
- Make sure you have the RPi.GPIO library installed. If not, install it using the following command:
- Install the Adafruit_ADS1x15 library by running the following commands on your Raspberry Pi terminal:
Reading Analog Values using Python
- Create a Python script file adc_read.py and add the following code:
- Save the file and run the Python script by executing the following command in the Terminal:
If everything is connected correctly, you should see the analog values printed in the terminal.
Explanation of Code:
- The Adafruit_ADS1x15 library initializes I2C communication.
- The ADS1115 object reads the 16-bit ADC value from the specified channel.
- The script continuously reads and prints the analog value every second.
Conclusion
Using an ADC like ADS1115 allows the Raspberry Pi to interface with analog sensors, expanding its capabilities. This tutorial demonstrated how to wire and program the ADS1115 to read analog data using I2C communication. You can now integrate other analog sensors for various projects!
Below are comprehensive tutorials that explain how to connect and use a Raspberry Pi with various analog sensors:
- Raspberry Pi - Soil Moisture Sensor tutorial
- Raspberry Pi - Water Sensor tutorial
- Raspberry Pi - Force Sensor tutorial
- Raspberry Pi - Light Sensor tutorial
- Raspberry Pi - Potentiometer tutorial