Raspberry Pi - Keypad 1x4
In this tutorial, we will learn how to use a keypad 1x4 with an Raspberry Pi. In detaile, we will learn:
- How to connect keypad 1x4 to Raspberry Pi.
- How to program Raspberry Pi to read the pressed keys from keypad 1x4.

Hardware Preparation
Or you can buy the following kits:
| 1 | × | DIYables Sensor Kit (18 sensors/displays) |
Additionally, some of these links are for products from our own brand, DIYables .
Overview of Keypad 1x4
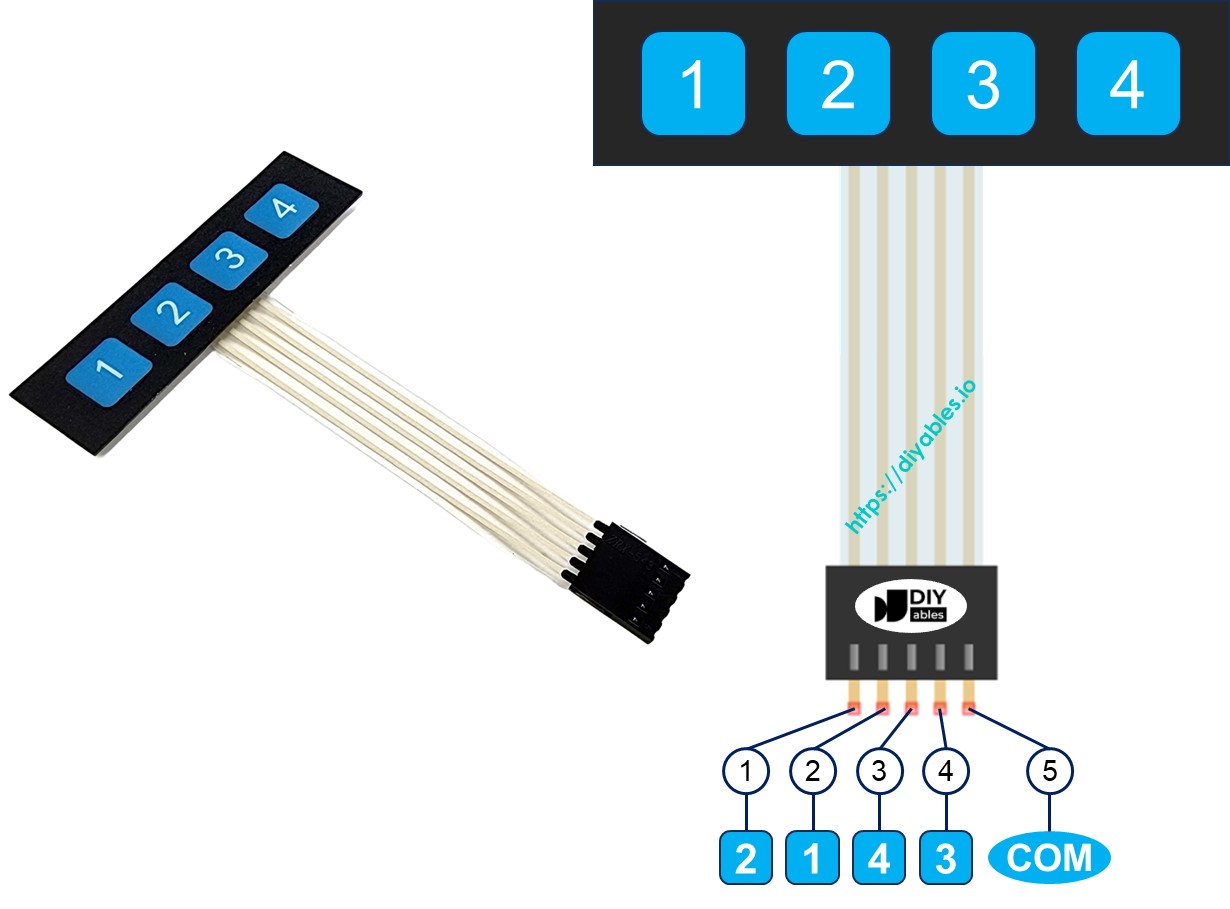
A 1x4 keypad is composed of four membrane buttons arranged in a single row. It is commonly used for user input in projects such as passcode entry, menu navigation, or control interfaces.
Pinout
The 1x4 keypad has 5 pins, which do not correspond directly to the key labels in order. Specifically:
- Pin 1: connects to key 2
- Pin 2: connects to key 1
- Pin 3: connects to key 4
- Pin 4: connects to key 3
- Pin 5: is a common pin that connects to all keys
Wiring Diagram
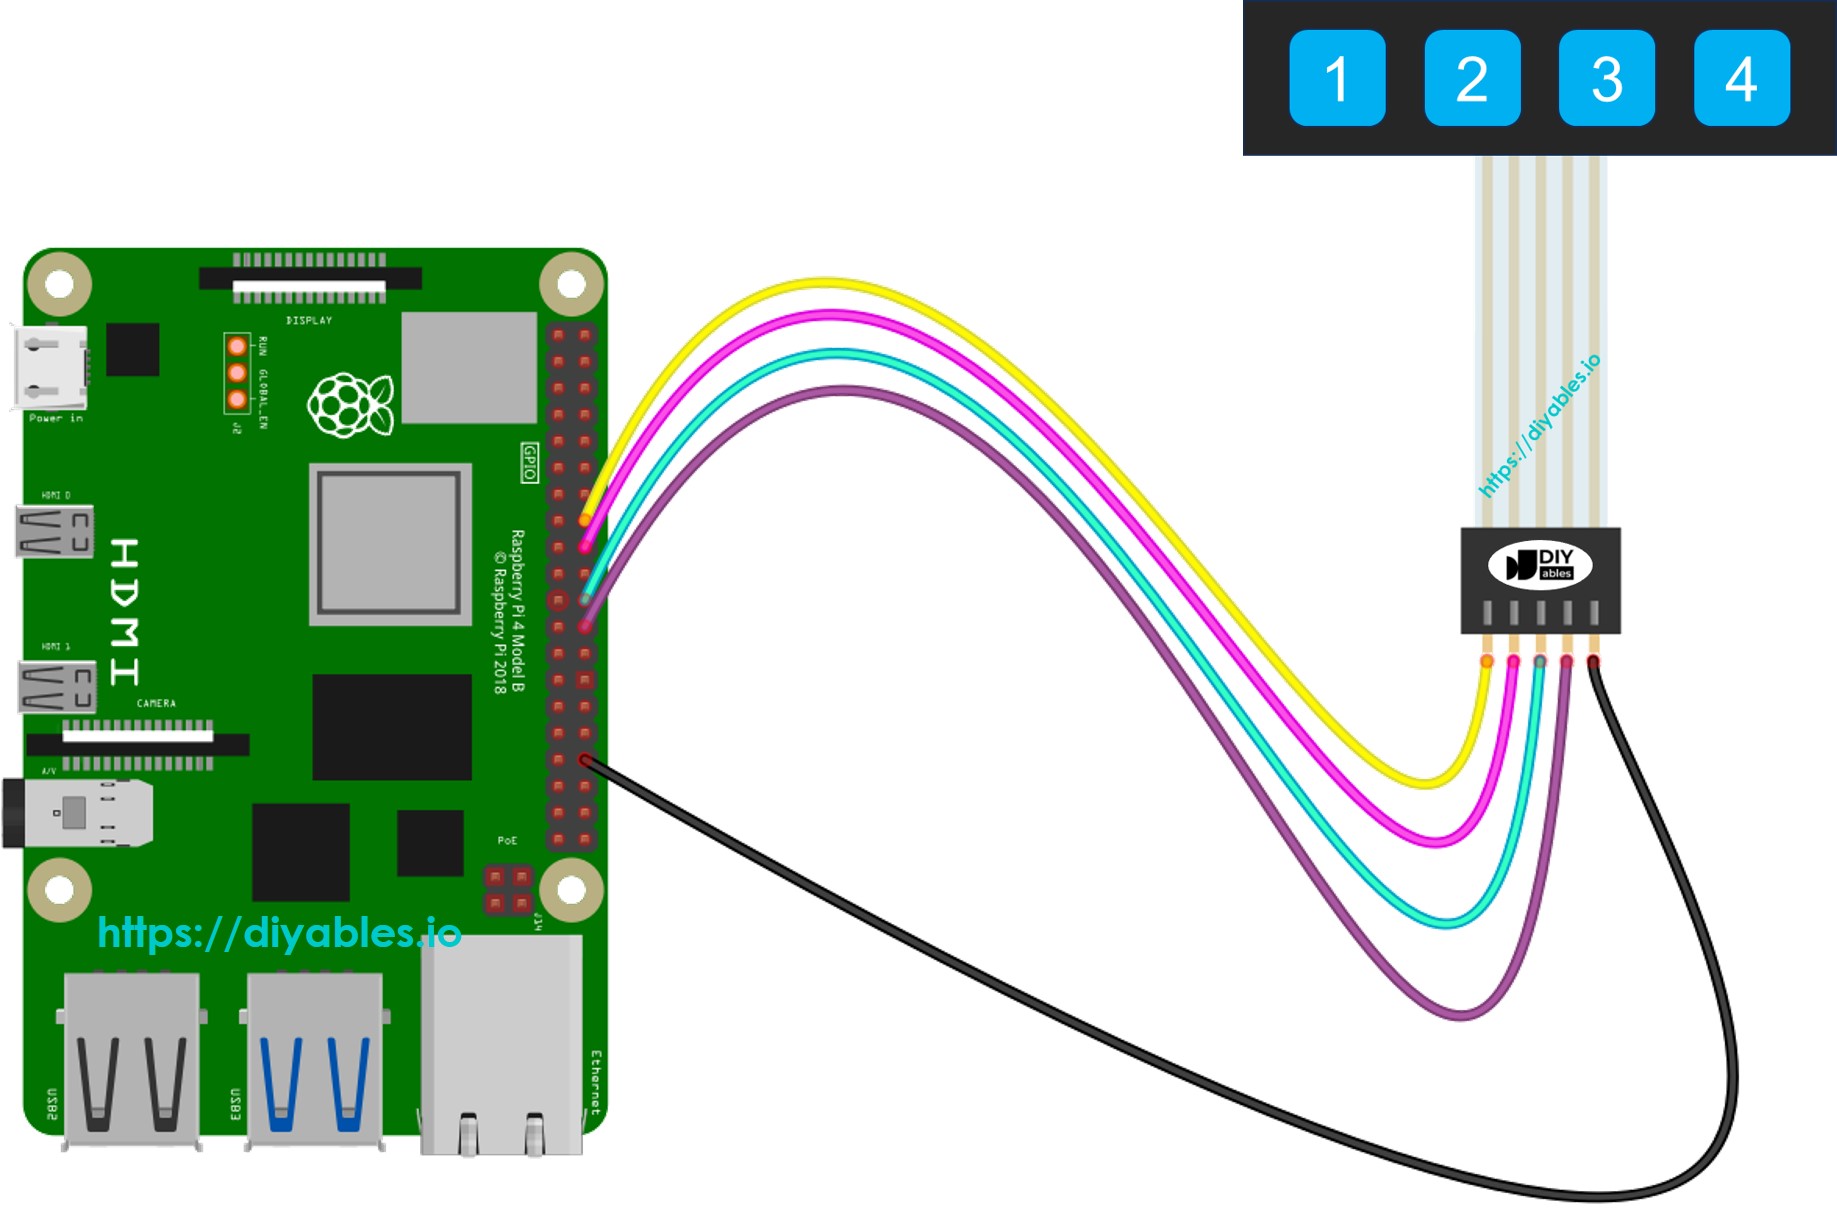
This image is created using Fritzing. Click to enlarge image
To simplify and organize your wiring setup, we recommend using a Screw Terminal Block Shield for Raspberry Pi. This shield ensures more secure and manageable connections, as shown below:

Raspberry Pi Code
Each key on the 1x4 keypad functions as a button. This means we can use the digitalRead() function to check the status of each key. However, in practice, like with any button, we must handle the issue of bouncing, where a single press might be mistakenly detected as multiple presses. To avoid this, we need to debounce each key. This task becomes challenging when trying to debounce four keys without blocking other parts of the code. Fortunately, the ezButton library simplifies this process.
Detailed Instructions
- Make sure you have Raspbian or any other Raspberry Pi compatible operating system installed on your Pi.
- Make sure your Raspberry Pi is connected to the same local network as your PC.
- Make sure your Raspberry Pi is connected to the internet if you need to install some libraries.
- If this is the first time you use Raspberry Pi, See how to set up the Raspberry Pi
- Connect the Arduino Nano to the 1x4 keypad.
- Connect your PC to the Raspberry Pi via SSH using the built-in SSH client on Linux and macOS or PuTTY on Windows. See to how connect your PC to Raspberry Pi via SSH.
- Make sure you have the RPi.GPIO library installed. If not, install it using the following command:
- Create a Python script file keypad_1x4.py and add the following code:
- Save the file and run the Python script by executing the following command in the terminal:
- Press each key on the 1x4 keypad one by one
- Check out the result on Terminal.