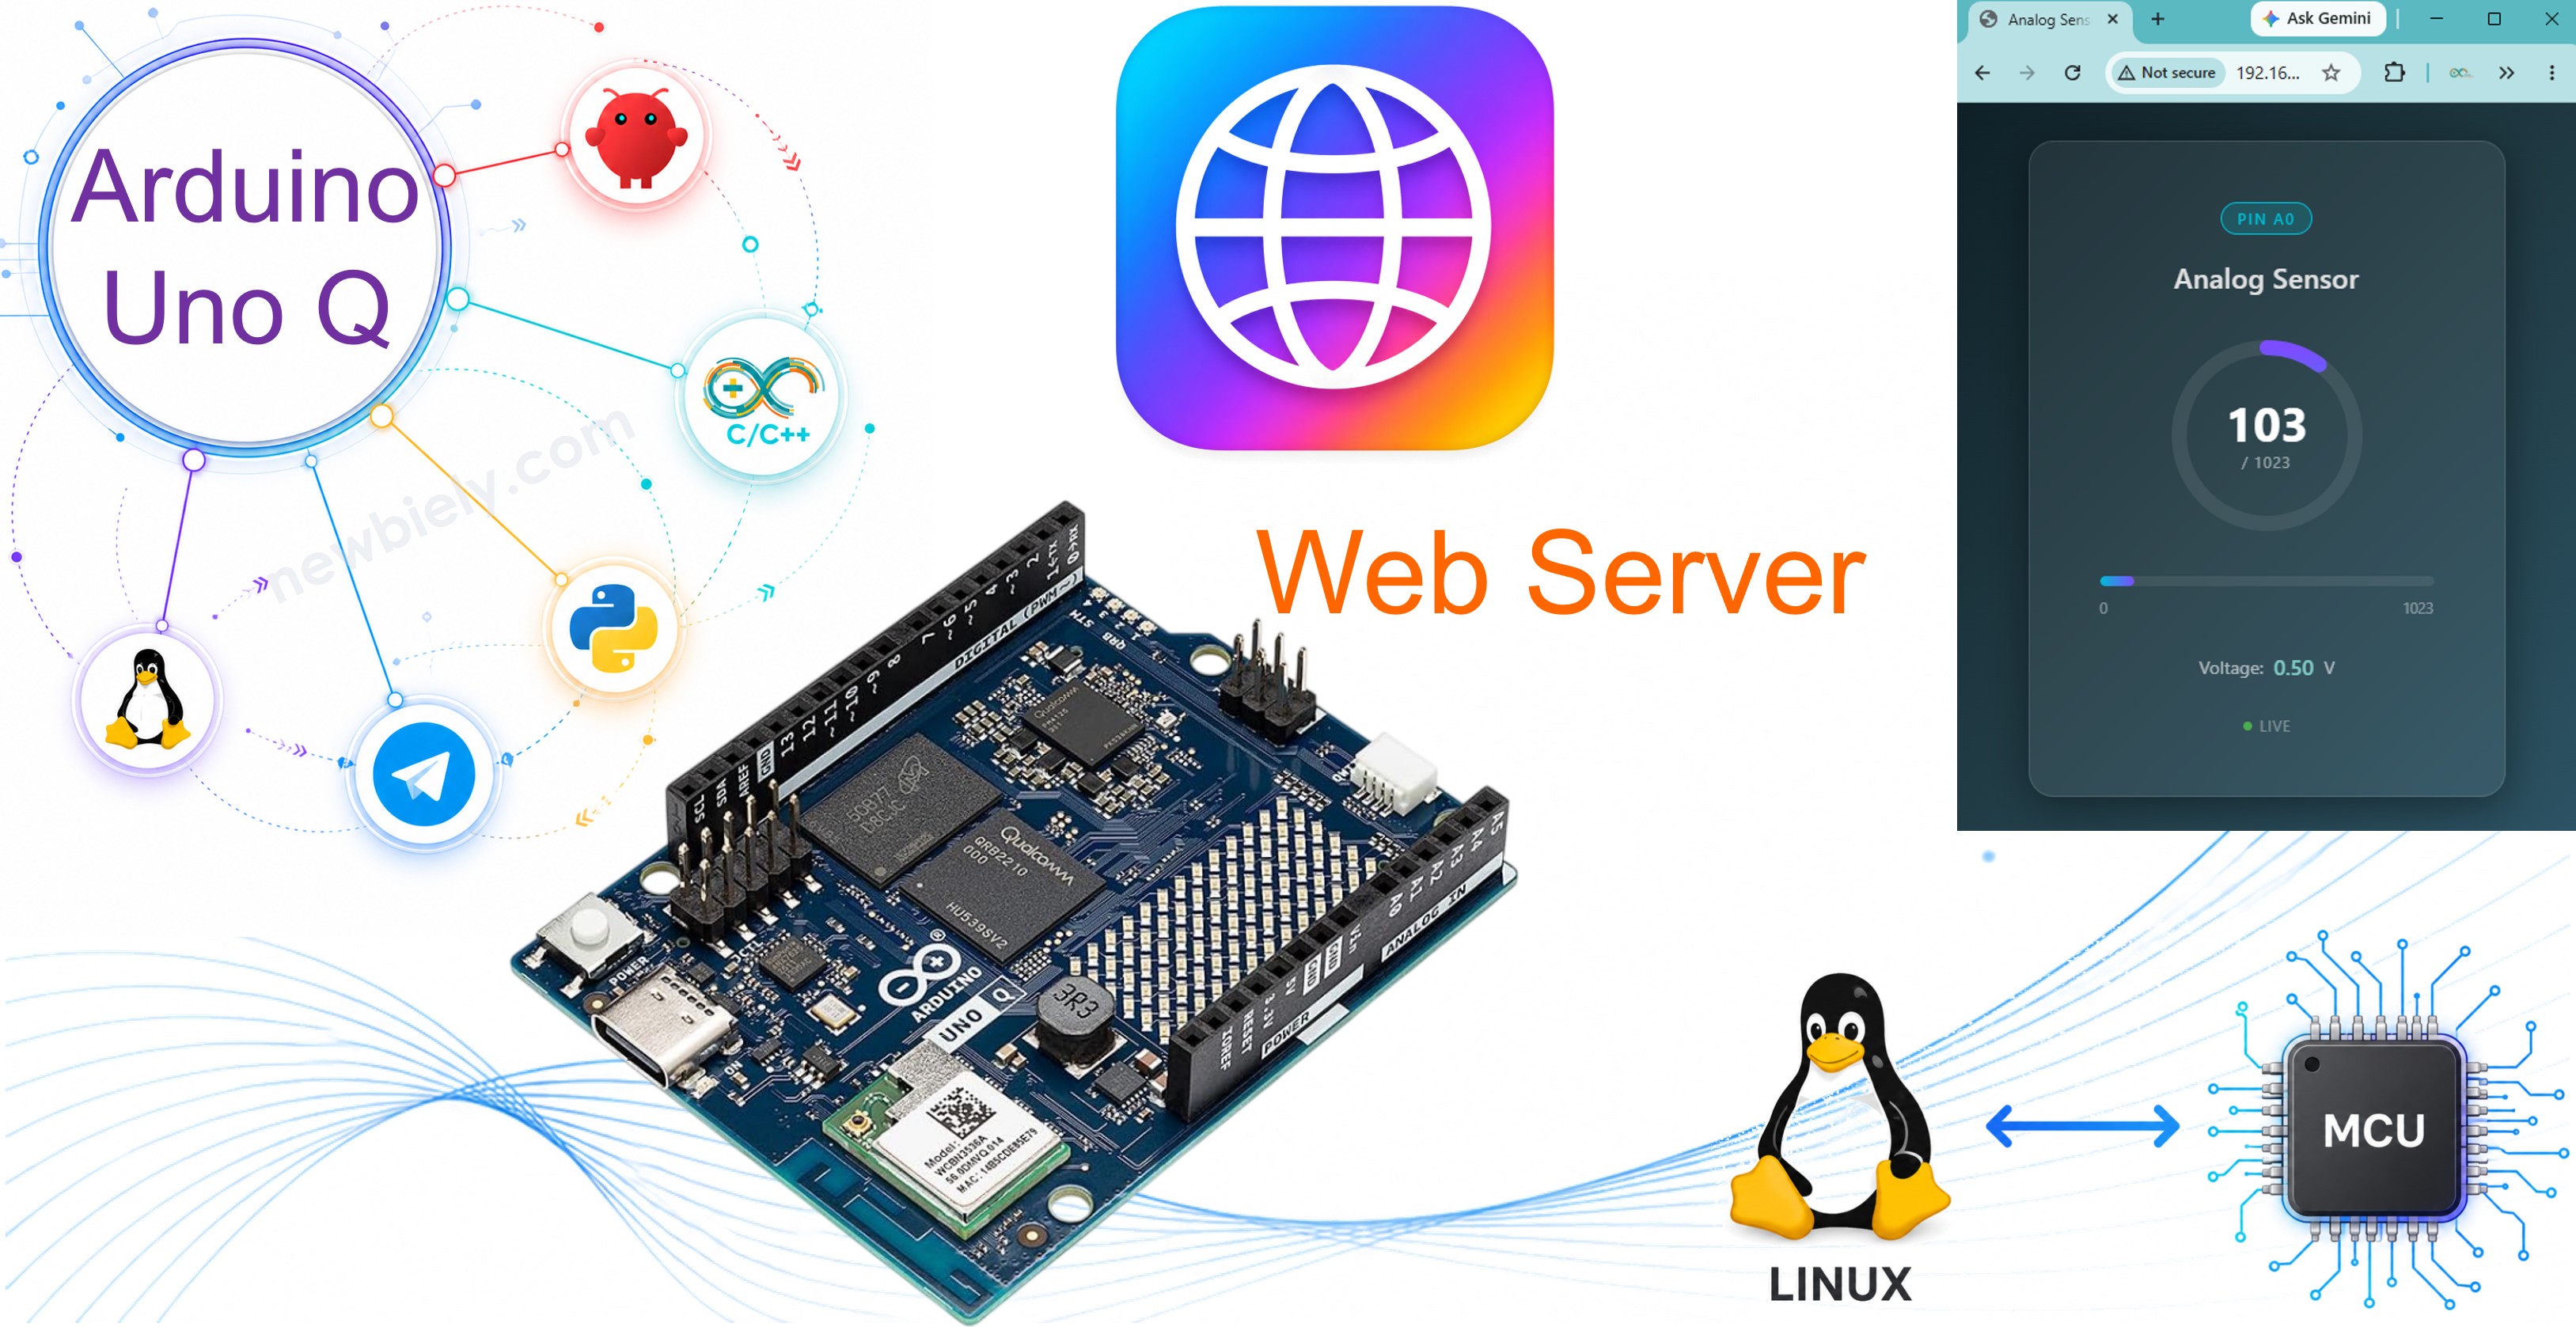
Arduino UNO Q - Web Server
The Arduino UNO Q has a built-in Debian Linux MPU, which means it can run a full web server — no extra Wi-Fi shield or cloud service needed. This tutorial shows you how to run a Python WebUI web server on the Arduino UNO Q in three progressive examples, starting from the simplest possible page and building up to a clean API.
In this tutorial, you will learn:
- How to display a raw sensor reading in a minimal HTML page (no CSS, no JavaScript)
- How to serve a full web page from an asset folder (HTML + CSS + JavaScript)
- How to expose MCU sensor data as a pure JSON API endpoint
- How the Bridge connects the MCU sketch and the Python web server
- How to wire a potentiometer to the analog pin A0 on the Arduino UNO Q
- How to add the WebUI Brick in Arduino App Lab to handle HTTP serving automatically
Hardware Preparation
Or you can buy the following kits:
| 1 | × | DIYables Sensor Kit (18 sensors/displays) |
Additionally, some of these links are for products from our own brand, DIYables .
How the Arduino UNO Q Web Server Works
The Arduino UNO Q combines two processors:
- STM32 MCU — runs your Arduino sketch (C/C++) in real-time. It reads sensors, controls relays, drives motors, and more.
- Qualcomm MPU — runs full Debian Linux. It connects to Wi-Fi and can run a Python WebUI web server that any browser on your network can reach.
The two processors communicate via the Bridge. The MCU exposes hardware functions through Bridge, and the Python web server on the MPU calls those functions to get sensor readings. A browser then fetches the data — either as a plain HTML page, a styled web page, or a JSON API response.
※ NOTE THAT:
No external Wi-Fi shield is needed. The Arduino UNO Q has built-in Wi-Fi on the Linux side.
Wiring Diagram

This image is created using Fritzing. Click to enlarge image
Arduino UNO Q Code
The Arduino UNO Q has two processors. For a web server, you write:
- An MCU sketch that reads the analog pin and exposes the value via Bridge
- A Python WebUI script on the Linux MPU that serves the value over HTTP
All three examples below use the same MCU sketch. Only the Python code (and optional HTML assets) differ.
Example 1 — Simple Web Page (No CSS, No JavaScript)
The simplest possible web server: open a browser, visit the board's IP, and see the raw analog reading in plain HTML. No styling, no auto-refresh — just the number.
The MCU sketch reads pin A0 and exposes the value through a Bridge function called get_analog. The Python server calls that function when a browser requests / and returns a bare HTML response.
MCU Code
Python Code
Detailed Instructions
- Connect: Plug the Arduino UNO Q into your computer with a USB-C cable and wire the potentiometer to A0 as described in the Wiring Diagram section.
- Connect to Wi-Fi: Make sure the Arduino UNO Q is connected to your Wi-Fi network. Use the network icon in Arduino App Lab to connect first.
- Open Arduino App Lab: Launch Arduino App Lab and wait until it detects your Arduino UNO Q.
- Create a new App: Click the Create New App button.

- Give the App a name, for example: WebServerSimple
- Click Create to confirm.

- Paste the MCU sketch: Copy the MCU code above and paste it into sketch/sketch.ino.
- Paste the Python code: Open python/main.py in the App. Select all existing content and delete it, then paste the Python web server code above.
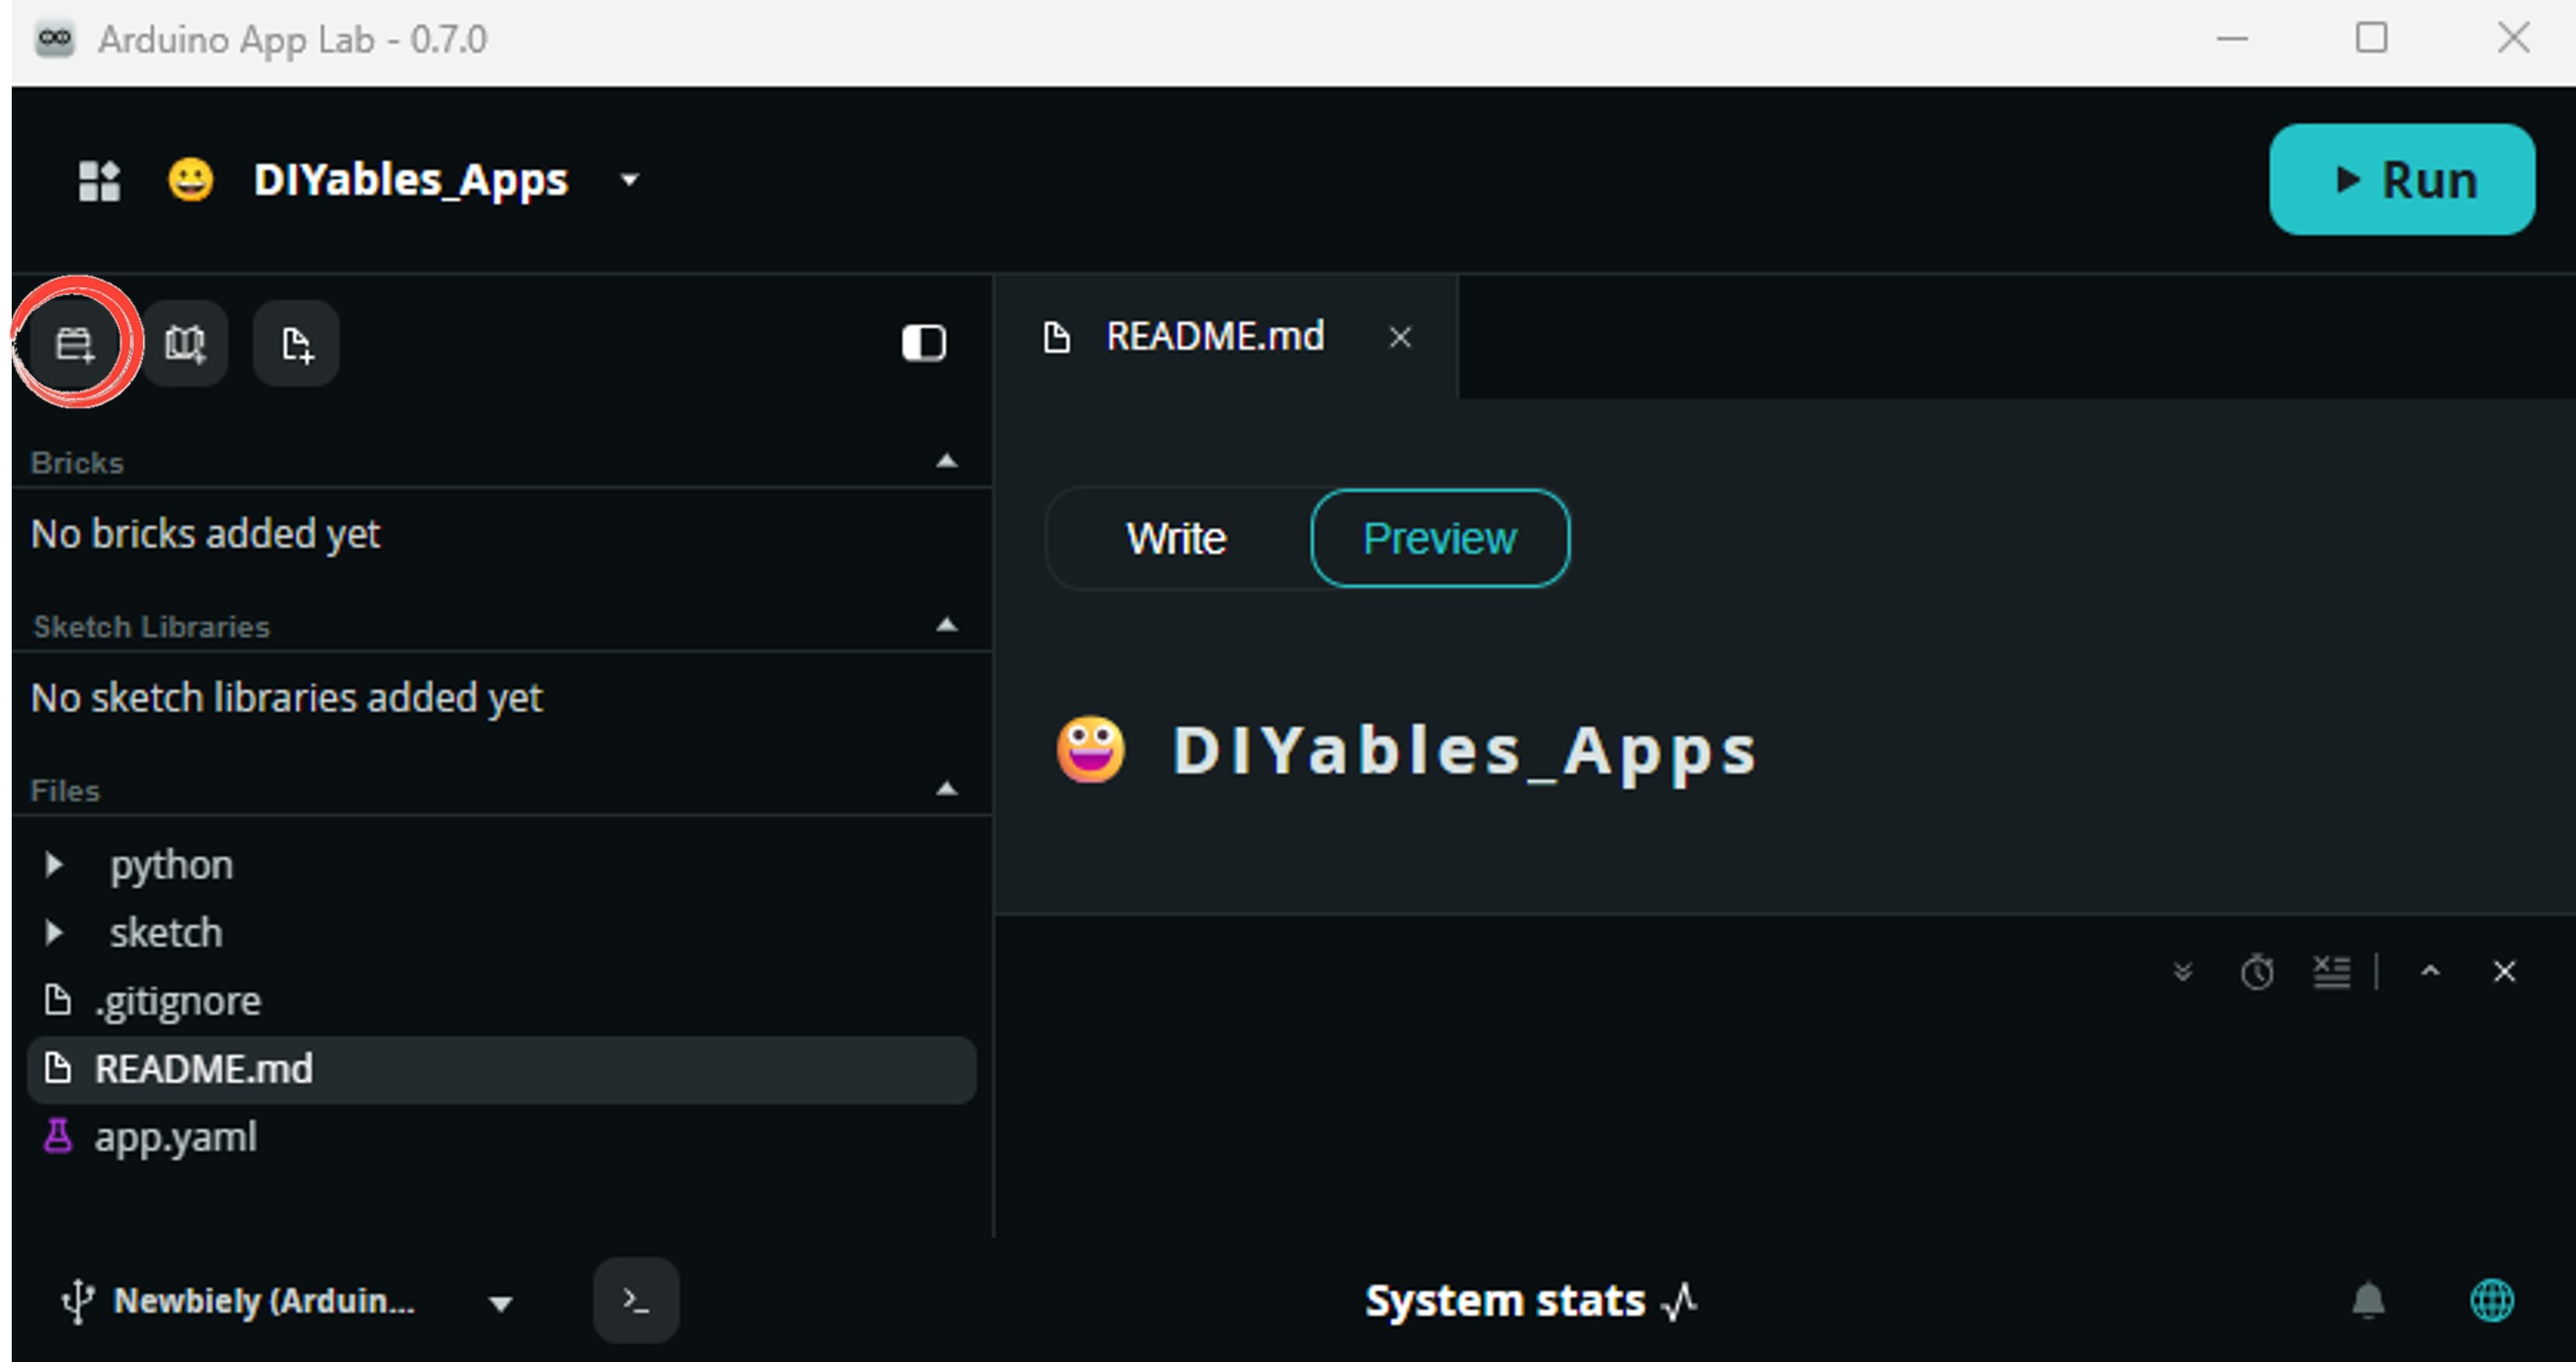
- Install the library: Click the Add sketch library button (the open book icon with a + sign) in the left sidebar.

- Search for Arduino_RouterBridge created by Arduino and click the Install button.
- Add the WebUI Brick: Click the Add Brick button in the Editor sidebar to open the Bricks catalog.
Find and select WebUI - HTML from the list, then follow any configuration prompts.
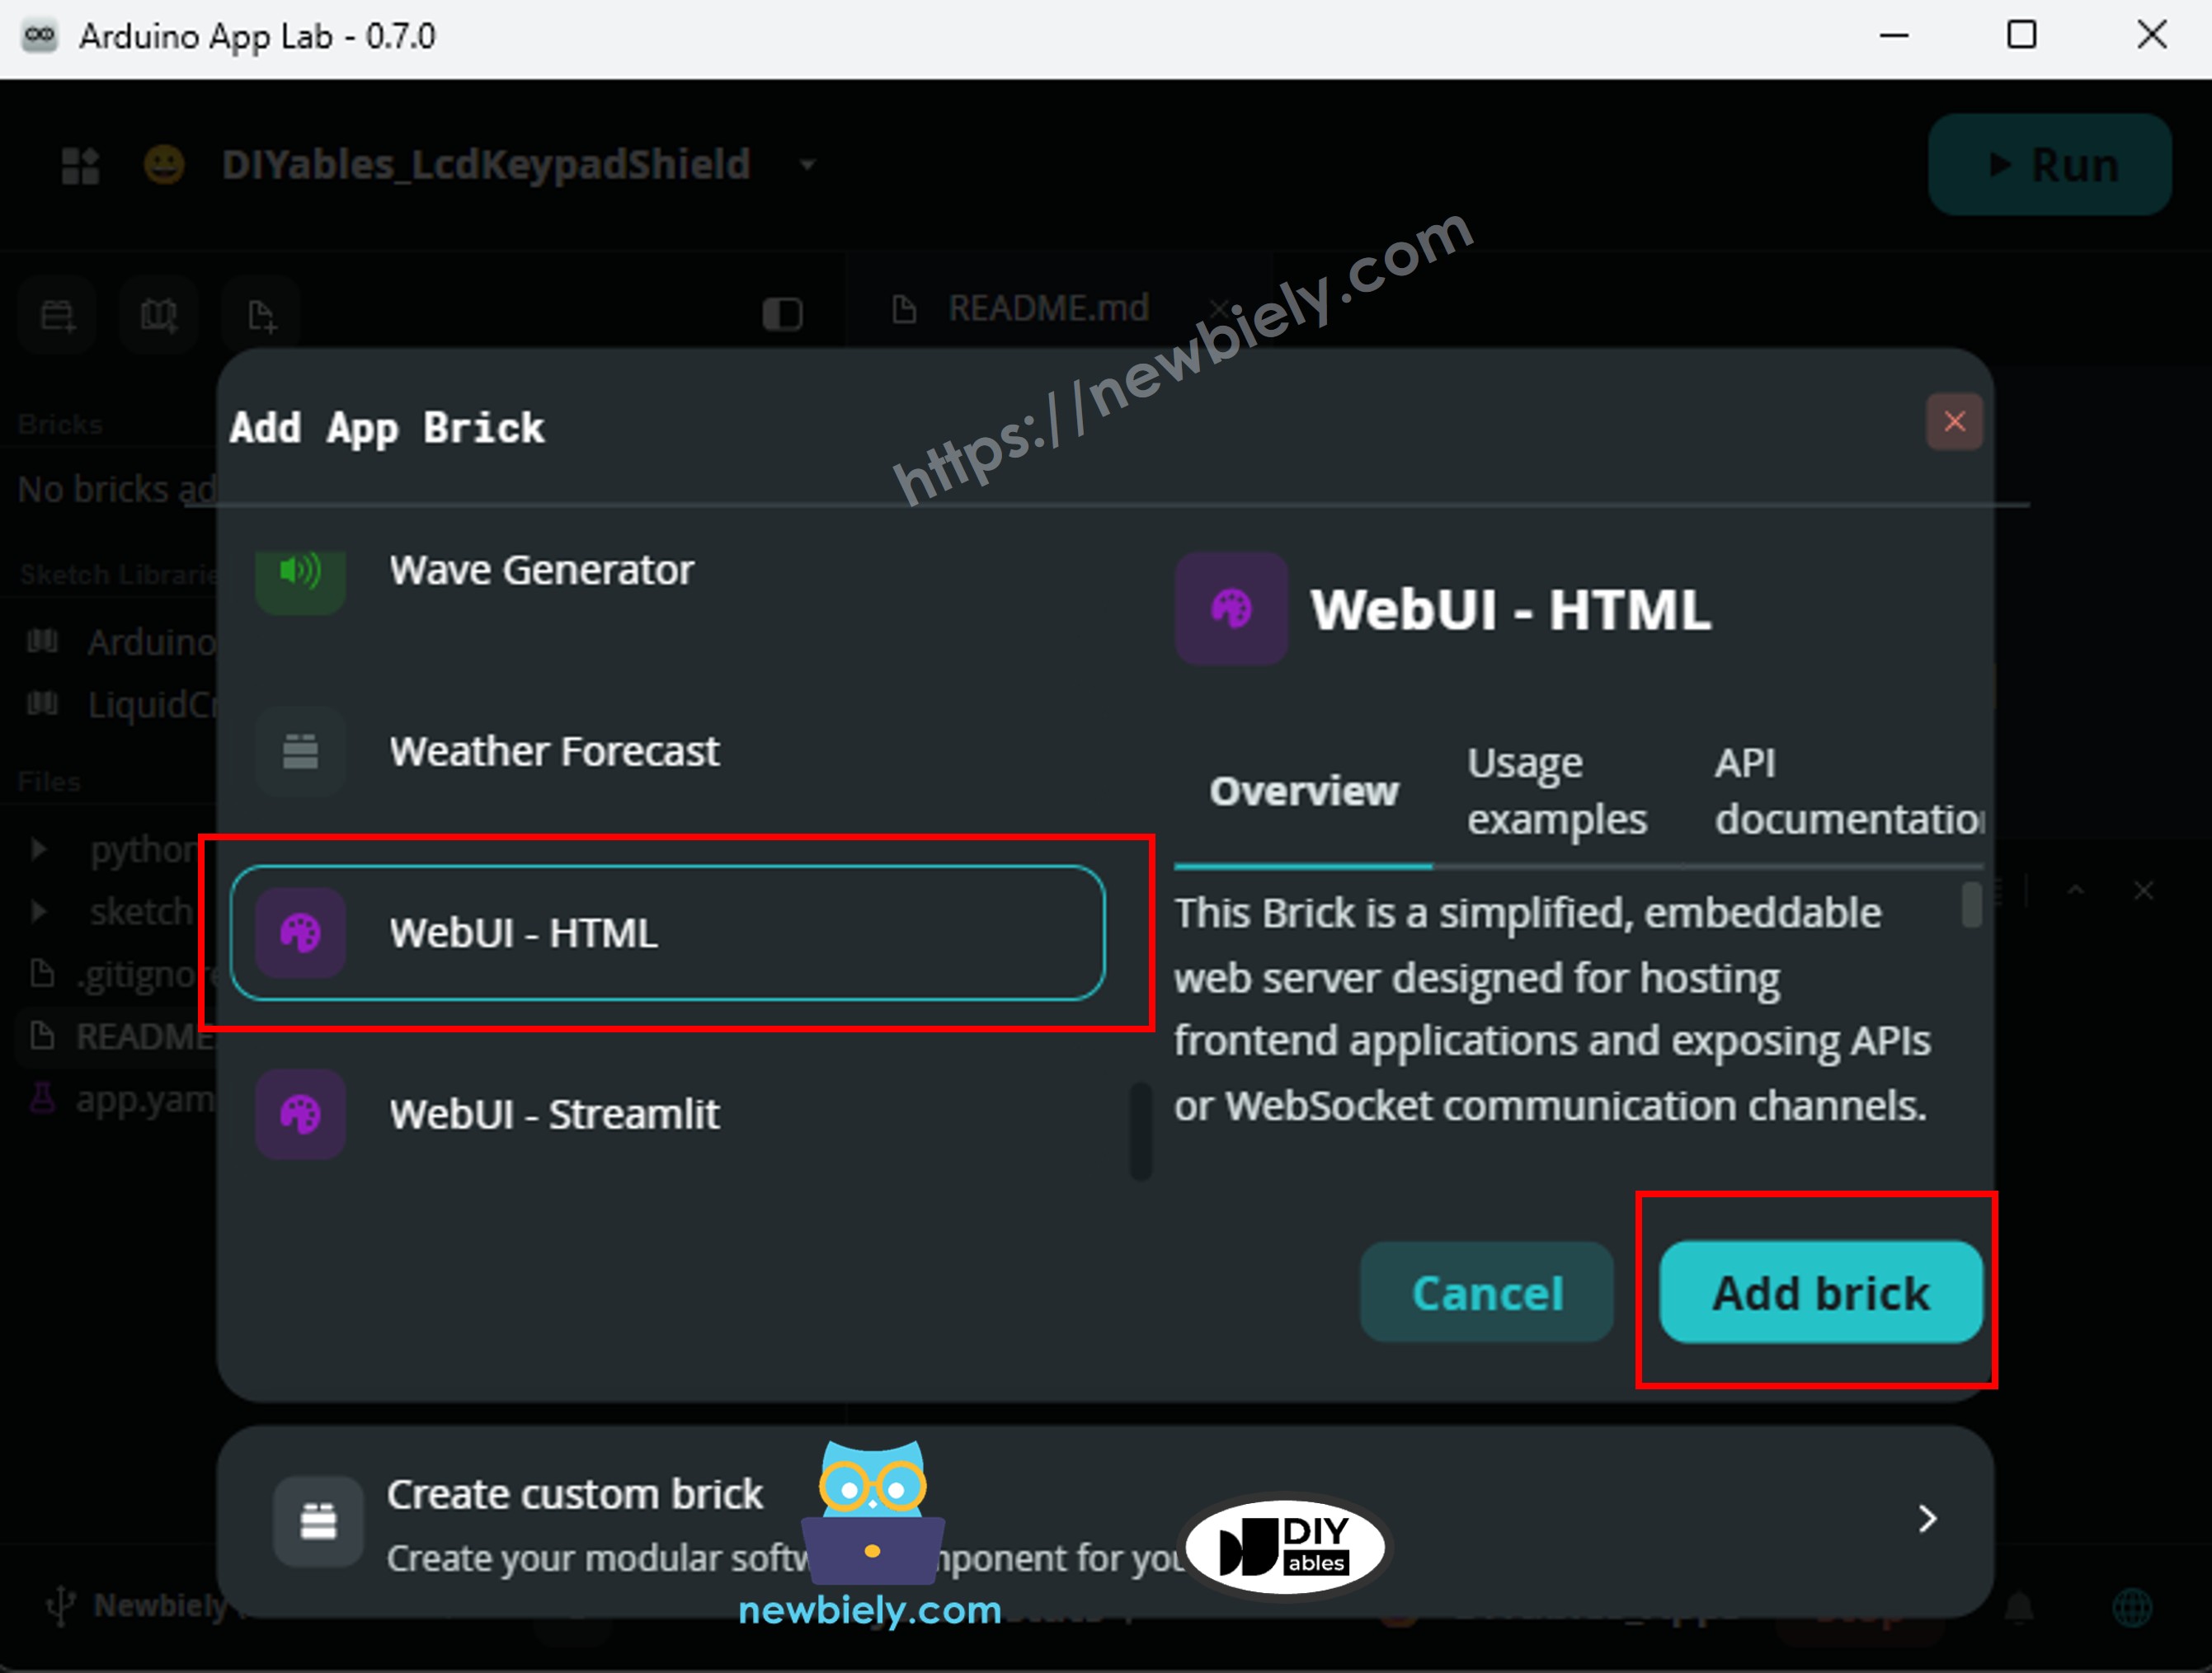
Arduino App Lab automatically adds the Brick entry to your app.yaml file — do not edit that entry manually.
※ NOTE THAT:
A Brick is a pre-built, plug-and-play service that runs on the Arduino UNO Q Linux side. The WebUI - HTML Brick handles the HTTP server so you do not need to install Flask or any other web framework manually. See About Bricks for more details.
- Upload: Click the Run button in Arduino App Lab to compile and upload.

- Open a web browser on your phone or PC and navigate to: http://
:7000/
Replace <ARDUINO_UNO_Q_IP> with the IP address of your Arduino UNO Q.
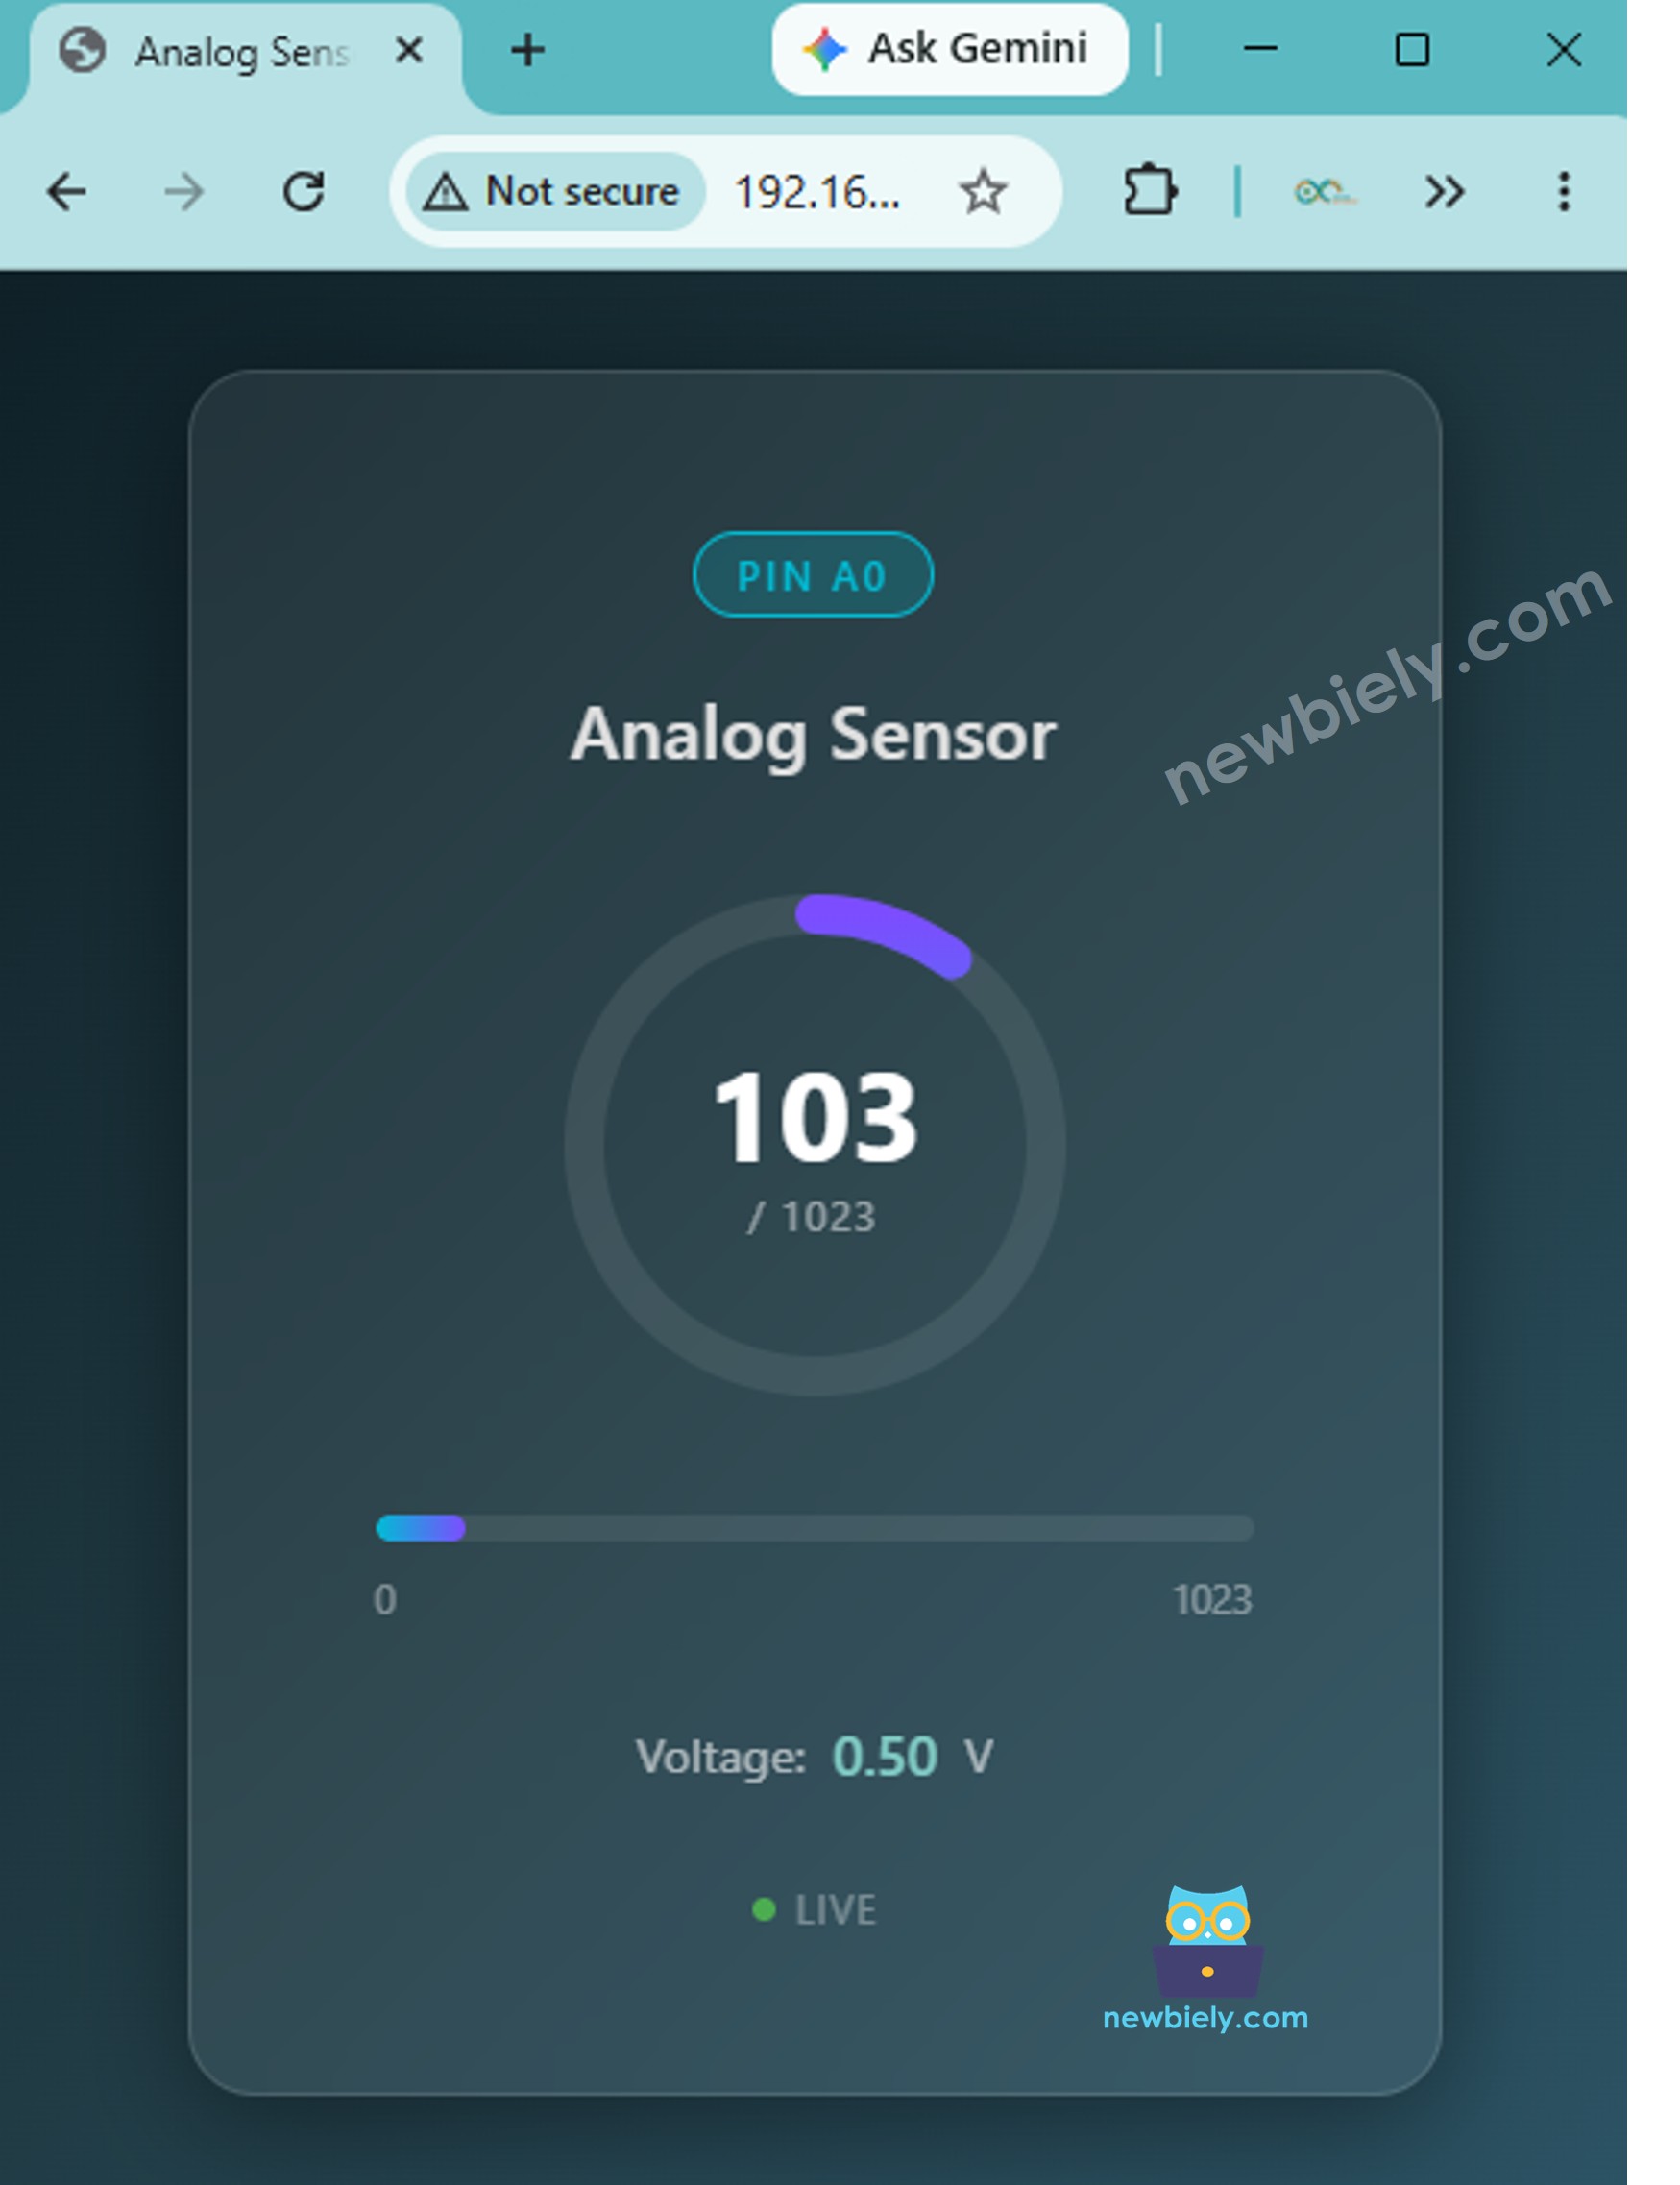
- You will see a plain HTML page showing the current raw ADC value from A0.
- Turn the potentiometer knob and refresh the browser page — the number changes.
App Lab Console Output
Browser Output
Open http://<ARDUINO_UNO_Q_IP>:7000/ in your browser. You will see a plain HTML page like:
_RENDER

Web Server with Asset Folder (HTML + CSS + JavaScript)
This example separates the front-end files into an assets/ folder, just like the blink-with-ui example. The Python server exposes a /api/analog endpoint; the index.html in the assets folder calls that endpoint every second with JavaScript and updates the displayed value — no page refresh needed.
The MCU sketch is the same as Example 1. The differences are:
- The Python code exposes /api/analog instead of a raw HTML route.
- The assets/index.html file contains the HTML, CSS, and JavaScript.
- The WebUI Brick automatically serves all files in the assets/ folder at the root URL (/).
MCU Code
Python Code
HTML (assets/index.html)
Place this file in the assets/ folder of your App:
Detailed Instructions
- Follow the same App creation steps as Example 1, but name the App WebServerAssets.
- Paste the MCU code into sketch/sketch.ino.
- Paste the Python code into python/main.py (replace all existing content).
- In the assets/ folder, open (or create) index.html and paste the HTML code above.
- Add the WebUI - HTML Brick as in Example 1.
- Click Run to upload.
- Open http://<ARDUINO_UNO_Q_IP>:7000/ in your browser.
- The page loads the styled web page from the assets folder and updates the analog value automatically every second.
- Turn the potentiometer — the value on the page changes without refreshing.
App Lab Console Output
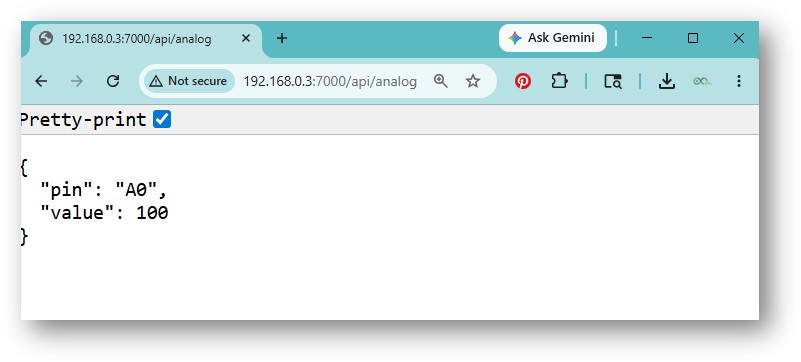
API Response
The JavaScript in index.html calls GET /api/analog. You can also test this endpoint directly:
Web Server as API (Pure JSON)
This example strips away all HTML and serves only a JSON API endpoint. Any client — browser, mobile app, curl, Postman, or another microcontroller — can call GET /api/analog to receive the current analog reading as structured data.
Use this pattern when you want to:
- Integrate Arduino UNO Q data into an existing web app or dashboard
- Query the board from a mobile app or back-end service
- Test or log sensor values from the command line
MCU Code
Python Code
Detailed Instructions
- Follow the same App creation steps as Example 1, but name the App WebServerAPI.
- Paste the MCU code into sketch/sketch.ino.
- Paste the Python code into python/main.py (replace all existing content).
- Add the WebUI - HTML Brick as in Example 1.
- Click Run to upload.
- Test the endpoint from your browser
- Test the endpoint from your terminal:
- Test the endpoint from from any client. For example, with curl:
API Response
App Lab Console Output
Separating HTML from Python Code
With the WebUI approach, your Python code only exposes API endpoints — it does not serve HTML. This is a clean separation by design:
- Python WebUI script — exposes JSON API endpoints (e.g. /api/status, /api/led/on)
- HTML file — a standalone file you open in the browser. Its JavaScript fetches data from the API.
Here is the Python script (same as Example 1 — no changes needed):
Here is the standalone HTML page (index.html) that fetches from the API:
※ NOTE THAT:
Open index.html directly in your browser (from your computer) or host it anywhere. The JavaScript inside fetches http://<ARDUINO_UNO_Q_IP>:7000/api/status every two seconds. Update the IP address in the HTML file to match your board.
Arduino UNO Q Web Server — Multiple Pages
To build a web server with multiple API endpoints (e.g., /api/status, /api/led/on, /api/settings), add one expose_api call per endpoint in the Python WebUI script.
For a detailed guide, see the Arduino UNO Q - Web Server Multiple Pages tutorial.
OpenClaw
You can adapt the OpenClaw to this tutorial by refering the instruction on Arduino Uno Q - OpenClaw Tutorial
Project Ideas
The web server is a building block for many useful projects on Arduino UNO Q:
- Sensor Dashboard: Connect a DHT22 or BMP280 to the MCU and display temperature, humidity, and pressure on a styled web page that auto-refreshes every few seconds
- Relay Control Panel: Add buttons on the web page to switch relays on and off — useful for controlling lights, fans, or pumps from a phone while at home
- Data Logger Viewer: Log sensor readings to a CSV file on the Linux side and add a /history endpoint that returns the last 100 readings as an HTML table
- Garage Door Opener: Expose a "trigger" Bridge function that pulses a relay for one second — add a single big button on the web page to open or close the garage door from your phone
- Plant Watering Monitor: Read a soil moisture sensor on the MCU, display the moisture level on the web page with a progress bar, and show a warning banner when the soil is too dry
Challenge Yourself
Ready to go further with the web server on Arduino UNO Q? Try these challenges:
- Easy: Create a styled index.html file on your computer that fetches from http://<ARDUINO_UNO_Q_IP>:7000/api/status and displays uptime and LED state with a clean layout using Bootstrap or custom CSS.
- Medium: Add a /api/history endpoint to the Python WebUI script that reads the last 10 Bridge values from an in-memory list and returns them as a JSON array — then display the history on the HTML page as a table.
- Advanced: Add a /api/led/toggle POST endpoint to the WebUI script that reads the current LED state via Bridge and calls either led_on or led_off to flip it — then add a single toggle button to the HTML page.