Arduino UNO Q - Telegram Bot
Want to control your Arduino UNO Q from anywhere using Telegram? This tutorial shows you how to create a Telegram Bot that runs on the Arduino UNO Q Linux side (Debian) and responds to fixed commands like /toggle_led or /status — no AI or cloud service required.
In this tutorial, you will learn:
- How to create a Telegram Bot using BotFather and get a bot token
- How to write an MCU sketch that exposes hardware control via the Bridge
- How to write a Python script on the Arduino UNO Q Linux side that receives Telegram commands and controls the MCU
- How to test end-to-end control from Telegram
Hardware Preparation
Or you can buy the following kits:
| 1 | × | DIYables Sensor Kit (18 sensors/displays) |
Additionally, some of these links are for products from our own brand, DIYables .
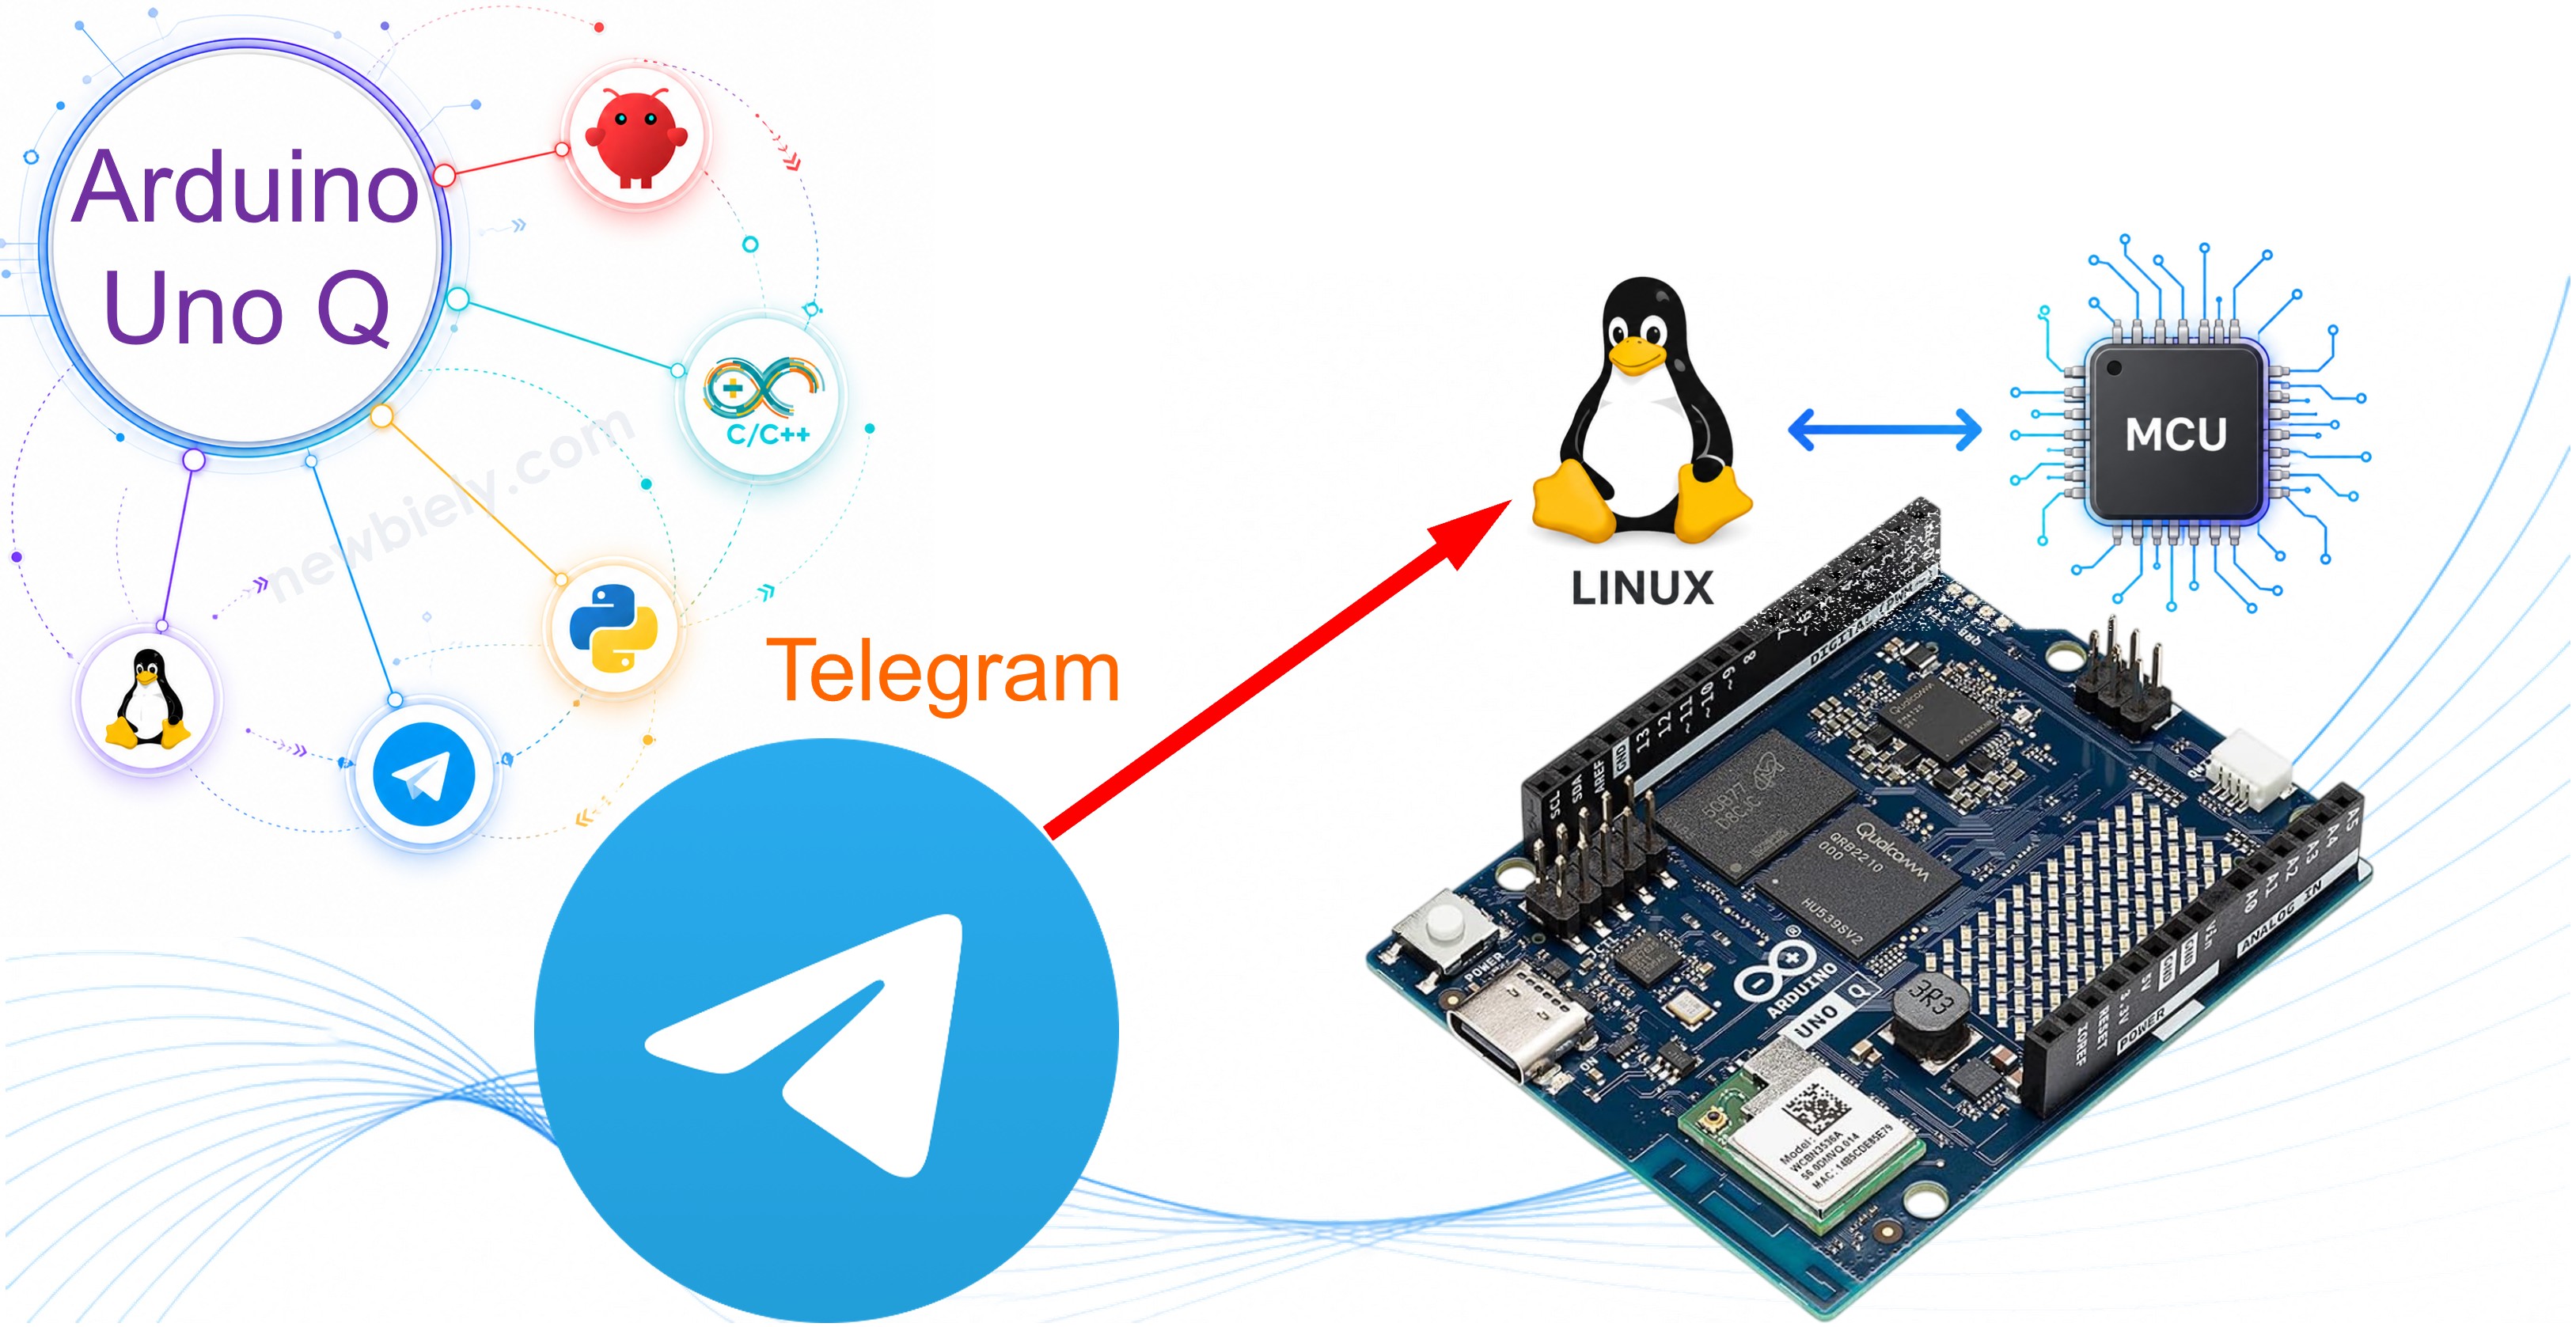
How It Works
The Arduino UNO Q combines two processors:
- STM32 MCU — runs your Arduino sketch. It controls hardware (LEDs, relays, sensors, etc.) in real-time.
- Qualcomm MPU — runs full Debian Linux. It connects to Wi-Fi and can run a Python script that communicates with Telegram.
The two processors communicate via the Bridge. The MCU exposes hardware functions through the Bridge, and the Python script on the Linux side calls those functions when a Telegram command arrives.
Here is the flow for each user message:
- User sends a command to the Telegram bot: /toggle_led
- Python script running on the Arduino UNO Q Linux side polls the Telegram API, receives the message, and parses the command
- Python script calls Bridge.call("toggle_led", "") to reach the MCU
- MCU (STM32) toggles the LED and returns the result via Bridge
- Python script sends the reply back to the user via Telegram: LED is now ON
※ NOTE THAT:
The Python script uses long polling — it repeatedly asks Telegram "are there any new messages?" This works without a public IP address or port forwarding, so it runs on any network.
| Feature | Details |
|---|---|
| Command style | Fixed commands (e.g. /toggle_led, /status) |
| Requires AI model | No |
| Messaging channel | Telegram only |
| Runs on | Arduino UNO Q Linux side (Debian) |
| Needs public IP | No (uses polling) |
※ NOTE THAT:
If you want natural language control ("turn the LED on", "what is the status?") across multiple channels (Telegram, WhatsApp, Discord, and more), see the OpenClaw tutorial instead.
Prerequisites
Before starting, make sure you have:
- Arduino UNO Q up and running — follow the Getting Started with Arduino UNO Q tutorial first
- Arduino App Lab installed and working
- Familiarity with the Bridge — see the Communication Between Linux and MCU tutorial
- A Telegram account — install Telegram on your phone or desktop from telegram.org
- Arduino UNO Q connected to Wi-Fi so the Linux side can reach the internet
Step 1 — Create a Telegram Bot with BotFather
BotFather is the official Telegram bot that creates and manages other bots. You will use it to get a bot token — the key your Python script uses to send and receive messages.
- Open Telegram and search for @BotFather, or open this link: t.me/BotFather
- Start a chat and send:

BotFather
- Send a display name for your bot (this can be anything):
BotFather
- Send a username that ends in bot (must be unique across all of Telegram):
BotFather
- Copy the bot token — it looks like this:
※ NOTE THAT:
Keep your bot token secret. Anyone who has it can send and receive messages through your bot.
Step 2 — Arduino UNO Q Code
MCU Code
The MCU sketch exposes hardware control functions via the Bridge. The Python script on the Linux side calls these functions when a Telegram command arrives.
Python Code
The Python script runs on the Arduino UNO Q Linux side. It polls the Telegram API for new messages, parses the commands, calls the MCU via the Bridge, and sends replies.
Detailed Instructions
First time with Arduino UNO Q? Follow the Getting Started with Arduino UNO Q tutorial to get your development environment ready before proceeding.
- Connect: Plug the Arduino UNO Q into your computer with a USB-C cable.
- Open Arduino App Lab: Launch Arduino App Lab and wait until it detects your Arduino UNO Q. This can take a few minutes on first launch.
- Create a new App: Click the Create New App button.

- Name the App: TelegramBot
- Click Create to confirm.
- You will see a set of folders and files generated inside your new App.
- Install the library: Click the Add sketch library button (the open book icon with a + sign) in the left sidebar.

- Search for Arduino_RouterBridge created by Arduino and click the Install button.
- Upload: Click the Run button in Arduino App Lab to compile and upload to the STM32, then start the Python script.

- Pro Tip: Keep Arduino App Lab running in the background. The Python script must be running for Telegram commands to reach the MCU.
App Lab Console Output
Available Commands
Once the bot is running, send these commands to your bot in Telegram:
| Command | What it does |
|---|---|
| /toggle_led | Toggles the built-in LED on or off and replies with the new state |
| /led_on | Turns the LED on |
| /led_off | Turns the LED off |
| /status | Returns the current MCU status (uptime and LED state) |
| /help | Lists all available commands |
Test It
Make sure the MCU Bridge sketch is uploaded and the Python script is running inside Arduino App Lab. Then open Telegram, find your bot by its username, and send commands:
ArduinoBot
If the bot does not reply, check that:
- Arduino App Lab is open and the Python script is running
- The Arduino UNO Q is connected to Wi-Fi
- BOT_TOKEN is correctly set in the Python code
- You are messaging from the Telegram account whose Chat ID you set
Extending the Bot
To add more hardware controls, follow these steps:
- MCU side: Add a new Bridge.provide_safe() call in the MCU sketch for the new function.
- Python side: Add a new elif command == "/your_command": block in the Python script, call Bridge.call("your_function", ""), and send the reply.
Example: to add a relay control command, expose toggle_relay on the MCU, then add this to the Python script:
Then add /toggle_relay — Toggle the relay to the /help reply text.
Project Ideas
You can extend this to any hardware connected to the Arduino UNO Q MCU:
- Remote LED strip control: Send /led_on and /led_off to toggle decorative lighting from anywhere
- Sensor dashboard: Use /status to get temperature, humidity, or motion sensor readings on demand
- Door or gate control: Send /unlock to trigger a relay that opens an electromagnetic lock
- Alert system: Combine polling with periodic MCU status checks to send you a Telegram message when a threshold is crossed (e.g. temperature too high)
- Multi-command panel: Add commands for multiple devices and control your whole lab from one Telegram chat
Challenge Yourself
Ready to go further?
- Easy: Add a /blink command that blinks the LED three times and replies "Done!" when finished.
- Medium: Add a password check — the bot only responds to commands that start with a secret keyword (e.g. /abc123 toggle_led), so that even if someone knows your bot username they cannot control the hardware without the password.
- Advanced: Connect a temperature sensor to the MCU, expose it via the Bridge, add a /temperature command, and configure the bot to send you an automatic alert if the temperature exceeds a set threshold.