Arduino UNO Q - SW520D Tilt Sensor

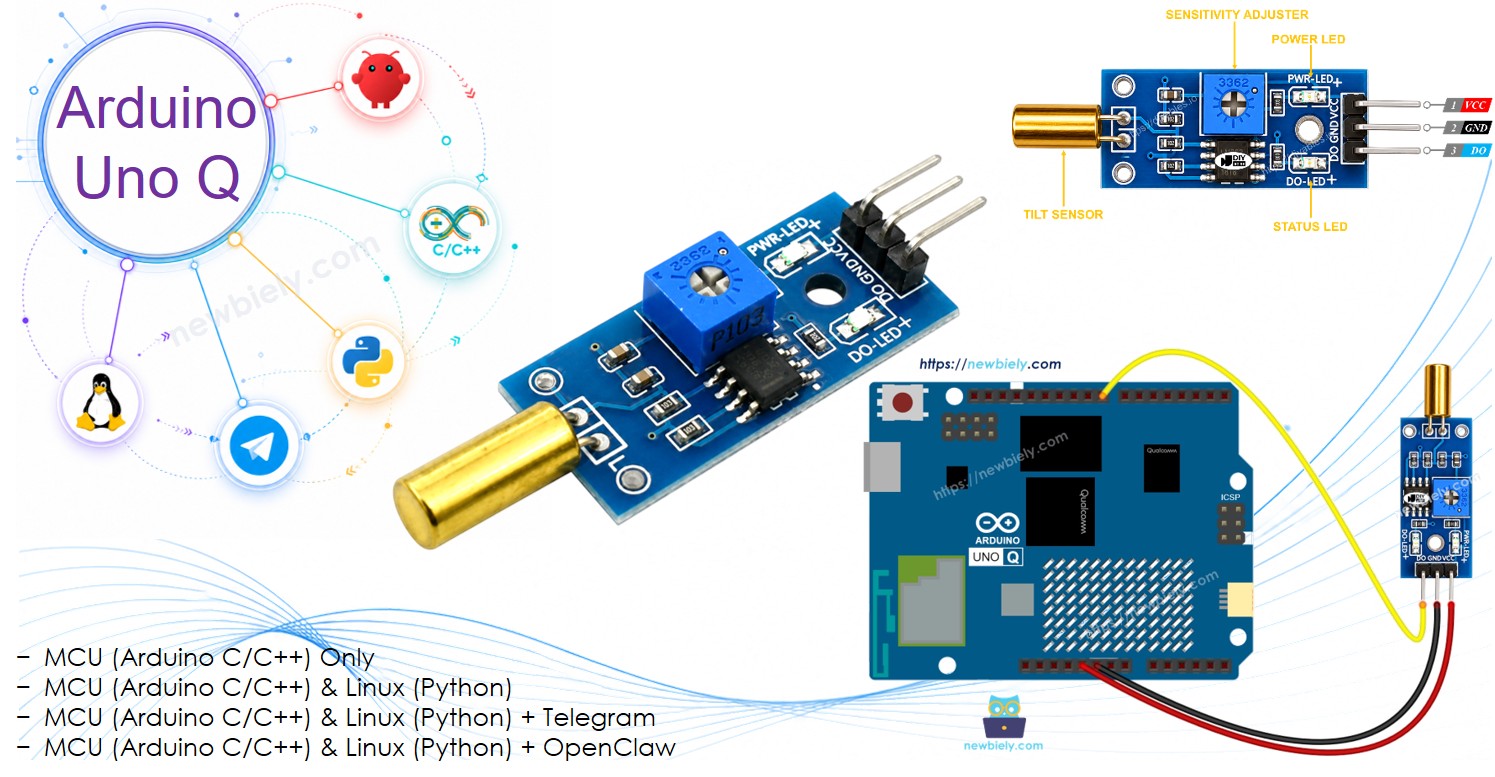
A SW520D tilt sensor detects orientation changes and outputs a digital signal. It uses a simple ball switch mechanism — no potentiometer or analog output. Use it to trigger actions when an object is tilted, tipped, or moved. With Bridge and Telegram, your Arduino UNO Q can send you instant alerts when tilt is detected.

In this tutorial, you will learn:

Arduino UNO Q SW520D Tilt Sensor

Hardware Preparation

1×Arduino UNO Q
1×USB Cable for Arduino Uno Q
1×SW520D Tilt Sensor Module
1×Jumper Wires
1×Recommended: Screw Terminal Block Shield for Arduino Uno
1×Recommended: Sensors/Servo Expansion Shield for Arduino Uno
1×Recommended: Breadboard Shield for Arduino Uno
1×Recommended: Enclosure for Arduino Uno
1×Recommended: Prototyping Base Plate & Breadboard Kit for Arduino UNO

Or you can buy the following kits:

1×DIYables Sensor Kit (18 sensors/displays)
Disclosure: Some of the links provided in this section are Amazon affiliate links. We may receive a commission for any purchases made through these links at no additional cost to you.
Additionally, some of these links are for products from our own brand, DIYables .

Overview of the SW520D Tilt Sensor

A SW520D tilt sensor module detects orientation changes using a small metal ball inside a cylindrical housing. When the sensor is upright, the ball closes the electrical contact. When the sensor is tilted, the ball rolls away and opens the contact. The module outputs a simple digital signal:

  • HIGH: Sensor is upright — no tilt detected
  • LOW: Sensor is tilted — tilt detected

The module includes:

  • VCC pin: 3.3V to 5V power supply
  • GND pin: Ground
  • DO pin: Digital output — HIGH = upright, LOW = tilt detected
  • PWR LED: Power indicator
  • Status LED: Reflects the tilt state — on when upright, off when tilted
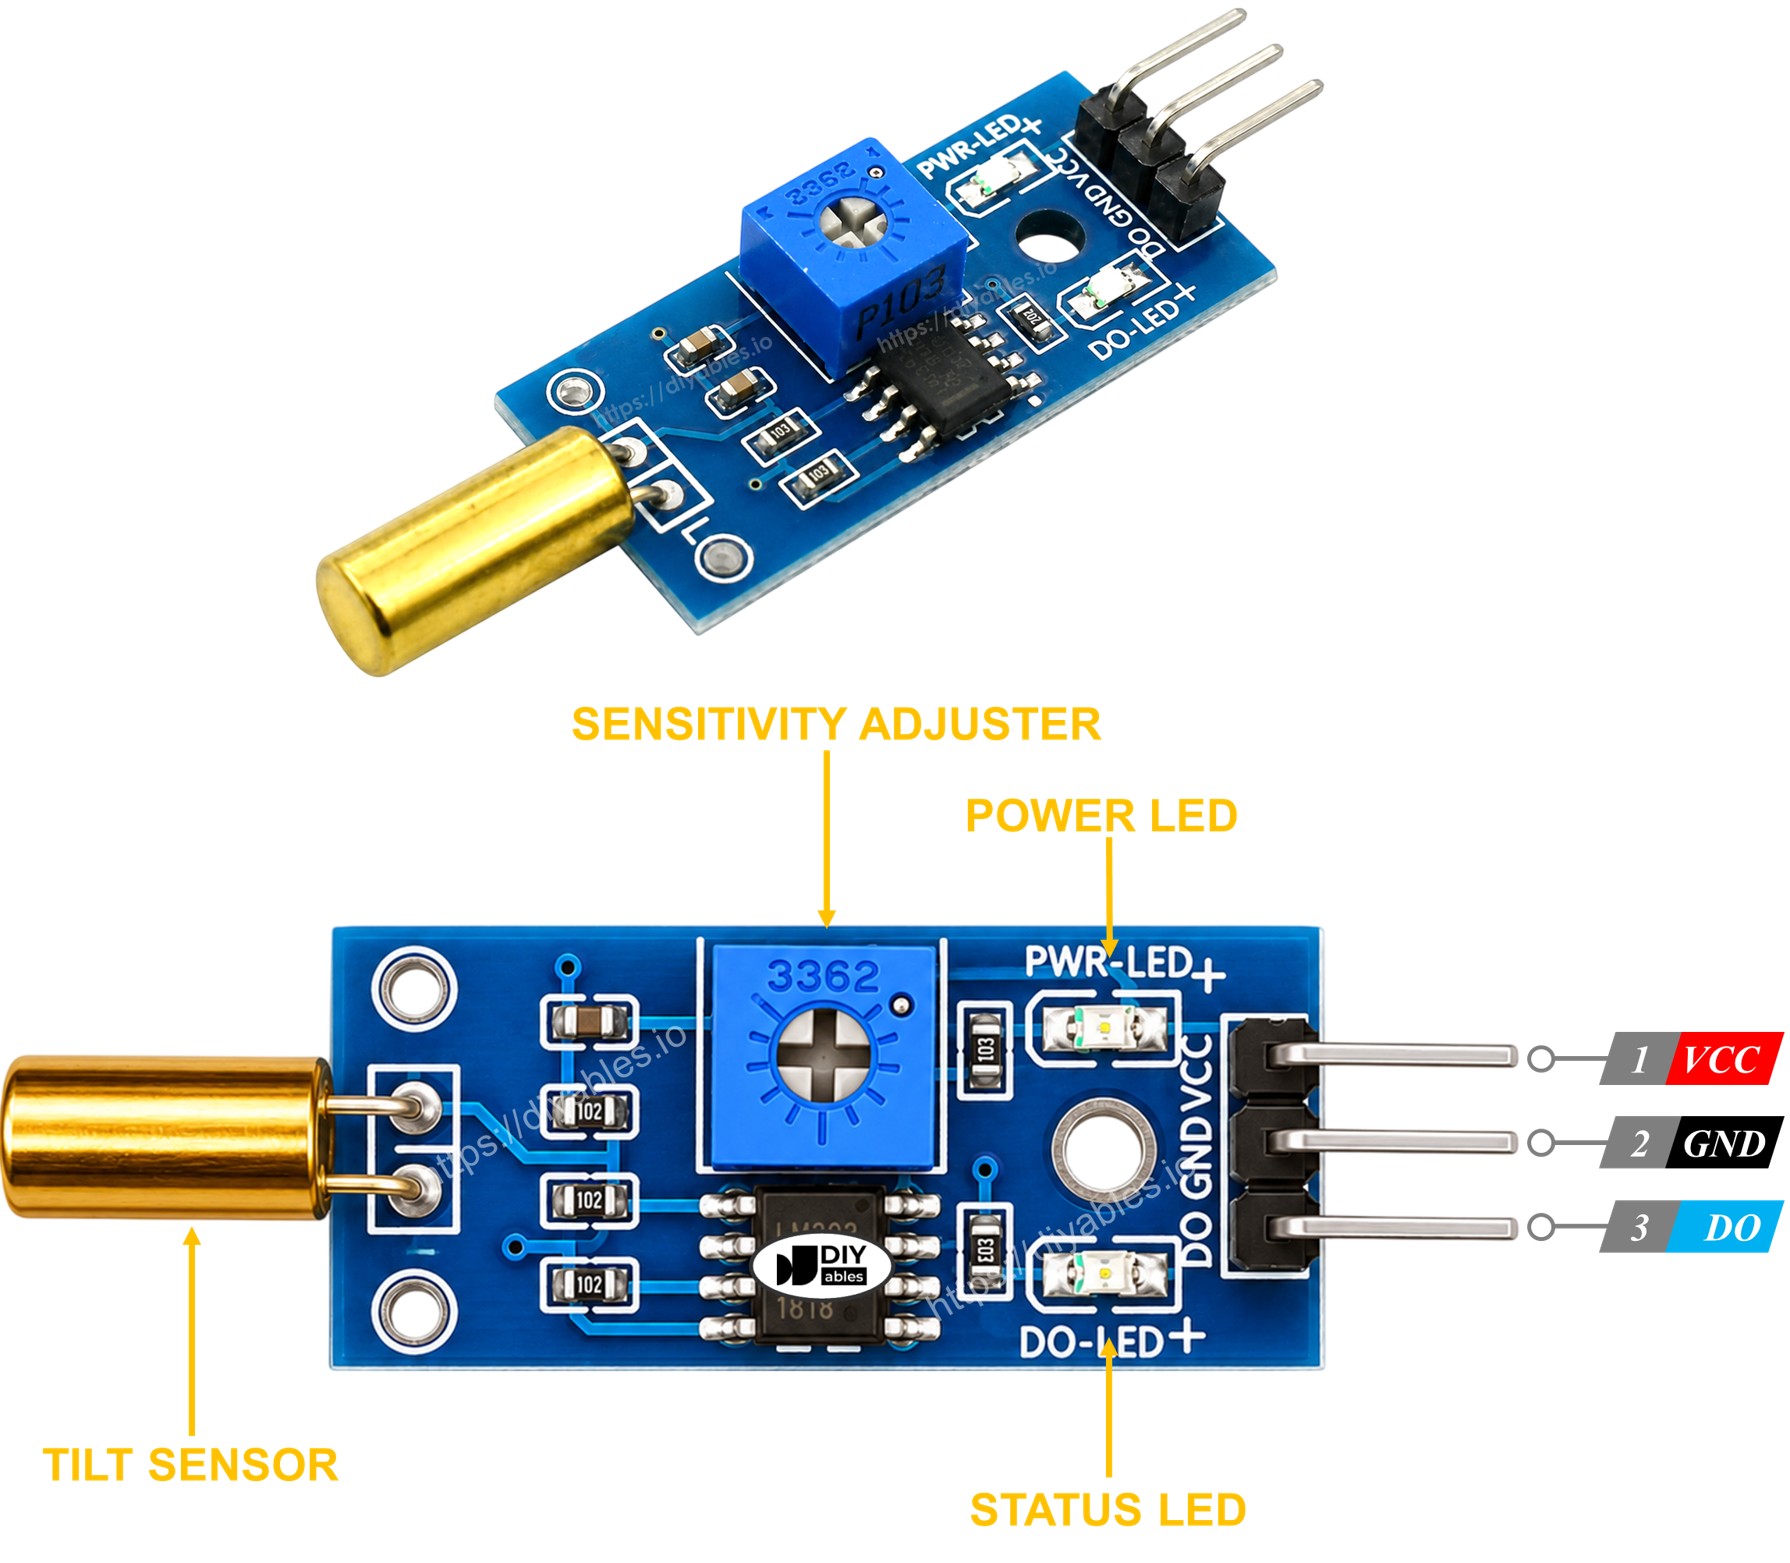
SW520D Tilt Sensor Pinout
image source: diyables.io

Wiring Diagram

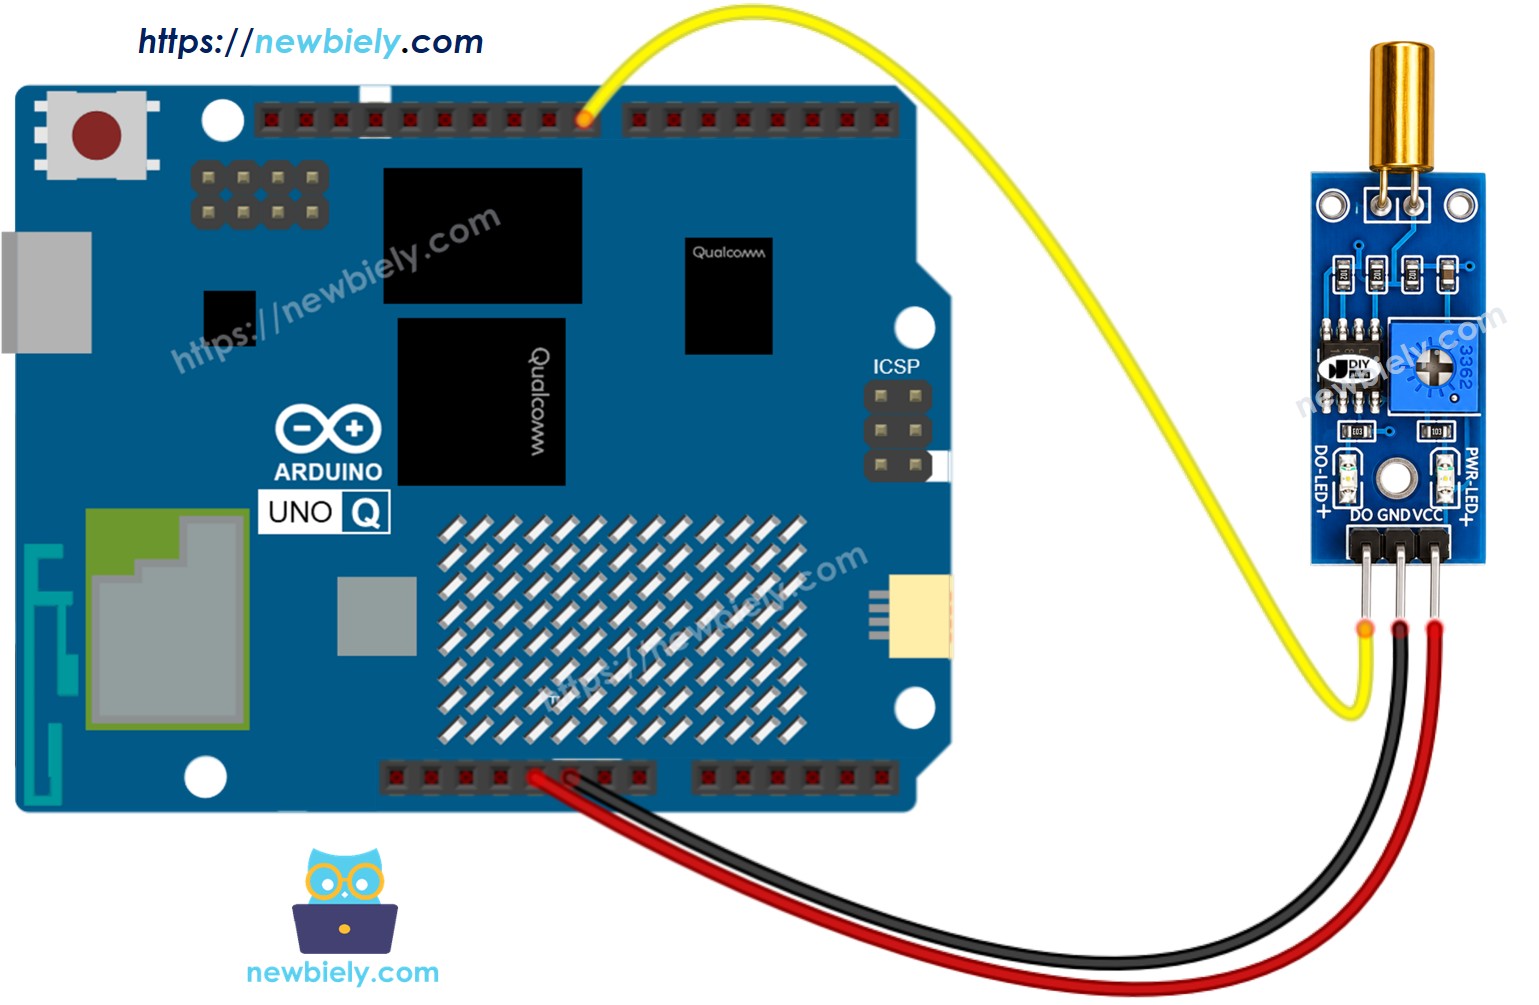
The wiring diagram between Arduino UNO Q SW520D Tilt Sensor

This image is created using Fritzing. Click to enlarge image

SW520D Tilt Sensor Pin Arduino UNO Q MCU
GND GND
VCC 5V
DO D8

How To Program For SW520D Tilt Sensor

  • Configure the sensor pin as a digital input:
pinMode(SENSOR_PIN, INPUT);
  • Read the digital output:
int tilt_state = digitalRead(SENSOR_PIN);
  • Detect tilt events by comparing to the previous state:
if (prev_state == HIGH && tilt_state == LOW) Serial.println("Tilt DETECTED"); else if (prev_state == LOW && tilt_state == HIGH) Serial.println("Tilt gone — upright again"); prev_state = tilt_state;

Arduino UNO Q Code

The Arduino UNO Q has two processors working together:

  • The STM32 MCU reads the SW520D tilt sensor's digital output and detects tilt events
  • The Qualcomm MPU runs Debian Linux with Wi-Fi — in this section, only the MCU is programmed. A later section shows how both processors work together via Bridge.
/* * This Arduino UNO Q code was developed by newbiely.com * * This Arduino UNO Q code is made available for public use without any restriction * * For comprehensive instructions and wiring diagrams, please visit: * https://newbiely.com/tutorials/arduino-uno-q/arduino-uno-q-sw520d-tilt-sensor */ // SW520D tilt sensor DO pin: HIGH = upright, LOW = tilt detected #define SENSOR_PIN 8 // The Arduino UNO Q MCU pin connected to DO of the SW520D tilt sensor int prev_tilt_state = HIGH; int tilt_state; void setup() { Serial.begin(9600); pinMode(SENSOR_PIN, INPUT); Serial.println("Arduino UNO Q SW520D Tilt Sensor ready"); } void loop() { tilt_state = digitalRead(SENSOR_PIN); if (prev_tilt_state == HIGH && tilt_state == LOW) Serial.println("Tilt DETECTED"); else if (prev_tilt_state == LOW && tilt_state == HIGH) Serial.println("Tilt gone — upright again"); prev_tilt_state = tilt_state; }

Detailed Instructions

First time with Arduino UNO Q? Follow the Getting Started with Arduino UNO Q tutorial before proceeding.

  • Connect: Wire the SW520D tilt sensor to the Arduino UNO Q MCU as shown in the wiring diagram.
  • Open Arduino App Lab: Launch Arduino App Lab and wait until it detects your Arduino UNO Q.
  • Create a new App: Click the Create New App button.
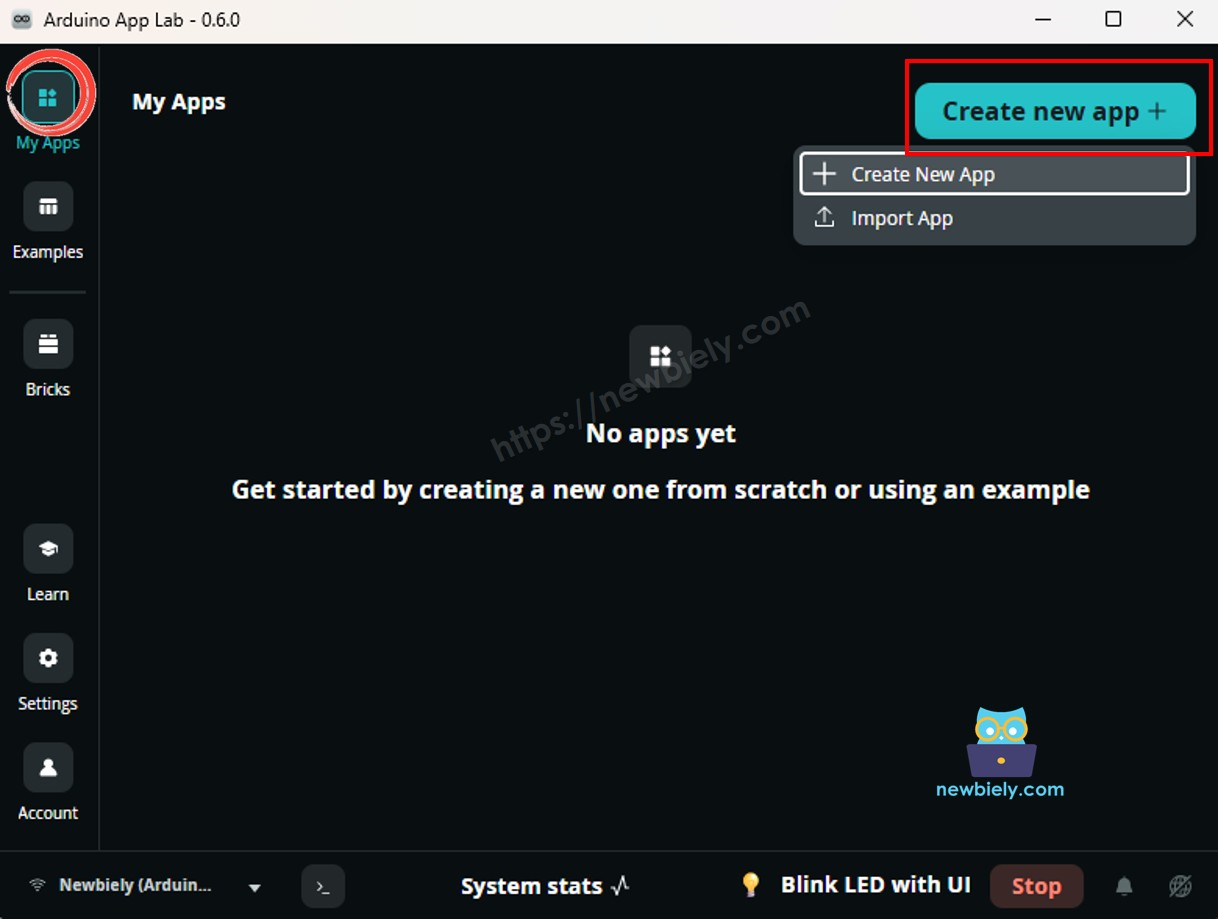
Create New App in Arduino App Lab on Arduino UNO Q
  • Give the App a name, for example: SW520DTiltSensor
  • Click Create to confirm.
Arduino App Lab App folders and files on Arduino UNO Q
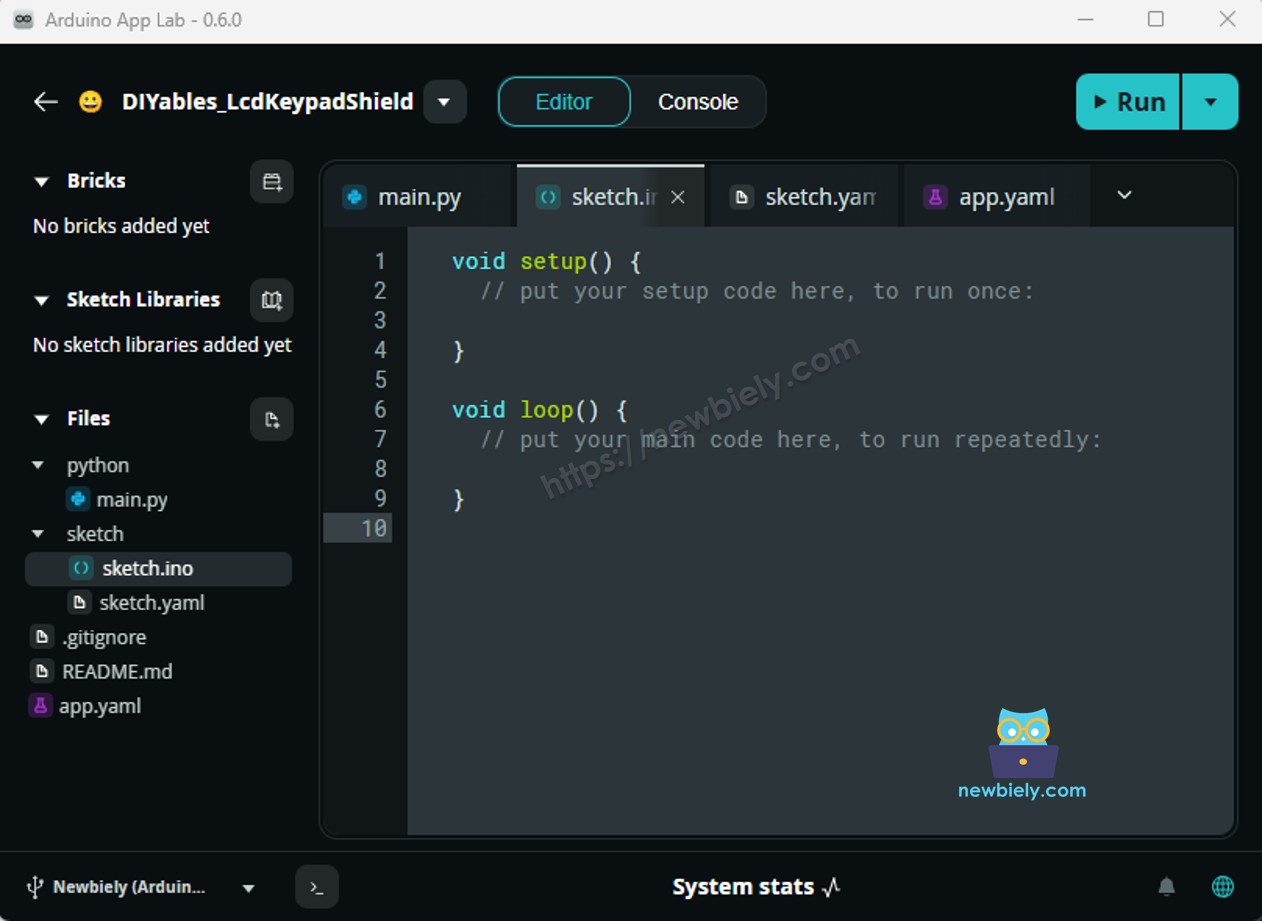
  • Paste the sketch: Copy the MCU code above and paste it into sketch/sketch.ino.
  • Upload: Click the Run button in Arduino App Lab.
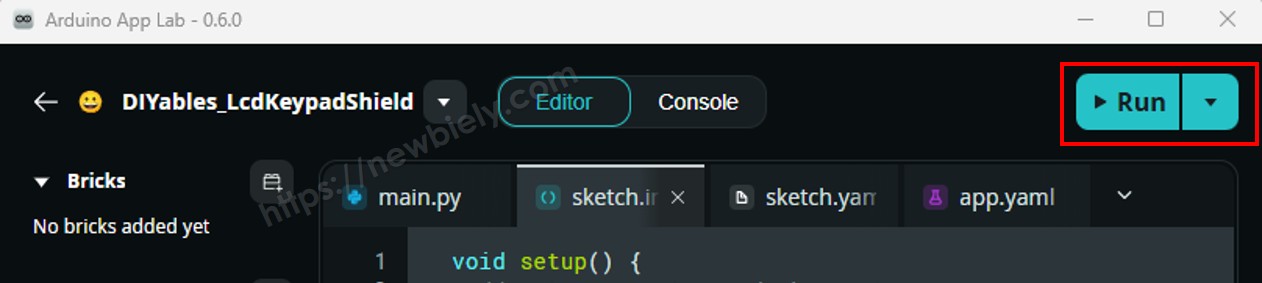
Click Run button in Arduino App Lab on Arduino UNO Q
  • Tilt the sensor back and forth — observe the Serial Monitor output.
  • Make sure the sensor is mounted in the correct upright position for reliable detection.

App Lab Console Output

DIYables_Apps
Stop
sketch.ino
1#include "Arduino_RouterBridge.h"
Serial Monitor
Python
Message (Enter to send a message to "Newbiely" on usb(2820070321))
New Line
9600 baud
[2026-04-29 09:00:01] Arduino UNO Q SW520D Tilt Sensor ready [2026-04-29 09:00:05] Tilt DETECTED [2026-04-29 09:00:05] Tilt gone — upright again [2026-04-29 09:00:08] Tilt DETECTED [2026-04-29 09:00:08] Tilt gone — upright again

Bridge: Linux + MCU

This section shows how to program both processors of the Arduino UNO Q so the Linux side can read tilt state and receive tilt events via Bridge:

  • The SW520D tilt sensor is connected to the MCU — the MCU monitors the digital output continuously and caches the current state
  • The MPU cannot read the sensor pin directly — it calls Bridge functions to get the current state or check for new tilt events
  • The MPU has Wi-Fi — running full Debian Linux, it can send Telegram alerts the moment tilt is detected
  • Arduino_RouterBridge enables RPC communication between the two processors
  • ⚠️ /dev/ttyHS1 (Linux) and Serial1 (MCU) are RESERVED by the router — never open them in user code

In short: MCU detects tilt via DO pin → sets event flag → MPU polls Bridge → MPU sends Telegram alert.

MCU Code (Bridge)

/* * This Arduino UNO Q code was developed by newbiely.com * * This Arduino UNO Q code is made available for public use without any restriction * * For comprehensive instructions and wiring diagrams, please visit: * https://newbiely.com/tutorials/arduino-uno-q/arduino-uno-q-sw520d-tilt-sensor */ #include "Arduino_RouterBridge.h" #define SENSOR_PIN 8 // The Arduino UNO Q MCU pin connected to DO of the SW520D tilt sensor bool cached_tilt = false; // true = tilt present bool tilt_event = false; // true = new tilt detected (falling edge) int prev_state = HIGH; String get_state(String arg) { return cached_tilt ? "tilt" : "upright"; } String get_event(String arg) { if (tilt_event) { tilt_event = false; return "tilt_detected"; } return "none"; } void setup() { Bridge.begin(); Monitor.begin(); pinMode(SENSOR_PIN, INPUT); Bridge.provide("get_state", get_state); Bridge.provide("get_event", get_event); Monitor.println("Arduino UNO Q SW520D Tilt Sensor Bridge ready"); } void loop() { int current = digitalRead(SENSOR_PIN); if (prev_state == HIGH && current == LOW) { // Upright → Tilt cached_tilt = true; tilt_event = true; Monitor.println("Tilt detected!"); } else if (prev_state == LOW && current == HIGH) { // Tilt → Upright cached_tilt = false; Monitor.println("Upright again."); } prev_state = current; }

Python Code (Bridge)

""" This Arduino UNO Q script was developed by newbiely.com This Arduino UNO Q script is made available for public use without any restriction For comprehensive instructions and wiring diagrams, please visit: https://newbiely.com/tutorials/arduino-uno-q/arduino-uno-q-sw520d-tilt-sensor """ from arduino.app_utils import * import time def loop(): state = Bridge.call("get_state") print(f"Tilt state: {state}") time.sleep(0.5) App.run(user_loop=loop)

Detailed Instructions

  • Connect: Wire the SW520D tilt sensor to the Arduino UNO Q as shown in the wiring diagram.
  • Open Arduino App Lab and create a new App named TiltSensorBridge.
  • Paste the MCU sketch into sketch/sketch.ino.
  • Paste the Python code into the Python file.
  • Install the library: Click the Add sketch library button (the open book icon with a + sign) in the left sidebar.
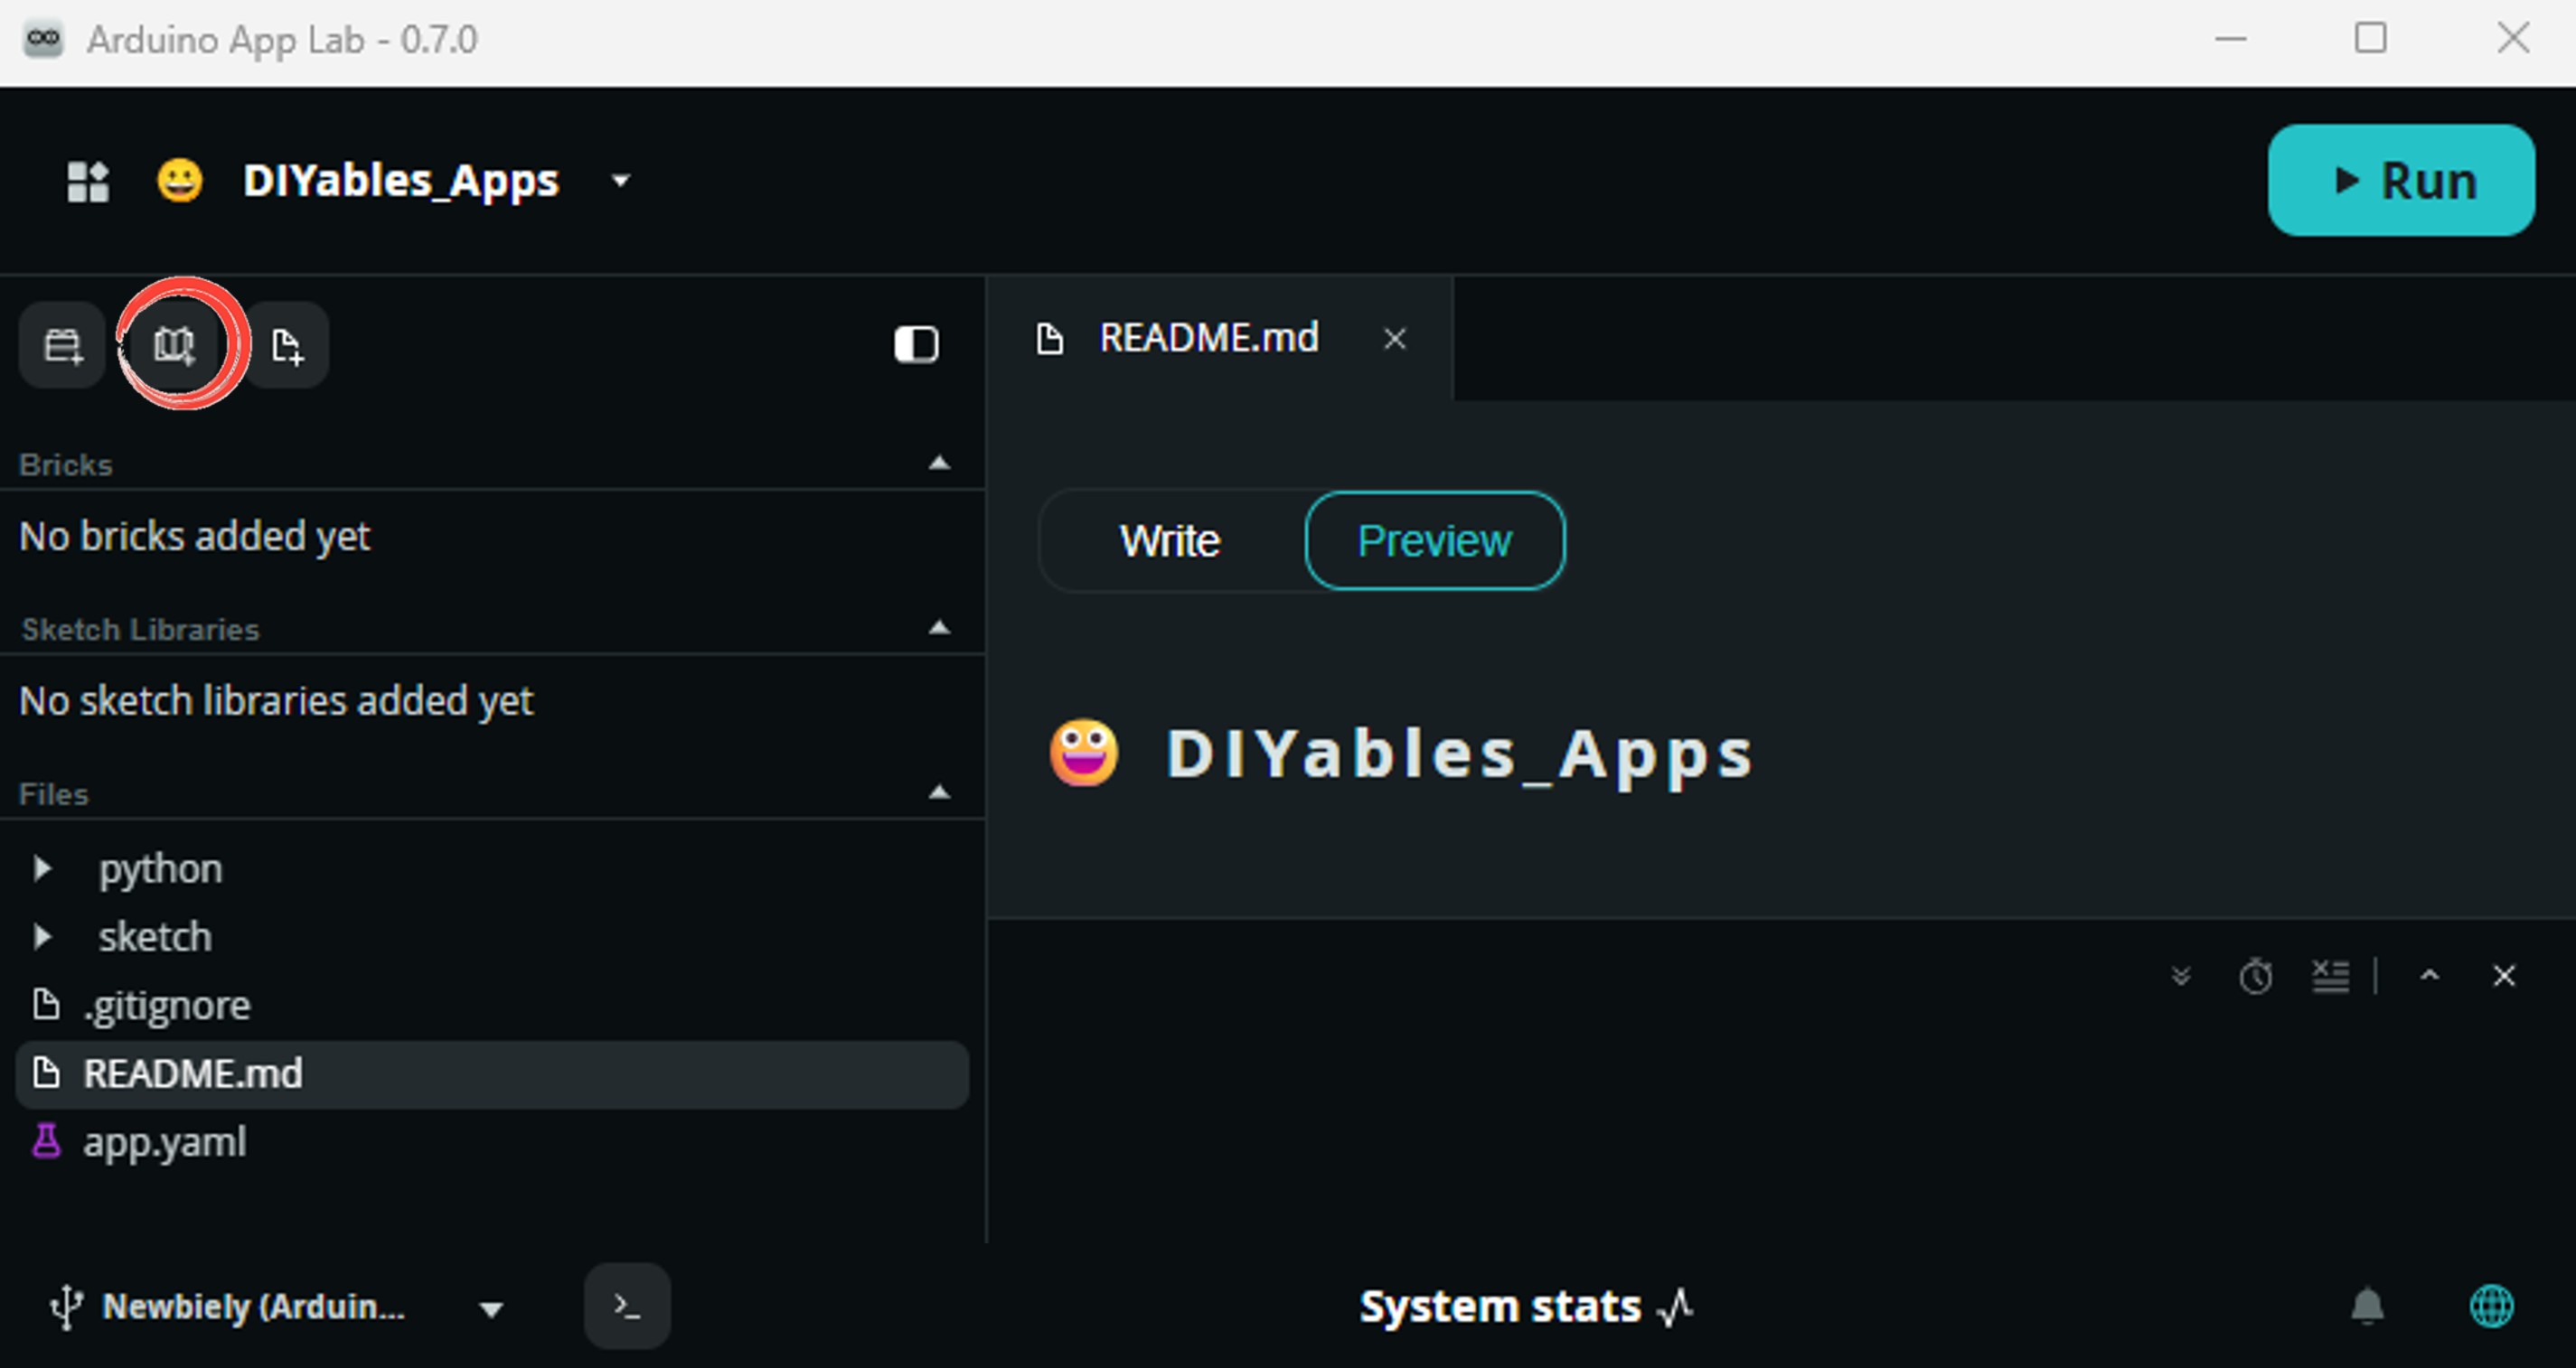
Add sketch library in Arduino App Lab on Arduino UNO Q
  • Search for Arduino_RouterBridge created by Arduino and click the Install button.
My Apps / DIYables Apps
Run
Bricks
No bricks added...
Sketch Libraries
No sketch libra...
Files
python
sketch
.gitignore
README.md
app.yaml
sketch.ino
Add sketch library
Arduino_RouterBridge Arduino

This library provides a simple RPC bridge for Arduino UNO Q boards, allowing communication between the board and other devices using MsgPack serialization.

0.4.1
Install
More Info
  • Upload: Click the Run button.
Click Run button in Arduino App Lab on Arduino UNO Q
  • Tilt the sensor — observe the event appear in both consoles.

App Lab Console Output

DIYables_Apps
Stop
sketch.ino
1#include "Arduino_RouterBridge.h"
Serial Monitor
Python
Message (Enter to send a message to "Newbiely" on usb(2820070321))
New Line
9600 baud
[2026-04-29 09:00:01] Arduino UNO Q SW520D Tilt Sensor Bridge ready [2026-04-29 09:00:05] Tilt detected! [2026-04-29 09:00:05] Upright again.
DIYables_Apps
Stop
sketch.ino
1#include "Arduino_RouterBridge.h"
Serial Monitor
Python
[2026-04-29 09:00:02] Tilt state: upright [2026-04-29 09:00:03] Tilt state: upright [2026-04-29 09:00:05] Tilt state: tilt [2026-04-29 09:00:06] Tilt state: upright

Telegram

Receive instant Telegram alerts when tilt is detected on the Arduino UNO Q SW520D tilt sensor.

MCU sketch: Keep the same MCU sketch from the previous Bridge section.

Python Code (Telegram)

""" This Arduino UNO Q script was developed by newbiely.com This Arduino UNO Q script is made available for public use without any restriction For comprehensive instructions and wiring diagrams, please visit: https://newbiely.com/tutorials/arduino-uno-q/arduino-uno-q-sw520d-tilt-sensor """ from arduino.app_utils import * import requests import time TELEGRAM_BOT_TOKEN = "YOUR_TELEGRAM_BOT_TOKEN" CHAT_ID = "YOUR_CHAT_ID" last_update_id = 0 def get_updates(): global last_update_id url = f"https://api.telegram.org/bot{TELEGRAM_BOT_TOKEN}/getUpdates" params = {"offset": last_update_id + 1, "timeout": 5} try: response = requests.get(url, params=params, timeout=10) data = response.json() if data["ok"]: return data["result"] except Exception as e: print(f"Error getting updates: {e}") return [] def send_message(chat_id, text): url = f"https://api.telegram.org/bot{TELEGRAM_BOT_TOKEN}/sendMessage" payload = {"chat_id": chat_id, "text": text} try: requests.post(url, data=payload, timeout=10) except Exception as e: print(f"Error sending message: {e}") def loop(): # Auto-alert on new tilt detection event = Bridge.call("get_event") if event == "tilt_detected": print("Tilt detected! Sending Telegram alert.") send_message(CHAT_ID, "📐 Tilt detected by Arduino UNO Q!") # Handle Telegram commands updates = get_updates() for update in updates: last_update_id = update["update_id"] if "message" not in update: continue message = update["message"] chat_id = message["chat"]["id"] text = message.get("text", "").strip() print(f"Received: {text}") if text == "/start": send_message(chat_id, "Arduino UNO Q SW520D Tilt Sensor Bot\n" "/state - Current tilt state (tilt / upright)\n" "Automatic alert when tilt is detected") elif text == "/state": result = Bridge.call("get_state") send_message(chat_id, f"Tilt state: {result}") App.run(user_loop=loop)

Detailed Instructions

  • Replace YOUR_TELEGRAM_BOT_TOKEN with your actual bot token from BotFather.
  • Replace YOUR_CHAT_ID with your Telegram chat ID.
  • Paste this Python code into your App's Python file (keep the same MCU sketch).
  • Click the Run button — tilt the sensor to trigger a Telegram alert.

App Lab Console Output

DIYables_Apps
Stop
sketch.ino
1#include "Arduino_RouterBridge.h"
Serial Monitor
Python
[2026-04-29 09:10:00] Waiting for Telegram messages... [2026-04-29 09:10:05] Tilt detected! Sending Telegram alert. [2026-04-29 09:10:10] Received: /state
Telegram
Telegram 12:45
Welcome to Telegram!
ArduinoBot 10:19
Chatting with Arduino...
telegram-botfather
BotFather Yesterday
Your bot has been created.

ArduinoBot

bot
Today
📐 Tilt detected by Arduino UNO Q!
10:15 AM
/state
10:16 AM ✓✓
Tilt state: upright
10:17 AM
/state
10:18 AM ✓✓
Tilt state: tilt
10:19 AM

OpenClaw

You can adapt the OpenClaw to this tutorial by refering the instruction on Arduino Uno Q - OpenClaw Tutorial

Project Ideas

You can build many useful projects with the SW520D tilt sensor and Arduino UNO Q:

  • Anti-Tamper Alert: Attach the sensor to an enclosure — if it is tilted or moved, the MPU sends an immediate Telegram alert with a timestamp so you know when tampering occurred
  • Tilt-Activated Switch: Use the tilt sensor with a relay via Bridge — Python detects the tilt event and toggles a light or fan on or off based on orientation
  • Equipment Monitor: Mount the sensor on machinery or furniture — the MPU logs each tilt event to a CSV file on Linux and sends a Telegram report at the end of the day
  • Smart Safe Alert: Combine the tilt sensor with a door sensor — Telegram alerts when either the safe door opens or the safe itself is moved
  • RC Tilt Controller: Use two SW520D sensors mounted on different axes — the MPU reads both states via Bridge and sends orientation commands to control a remote device over Wi-Fi

Learn More

※ OUR MESSAGES

  • As freelancers, We are AVAILABLE for HIRE. See how to outsource your project to us
  • Please feel free to share the link of this tutorial. However, Please do not use our content on any other websites. We invested a lot of effort and time to create the content, please respect our work!