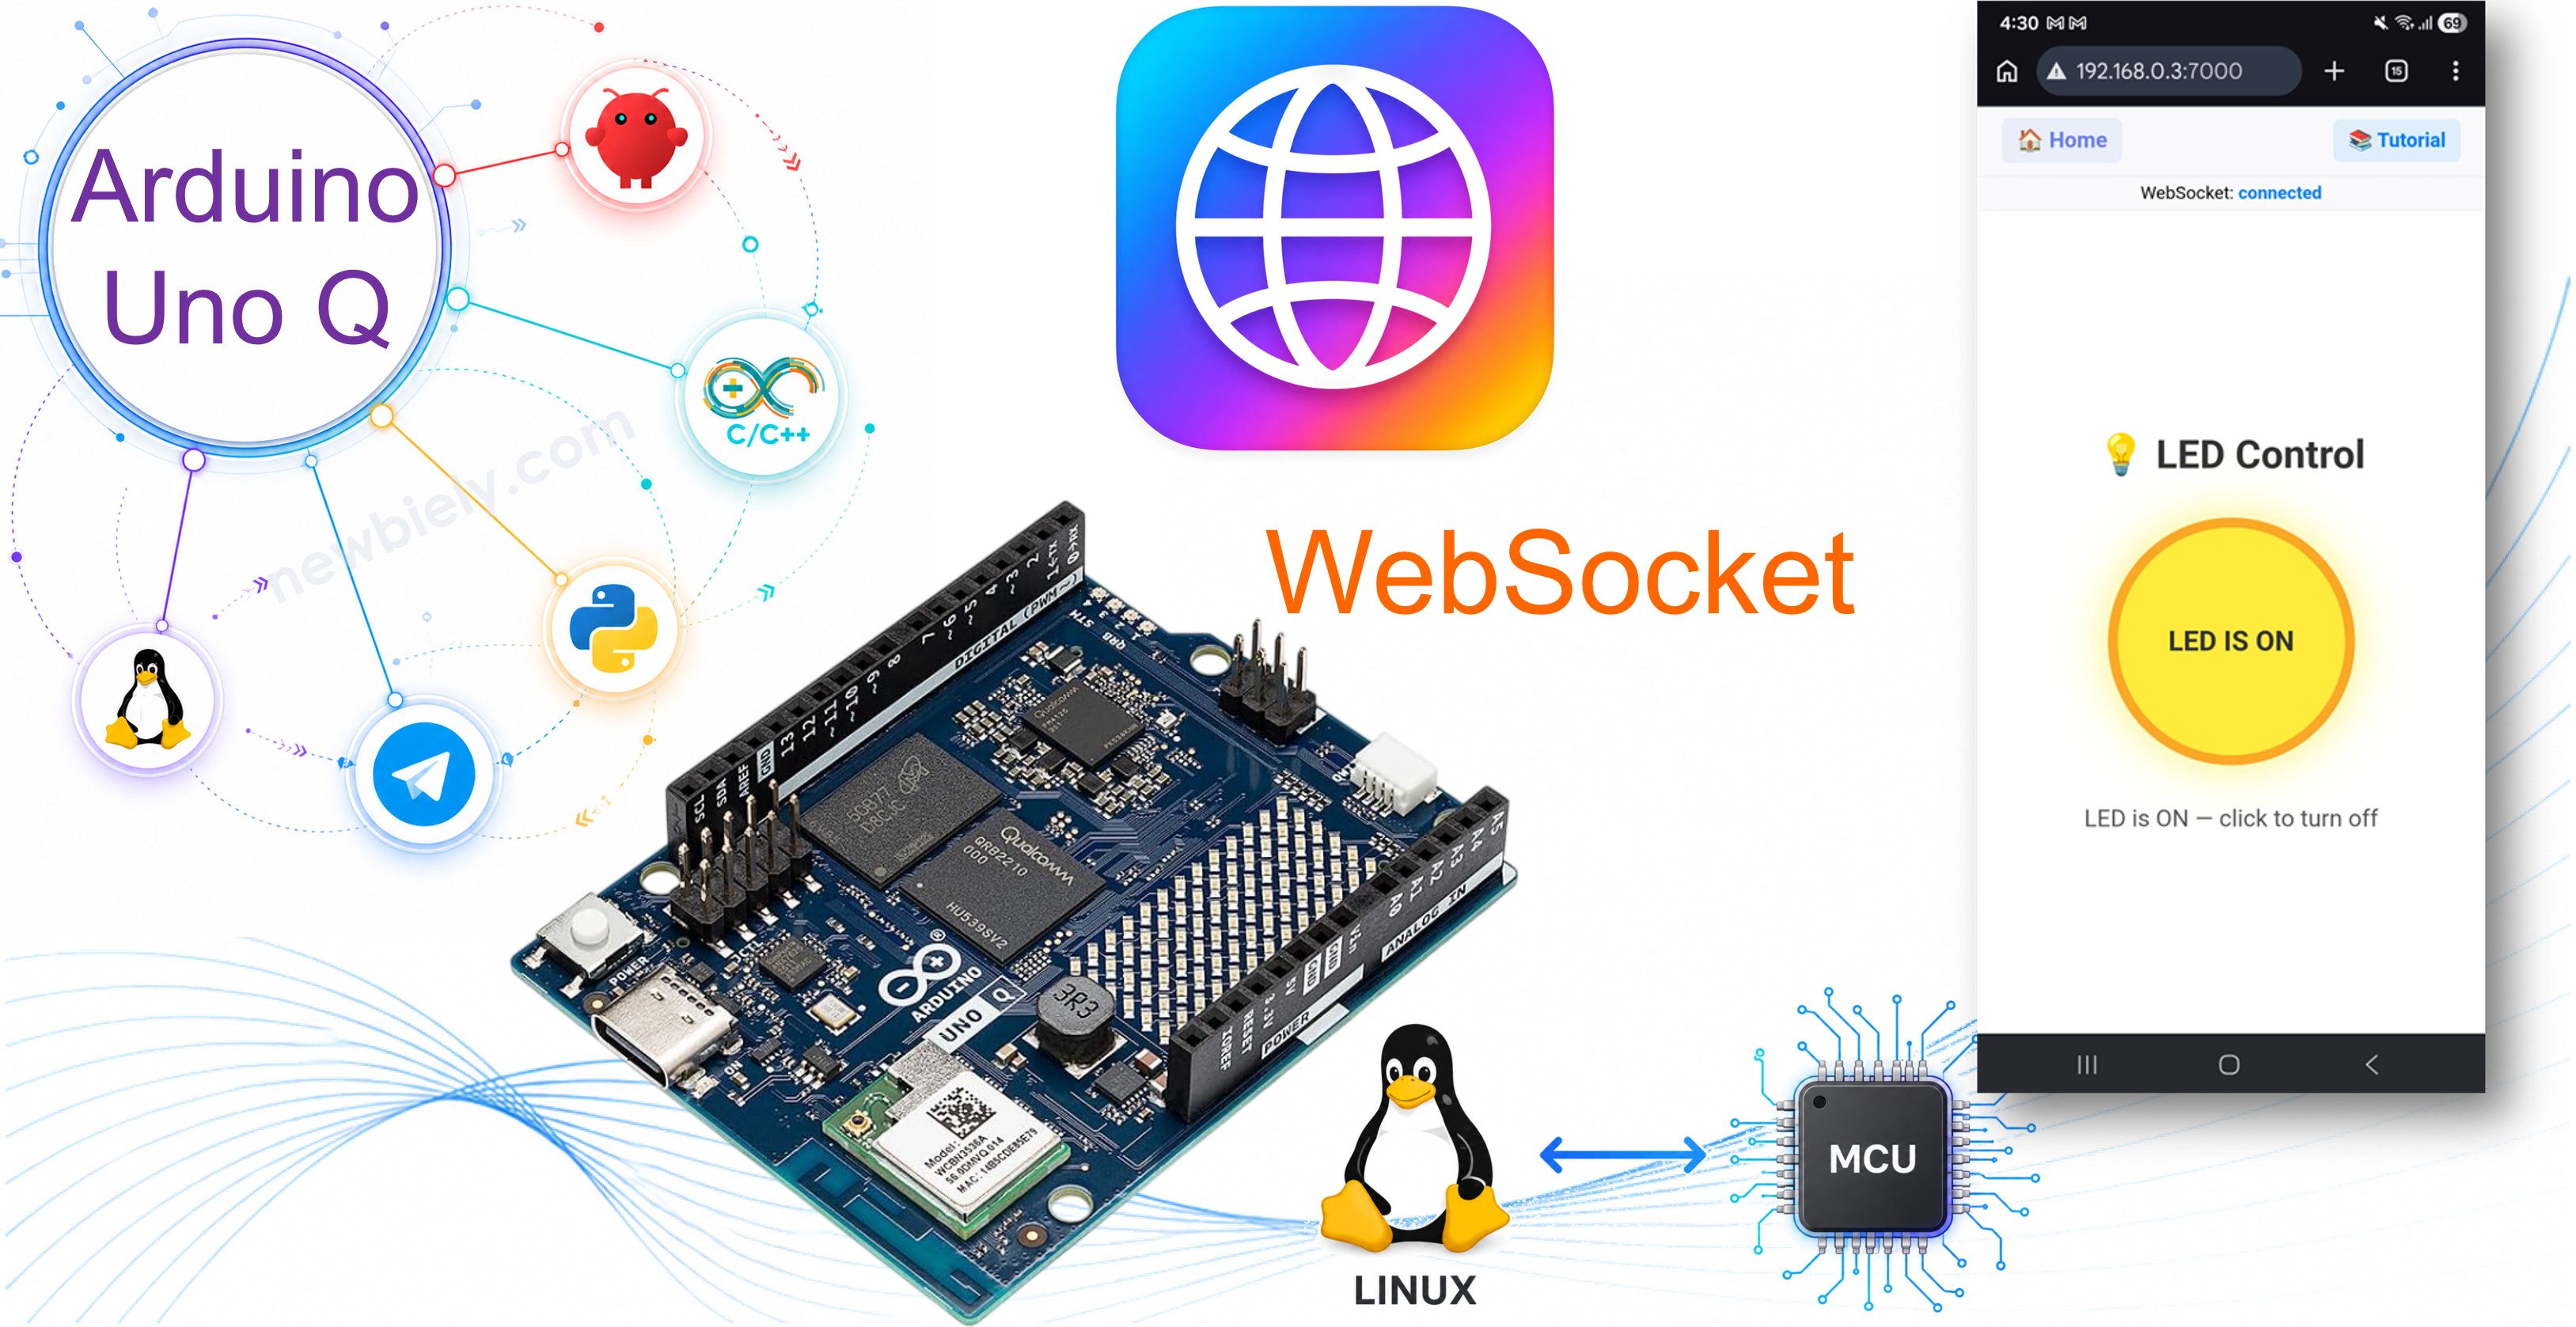
Arduino UNO Q - WebSocket
The Arduino UNO Q supports WebSocket out of the box through the WebUI Brick — no extra library to install, no separate server process to start. The WebUI Brick provides a Socket.IO WebSocket server on the same port 7000 as the HTTP file server. Python handles incoming events with ui.on_message() and pushes data back to one client or all clients with ui.send_message(). On the browser side, the Socket.IO client connects automatically and uses socket.emit() to send events and socket.on() to receive them.
This tutorial teaches the WebSocket pattern on Arduino UNO Q using a simple LED control example: clicking a button in the browser toggles the built-in LED on the board and instantly updates the status for every connected browser — no page refresh, no polling.
In this tutorial, you will learn:
- How the WebUI Brick provides a built-in Socket.IO WebSocket server alongside the HTTP file server on port 7000
- How to use ui.on_message(event, handler) in Python to handle incoming WebSocket events from the browser
- How to use ui.send_message(event, data) to broadcast to all connected clients
- How to use ui.send_message(event, data, client) to reply to a single client only
- How to call MCU functions from Python using Bridge.call()
- How to load the Socket.IO client in the browser and use socket.emit() and socket.on()
Hardware Preparation
Or you can buy the following kits:
| 1 | × | DIYables Sensor Kit (18 sensors/displays) |
Additionally, some of these links are for products from our own brand, DIYables .
No external components are needed — this tutorial uses the built-in LED on the Arduino UNO Q.
Overview of WebSocket on Arduino UNO Q
- WebUI Brick Socket.IO server: The WebUI Brick starts both an HTTP file server and a Socket.IO WebSocket server on port 7000. You do not need to install Flask, the websockets library, or any other package — the Brick handles everything automatically. The Socket.IO client script is served at /socket.io/socket.io.js so the HTML page loads it directly from the board.
- Python event handlers: Register a handler for an incoming browser event with ui.on_message("event_name", handler). The handler receives two arguments: client (the sender) and data (the JSON payload). To reply only to the sender, call ui.send_message("event_name", payload, client). To broadcast to all connected clients, omit the third argument: ui.send_message("event_name", payload).
- Browser Socket.IO client: Include /socket.io/socket.io.js in the HTML page, then open a connection with const socket = io("http://" + window.location.host). Send an event with socket.emit("event_name", {}) and listen for server events with socket.on("event_name", function(data) { ... }).
- MCU calls from Python: Use Bridge.call("function_name", argument) in Python to call a function registered in the MCU sketch with Bridge.provide("function_name", handler). This is how Python controls hardware from a WebSocket event.
Arduino UNO Q Code
The Arduino UNO Q has two processors working together:
- The STM32 MCU exposes a set_led function via Bridge that turns the built-in LED on or off.
- The Qualcomm MPU runs a Python app that listens for WebSocket events from the browser, calls Bridge to control the LED, and broadcasts the new LED state back to all connected clients.
MCU Code
Python Code
HTML (assets/index.html)
Place this file in the assets/ folder of your App. It loads the Socket.IO client from the WebUI Brick (/socket.io/socket.io.js) and shows a button that toggles the built-in LED:
Detailed Instructions
- Connect to Wi-Fi: Make sure the Arduino UNO Q is connected to your Wi-Fi network. Use the network icon in Arduino App Lab to connect first.
- Open Arduino App Lab: Launch Arduino App Lab and wait until it detects your Arduino UNO Q.
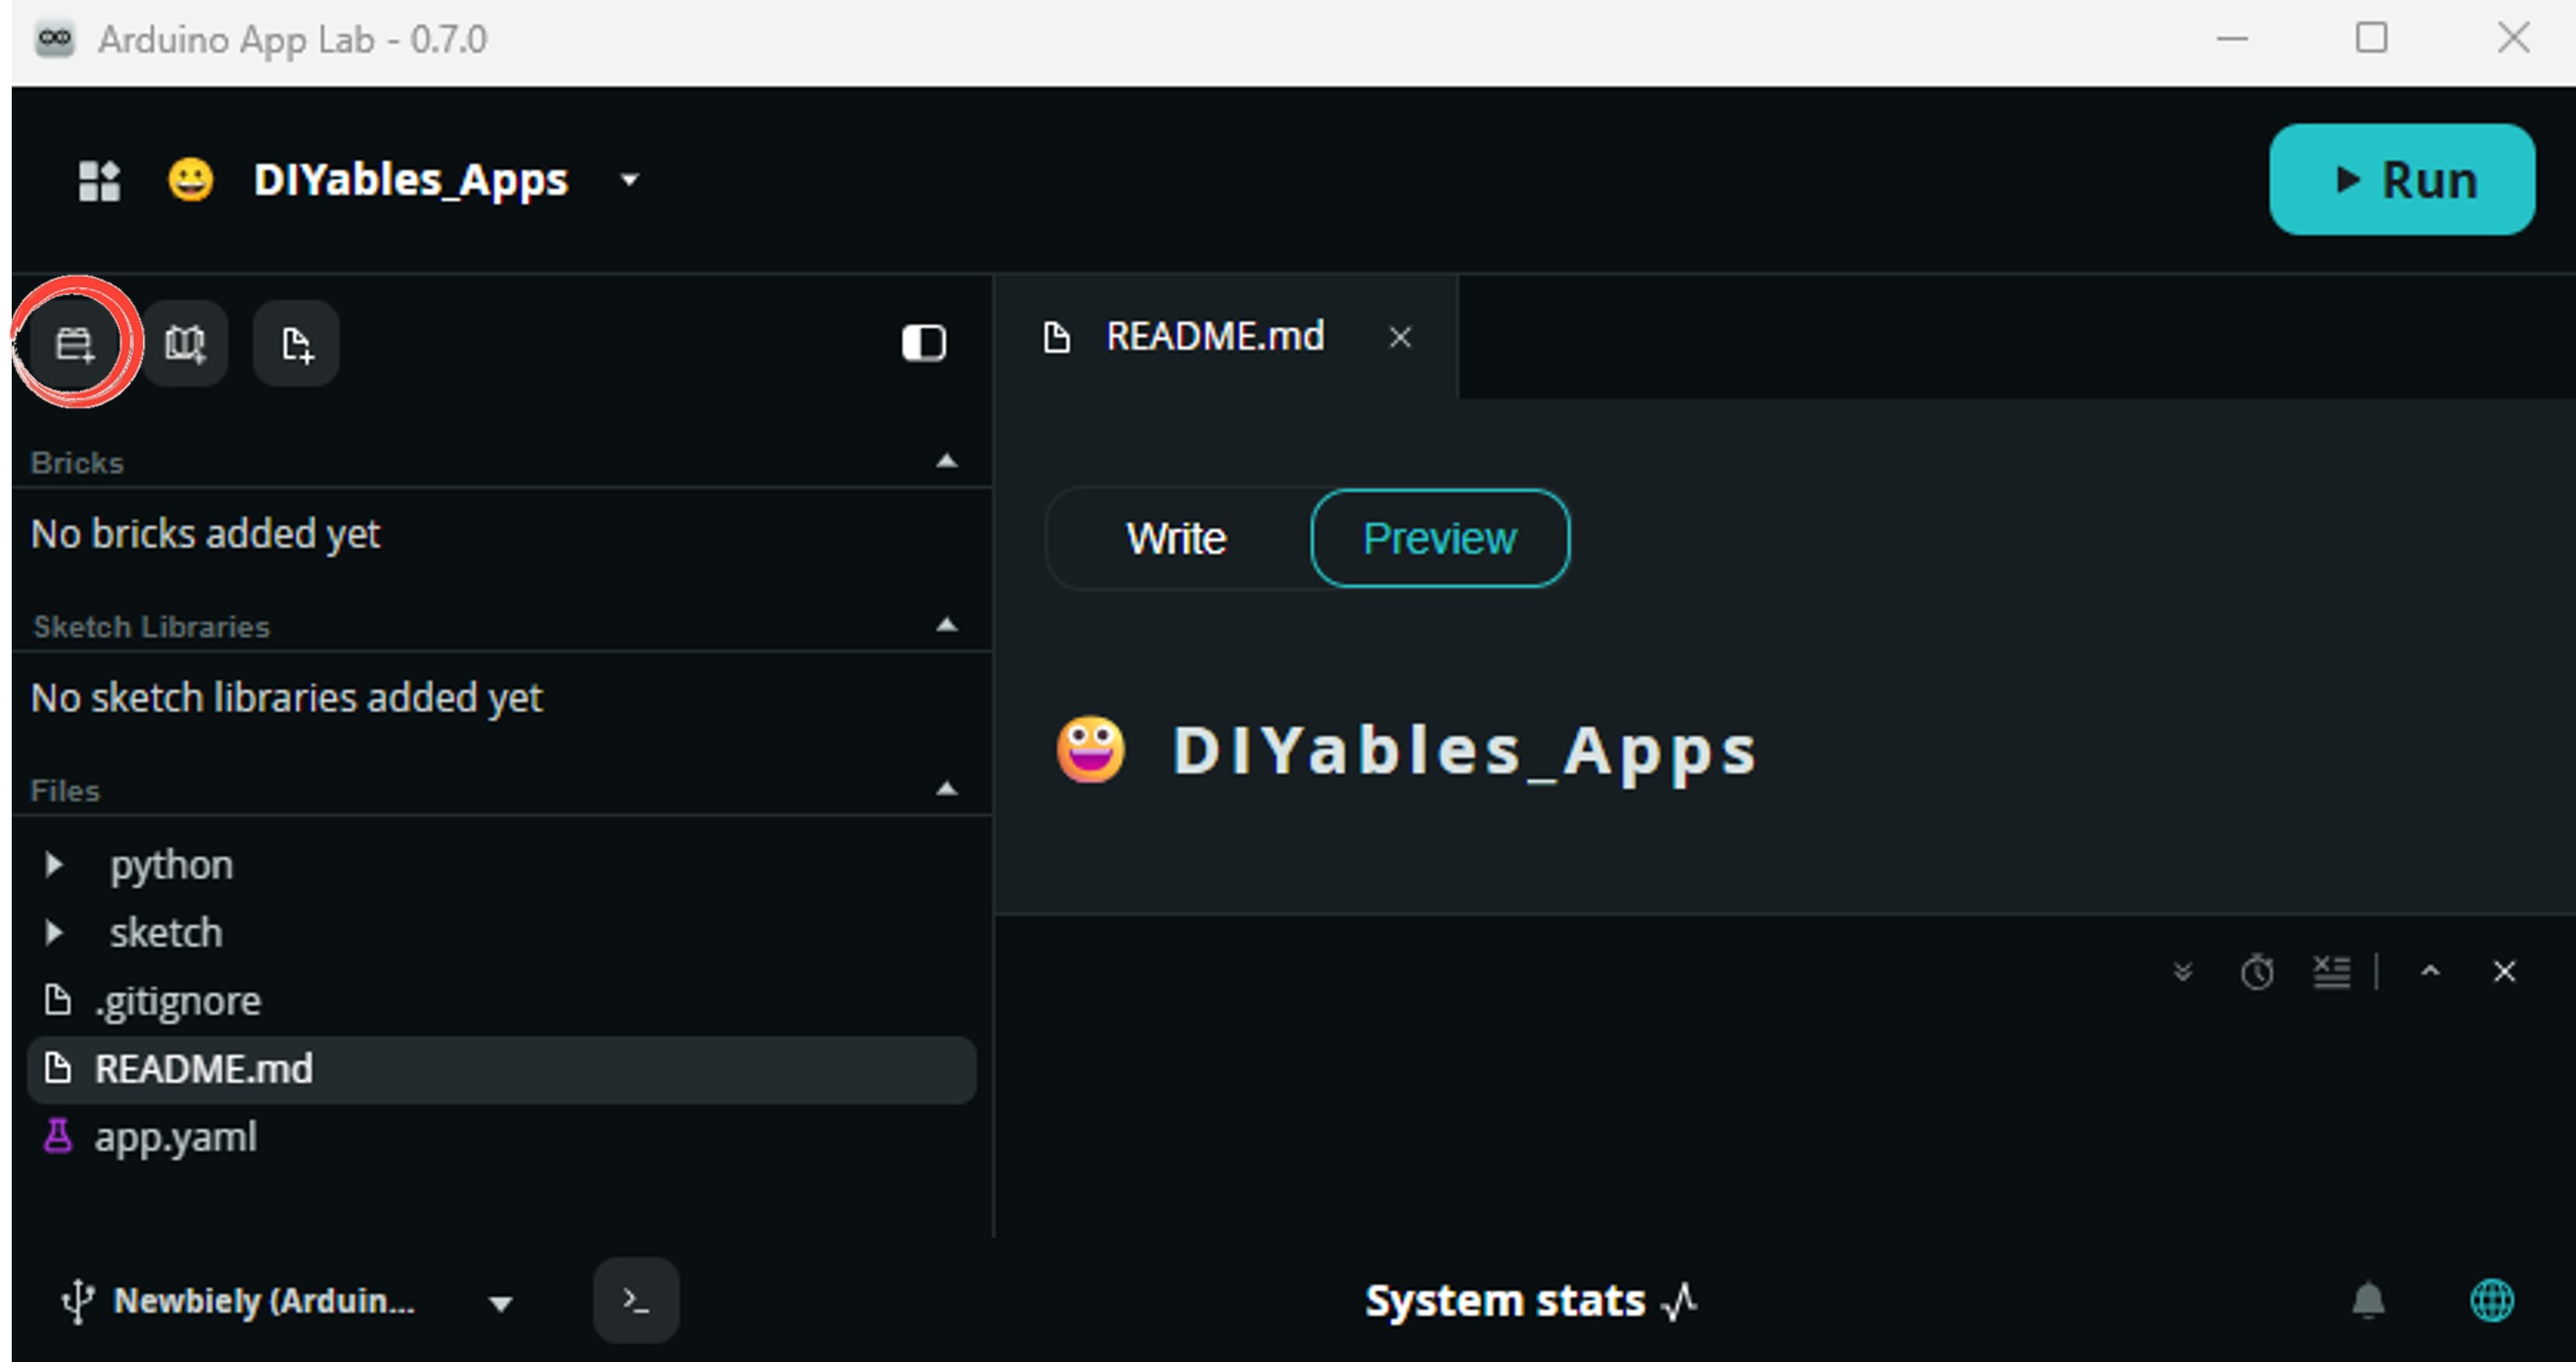
- Create a new App: Click the Create New App button.

- Give the App a name, for example: WebSocketLED
- Click Create to confirm.

- Paste the MCU sketch: Copy the MCU code above and paste it into sketch/sketch.ino.
- Paste the Python code: Open python/main.py. Select all existing content and delete it, then paste the Python code above.
- Add the HTML file: In the assets/ folder, open (or create) index.html and paste the HTML code above.
- Add the Socket.IO client: In the assets/ folder, create a libs/ subfolder. Download socket.io.min.js and save it as assets/libs/socket.io.min.js.
- Install the library: Click the Add sketch library button (the open book icon with a + sign) in the left sidebar.

- Search for Arduino_RouterBridge created by Arduino and click the Install button.
- Add the WebUI Brick: Click the Add Brick button in the Editor sidebar to open the Bricks catalog.
Find and select WebUI - HTML from the list, then follow any configuration prompts.
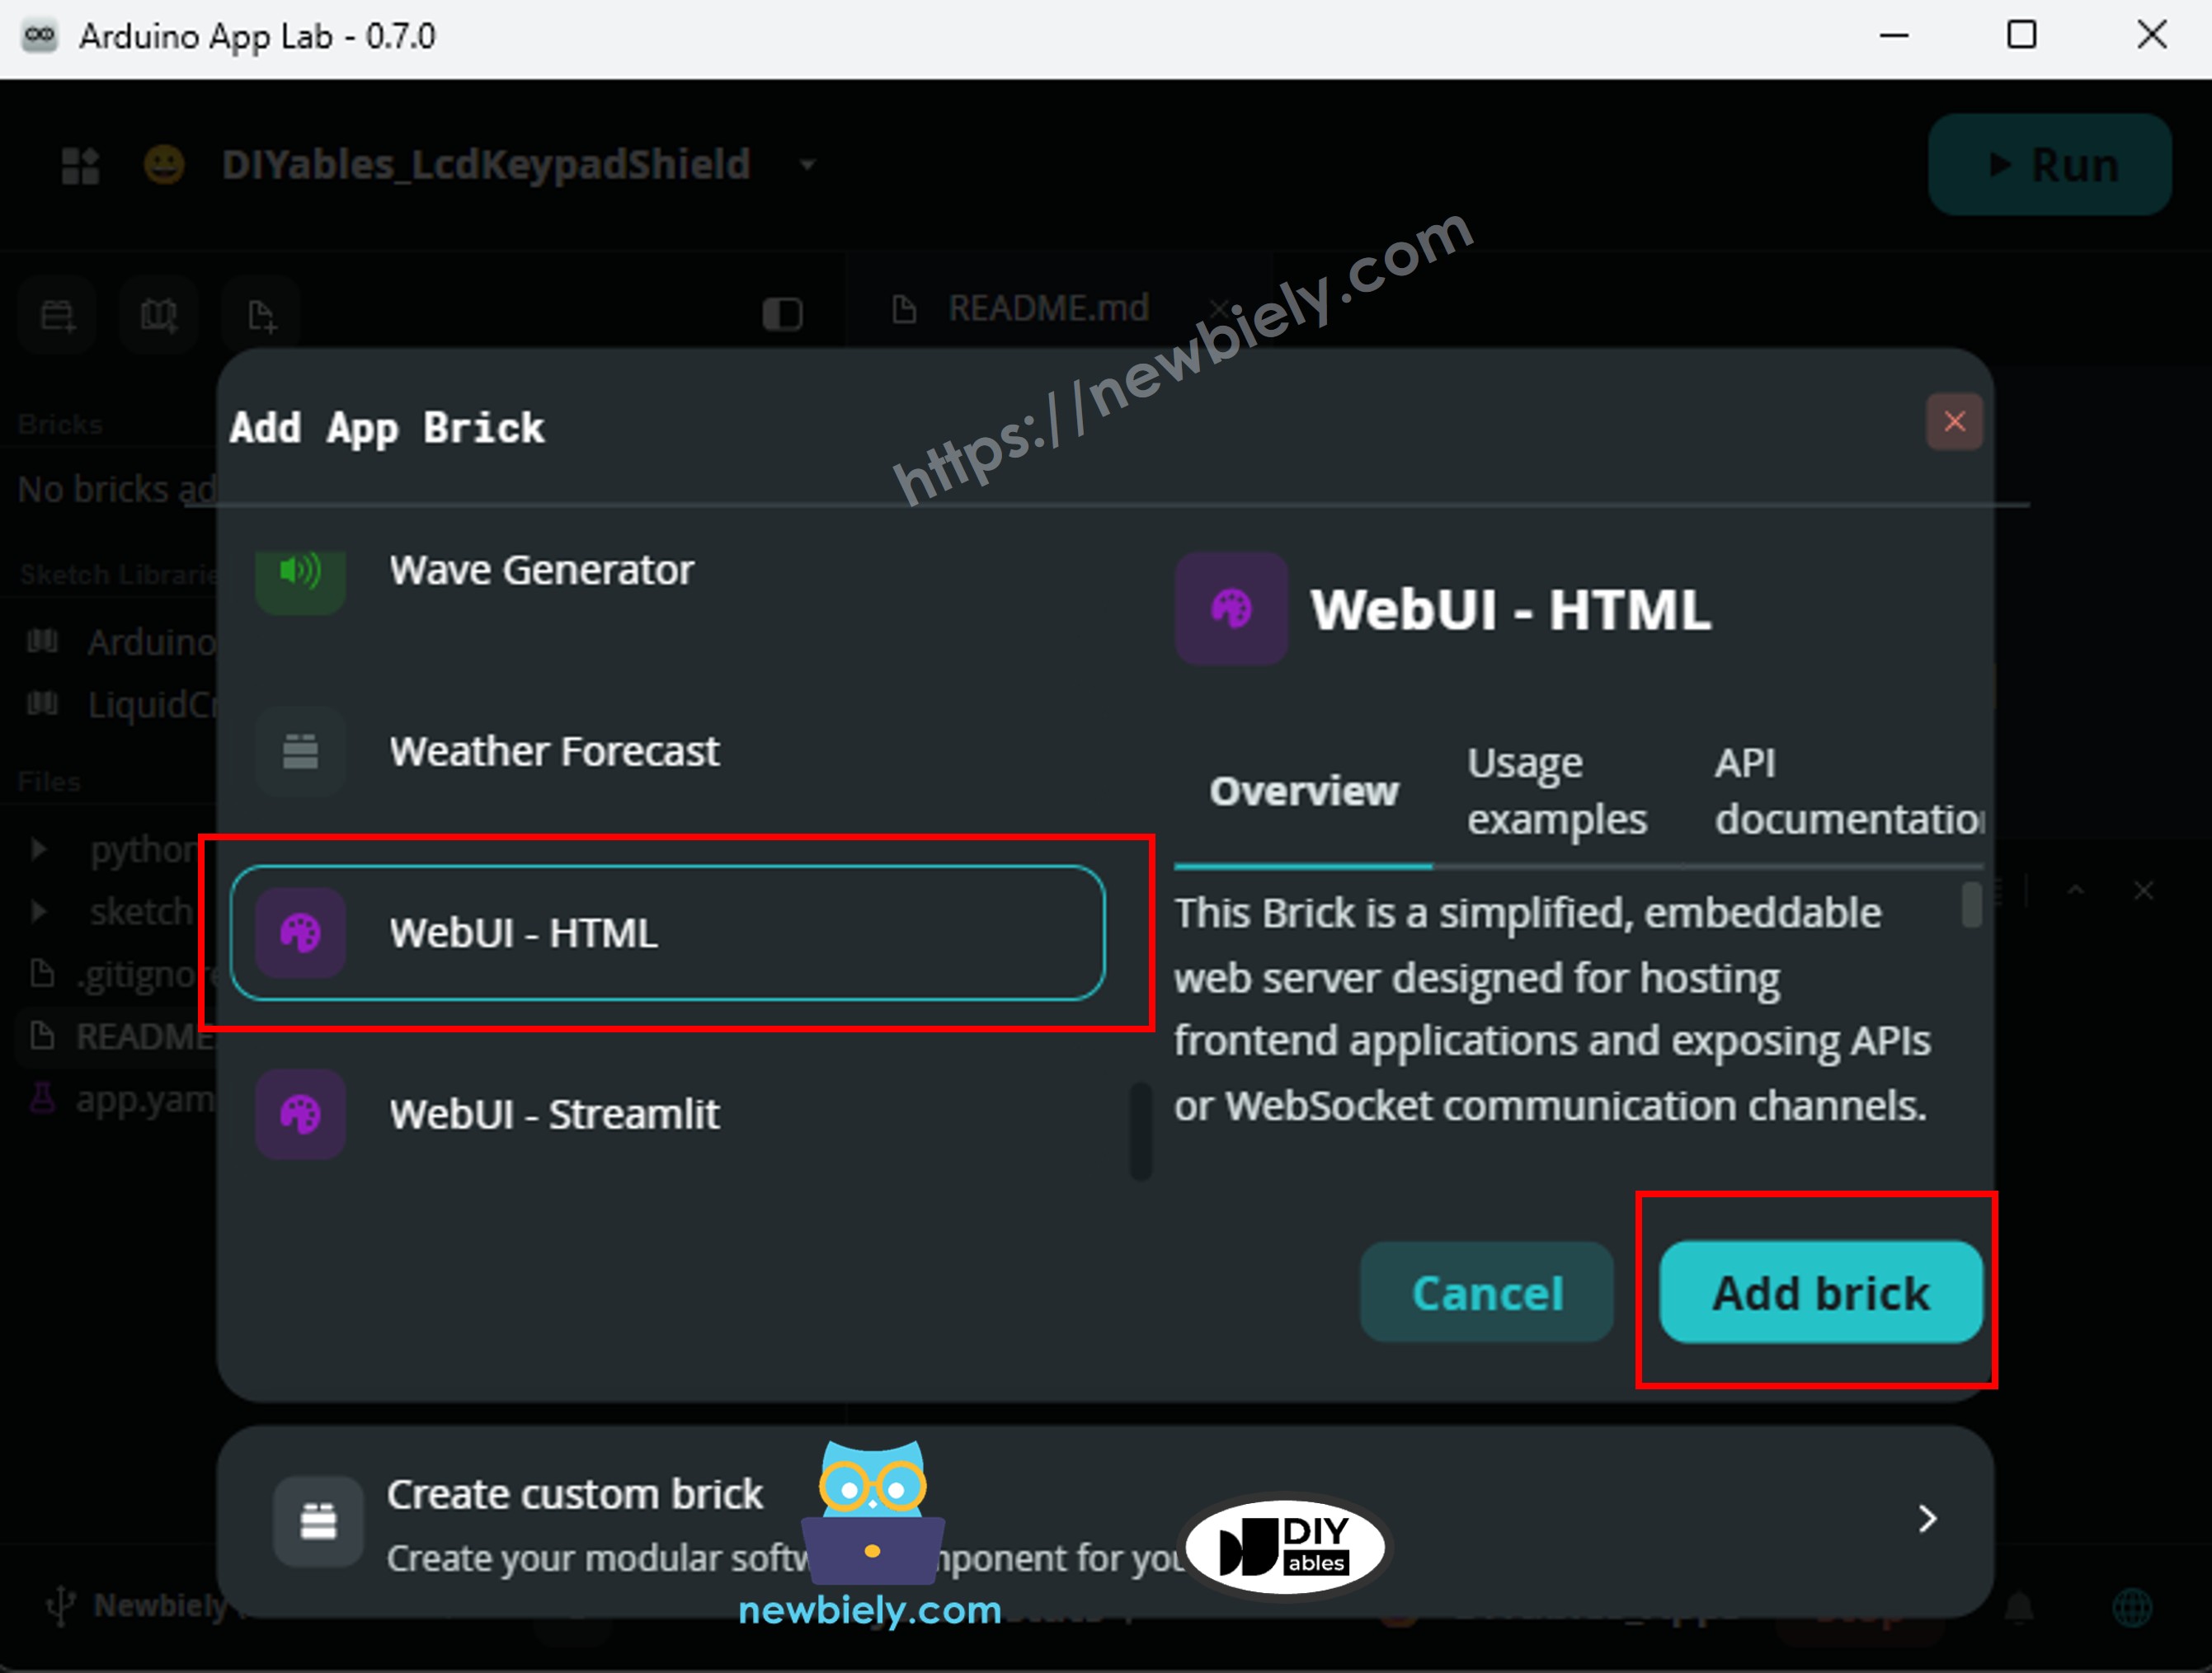
Arduino App Lab automatically adds the Brick entry to your app.yaml file — do not edit that entry manually.
※ NOTE THAT:
The WebUI - HTML Brick handles both HTTP file serving and Socket.IO WebSocket in a single service on port 7000. The Socket.IO client script must be placed in assets/libs/socket.io.min.js — the brick does not serve a compatible version automatically. See About Bricks for details.
- Upload: Click the Run button in Arduino App Lab to compile and upload.

- Open a web browser on your phone or PC and navigate to:
Replace <ARDUINO_UNO_Q_IP> with the IP address shown in the Python console.
App Lab Console Output
Browser Output
Open http://<ARDUINO_UNO_Q_IP>:7000/ in any browser on the same network. You will see the LED control page:
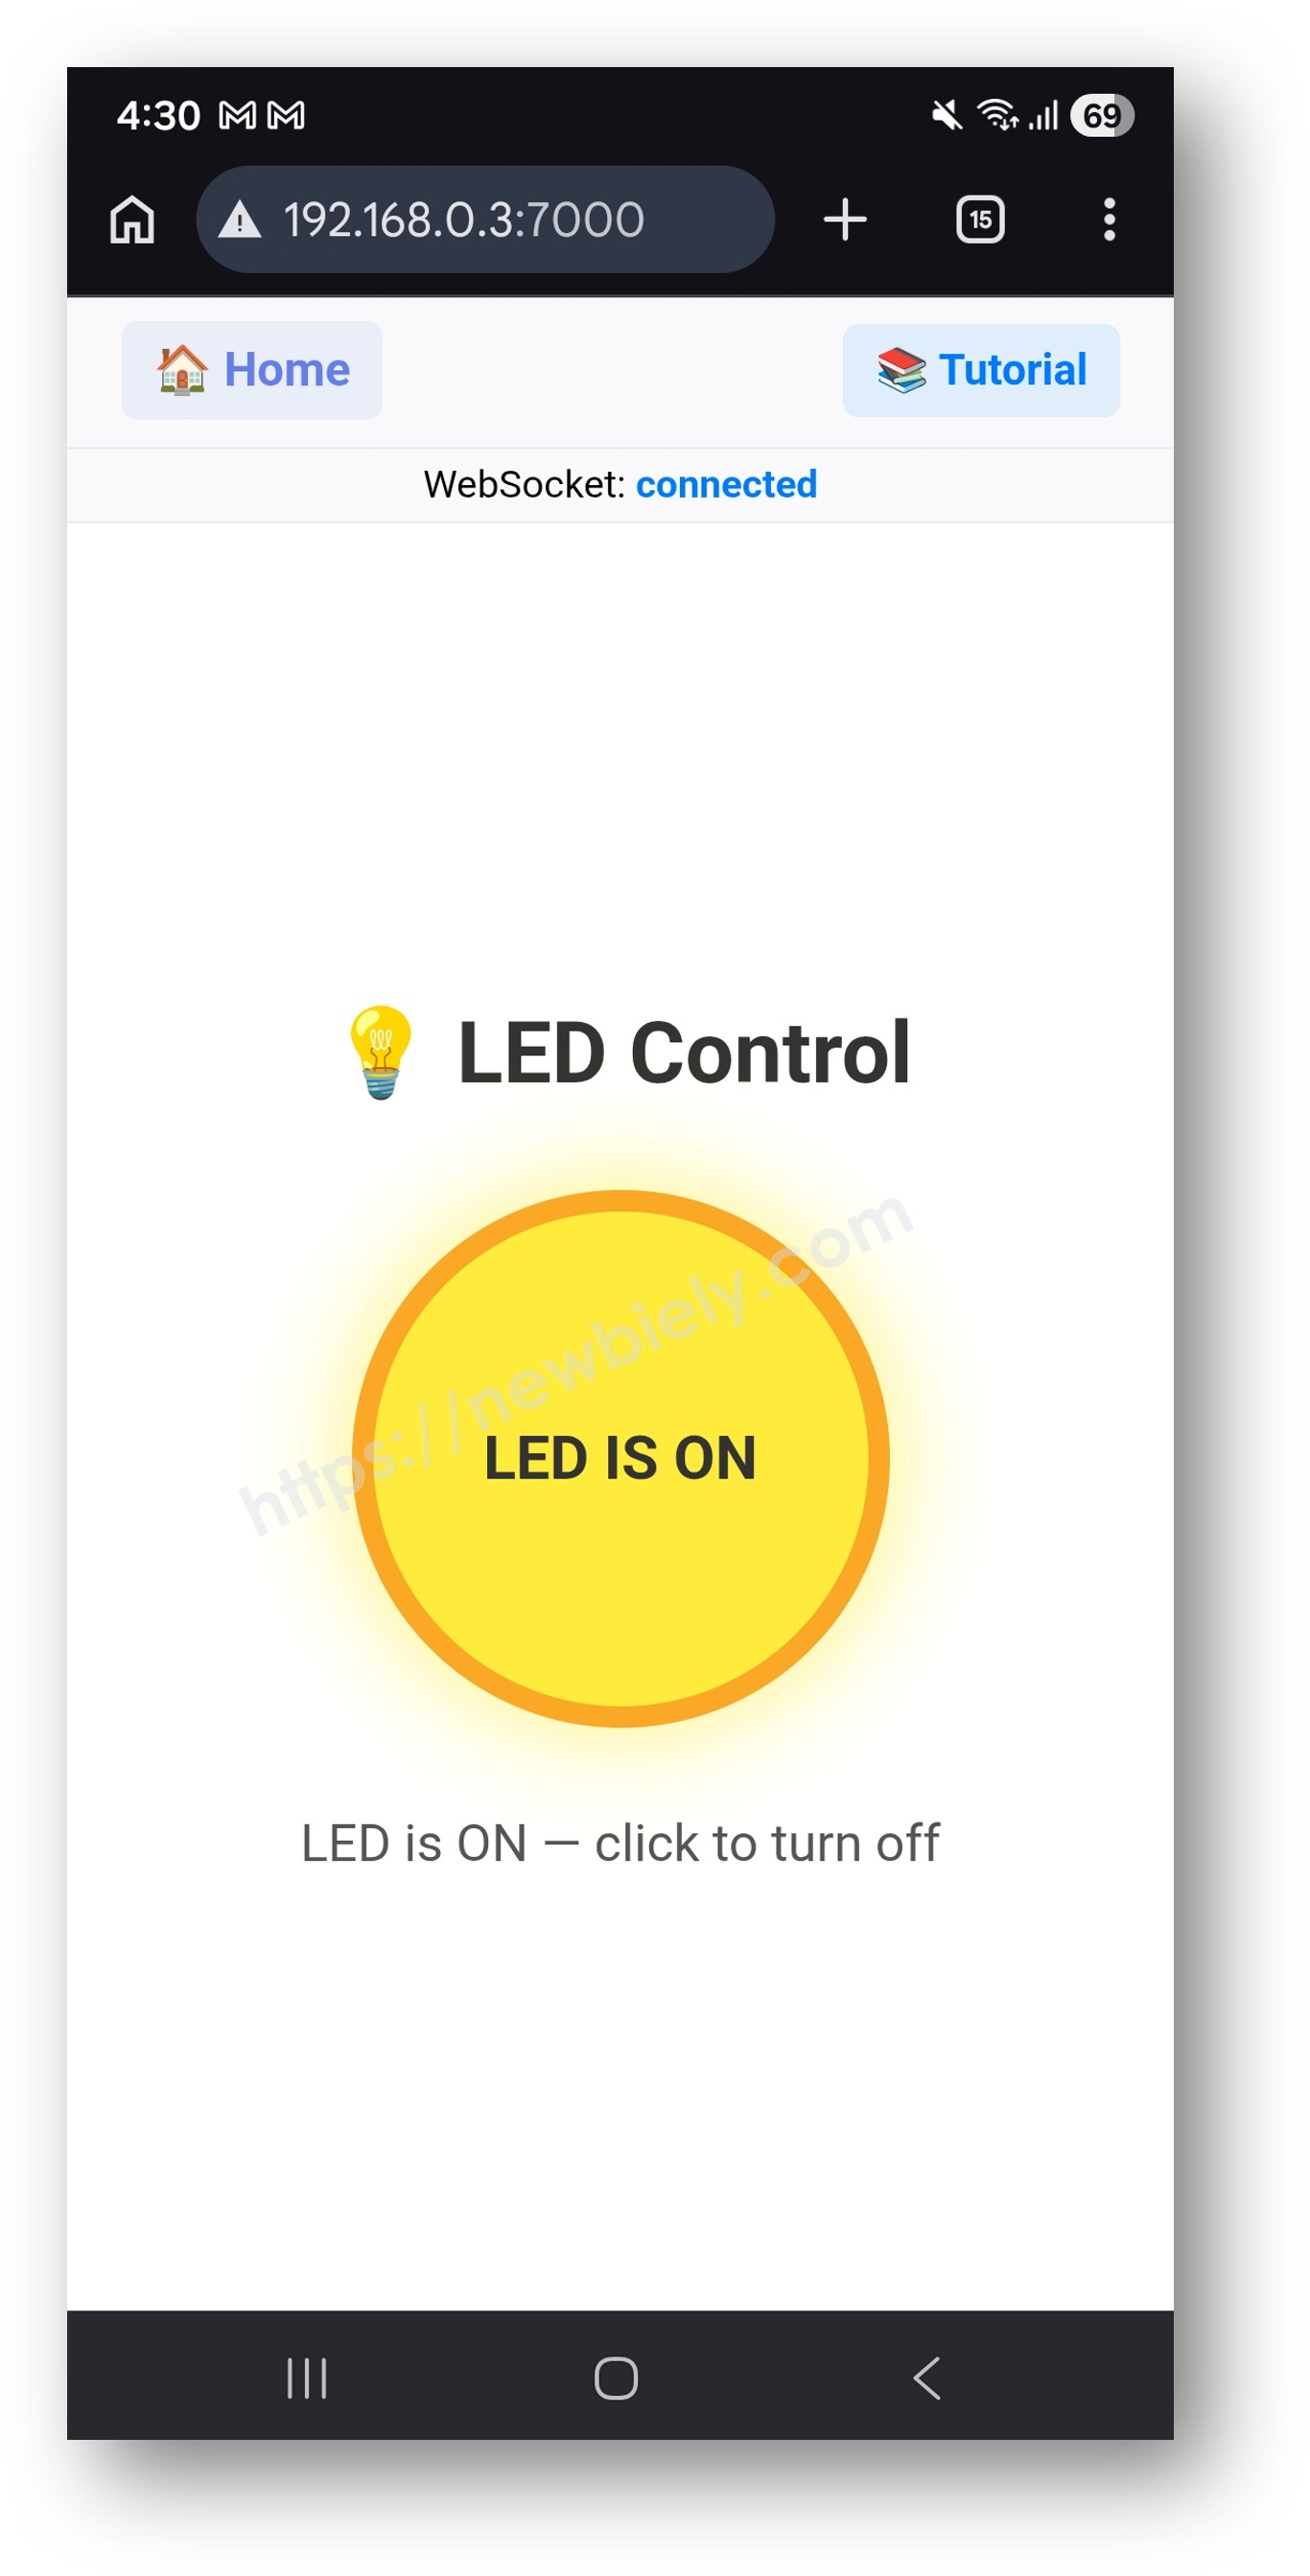
The page displays:
- A circular LED button — grey when off, yellow with a glow when on
- A status text line that updates instantly when the LED state changes
- A connection status bar at the top — shows "connected" in blue, "disconnected" in red
- The button is disabled until the WebSocket connection is established
WebSocket Events
The browser and the Python server communicate using the following Socket.IO events:
| Direction | Event | Payload | |
|---|---|---|---|
| Browser → Server | get_state | {} | |
| Server → Browser | led_status | {"on" | false} |
| Browser → Server | toggle_led | {} | |
| Server → Browser | led_status | {"on" | true/false} |
Project Ideas
Once you understand the WebSocket pattern on Arduino UNO Q, you can apply it to many real-time projects:
- Temperature Monitor: Run a DS18B20 sensor on the MCU and expose get_temperature via Bridge — a Python thread reads it every second and pushes temperature_update to all browsers, which display a live canvas thermometer
- Multi-Device Control: Open the page in two different browsers — both receive every led_status broadcast instantly because ui.send_message() without a client argument reaches all connected clients at once
- Sensor Dashboard: Expose multiple Bridge functions (temperature, humidity, light level) and push a single sensor_update event every second with all values — the page updates each gauge simultaneously
- Bidirectional Messaging: Add a text input to the page — socket.emit("chat", {text: "hello"}) on the browser side, ui.send_message("chat", {"text": "hello"}) broadcasts it to all other tabs in real time
- Alert System: In the Python push loop, check a sensor value against a threshold — if it crosses the limit, emit an alert event with a message; the browser listens and shows a red warning banner without reloading
Challenge Yourself
Ready to go deeper with WebSocket on Arduino UNO Q? Try these challenges:
- Easy: Add a second button to the page that sends a blink event — in Python, on_message("blink", ...) calls Bridge three times with alternating states and a time.sleep(0.5) between each call, making the LED blink without blocking the WebSocket server.
- Medium: Add a slider to the HTML that emits a set_brightness event with a value from 0 to 255 — in Python, on_message("set_brightness", ...) calls Bridge.call("set_brightness", value) and the MCU sketch uses analogWrite(LED_BUILTIN, value) to control LED brightness via PWM.
- Advanced: Add a Python background thread that reads a sensor (or simulates one) every 500 ms and pushes sensor_update to all clients — combine this with the LED toggle on the same page so both real-time push and interactive control work simultaneously through a single WebSocket connection.