Arduino Nano 33 IoT - SSD1309 OLED Display
This guide shows you how to connect and use the SSD1309 OLED 128×64 (2.42-inch) with the Arduino Nano 33 IoT using the DIYables_OLED_SSD1309 library. We will learn these things:
- How to hook up the 2.42-inch SSD1309 OLED to the Arduino Nano 33 IoT over I2C
- How to show text and numbers on the SSD1309 OLED
- How to place text in the center of the screen both vertically and horizontally
- How to draw lines, rectangles, circles, and other shapes
- How to put a bitmap image on the screen
- How to use the built-in hardware scroll feature
- How to change the screen brightness and dim the display
- How to use custom fonts from the Adafruit GFX font collection
Hardware Preparation
Or you can buy the following kits:
| 1 | × | DIYables Sensor Kit (18 sensors/displays) |
Additionally, some of these links are for products from our own brand, DIYables .
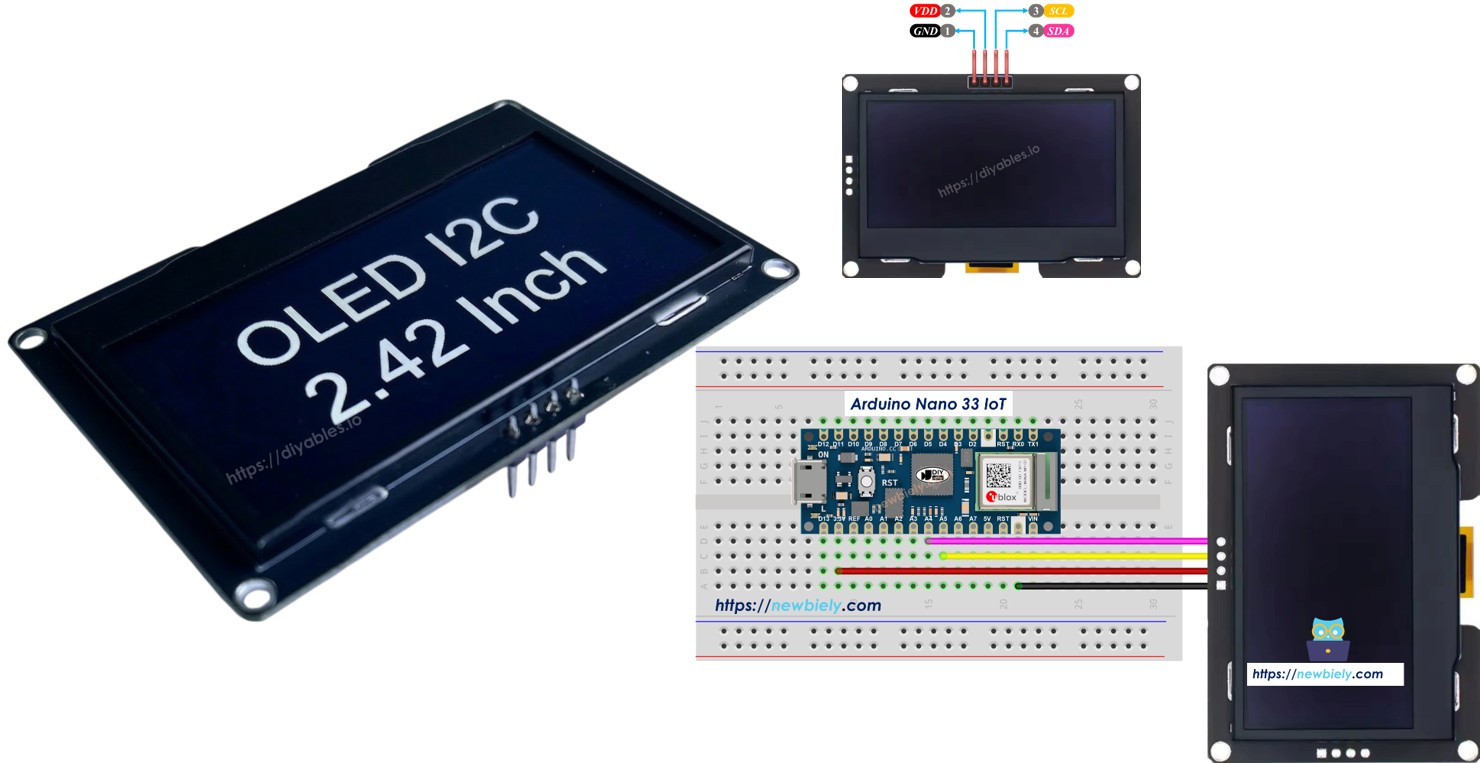
Overview of the SSD1309 2.42-Inch OLED Display
An OLED (Organic Light-Emitting Diode) screen is different from a regular LCD. Each pixel produces its own light, which gives you deep blacks and sharp contrast without a backlight. The SSD1309 chip drives the 128×64 pixel panels found on 2.42-inch (sometimes marked 2.4-inch) I2C OLED modules.
A few things worth knowing about the SSD1309:
- It is register-compatible with the popular SSD1306, so a lot of existing code works with only small changes.
- It does not have a built-in charge pump, but the OLED breakout board includes an onboard boost converter — you do not need to worry about this.
- Panel colour (white, blue, yellow-blue, or green) is set by the physical material and cannot be changed in software.
The I2C interface means you only need two signal wires to talk to the display, and you can share those wires with other I2C sensors on the same bus.
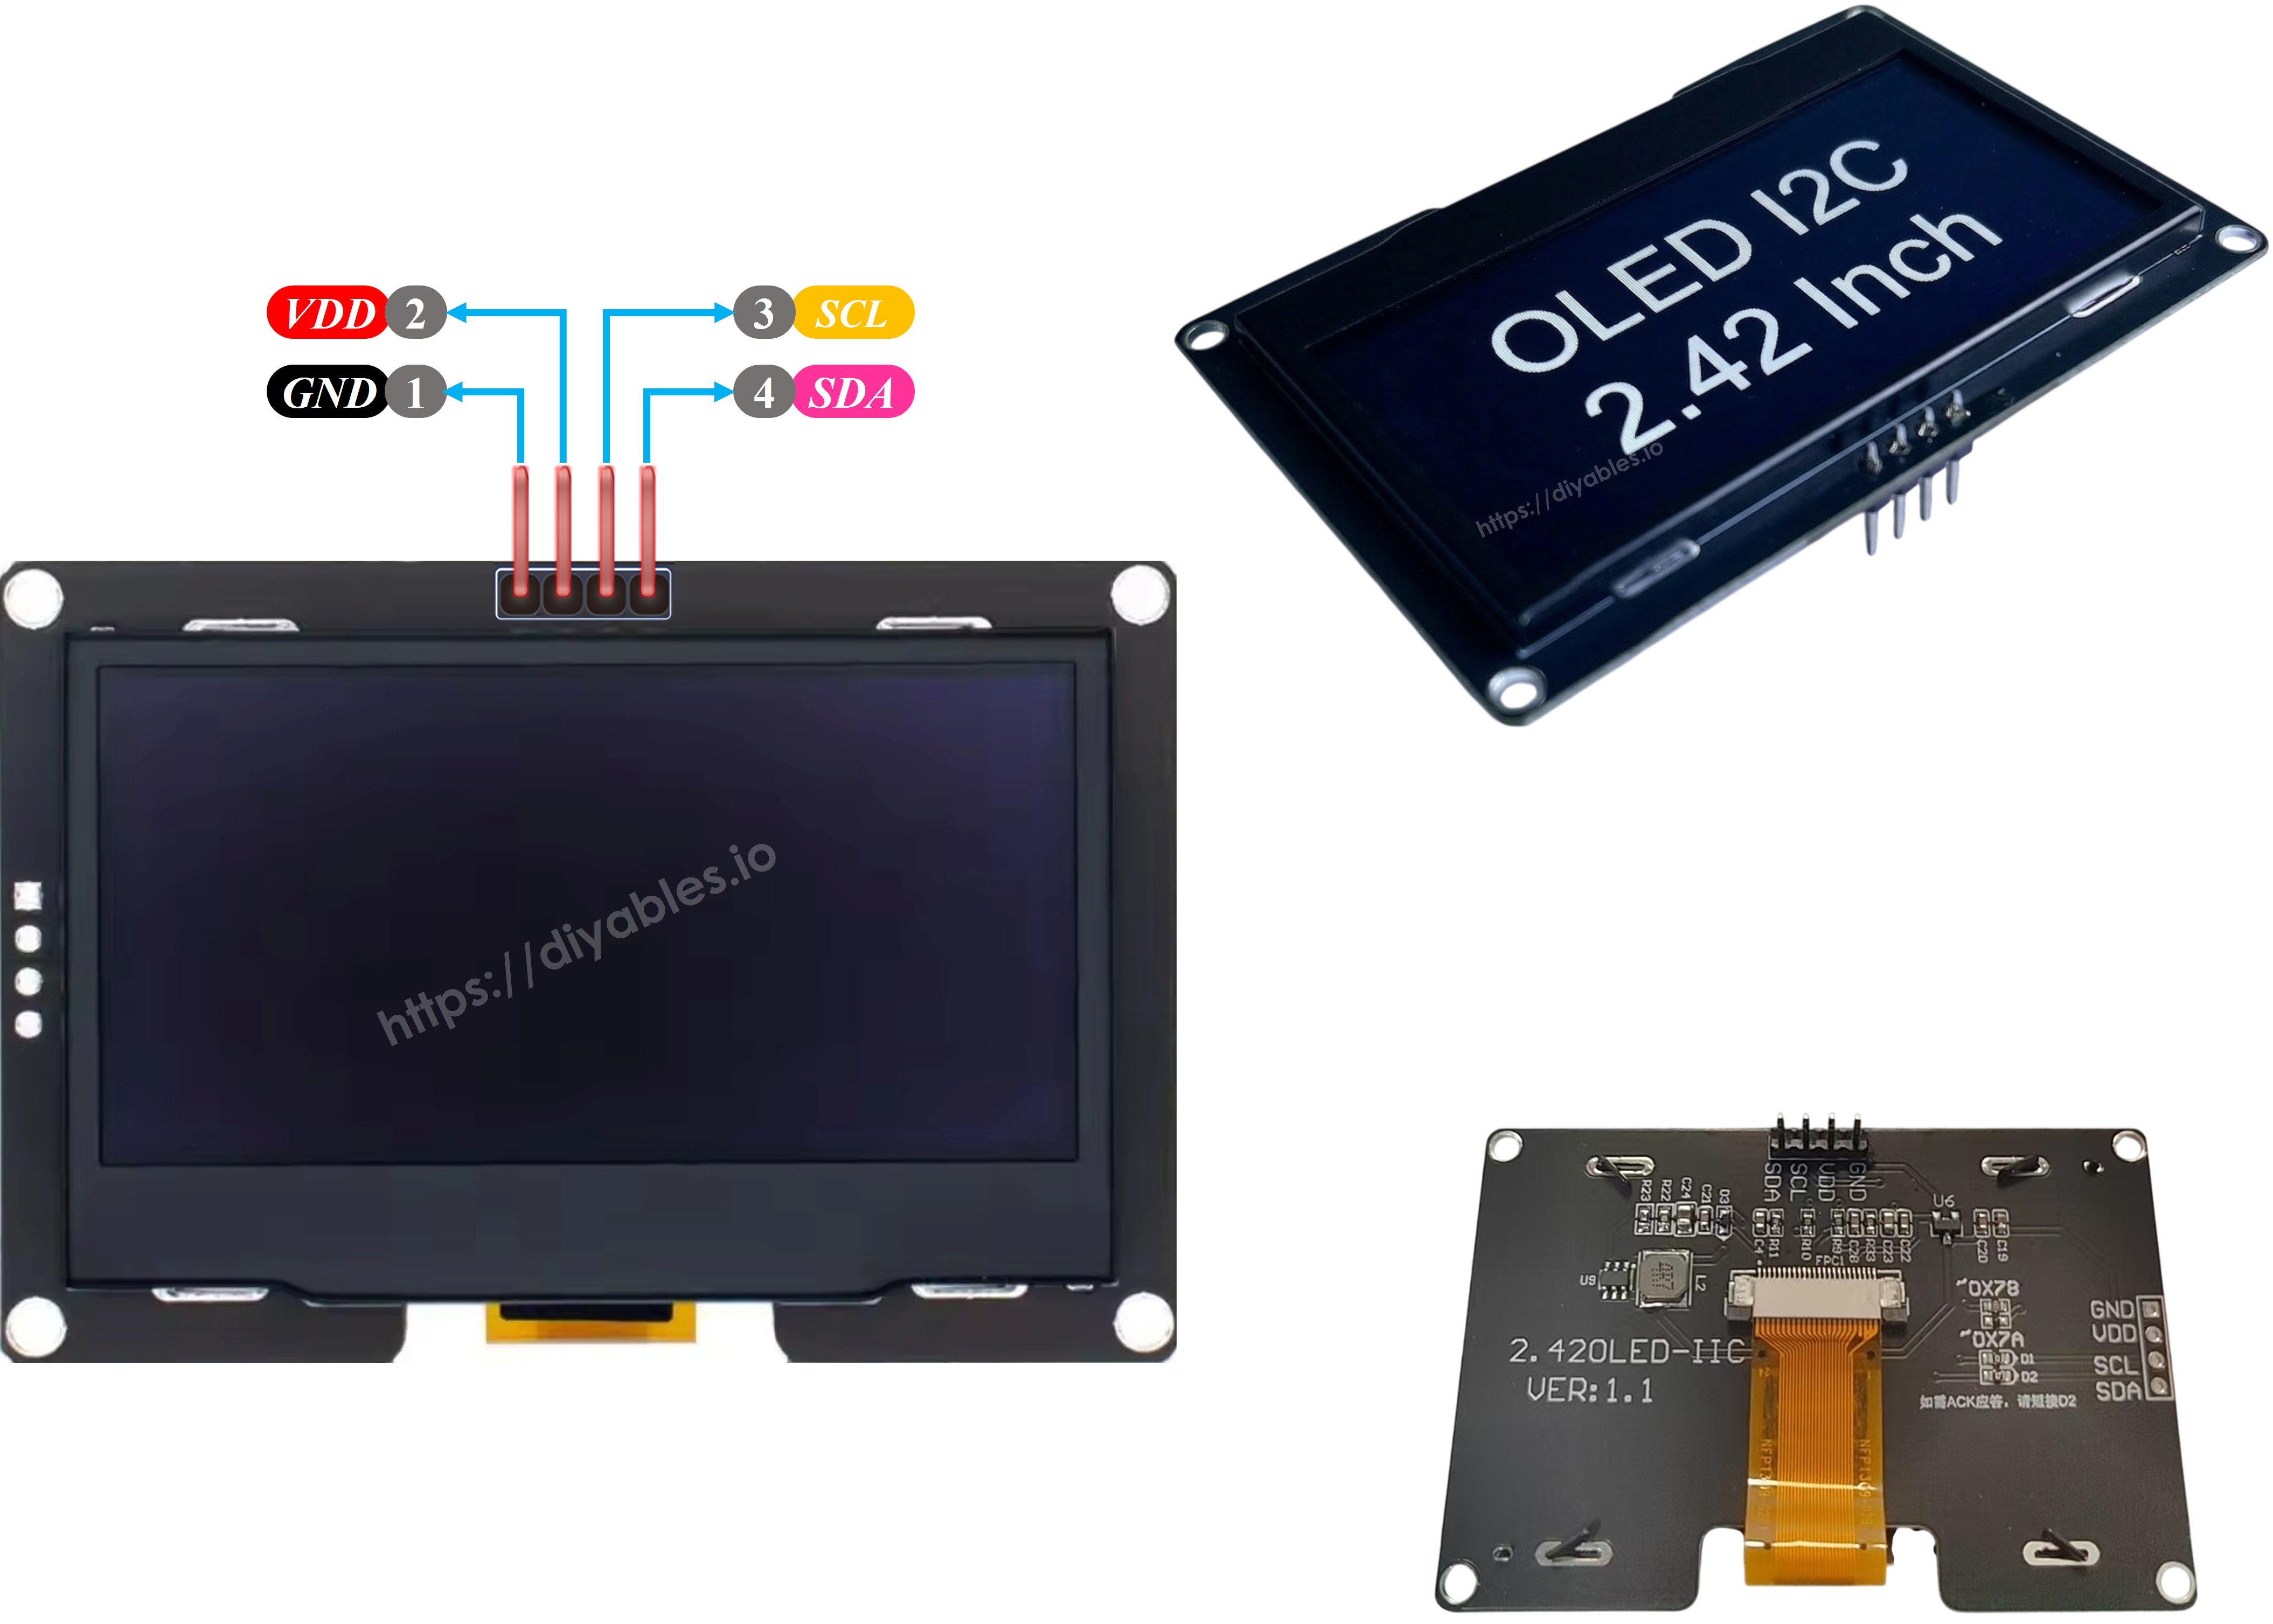
SSD1309 OLED Pinout (I2C Module)
- GND pin: Connect this pin to the ground (GND) of the Arduino Nano 33 IoT.
- VCC pin: This pin powers the display; connect it to 3.3V.
- SCL pin: This is the clock pin for I2C communication. Connect it to A5.
- SDA pin: This is the data pin for I2C communication. Connect it to A4.
※ NOTE THAT:
- The pin order on your module may look different depending on who made it. Always check the labels on the module itself.
- This guide uses the SSD1309 OLED from DIYables. We have tested it with the Arduino Nano 33 IoT and it works perfectly.
Wiring Diagram
- Wiring diagram between Arduino Nano 33 IoT and SSD1309 OLED 128x64
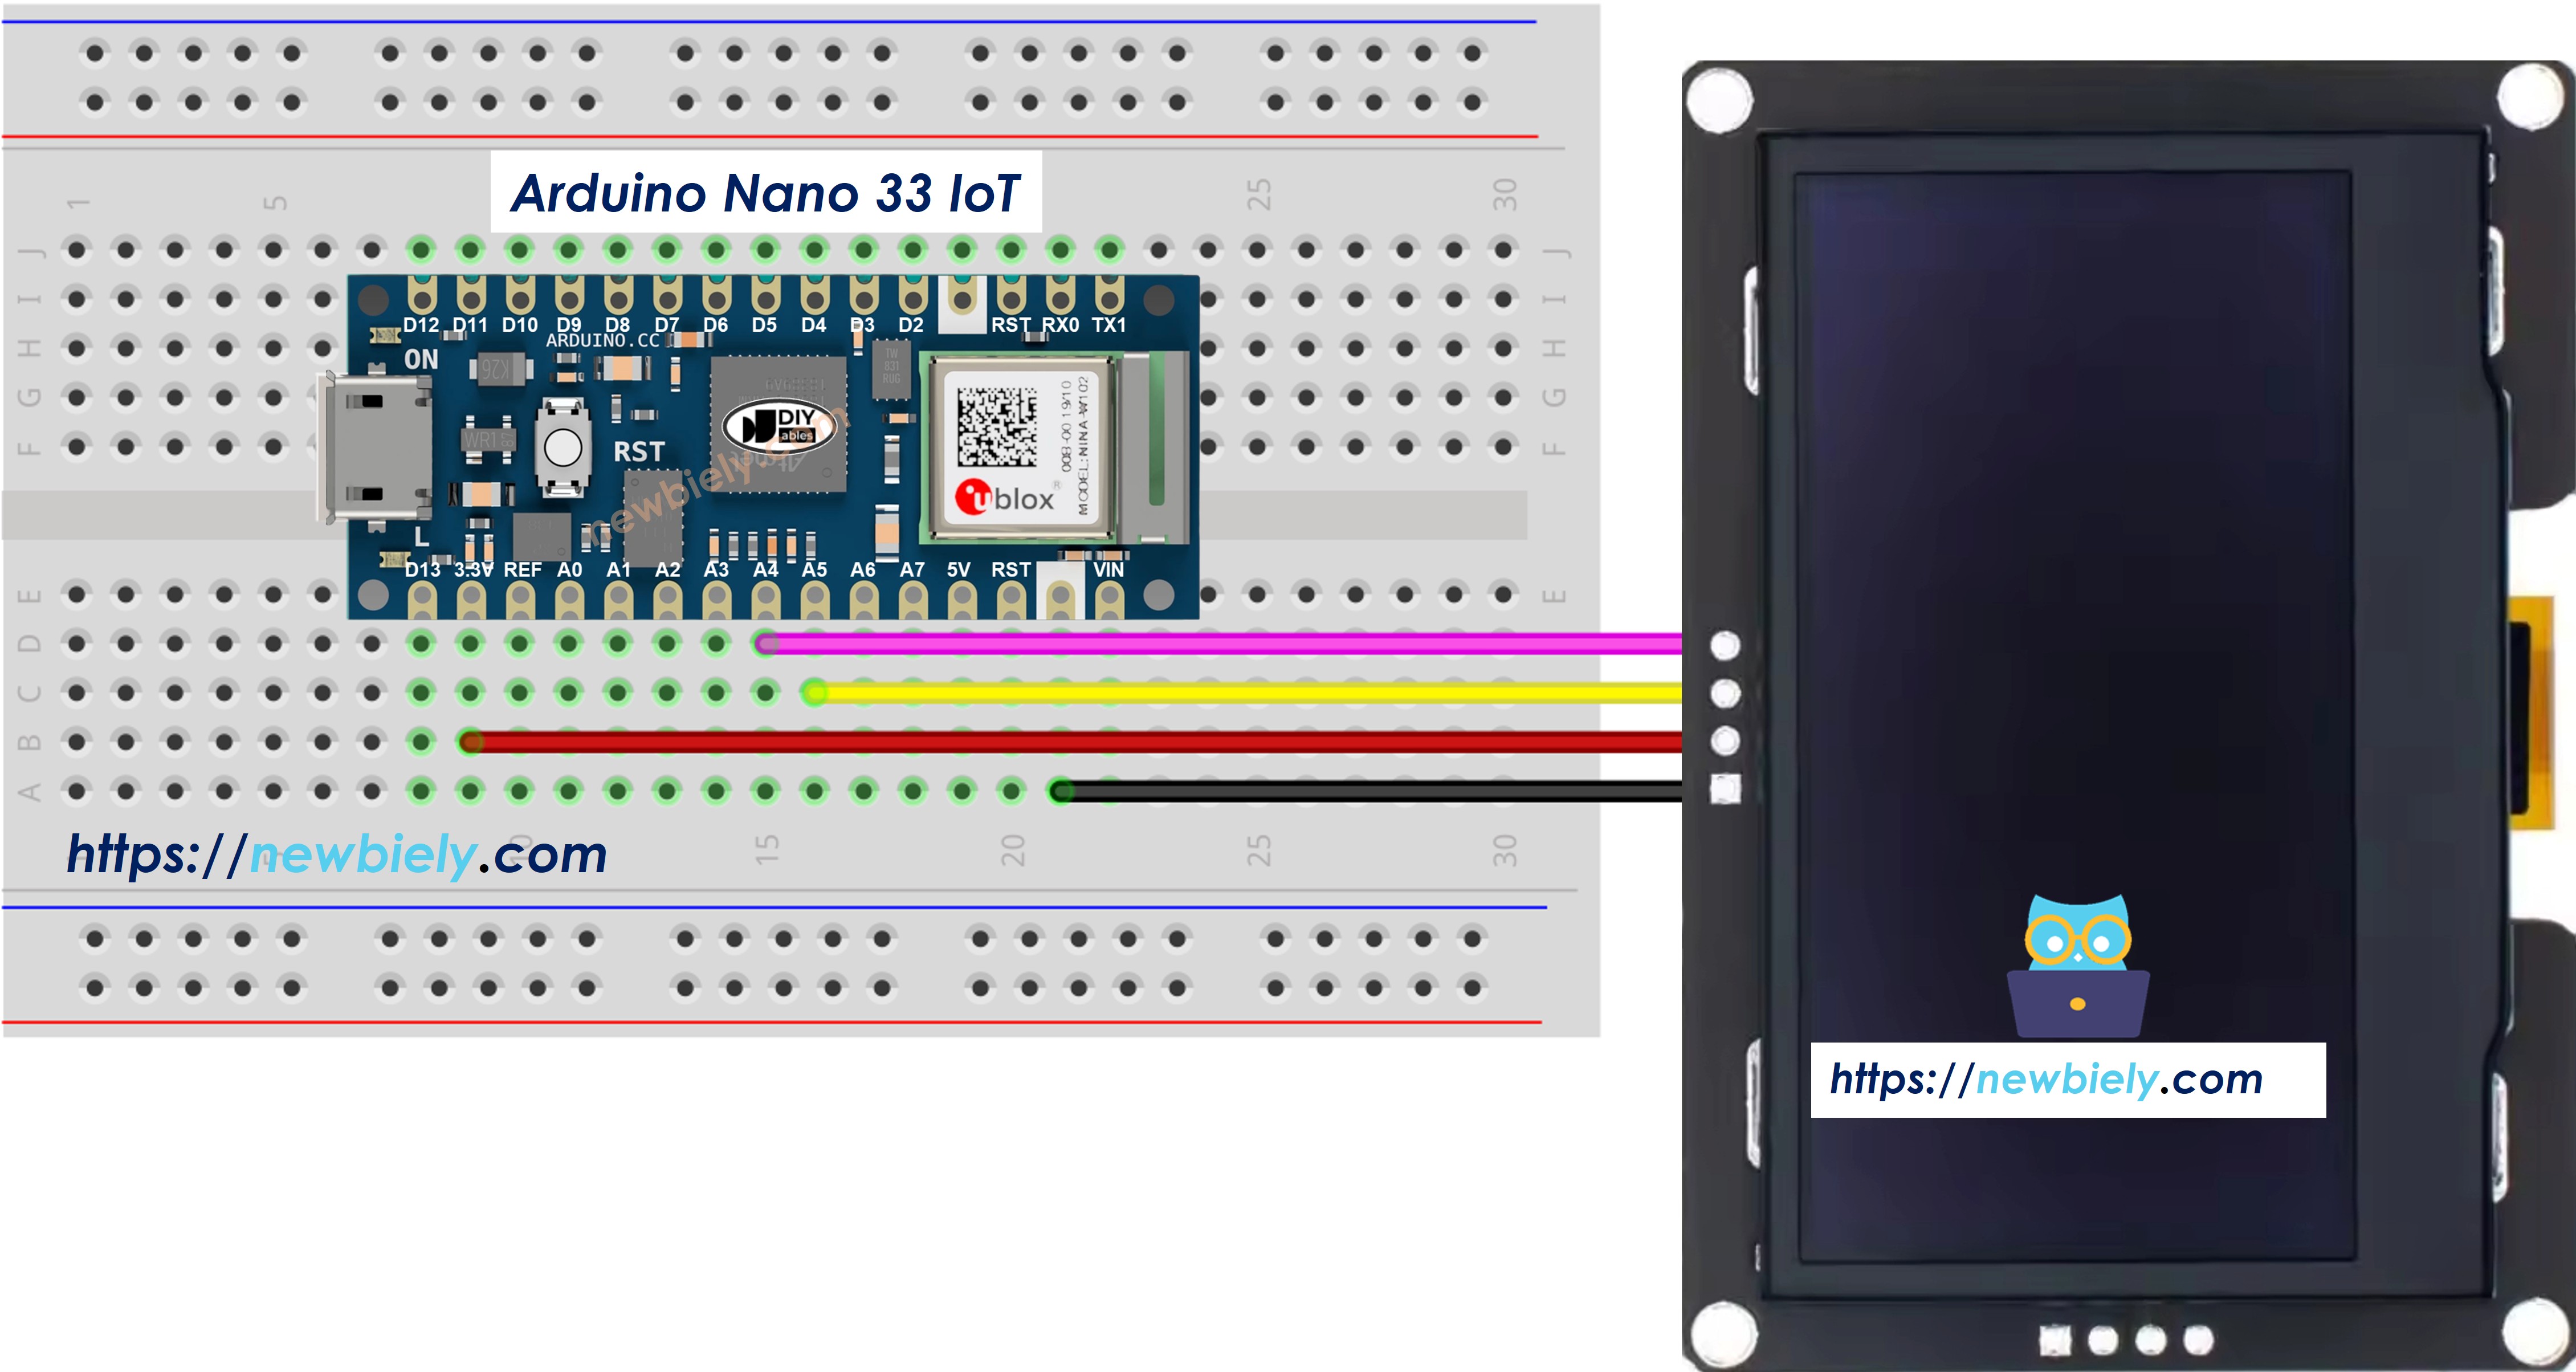
This image is created using Fritzing. Click to enlarge image
Connection table for the Arduino Nano 33 IoT and SSD1309 OLED display:
| OLED Module | Arduino Nano 33 IoT |
|---|---|
| VCC | 3.3V |
| GND | GND |
| SDA | A4 |
| SCL | A5 |
How To Use the SSD1309 OLED with Arduino Nano 33 IoT
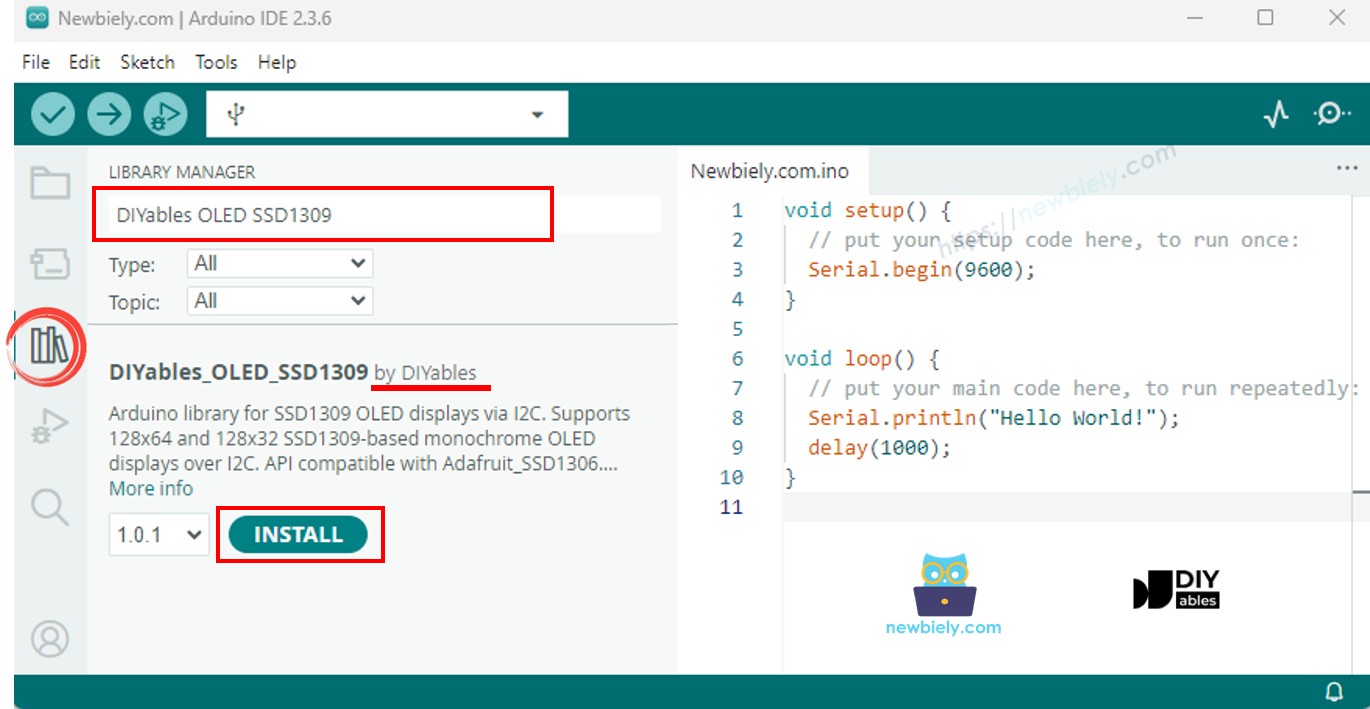
Install the DIYables_OLED_SSD1309 Library
- Click on the Libraries icon on the left side of the Arduino IDE.
- Search for DIYables_OLED_SSD1309 and find the DIYables OLED SSD1309 library.
- Click the Install button.
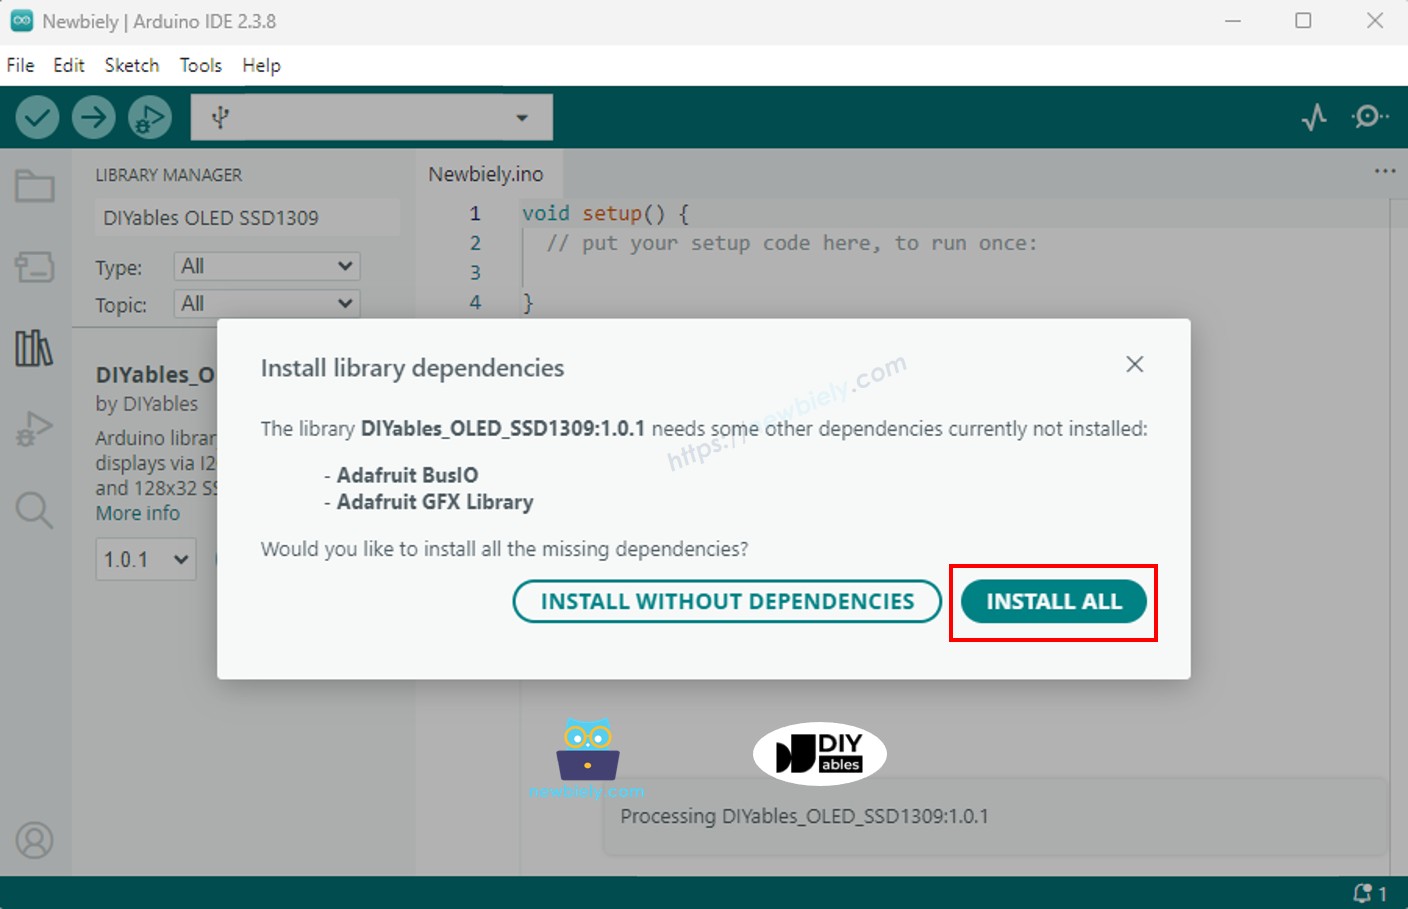
- A message will appear asking you to install extra library files.
- Click Install All to add all required dependencies.
How to Write Code for SSD1309 OLED
- Add the library files to your sketch
- Set the screen size to 128 by 64
- Create a display object
- Start the OLED in the setup() function
- Show something on the screen
Arduino Nano 33 IoT Code — Hello World on SSD1309 OLED
A simple starting sketch that prints a few lines of text at different sizes.
Arduino Nano 33 IoT Code — Display Text on SSD1309 OLED
This example shows more text features — different text sizes, numbers, and using the F() macro to save RAM.
Handy Display Functions
Here is a list of the most useful functions for working with the SSD1309 OLED:
- oled.clearDisplay() — clear the screen buffer (all pixels off).
- oled.display() — send the buffer to the OLED so your changes appear.
- oled.drawPixel(x, y, color) — turn a single pixel on or off.
- oled.setTextSize(n) — make text bigger; n=1 is the smallest, n=8 is the biggest.
- oled.setCursor(x, y) — move the cursor to a specific pixel position.
- oled.setTextColor(SSD1309_PIXEL_ON) — white text on a black background.
- oled.setTextColor(SSD1309_PIXEL_OFF, SSD1309_PIXEL_ON) — black text on a white background.
- oled.println("message") — print text and move to the next line.
- oled.println(number) — print a number.
- oled.println(number, HEX) — print a number as hexadecimal.
- oled.startscrollright(start, stop) — scroll the screen to the right.
- oled.startscrollleft(start, stop) — scroll the screen to the left.
- oled.startscrolldiagright(start, stop) — scroll diagonally to the right.
- oled.startscrolldiagleft(start, stop) — scroll diagonally to the left.
- oled.stopscroll() — stop any scrolling that is running.
- oled.setContrast(value) — set brightness from 0 (dimmest) to 255 (brightest).
- oled.dim(true/false) — quickly switch to minimum brightness or go back to normal.
- oled.invertDisplay(true/false) — swap all on and off pixels.
How to Center Text on the SSD1309 OLED
Arduino Nano 33 IoT Code — Draw Shapes on SSD1309 OLED
Because the library builds on Adafruit_GFX, you can draw all common shapes: pixels, lines, rectangles, filled rectangles, circles, filled circles, triangles, filled triangles, and rounded rectangles.
Arduino Nano 33 IoT Code — Hardware Scrolling on SSD1309 OLED
The SSD1309 has a built-in scroll engine that moves the screen contents on its own, without using any CPU time. You can scroll right, left, diagonally right, or diagonally left. Each scroll command takes a start page and a stop page (pages are 8-pixel strips numbered 0–7 on a 64-pixel tall display).
※ NOTE THAT:
Always call display() to push your content to the screen before you start scrolling. If you want to draw new content, call stopscroll() first.
Arduino Nano 33 IoT Code — Display Bitmap Image on SSD1309 OLED
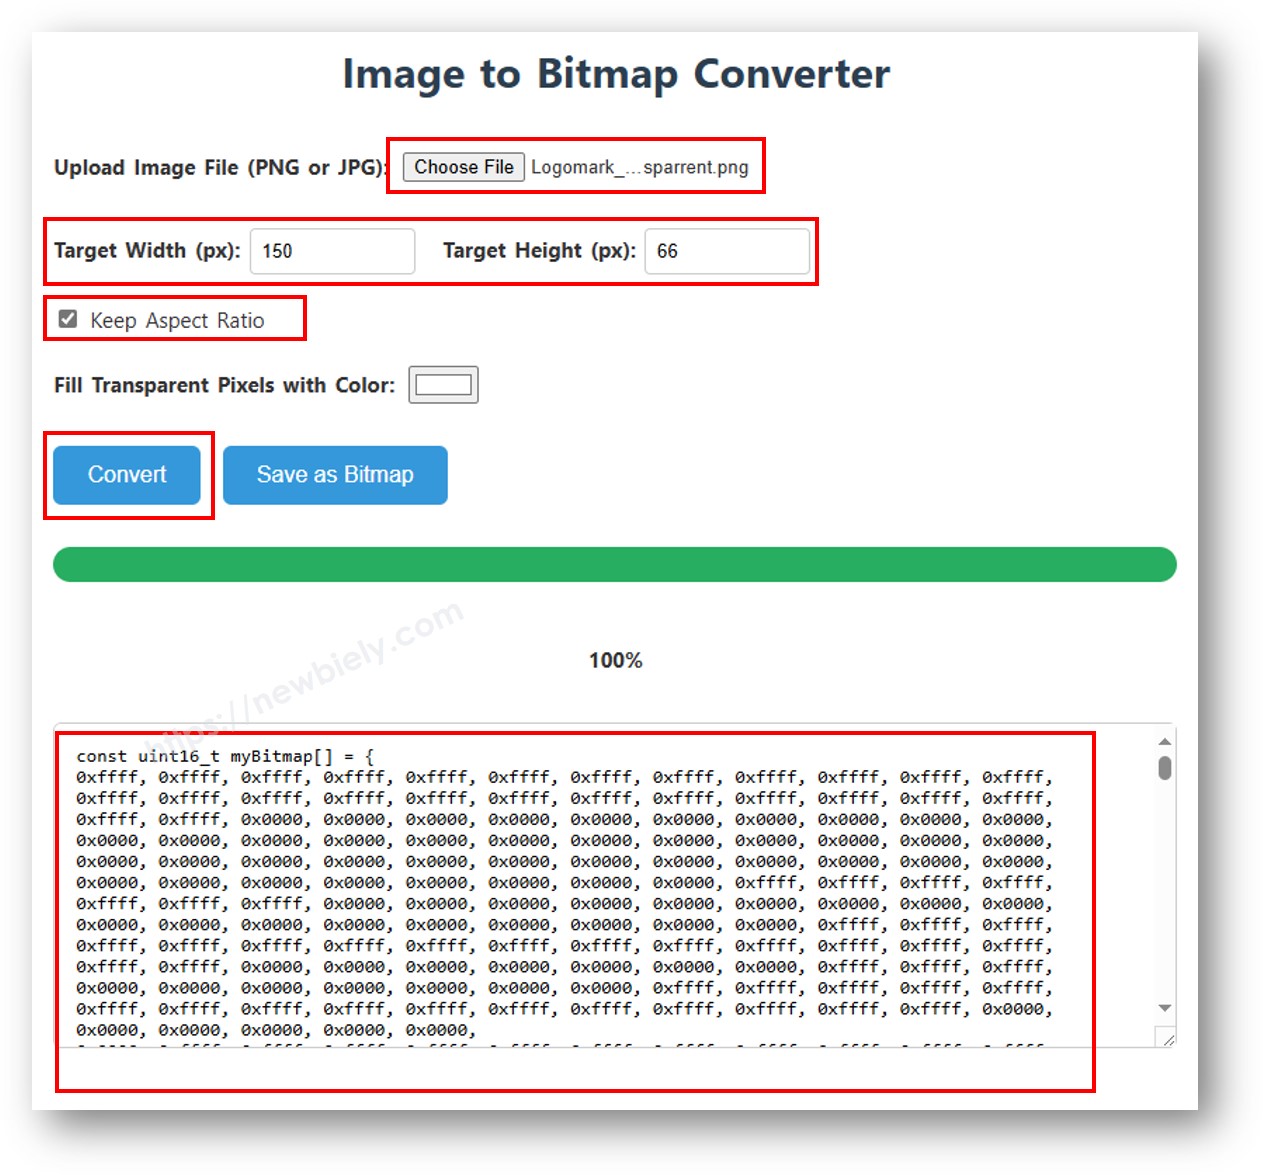
Before you can show a bitmap on the screen, you need to turn your image file into a C byte array. The free image2cpp online tool makes this easy:
- Open the tool and upload your image (PNG, JPG, BMP, or similar).
- Set the canvas size to match your OLED — 128×64 for this module.
- Pick Arduino code as the output format.
- Copy the byte array into your sketch.
※ NOTE THAT:
- Make sure the bitmap is not larger than 128×64 pixels, which is the full size of this display.
Arduino Nano 33 IoT Code — Contrast and Dim on SSD1309 OLED
The SSD1309 lets you set brightness anywhere between 0 and 255. The setContrast() function gives fine control, while dim() is a quick way to switch between minimum brightness and the last contrast setting you chose.
Arduino Nano 33 IoT Code — Custom External Fonts on SSD1309 OLED
The Adafruit GFX library comes with many ready-to-use FreeFont typefaces — Serif, Sans, and Mono — each available in Regular, Bold, Italic, and four different sizes. To use one, include its header file and call setFont().
※ NOTE THAT:
- When you use an external font, the Y position of your cursor points to the text baseline, not the top-left corner. This is different from the built-in 5×7 font.
- Font data is stored in flash memory (PROGMEM). On boards with limited flash, avoid loading too many fonts at once.
SSD1309 OLED Troubleshooting with Arduino Nano 33 IoT
If nothing shows up on the 2.42-inch SSD1309 OLED after you upload your sketch, go through these steps:
- Check your wiring — make sure SDA goes to A4, SCL goes to A5, VCC goes to 3.3V, and GND goes to GND.
- Confirm the right driver chip — this library is written for the SSD1309 only. If your module has a different chip (for example SH1106), it will not work.
- Find the correct I2C address — most SSD1309 modules use 0x3C, but some use 0x3D. Run the scanner sketch below to check what address your module is using:
What you should see in the Serial Monitor when the SSD1309 is connected correctly:
- Do not forget display() — the SSD1309 keeps a copy of the screen in RAM. Your drawing commands only change that copy. Nothing will appear on the physical screen until you call oled.display().
- Power supply — the 2.42-inch module uses a bit more power than smaller OLED displays. Make sure your power source can provide enough current (typically 20–40 mA when the screen is at full brightness).