Raspberry Pi - MQ3 Alcohol Sensor
This tutorial instructs you how to use Raspberry Pi and the MQ3 alcohol sensor to detect the presence of alcohol in the air by measuring alcohol vapor concentrations. In detail, we will learn:
- How to connect the MQ3 alcohol sensor to Raspberry Pi
- How to program Raspberry Pi to read value from the MQ3 alcohol sensor
Hardware Preparation
Or you can buy the following kits:
| 1 | × | DIYables Sensor Kit (18 sensors/displays) |
Additionally, some of these links are for products from our own brand, DIYables .
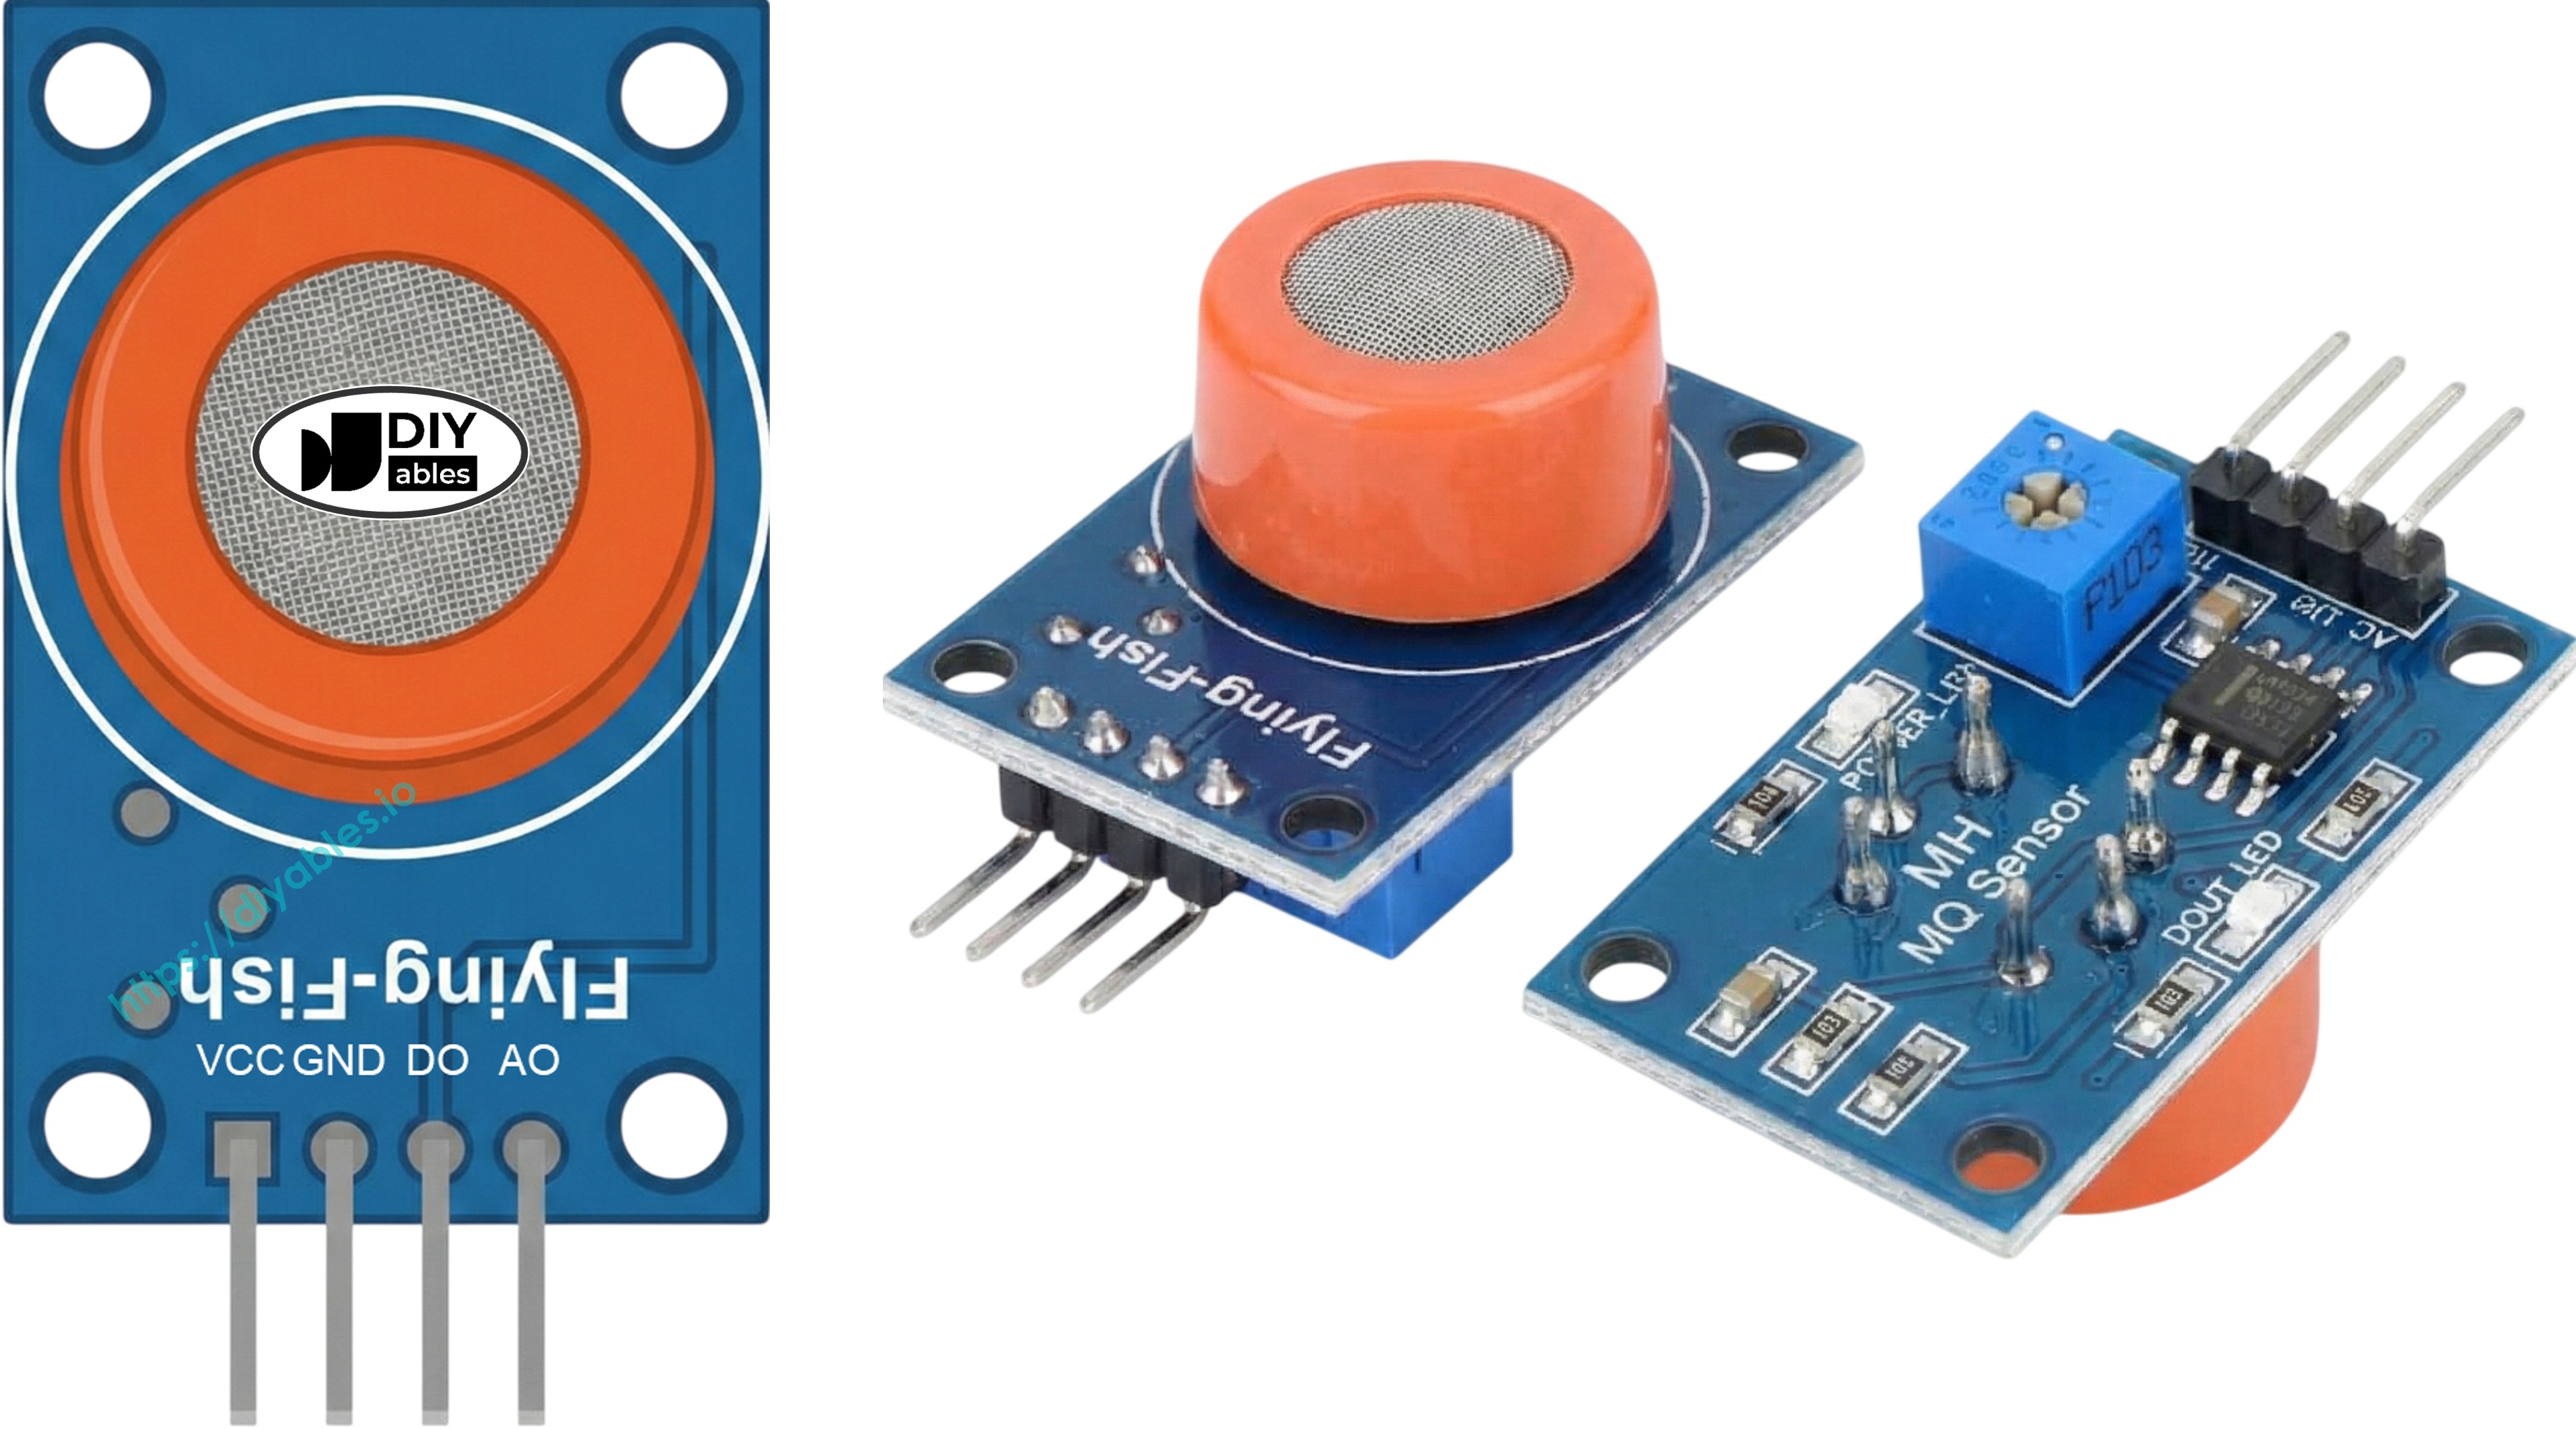
Overview of MQ3 Alcohol Sensor
The MQ3 alcohol sensor is capable of detecting the presence of alcohol vapor in the surrounding environment. It provides two options for output: a digital output pin and an analog output pin.
By using the MQ3 sensor, we can determine if alcohol is present in breathalyzer applications or if there are alcohol vapors in the air. This information is valuable in helping us take appropriate actions, such as triggering an alarm or activating ventilation systems.
Pinout
The MQ3 alcohol sensor has four pins that serve different purposes:
- VCC pin: This pin needs to be connected to a 5V power source (VCC).
- GND pin: This pin needs to be connected to the ground (0V) for proper circuit operation.
- DO pin: It is a digital output pin that indicates the presence of alcohol. When the concentration of alcohol is detected, the pin is set to LOW. Conversely, if no alcohol is detected, the pin is set to HIGH. The threshold for detecting alcohol concentration can be adjusted using a built-in potentiometer.
- AO pin: This is an analog output pin that generates a voltage proportional to the alcohol concentration. As the alcohol concentration increases, the voltage on this pin also rises. Similarly, when the alcohol concentration decreases, the voltage decreases accordingly.
In summary, the VCC and GND pins provide power and grounding, while the DO pin gives a digital indication of alcohol presence, and the AO pin generates an analog voltage that corresponds to the alcohol concentration.
Additionally, the MQ3 alcohol sensor is equipped with two LED indicators:
- PWR-LED indicator: This LED serves as a power indicator, illuminating to show that the sensor is receiving power.
- DO-LED indicator: This LED is connected to the DO pin and provides a visual indication of the alcohol concentration. When alcohol concentration is detected and the DO pin is set to LOW, the DO-LED indicator turns on. Conversely, if no alcohol concentration is detected and the DO pin is set to HIGH, the DO-LED indicator turns off.
How It Works
Regarding the DO pin:
- The MQ3 module includes a built-in potentiometer that allows you to adjust the sensitivity or threshold for alcohol concentration.
- When the concentration of alcohol in the surrounding environment surpasses the set threshold value, the output pin of the sensor becomes LOW, and the DO-LED turns on.
- Conversely, when the concentration of alcohol in the surrounding environment falls below the threshold value, the output pin of the sensor becomes HIGH, and the DO-LED turns off.
Regarding the AO pin:
- As the alcohol concentration increases, the voltage on the AO pin also increases proportionally.
- Conversely, as the alcohol concentration decreases, the voltage on the AO pin decreases accordingly.
It is important to note that the potentiometer does not affect the value observed on the AO pin.
The MQ3 Sensor Warm-up
The MQ3 alcohol sensor requires a warming-up process before it can be used effectively. Here are the details:
- If the sensor has been stored for a long time (approximately a month or more) and you are using it for the first time, it needs to be warmed up for 24-48 hours. This extended warm-up time ensures accurate readings.
- However, if the sensor has been recently used, it will only take around 5-10 minutes to reach its fully warmed-up state. During this warm-up period, the sensor may initially provide high readings, but they will gradually decrease until the sensor stabilizes.
To warm up the MQ3 sensor, simply connect its VCC and GND pins to a power supply or connect them to the VCC and GND pins of Raspberry Pi. Then, allow the sensor to remain in this connected state for the required period of time.
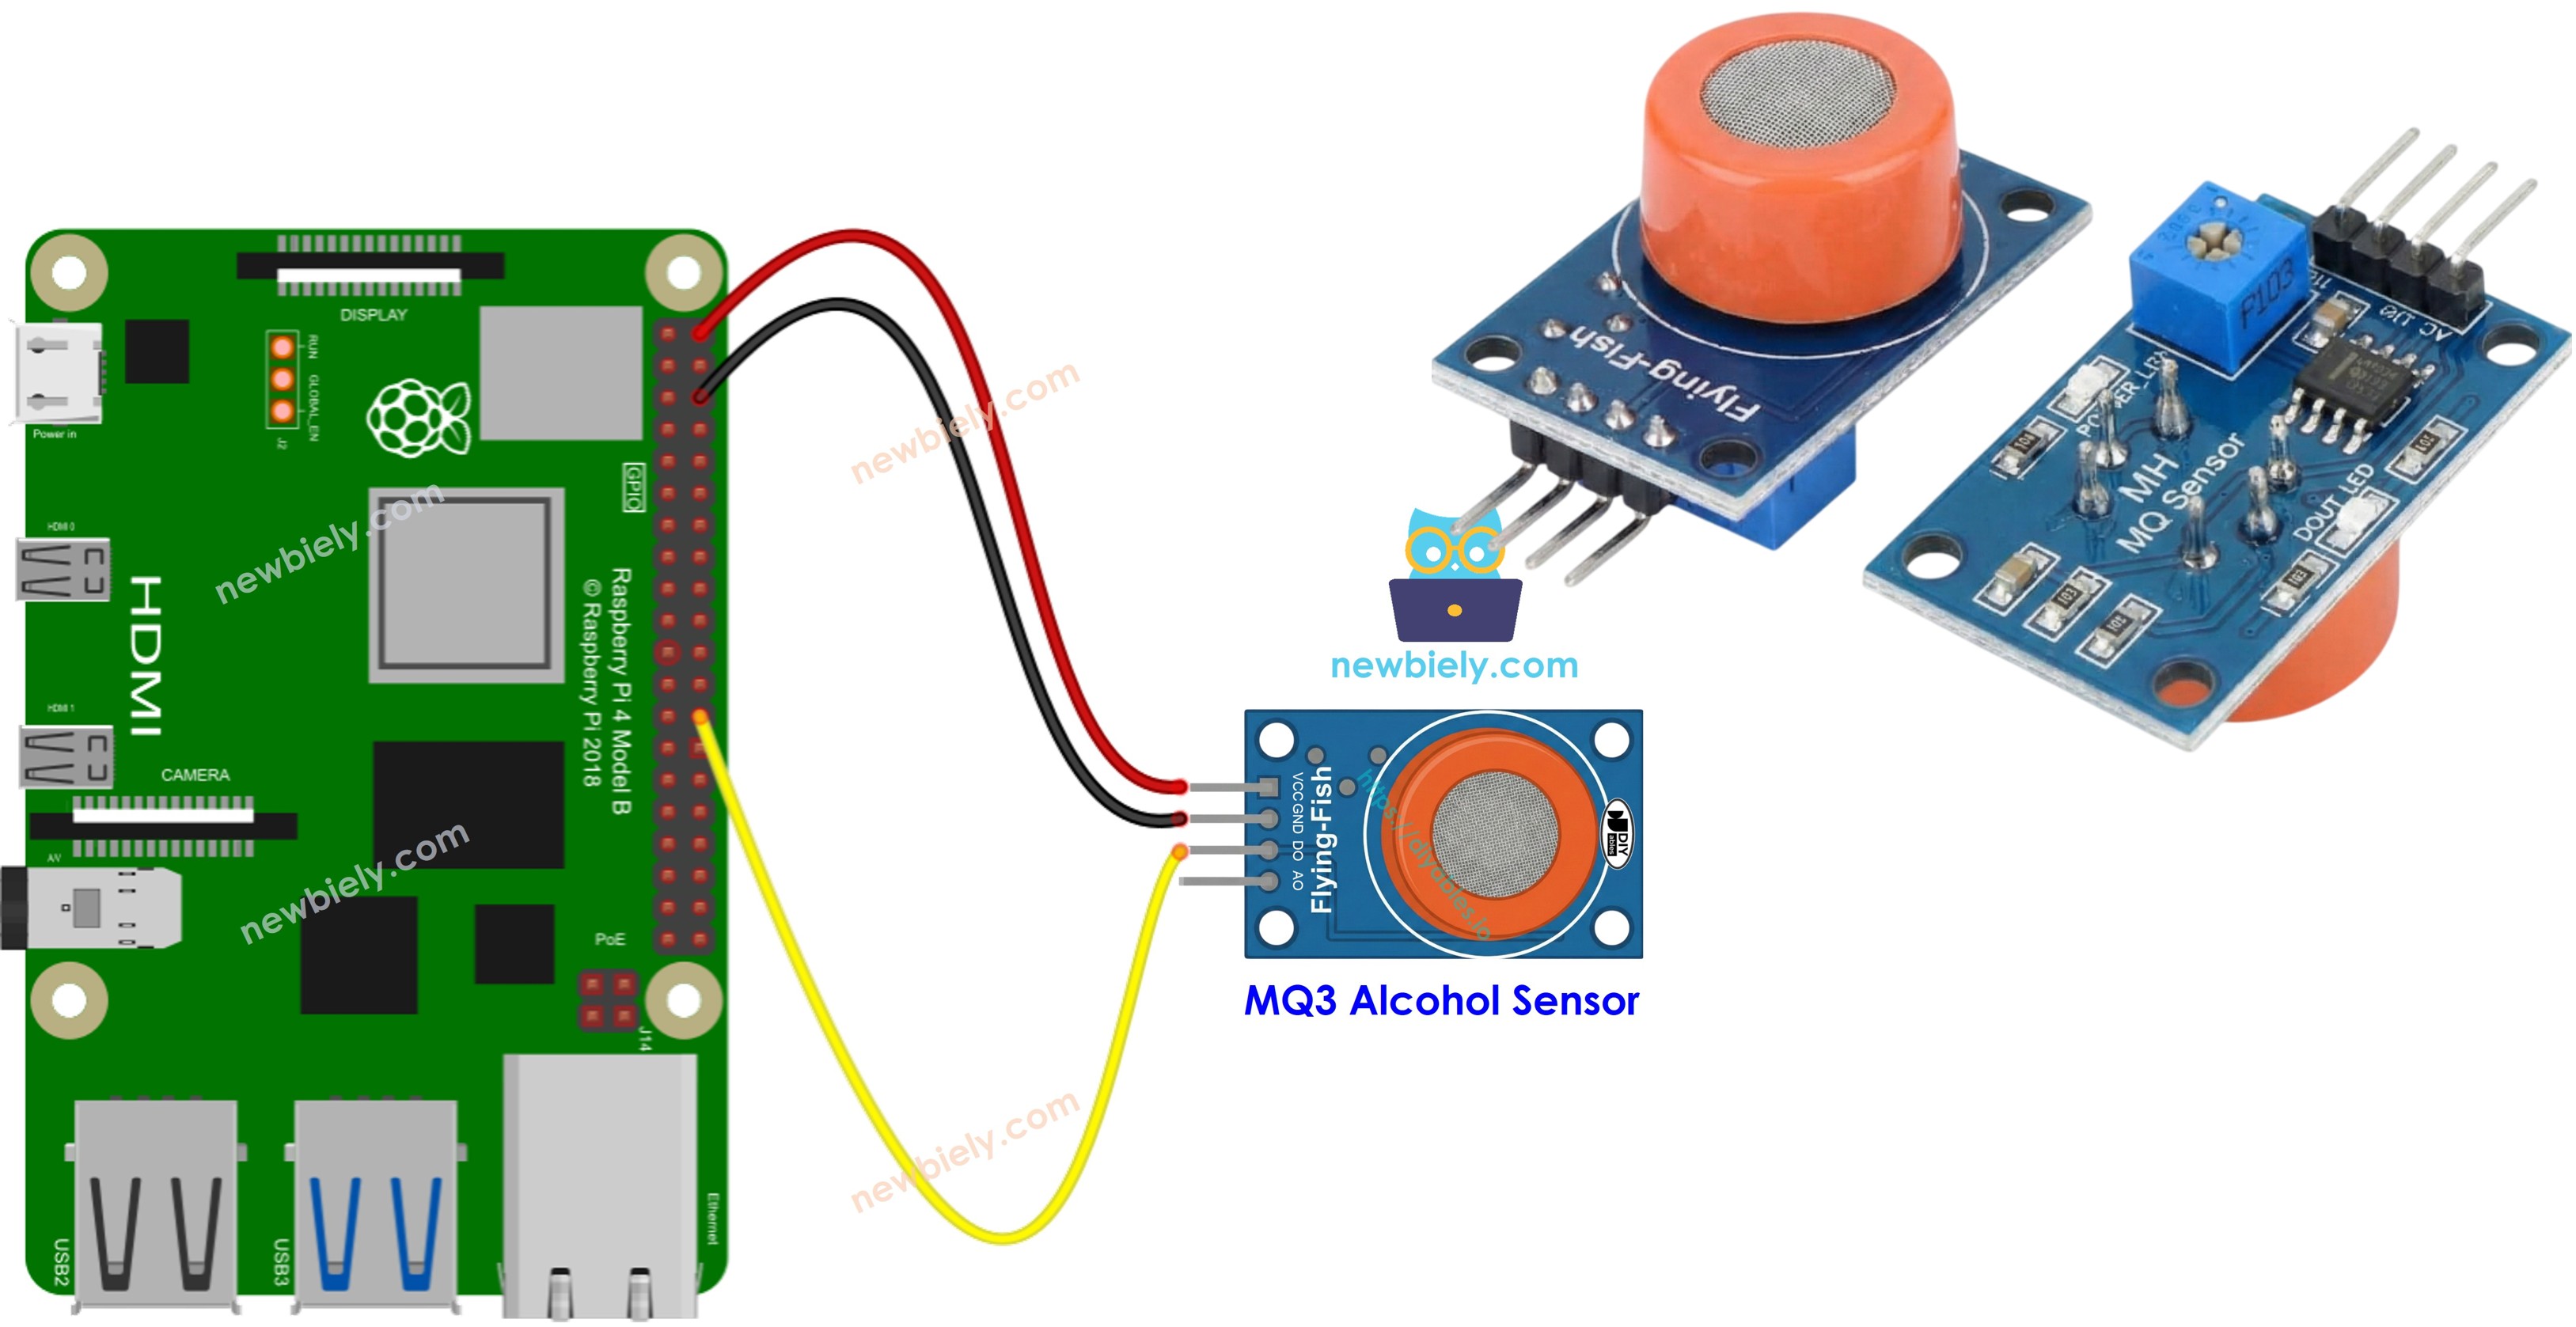
Wiring Diagram
Since the MQ3 alcohol sensor module has two outputs, you can choose to use one or both of them, depending on what you need.
- The wiring diagram between Raspberry Pi and the MQ3 alcohol sensor when using DO only.
This image is created using Fritzing. Click to enlarge image
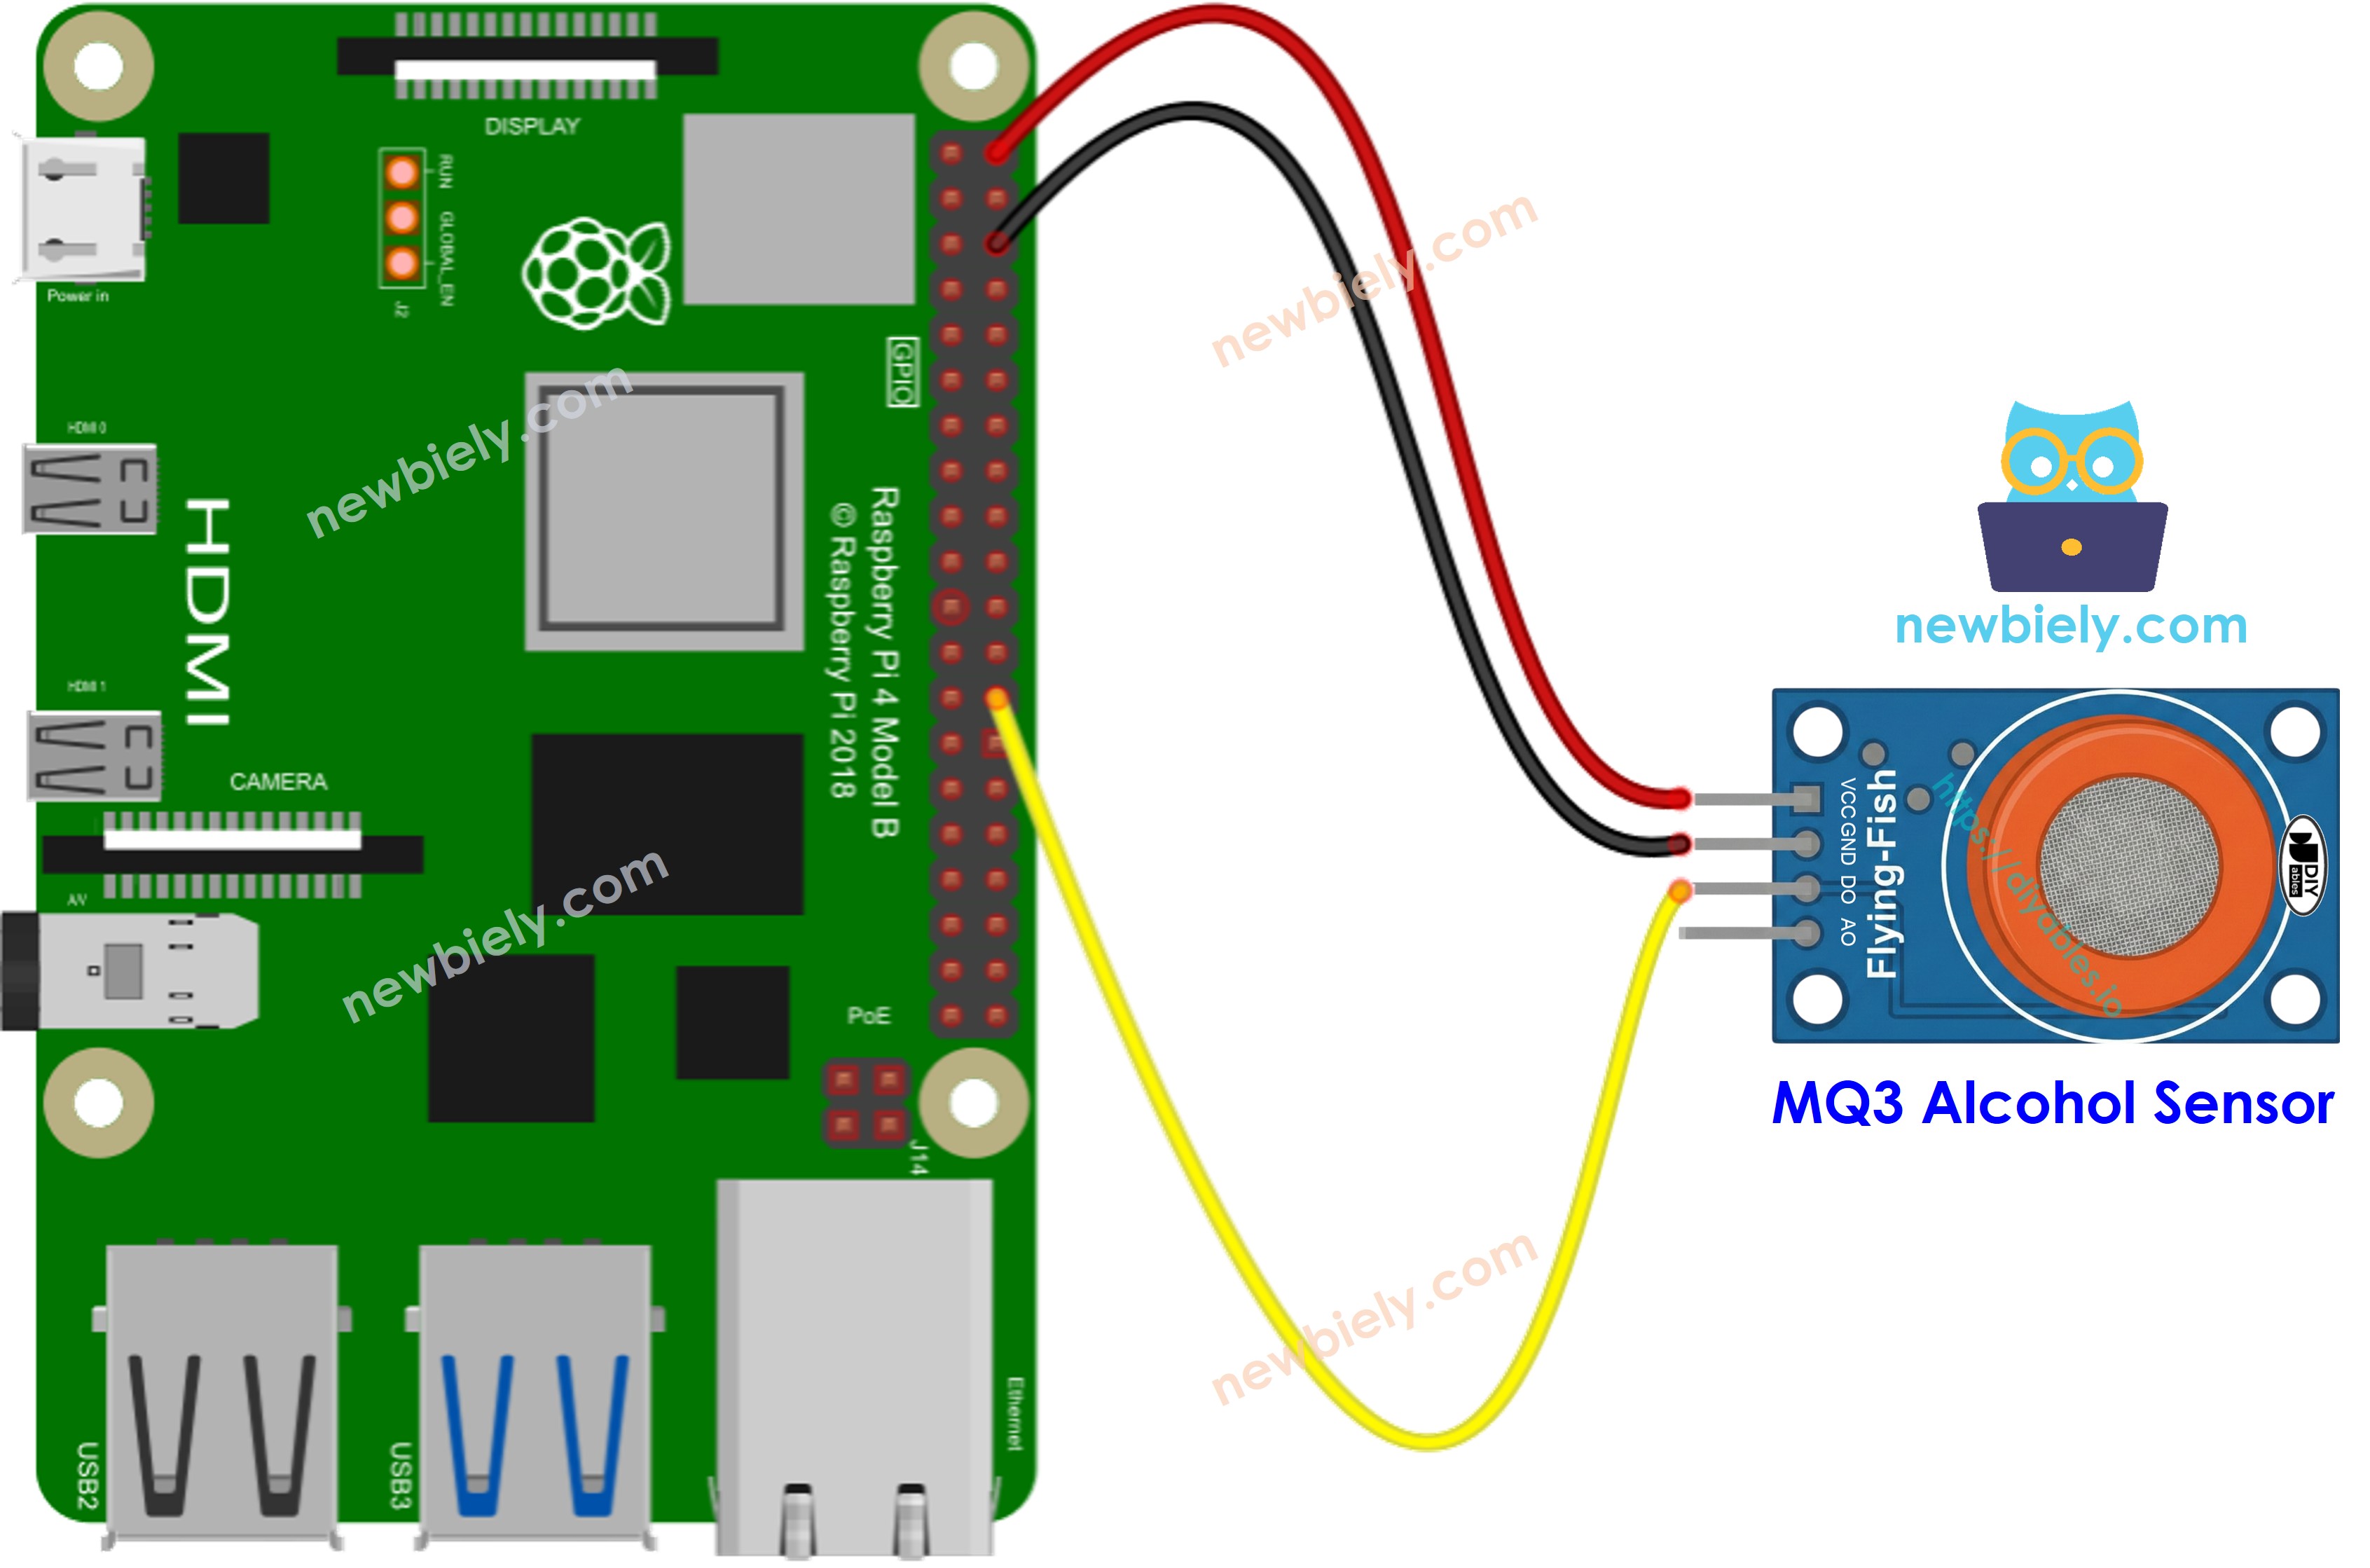
To simplify and organize your wiring setup, we recommend using a Screw Terminal Block Shield for Raspberry Pi. This shield ensures more secure and manageable connections, as shown below:

NOTE THAT:
- Raspberry Pi does not have analog input pin, so you can leave it unconnected. If you want to read ADC value from the module, you need to use an external ADC module, you can see detail at How to use Raspberry Pi with ADC module
Raspberry Pi Code - Read value from DO pin
Detailed Instructions
- Make sure you have Raspbian or any other Raspberry Pi compatible operating system installed on your Pi.
- Make sure your Raspberry Pi is connected to the same local network as your PC.
- Make sure your Raspberry Pi is connected to the internet if you need to install some libraries.
- If this is the first time you use Raspberry Pi, See how to set up the Raspberry Pi
- Connect your PC to the Raspberry Pi via SSH using the built-in SSH client on Linux and macOS or PuTTY on Windows. See to how connect your PC to Raspberry Pi via SSH.
- Make sure you have the RPi.GPIO library installed. If not, install it using the following command:
- Create a Python script file mq3_alcohol_sensor.py and add the following code:
- Save the file and run the Python script by executing the following command in the terminal:
- Place the MQ3 alcohol sensor near alcohol vapor or exhaled breath
- See the result on Terminal.
The script runs in an infinite loop continuously until you press Ctrl + C in the terminal.
Please keep in mind that if you notice the LED status remaining on constantly or off, you can adjust the potentiometer to fine-tune the sensitivity of the sensor.
Raspberry Pi Code - Read value from AO pin
To read the value from the AO pin, you need to use ADS1115 ADC Module since Raspberry Pi does not have any ADC pin. See how to use ADS1115 ADC Module with Raspberry Pi