
Arduino UNO Q - MAX6675 Thermocouple Module
Regular sensors like the DHT11 or LM35 can't survive being near an oven, a soldering iron, or a running engine — they simply weren't built for that kind of heat. The MAX6675 module solves this by pairing a Type-K thermocouple probe with a dedicated digitizer chip, letting your Arduino UNO Q safely read temperatures far beyond what a normal sensor could handle. This tutorial shows you how to wire and program it — and monitor it remotely via Telegram.
In this tutorial, you will learn:
- What the MAX6675 thermocouple module is and how it works
- How to wire the MAX6675 module to the Arduino UNO Q MCU
- How to program the MCU (C/C++ Arduino code) to read temperature from the MAX6675
- How to program both the Linux side (Python) and MCU side (C/C++) to read MAX6675 data via Bridge
- How to receive Telegram alerts when temperature exceeds a threshold on Arduino UNO Q
- How to use OpenClaw on Arduino UNO Q with the MAX6675 module
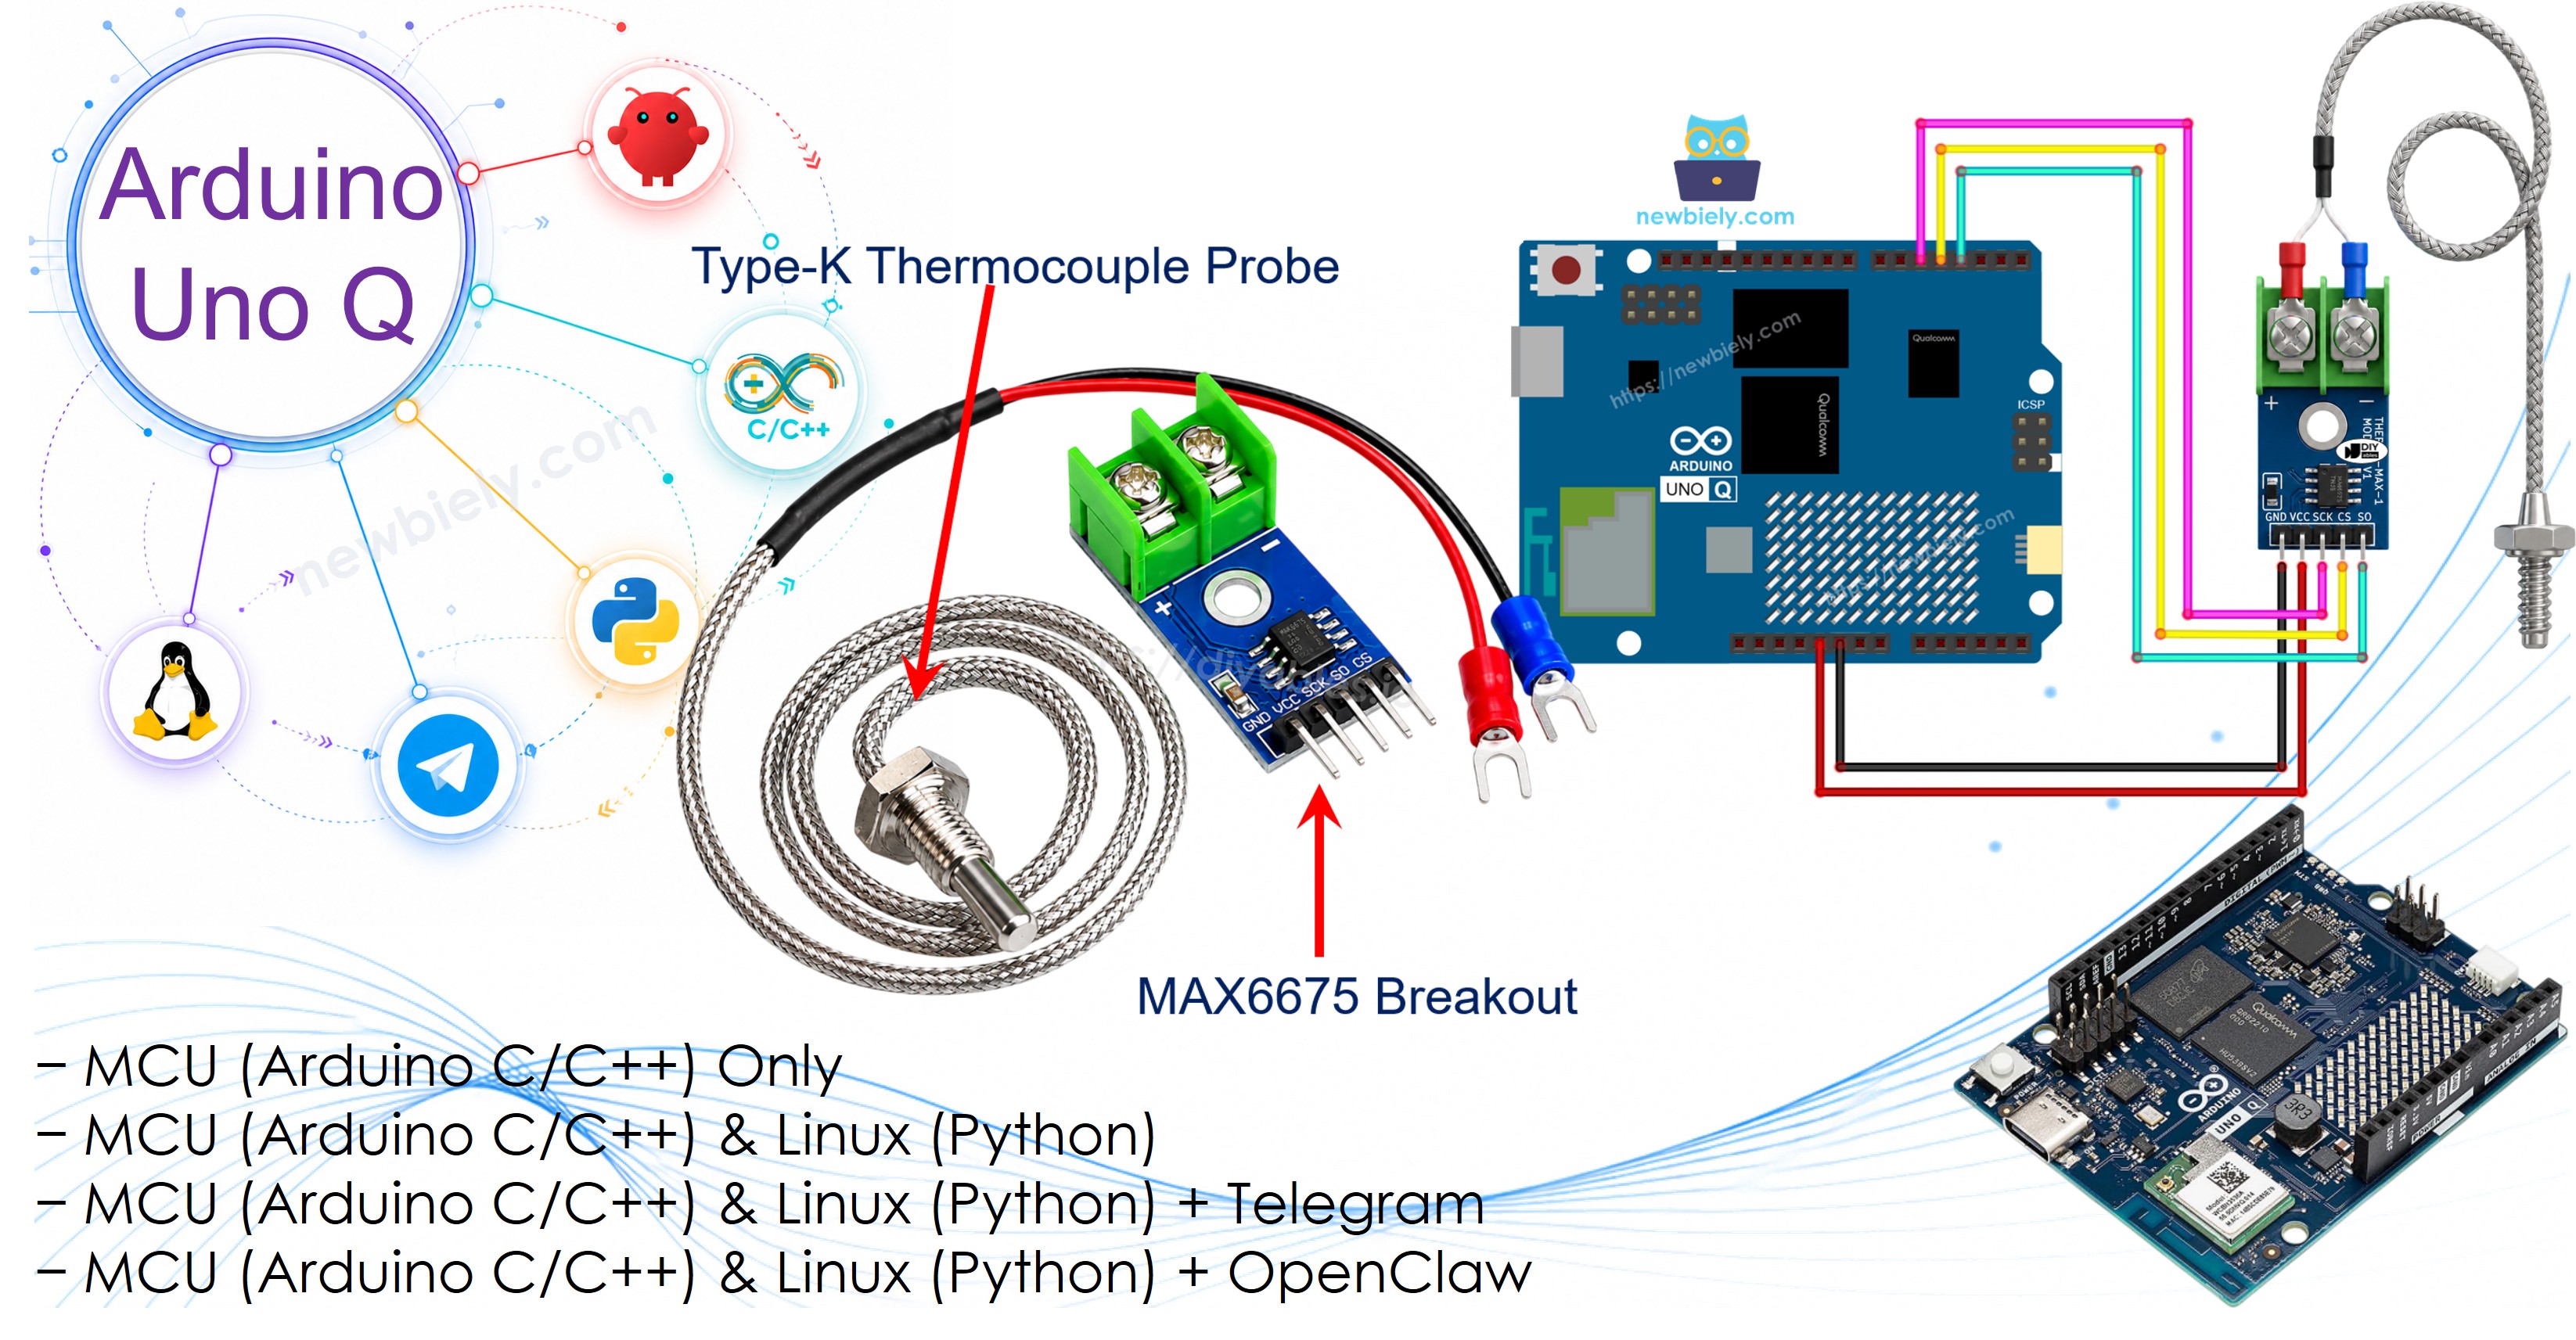
Hardware Preparation
Or you can buy the following kits:
| 1 | × | DIYables Sensor Kit (18 sensors/displays) |
Additionally, some of these links are for products from our own brand, DIYables .
Overview of the MAX6675 Thermocouple Module
A thermocouple is a temperature sensor made of two different metal wires joined together at one end, called the hot junction. Heating that junction produces a tiny voltage that changes with temperature — the MAX6675 chip converts this tiny voltage into a clean 12-bit digital reading your Arduino UNO Q can use directly. The most common probe type, Type-K, is made of Chromel and Alumel wires and can measure roughly -328°F to +2300°F.
| MAX6675 Module | |
|---|---|
| Operating Voltage | 3.0V to 5.5V |
| Interface | 3-wire (SCK, CS, SO) |
| Temperature Range | 0°C to 1024°C (probe rated 0°C to 80°C on the outside casing) |
| Accuracy | ±3°C |
Pinout
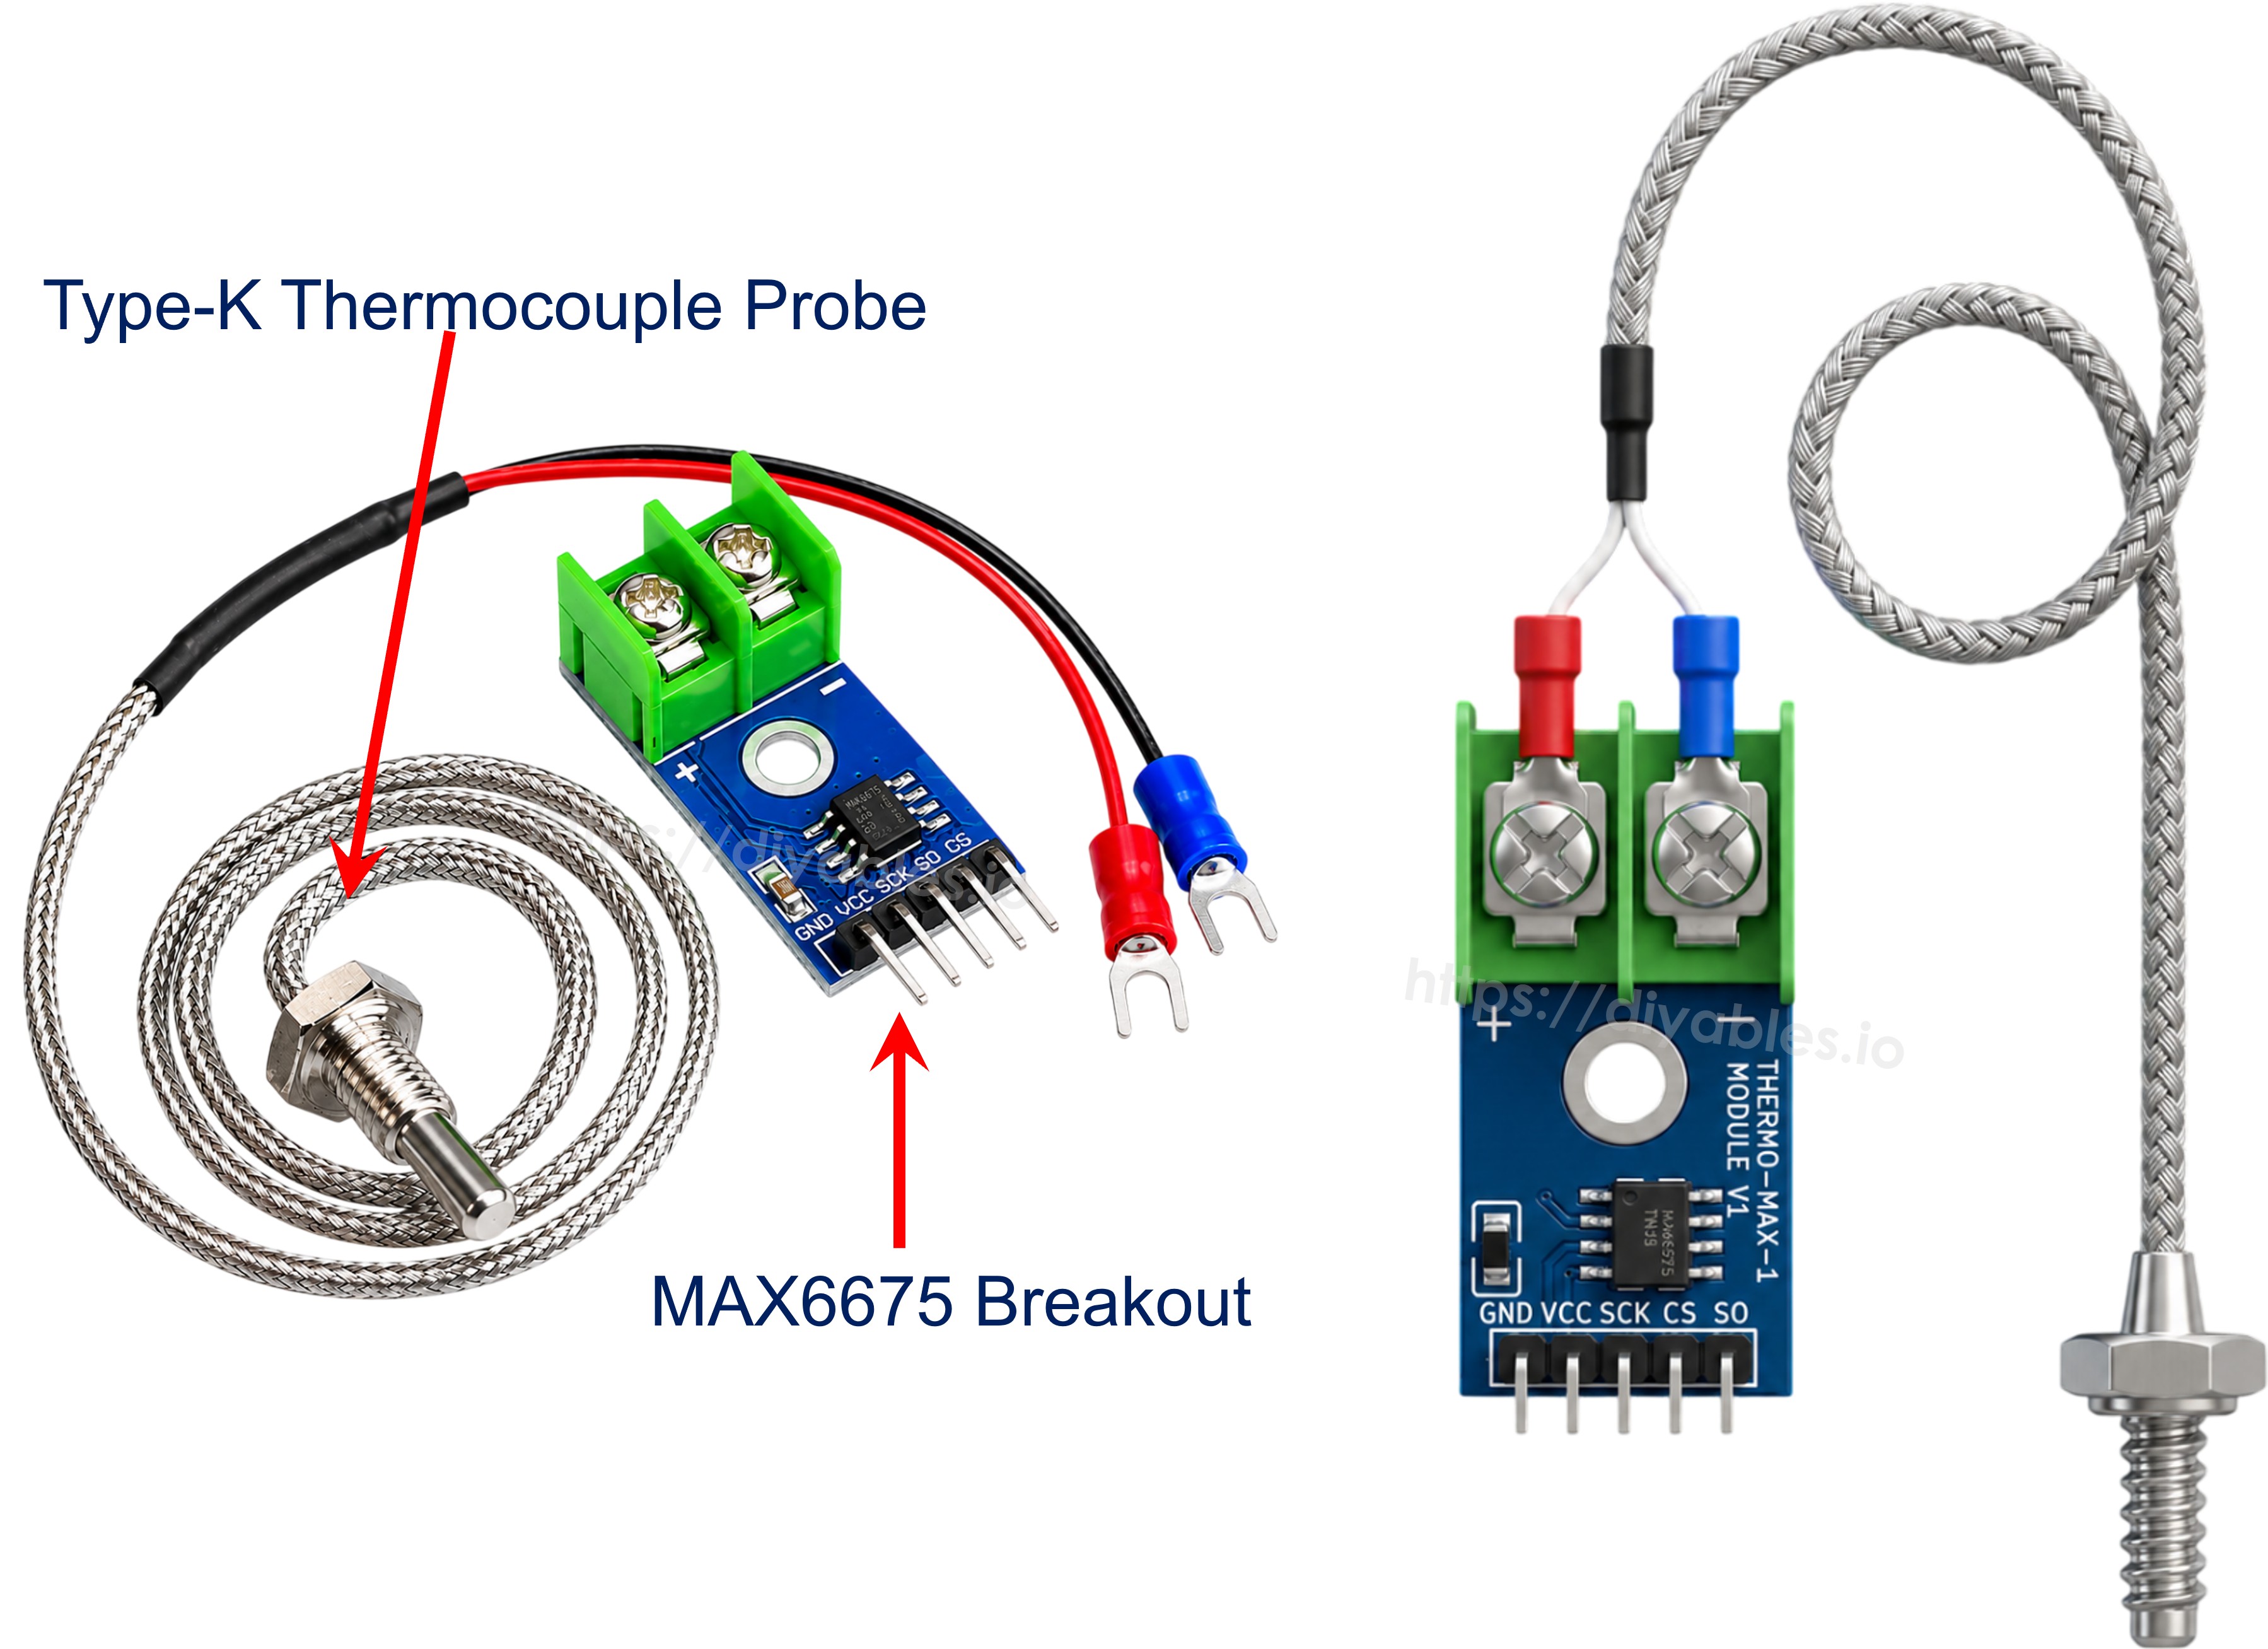
The breakout board has four header pins and a 2-pin screw terminal for the probe:
- VCC: Connect to 3.3V or 5V
- GND: Connect to GND (0V)
- SCK: Clock pin — connect to a digital pin on the MCU
- CS: Chip select pin — connect to a digital pin on the MCU
- SO: Serial data output (MISO only, there is no MOSI) — connect to a digital pin on the MCU
The Type-K probe connects to the screw terminal on the other side of the board: red wire to +, blue wire to -.
Wiring Diagram
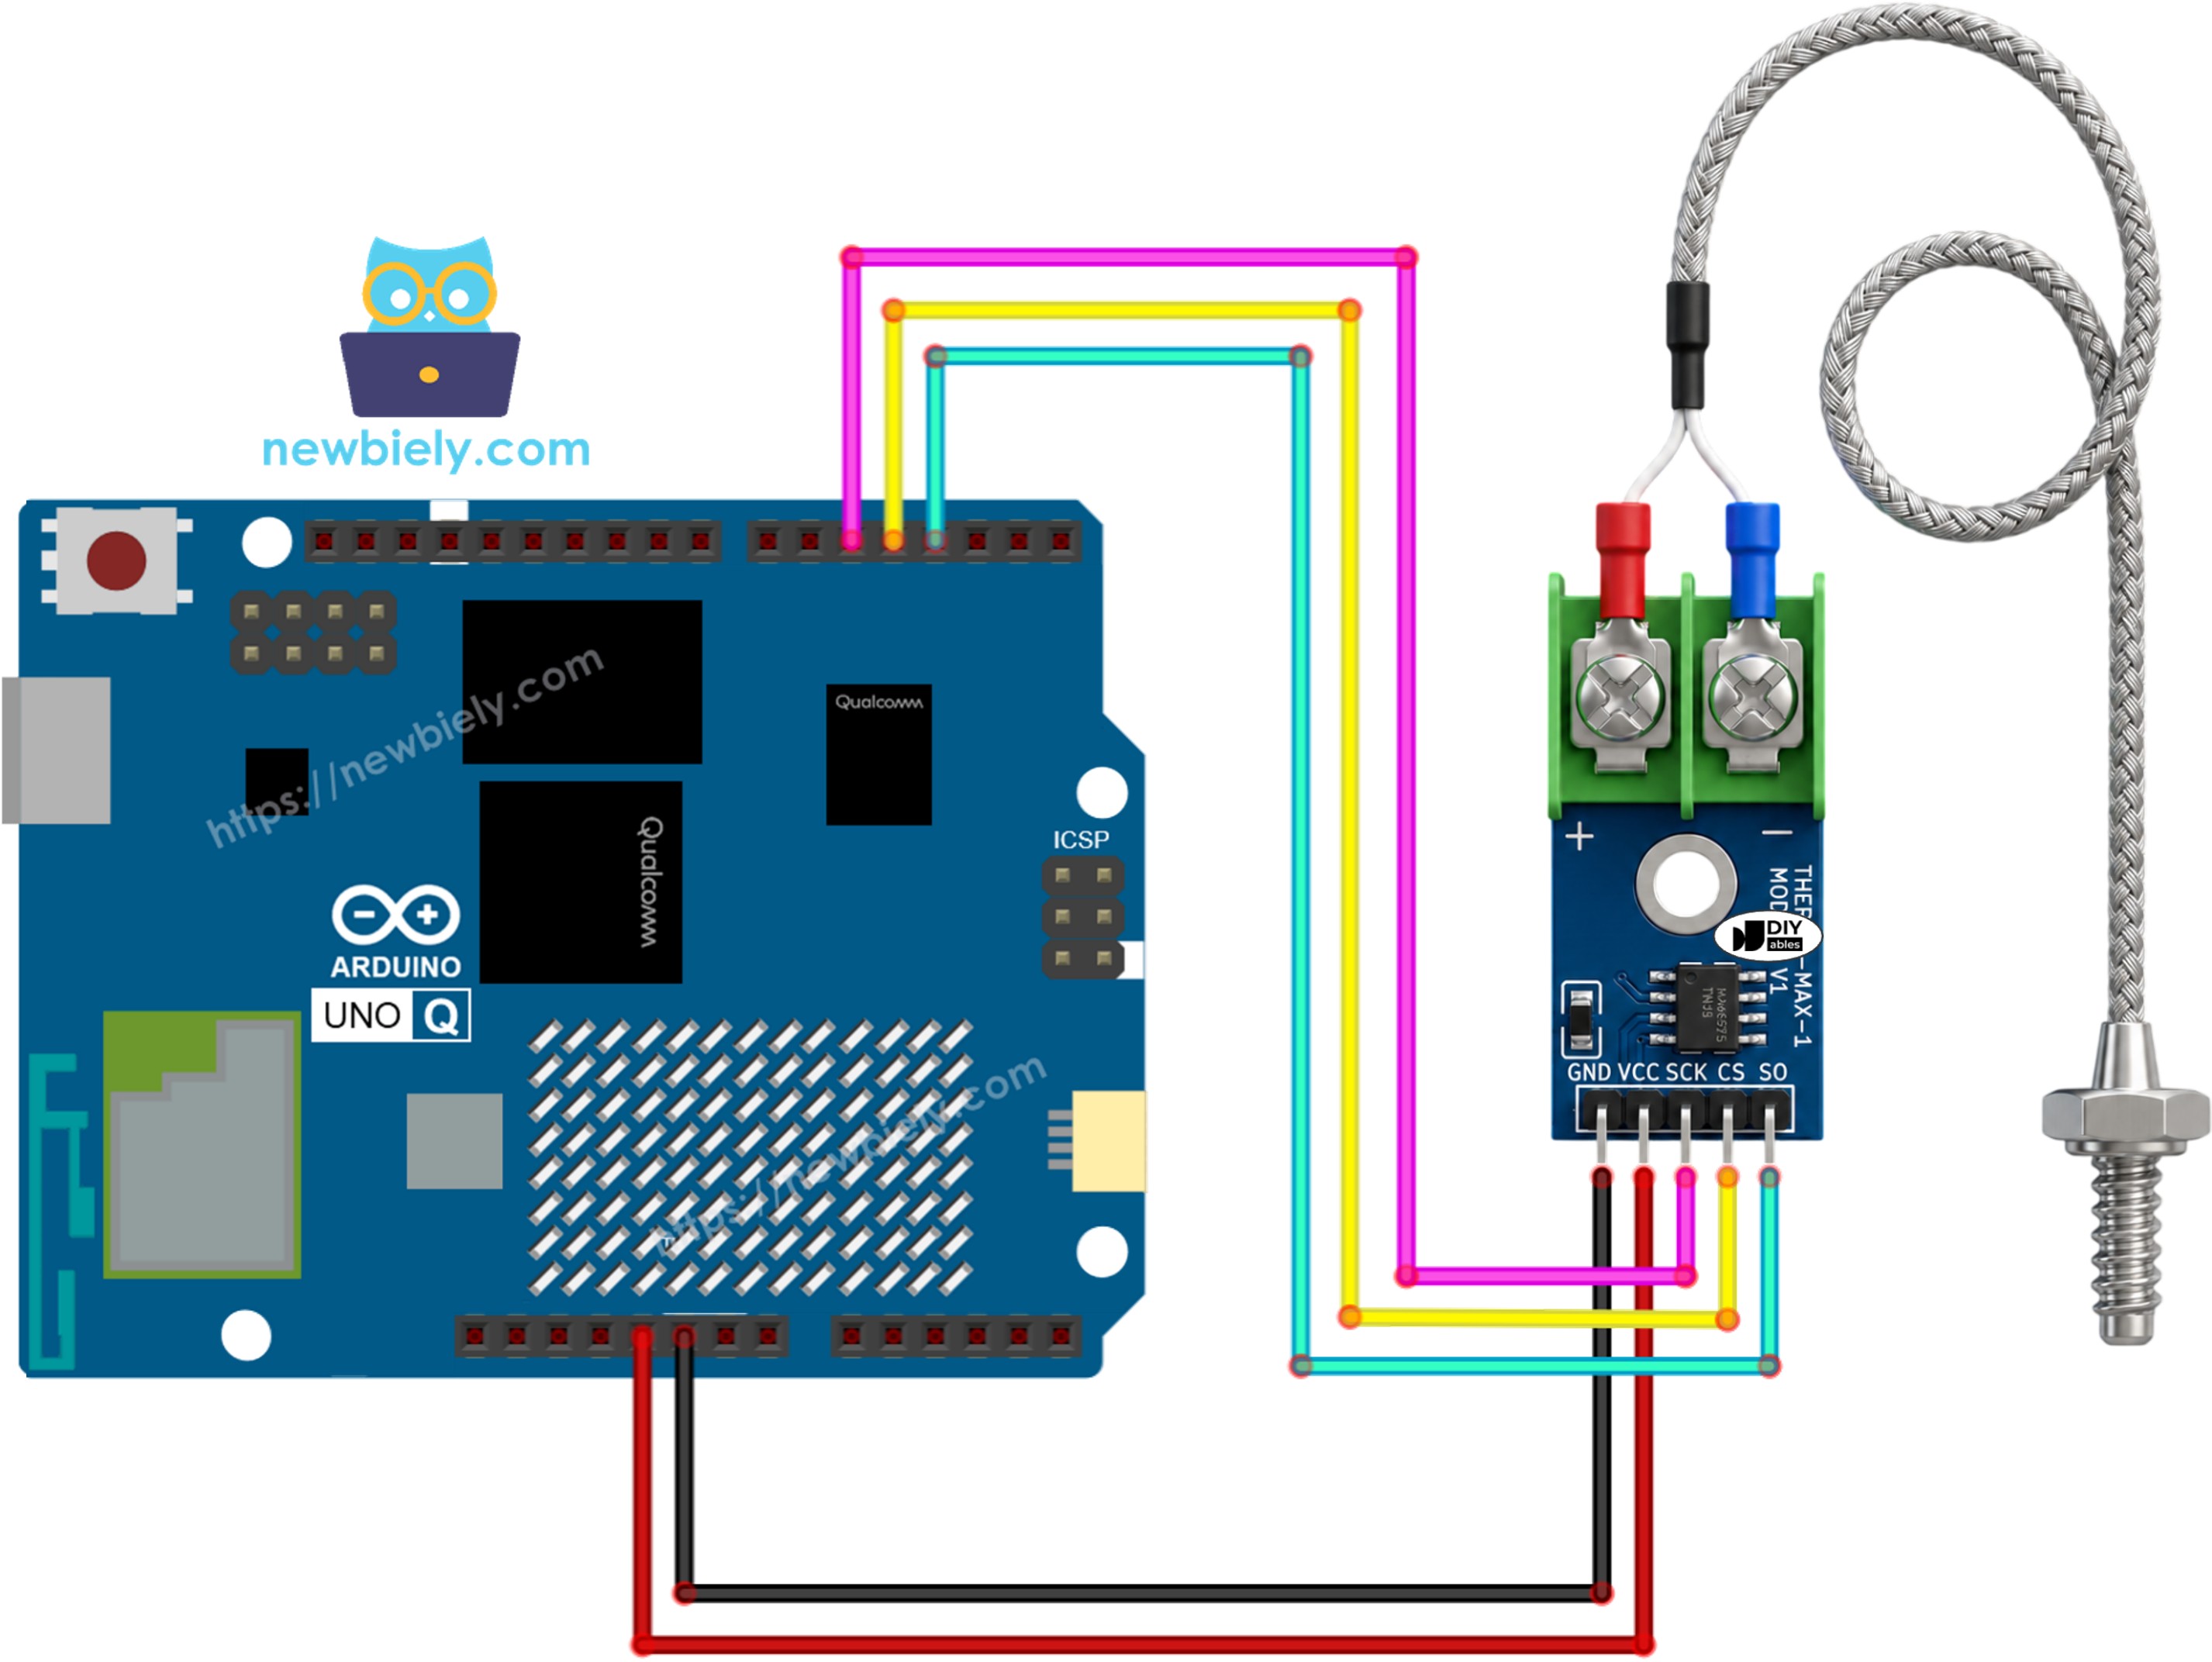
This image is created using Fritzing. Click to enlarge image
| MAX6675 Module Pin | Arduino UNO Q MCU |
|---|---|
| VCC | 5V |
| GND | GND |
| SCK | D5 |
| CS | D4 |
| SO | D3 |
How To Program For MAX6675
- Include the library:
- Define the pins and create a thermocouple object:
- Read the temperature in Celsius and Fahrenheit:
※ NOTE THAT:
The MAX6675 needs about 220ms to complete a conversion — avoid reading it more often than roughly once every 250ms.
Arduino UNO Q Code
The Arduino UNO Q has two processors working together:
- The STM32 MCU reads the MAX6675 module directly via its 3-wire interface — all sensor reading runs on the MCU
- The Qualcomm MPU runs Debian Linux and handles Wi-Fi, Python, and cloud connectivity
- In this section, only the MCU is programmed — the Linux side stays idle. A later section shows how both processors work together via Bridge.
The MCU reads the MAX6675 every second and prints the temperature to the Serial Monitor.
Detailed Instructions
First time with Arduino UNO Q? Follow the Getting Started with Arduino UNO Q tutorial before proceeding.
- Connect: Wire the MAX6675 module to the Arduino UNO Q MCU as shown in the wiring diagram.
- Open Arduino App Lab: Launch Arduino App Lab and wait until it detects your Arduino UNO Q.
- Create a new App: Click the Create New App button.
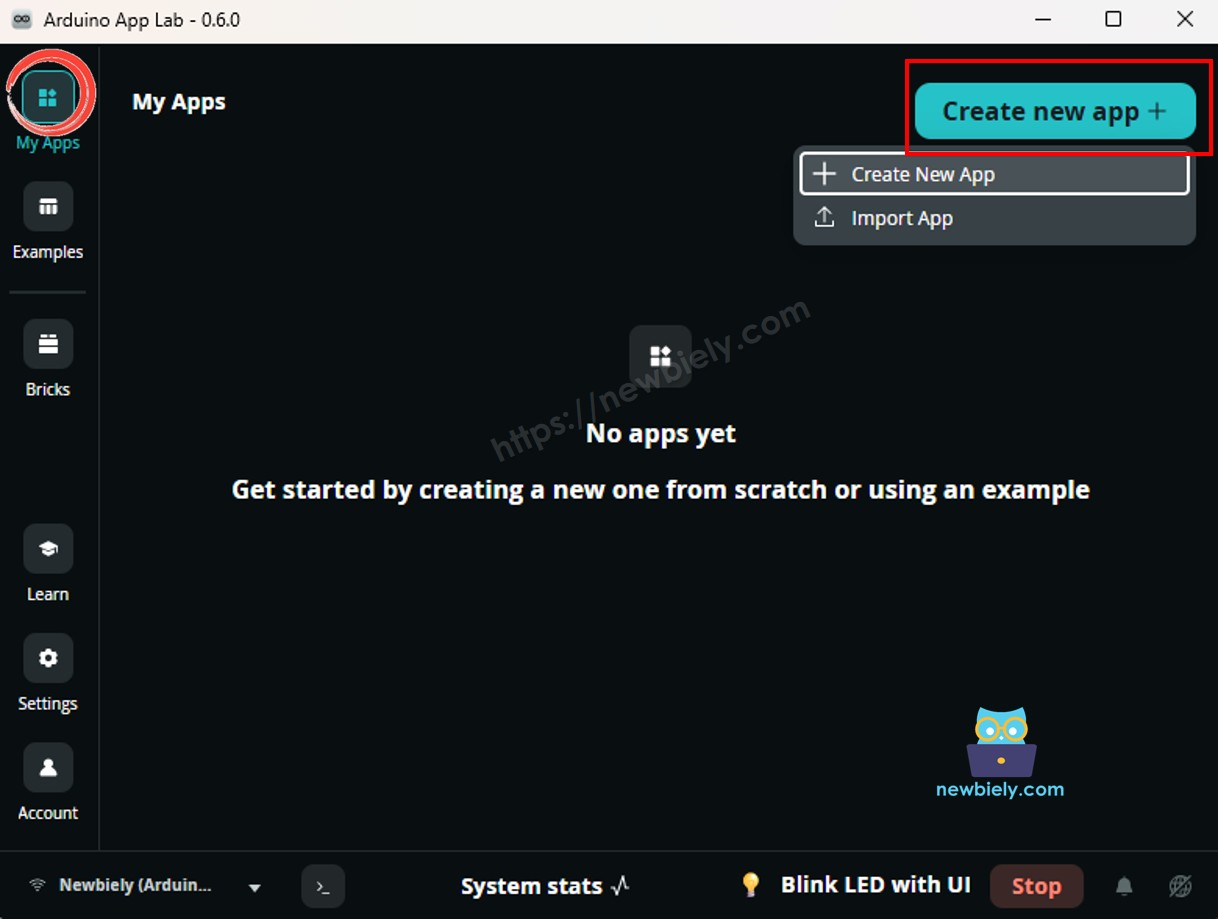
- Give the App a name, for example: Max6675ThermocoupleModule
- Click Create to confirm.
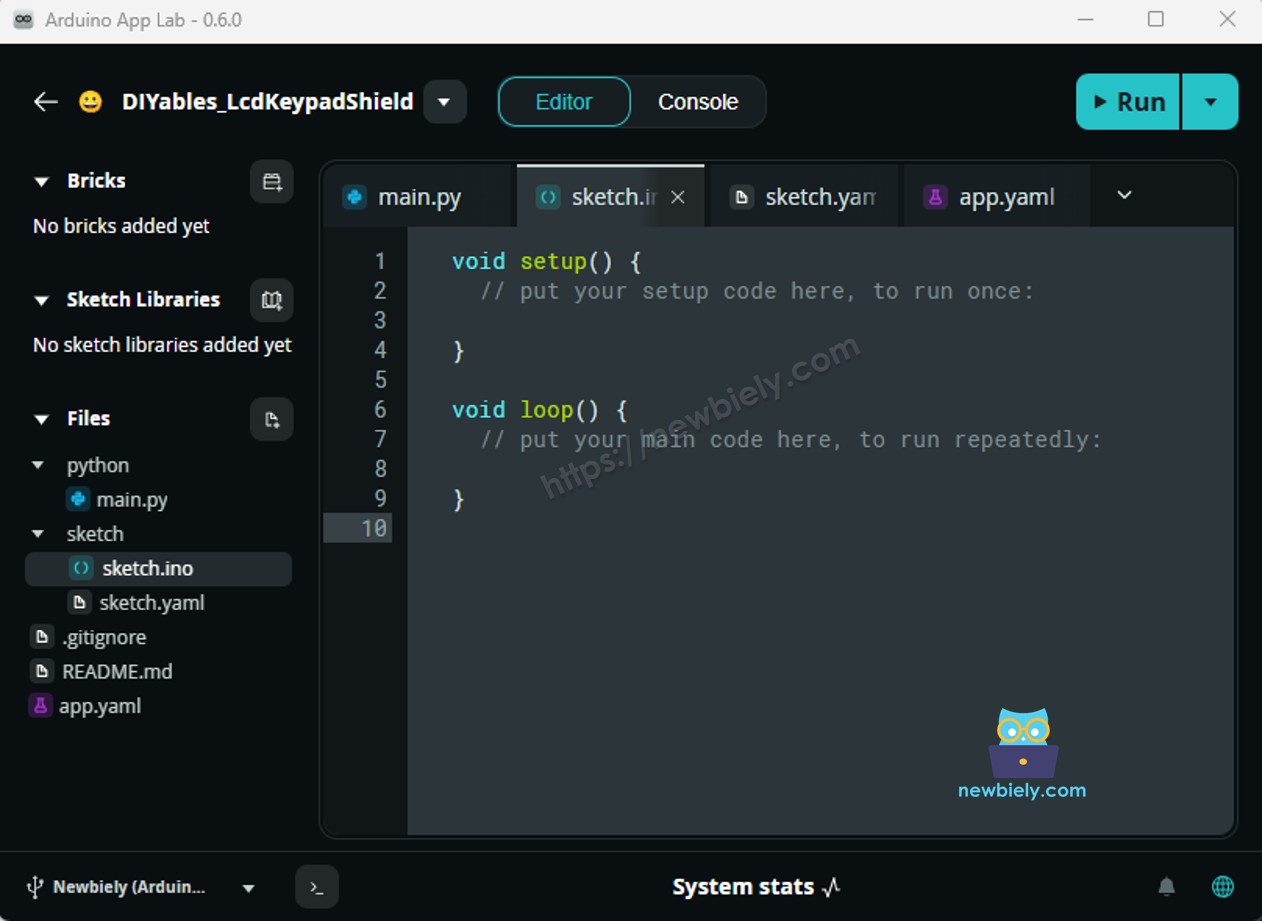
- Paste the sketch: Copy the MCU code above and paste it into sketch/sketch.ino. Keep other files as default.
- Install the library: Click the Add sketch library button (the open book icon with a + sign) in the left sidebar.
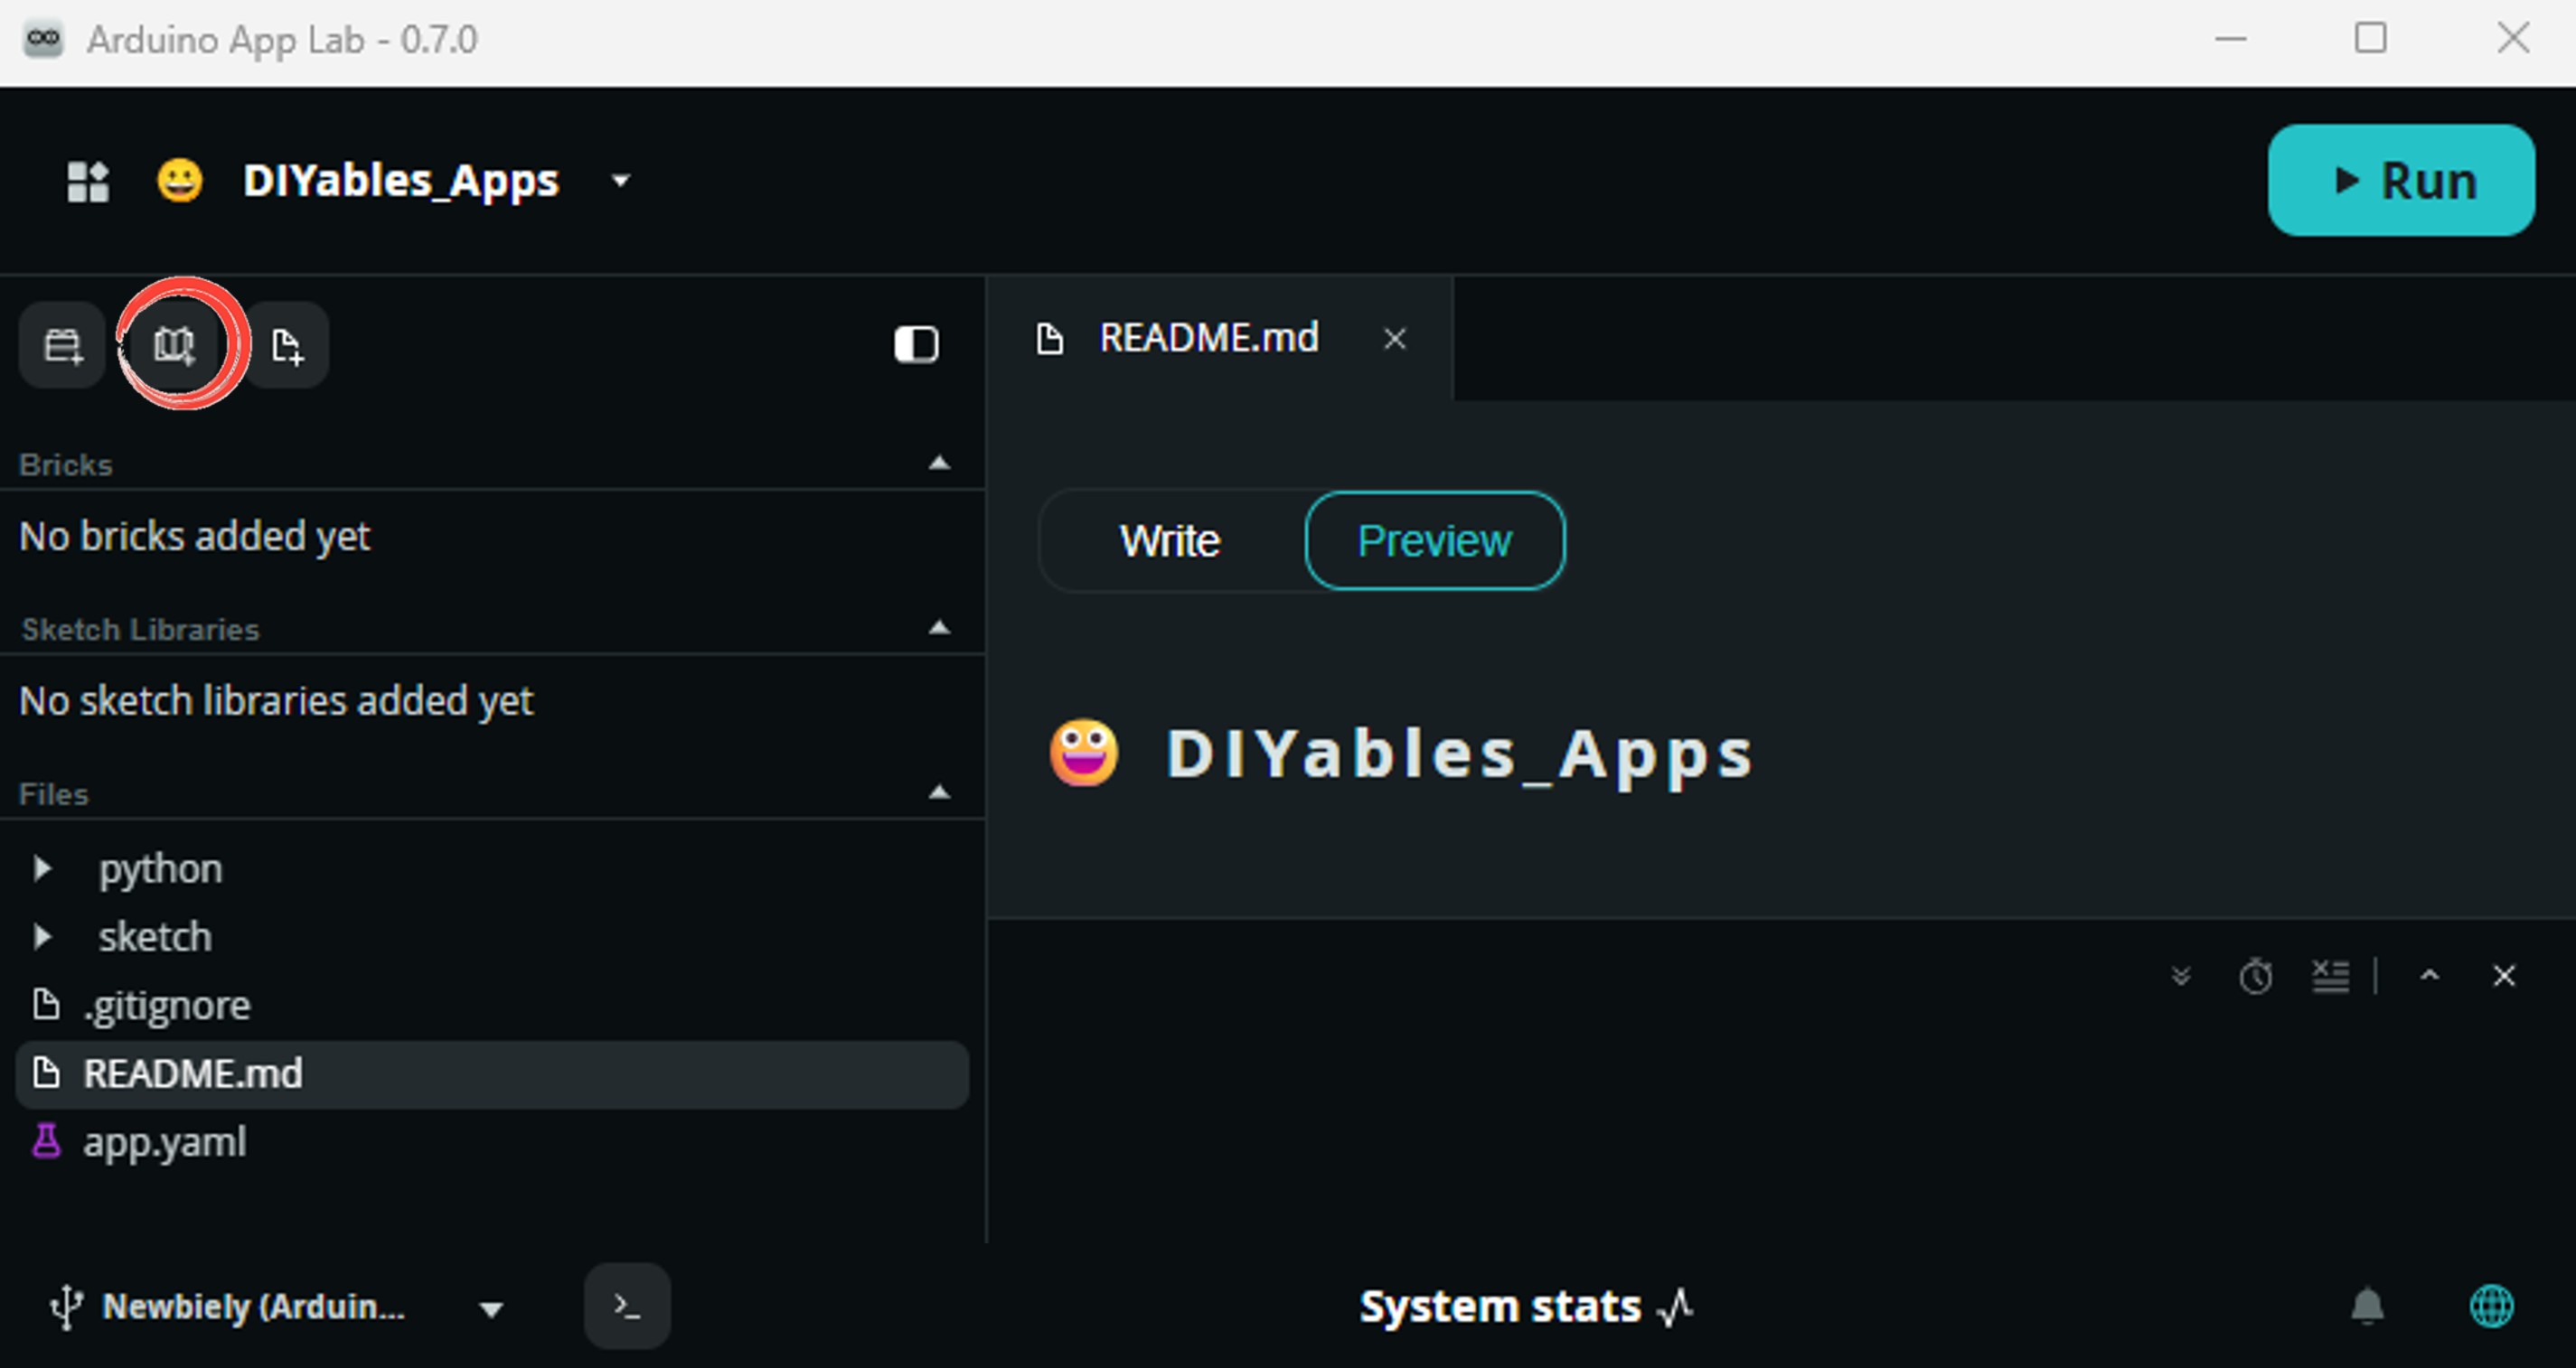
- Search for MAX6675 library created by Adafruit and click the Install button.
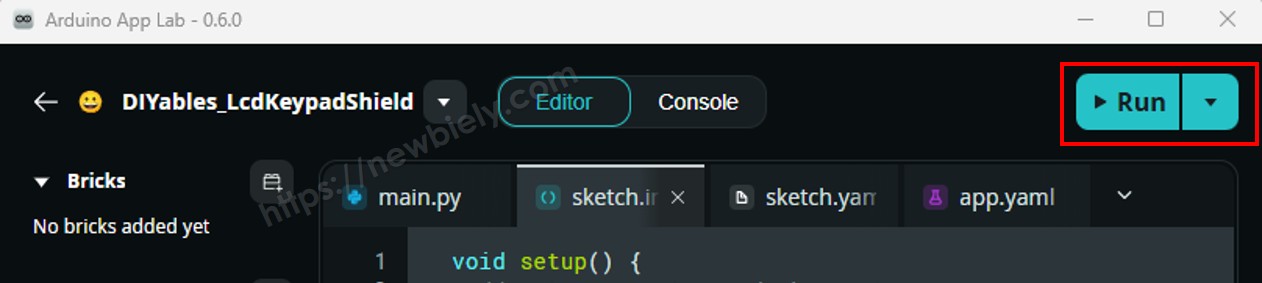
- Upload: Click the Run button in Arduino App Lab.
- Touch the probe tip to something warm (a mug of hot water works well) — watch the temperature rise in the console.
App Lab Console Output
Bridge: Linux + MCU
This section shows how to program both processors of the Arduino UNO Q so the Linux side can read MAX6675 temperature via Bridge:
- The MAX6675 module is connected to the MCU (STM32) via its 3-wire interface — the MCU reads and caches the latest values every second
- The MPU cannot access the MAX6675 directly — it must call Bridge functions to retrieve readings
- The MPU has Wi-Fi — running full Debian Linux, it can log data, publish to dashboards, or send alerts over the Internet
- Arduino_RouterBridge enables RPC communication between the two processors
- ⚠️ /dev/ttyHS1 (Linux) and Serial1 (MCU) are RESERVED by the router — never open them in user code
In short: MCU reads the MAX6675 every second and caches the result → MPU polls Bridge to retrieve readings → MPU publishes or alerts over Wi-Fi.
MCU Code (Bridge)
Python Code (Bridge)
Detailed Instructions
- Connect: Wire the MAX6675 module to the Arduino UNO Q as shown in the wiring diagram.
- Open Arduino App Lab: Launch Arduino App Lab and wait for the board to be detected.
- Create a new App: Click Create New App, name it Max6675ThermocoupleModuleBridge, then click Create.
- Paste the MCU sketch: Copy the MCU Bridge code above and paste it into sketch/sketch.ino.
- Paste the Python code: Copy the Python Bridge code above and paste it into the Python file in the App.
- Install the library: Click the Add sketch library button (the open book icon with a + sign) in the left sidebar.
- Search for Arduino_RouterBridge created by Arduino and click the Install button.
- Upload: Click the Run button in Arduino App Lab.
- Watch temperature readings appear in the Python console every second.
App Lab Console Output
Telegram
Monitor MAX6675 temperature remotely and receive automatic Telegram alerts when temperature rises above 100°C — handy for keeping an eye on an oven, a kiln, or a soldering station from another room.
MCU sketch: Keep the same MCU sketch from the previous Bridge section.
Python Code (Telegram)
Detailed Instructions
- Replace YOUR_TELEGRAM_BOT_TOKEN with your actual bot token from BotFather.
- Replace YOUR_CHAT_ID with your Telegram chat ID.
- Paste this Python code into your App's Python file (keep the same MCU sketch).
- Click the Run button. Send /temp from Telegram, or heat the probe past 100°C to trigger the alert.
App Lab Console Output


ArduinoBot
OpenClaw
You can adapt the OpenClaw to this tutorial by refering the instruction on Arduino Uno Q - OpenClaw Tutorial
Project Ideas
You can build many useful projects with the MAX6675 and Arduino UNO Q:
- Kiln or Oven Temperature Logger: Log temperature over time via Bridge and Python, and plot the firing/baking curve on a dashboard
- Soldering Station Monitor: Track tip temperature and get a Telegram alert if it drifts outside your target range
- BBQ / Smoker Thermometer: Clip the probe to your grill grate and get remote Telegram updates so you don't have to keep opening the lid
- 3D Printer Hot End Watchdog: Use the MCU to trigger a relay via Bridge that cuts power if the hot end overheats beyond a safe limit
- Multi-Zone Furnace Survey: Connect multiple MAX6675 modules to different digital pins and have the Python side poll each one via Bridge for a side-by-side comparison
Challenge Yourself
Ready to go further with the MAX6675 on Arduino UNO Q? Try these challenges:
- Easy: Add a minimum/maximum tracker in the MCU sketch that remembers the highest and lowest temperature seen since boot.
- Medium: Add a get_fault(String) Bridge function that reports whether the thermocouple probe is disconnected (the MAX6675 sets a fault bit when the probe is open), and have the Python side print a warning if it's ever true.
- Advanced: Build a data logger: have the Python side write a timestamped CSV of temperature readings every 5 seconds, then add a Telegram /report command that sends back the highest reading from the last hour.