
Arduino UNO Q - SW-420 Vibration Sensor
The SW-420 vibration sensor module watches for shock or vibration and reports it as a clean digital signal, so your program never has to interpret a noisy analog wave. Inside the module, a small spring-based switch sits close to a metal contact; the onboard LM393 comparator keeps an eye on that switch and flips its output the instant vibration disturbs it, while a small potentiometer on the board lets you dial in how much shaking counts as an event. Paired with the Arduino UNO Q's Bridge and Telegram integration, you can get an instant phone alert the moment something is bumped, shaken, or tampered with.
In this tutorial, you will learn:
- What a SW-420 vibration sensor is and how it works
- How to wire the SW-420 vibration sensor to the Arduino UNO Q MCU
- How to read the digital output to detect vibration
- How to use Bridge to expose vibration state and events to the Linux side (Python)
- How to receive Telegram alerts when vibration is detected on Arduino UNO Q
- How to use OpenClaw on Arduino UNO Q with the SW-420 vibration sensor
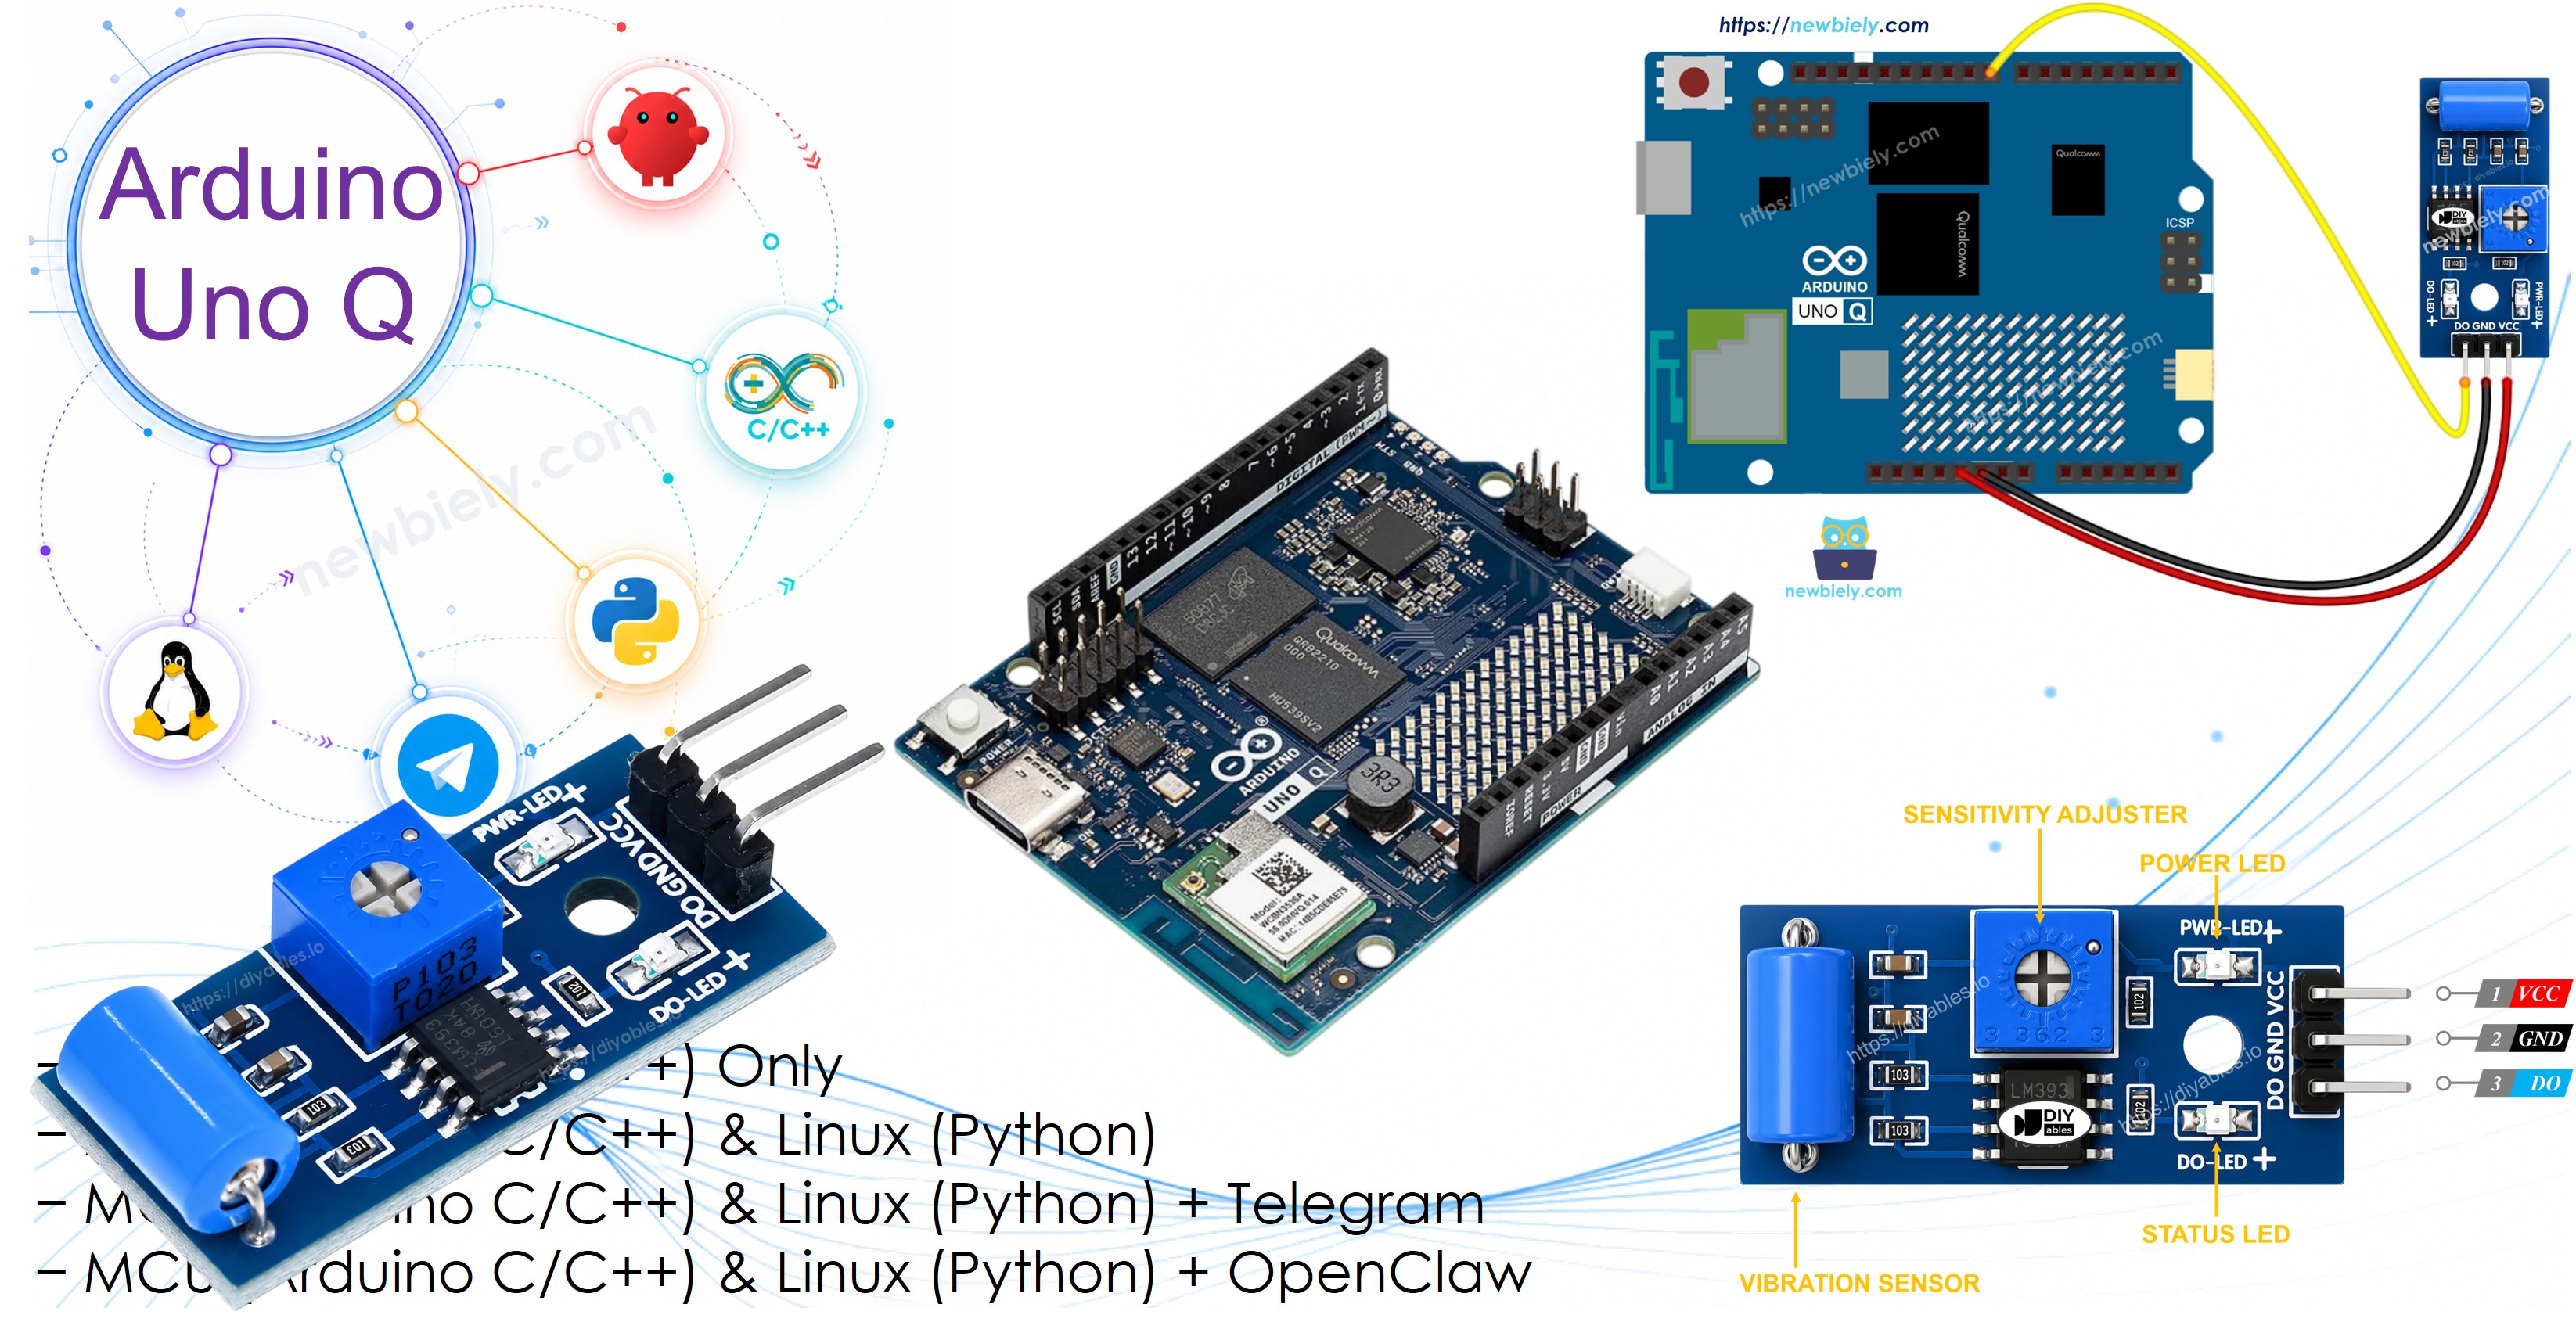
Hardware Preparation
Or you can buy the following kits:
| 1 | × | DIYables Sensor Kit (18 sensors/displays) |
Additionally, some of these links are for products from our own brand, DIYables .
Overview of the SW-420 Vibration Sensor
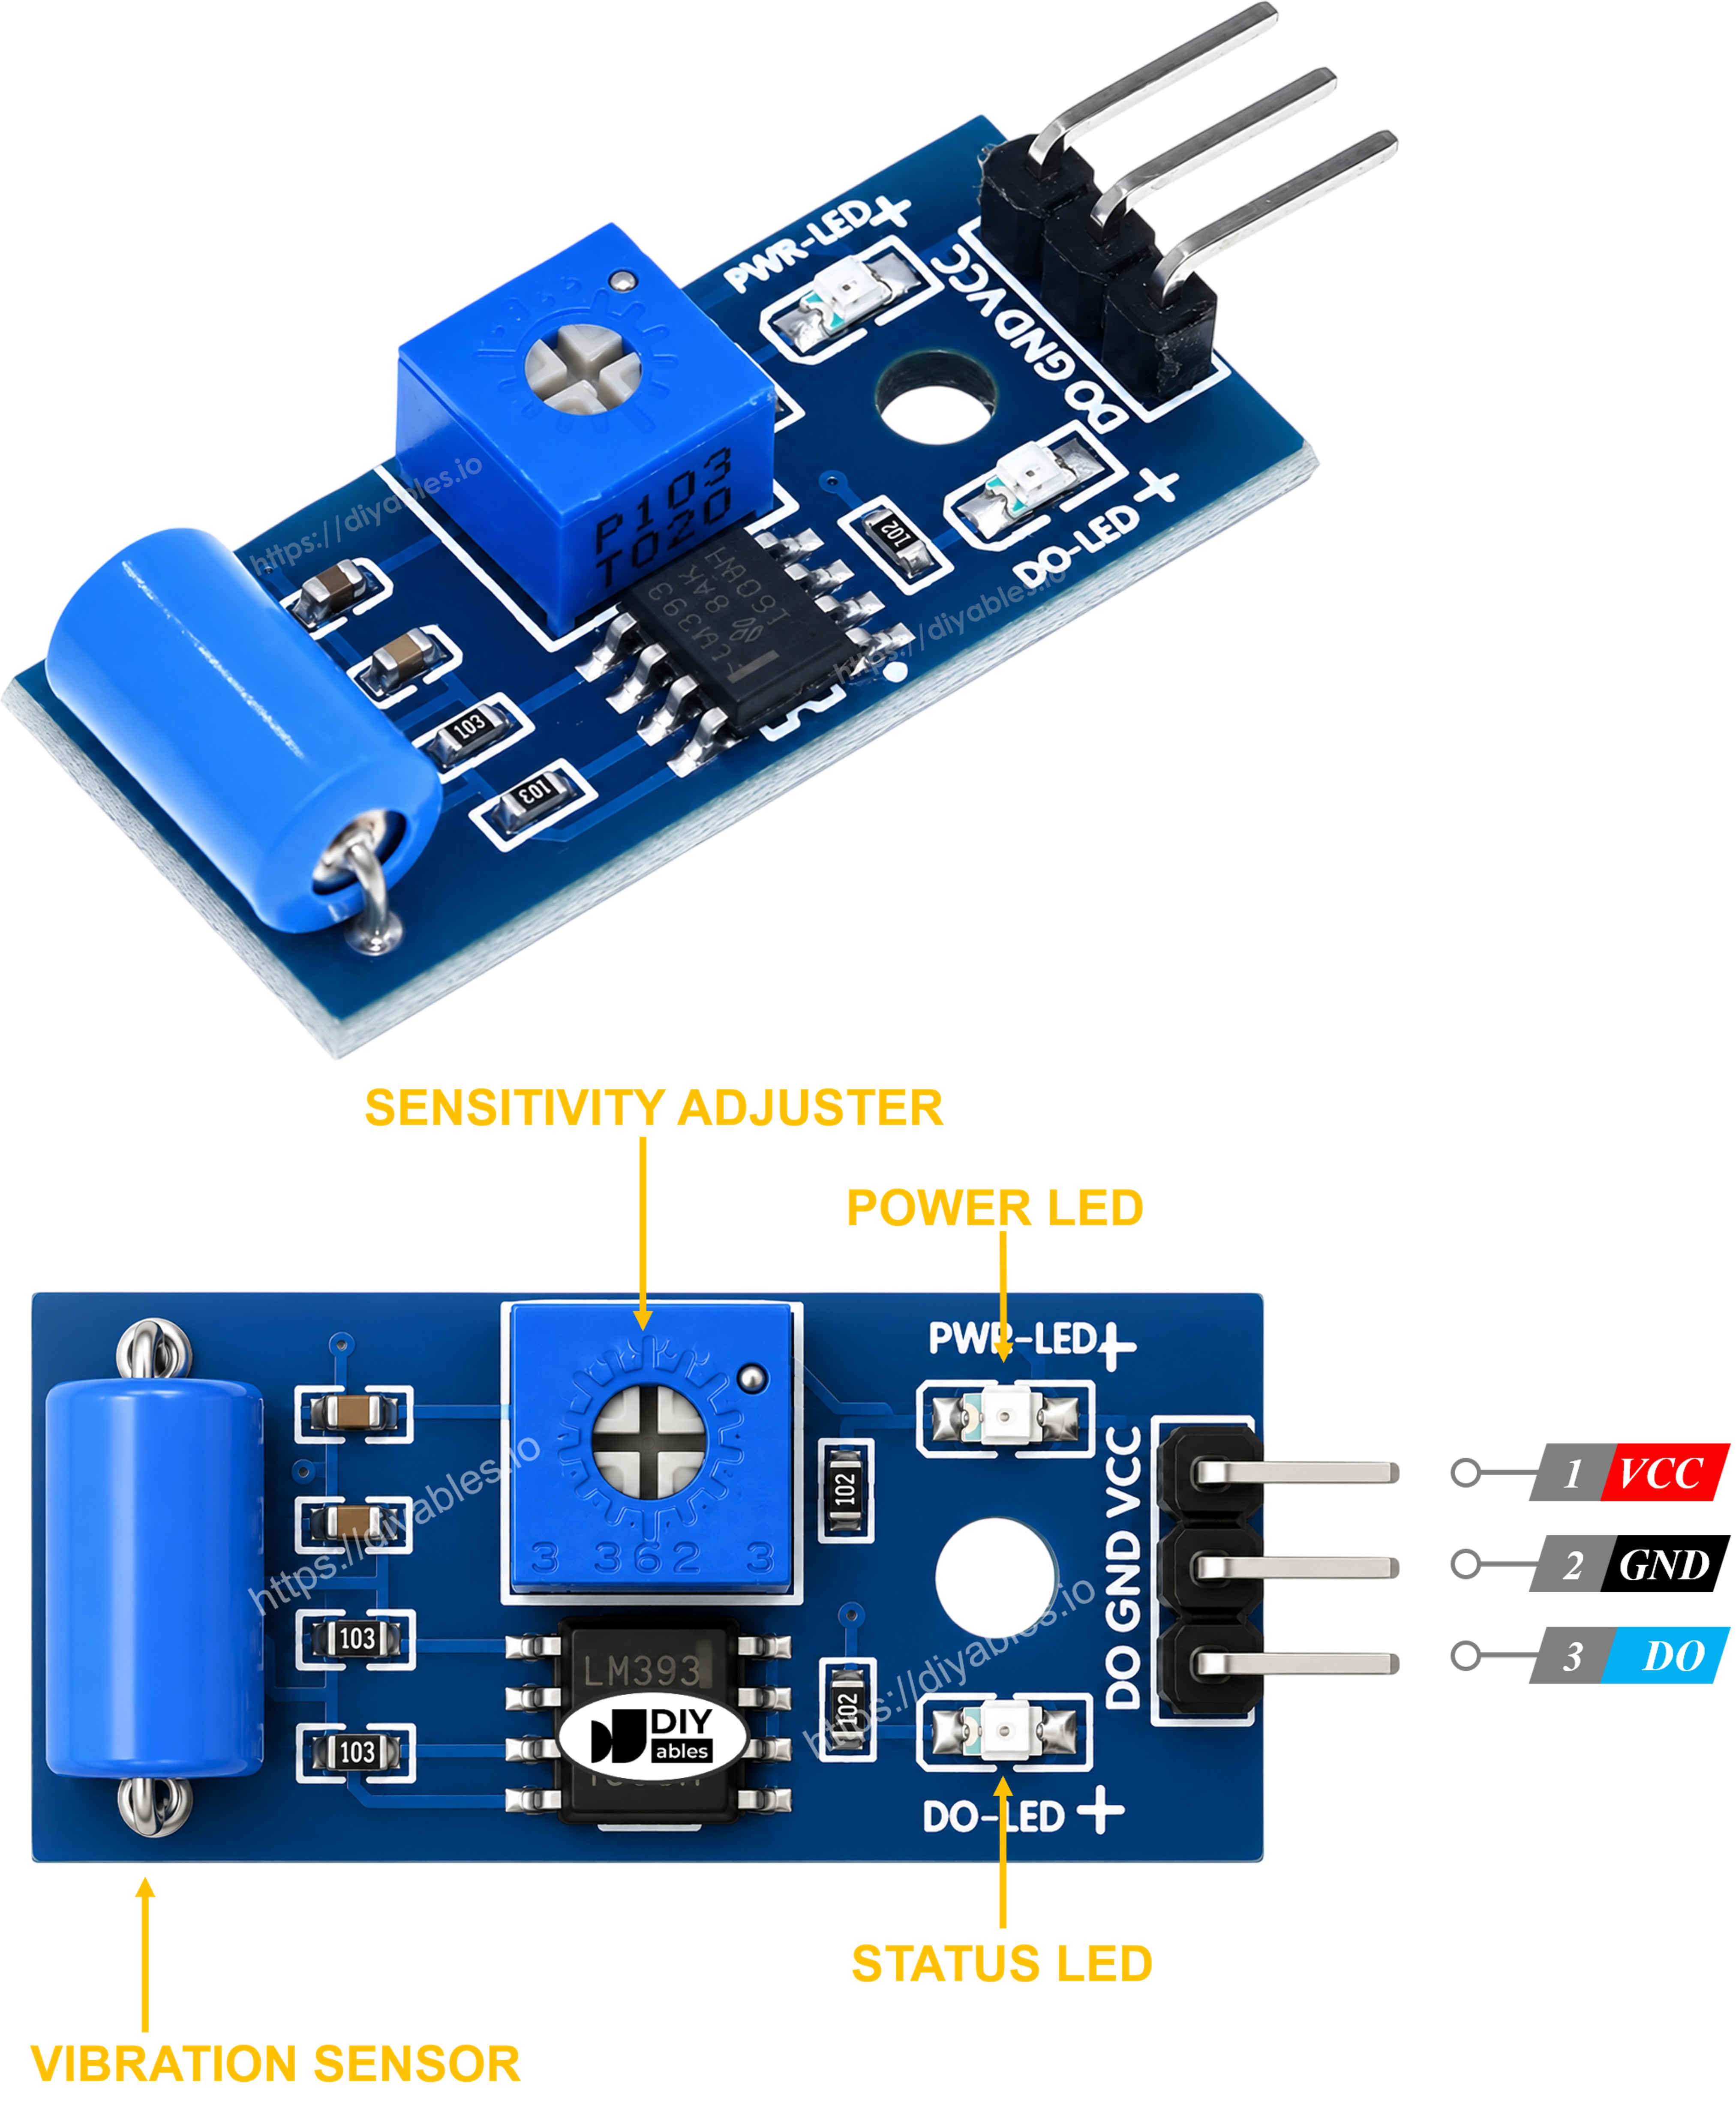
The SW-420 vibration sensor module is built around a tiny spring-based vibration switch. While the module sits still, the switch stays in one resting position; the moment vibration or shock disturbs it, the switch's contact state flips. An onboard LM393 comparator turns that mechanical change into a clean digital signal, and a small potentiometer lets you adjust exactly how much shaking is needed before the output triggers. The module outputs a simple digital signal:
- LOW: No vibration — module is idle
- HIGH: Vibration or shock detected
The module includes:
- VCC pin: 3.3V to 5V power supply
- GND pin: Ground
- DO pin: Digital output — LOW = idle, HIGH = vibration detected
- PWR LED: Power indicator
- Status LED: Lights up whenever the output goes HIGH
Wiring Diagram
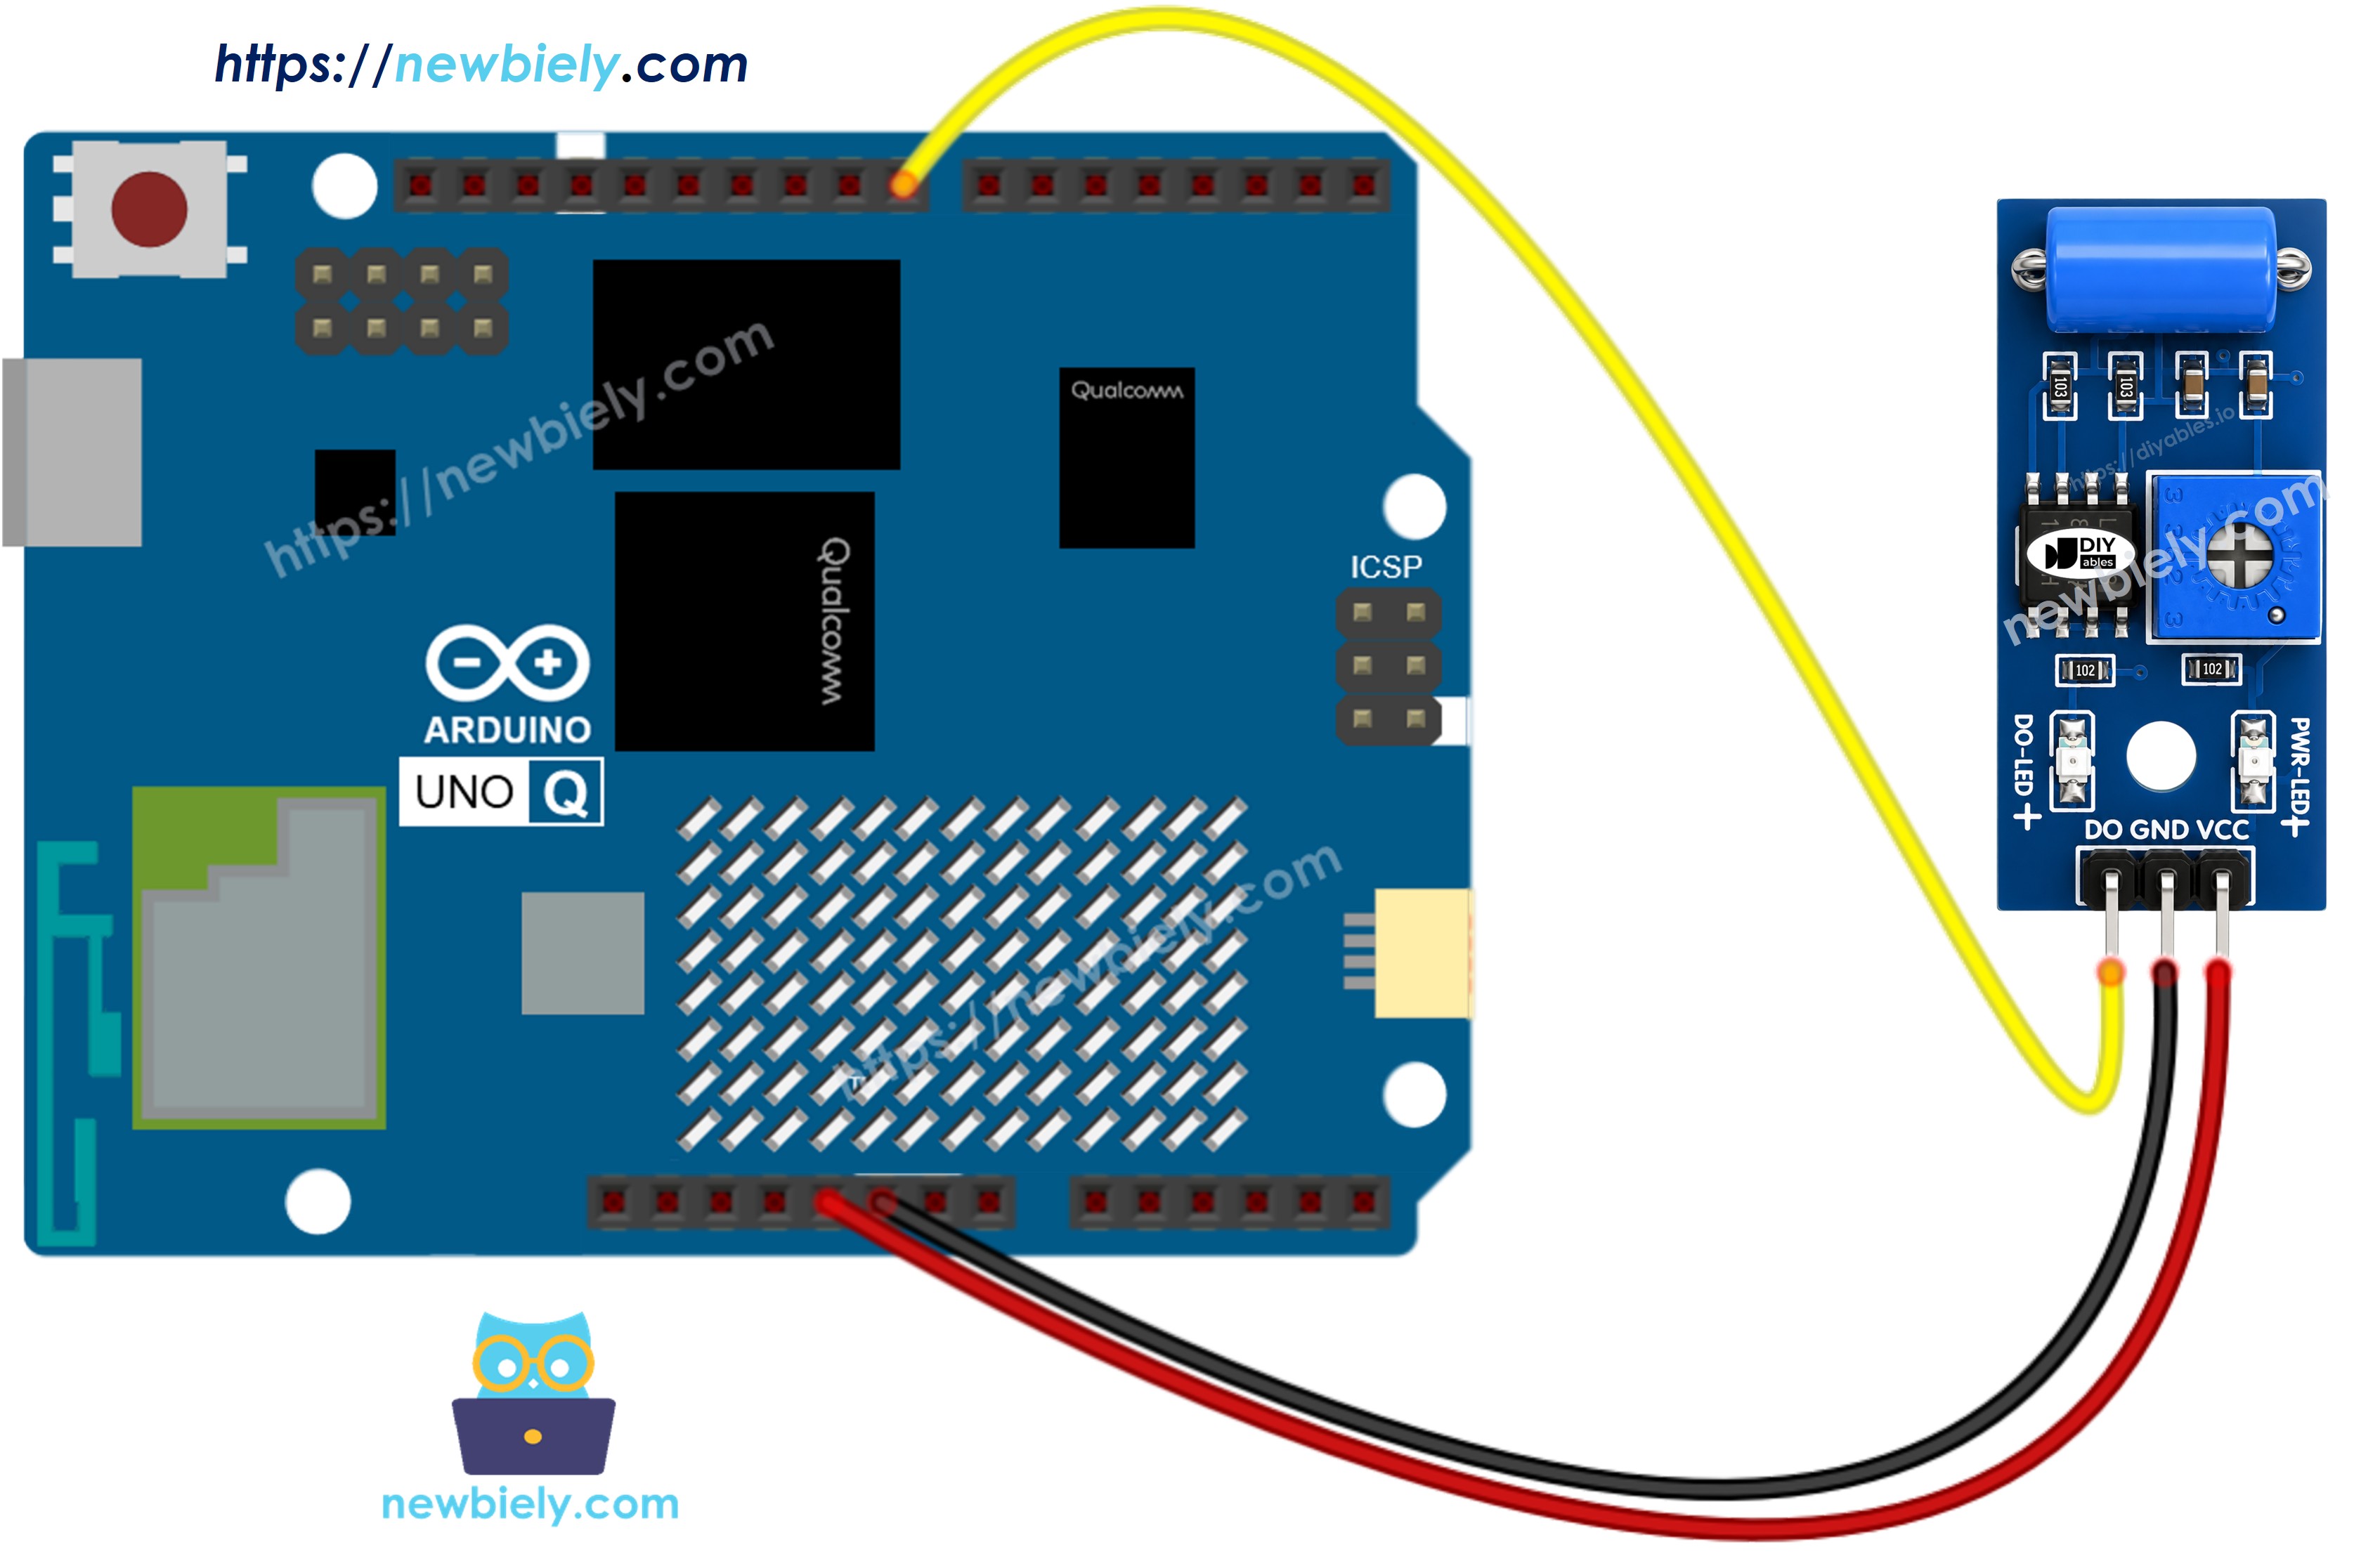
This image is created using Fritzing. Click to enlarge image
| SW-420 Vibration Sensor Pin | Arduino UNO Q MCU |
|---|---|
| GND | GND |
| VCC | 5V |
| DO | D8 |
How To Program For SW-420 Vibration Sensor
- Configure the sensor pin as a digital input:
- Read the digital output:
- Detect vibration events by comparing to the previous state:
Arduino UNO Q Code
The Arduino UNO Q has two processors working together:
- The STM32 MCU reads the SW-420 vibration sensor's digital output and detects vibration events
- The Qualcomm MPU runs Debian Linux with Wi-Fi — in this section, only the MCU is programmed. A later section shows how both processors work together via Bridge.
Detailed Instructions
First time with Arduino UNO Q? Follow the Getting Started with Arduino UNO Q tutorial before proceeding.
- Connect: Wire the SW-420 vibration sensor to the Arduino UNO Q MCU as shown in the wiring diagram.
- Open Arduino App Lab: Launch Arduino App Lab and wait until it detects your Arduino UNO Q.
- Create a new App: Click the Create New App button.
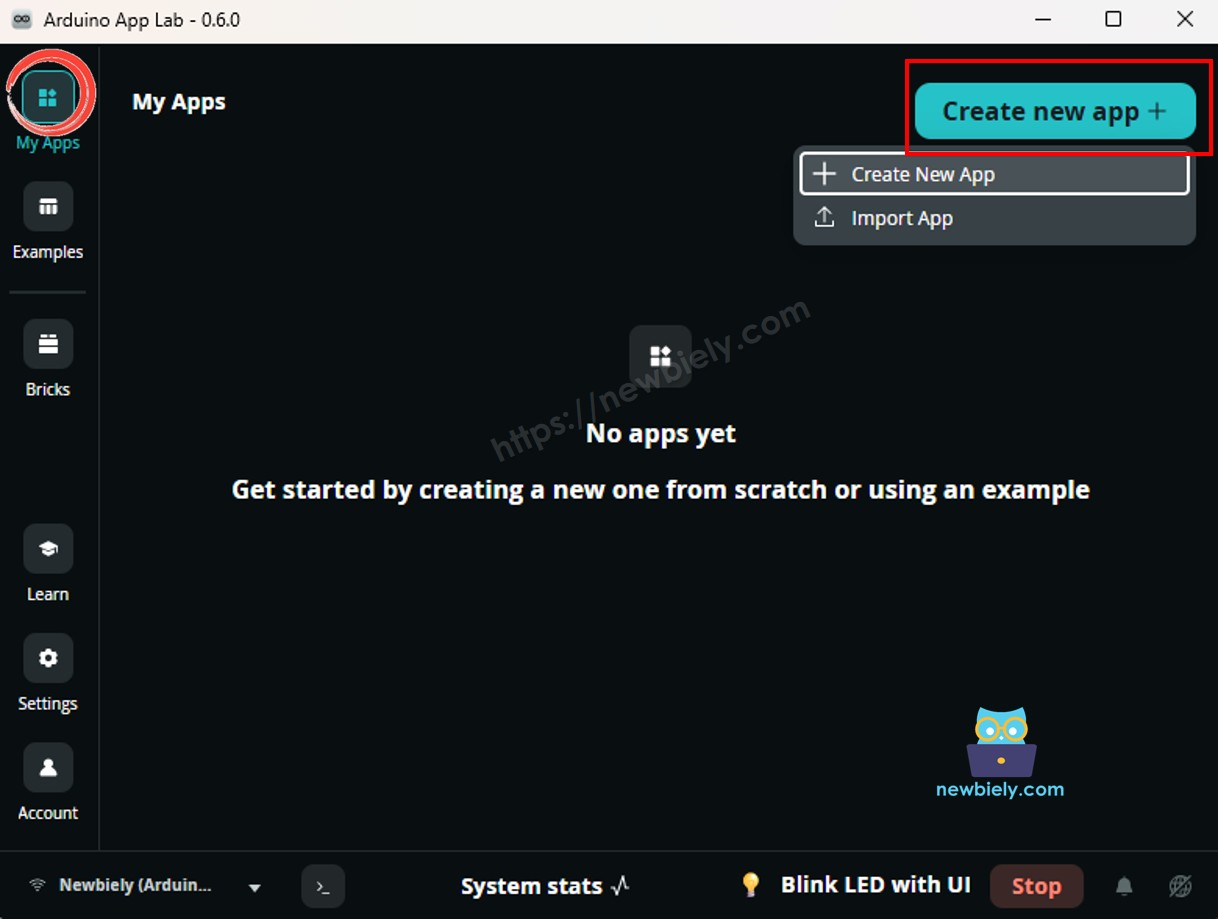
- Give the App a name, for example: SW420VibrationSensor
- Click Create to confirm.
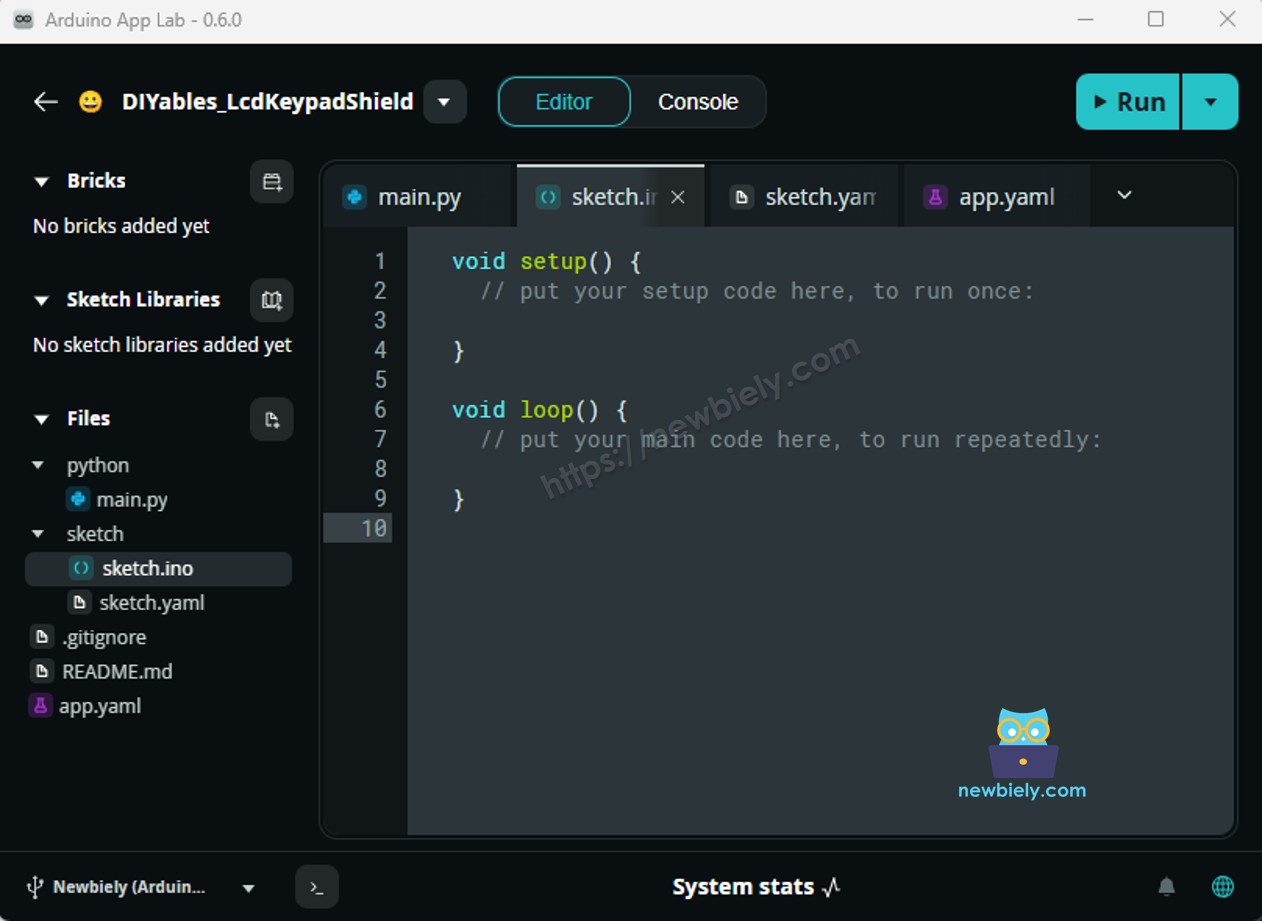
- Paste the sketch: Copy the MCU code above and paste it into sketch/sketch.ino.
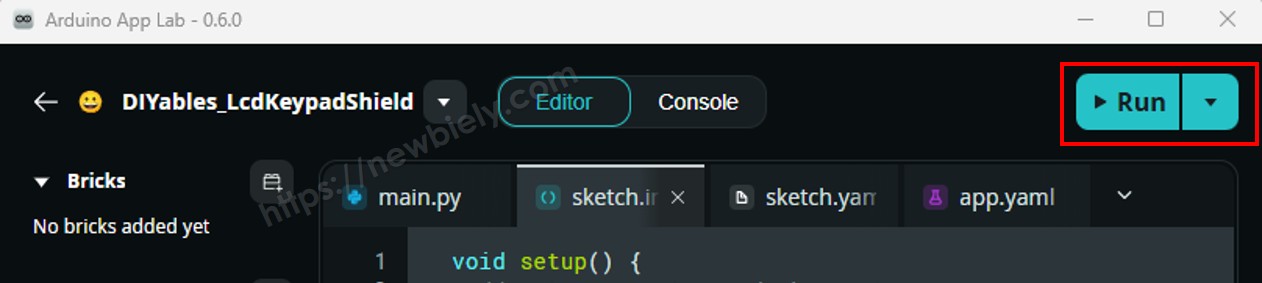
- Upload: Click the Run button in Arduino App Lab.
- Tap or shake the sensor gently — observe the Serial Monitor output.
- Turn the onboard potentiometer if the sensor feels too sensitive or not sensitive enough.
App Lab Console Output
Bridge: Linux + MCU
This section shows how to program both processors of the Arduino UNO Q so the Linux side can read vibration state and receive vibration events via Bridge:
- The SW-420 vibration sensor is connected to the MCU — the MCU monitors the digital output continuously and caches the current state
- The MPU cannot read the sensor pin directly — it calls Bridge functions to get the current state or check for new vibration events
- The MPU has Wi-Fi — running full Debian Linux, it can send Telegram alerts the moment vibration is detected
- Arduino_RouterBridge enables RPC communication between the two processors
- ⚠️ /dev/ttyHS1 (Linux) and Serial1 (MCU) are RESERVED by the router — never open them in user code
In short: MCU detects vibration via DO pin → sets event flag → MPU polls Bridge → MPU sends Telegram alert.
MCU Code (Bridge)
Python Code (Bridge)
Detailed Instructions
- Connect: Wire the SW-420 vibration sensor to the Arduino UNO Q as shown in the wiring diagram.
- Open Arduino App Lab and create a new App named VibrationSensorBridge.
- Paste the MCU sketch into sketch/sketch.ino.
- Paste the Python code into the Python file.
- Install the library: Click the Add sketch library button (the open book icon with a + sign) in the left sidebar.
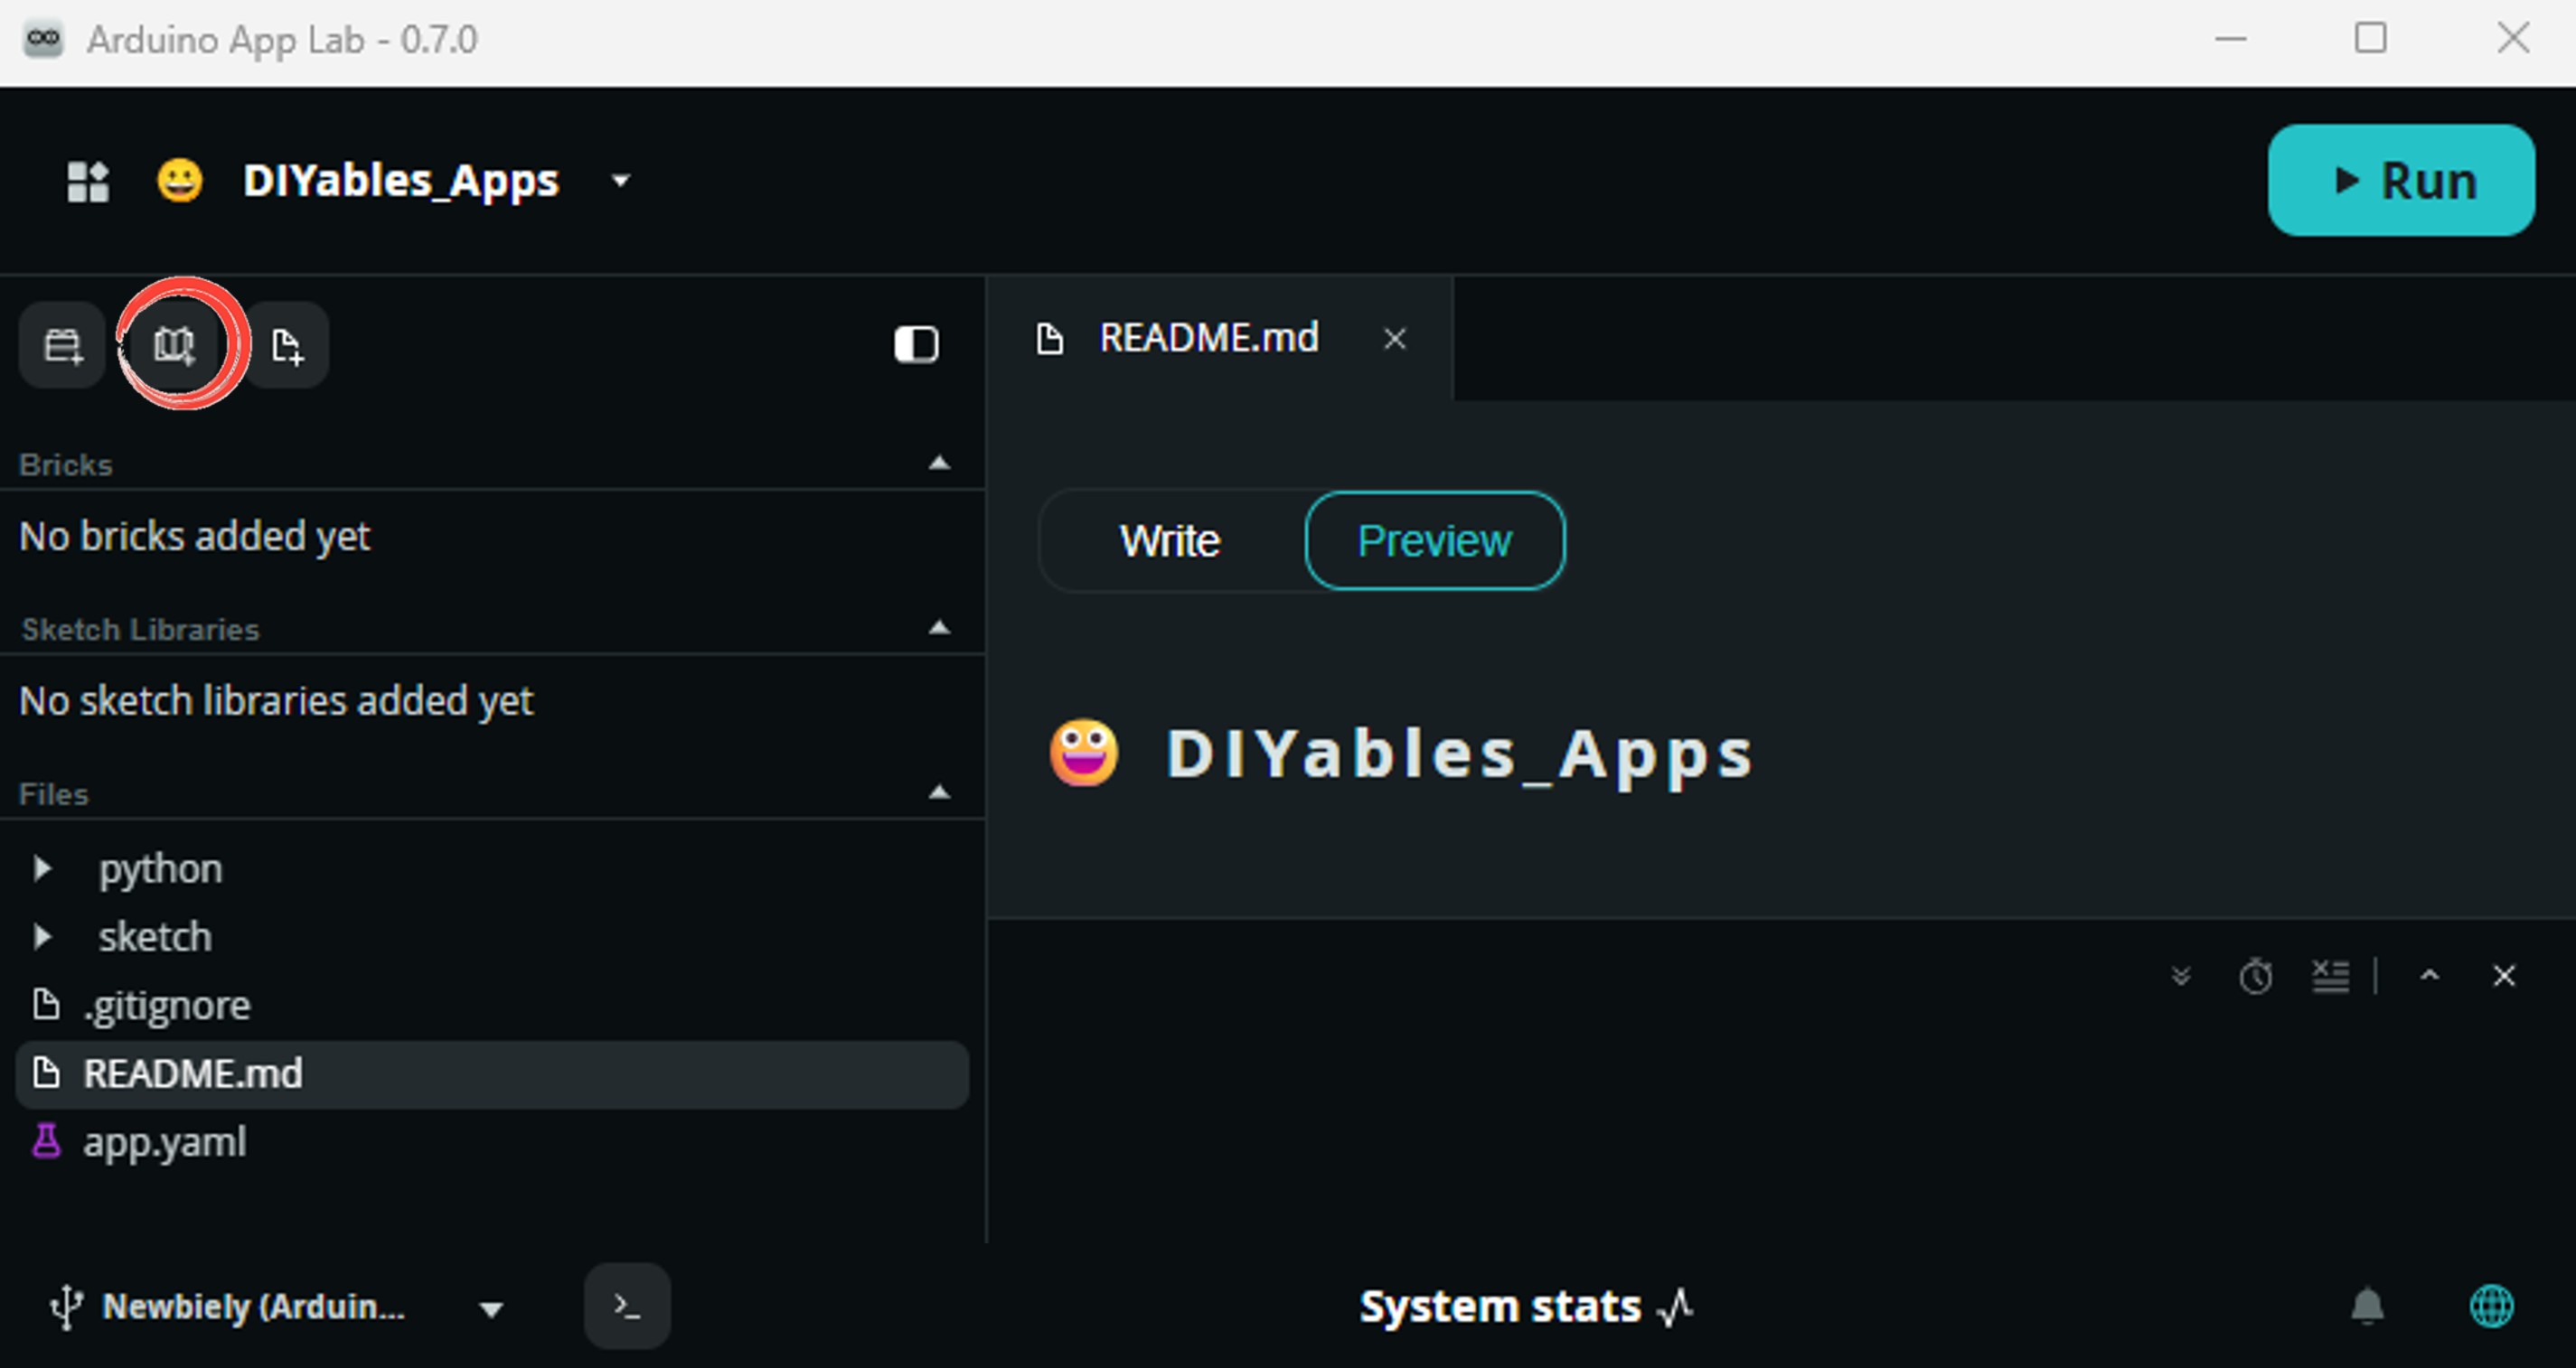
- Search for Arduino_RouterBridge created by Arduino and click the Install button.
- Upload: Click the Run button.
- Tap the sensor — observe the event appear in both consoles.
App Lab Console Output
Telegram
Receive instant Telegram alerts when vibration is detected on the Arduino UNO Q SW-420 vibration sensor.
MCU sketch: Keep the same MCU sketch from the previous Bridge section.
Python Code (Telegram)
Detailed Instructions
- Replace YOUR_TELEGRAM_BOT_TOKEN with your actual bot token from BotFather.
- Replace YOUR_CHAT_ID with your Telegram chat ID.
- Paste this Python code into your App's Python file (keep the same MCU sketch).
- Click the Run button — tap or shake the sensor to trigger a Telegram alert.
App Lab Console Output


ArduinoBot
OpenClaw
You can adapt the OpenClaw to this tutorial by refering the instruction on Arduino Uno Q - OpenClaw Tutorial
Project Ideas
You can build many useful projects with the SW-420 vibration sensor and Arduino UNO Q:
- Door/Window Tamper Alert: Stick the sensor to a door or window — if someone forces or knocks on it, the MPU sends an instant Telegram alert so you know right away
- Parcel Shock Logger: Tape the sensor inside a shipping box — the MPU timestamps every shock event to a log file on Linux so you can tell if a package was mishandled in transit
- Washing Machine Watchdog: Mount the sensor on an appliance — the MPU tracks vibration events via Bridge and sends a Telegram message if the machine shakes abnormally hard or won't stop at the expected time
- Earthquake/Impact Demo Toy: Use the sensor as a simple early-warning demo — the MCU flags any sudden shock instantly, and the MPU broadcasts a Telegram warning within moments
- Tutorial Equipment Monitor: Attach the sensor to a running tool or machine — the MPU polls Bridge continuously and alerts you by Telegram the moment unexpected vibration suggests the equipment needs attention