Arduino UNO R4 - LED Strip
Discover how to program the Arduino Uno R4 to control 12V LED strips in this beginner-friendly tutorial. From single-color to RGB LED strips, learn to use relays for dynamic lighting projects. Here’s what you’ll learn:
- Step-by-step guidance on setting up Arduino Uno R4 with 12V LED strips
- Clear instructions for wiring relay modules to control single-color and RGB LED strips
- Practical Arduino code examples for LED strip control
- Insights into DIY electronics and home automation applications
Start your journey into Arduino programming and LED strip projects today!
Hardware Preparation
Or you can buy the following kits:
| 1 | × | DIYables STEM V4 IoT Starter Kit (Arduino included) | |
| 1 | × | DIYables Sensor Kit (18 sensors/displays) |
Additionally, some of these links are for products from our own brand, DIYables .

Overview of LED Strip
A LED strip, also called LED tape or LED ribbon, is a flexible board with LEDs that shine light. These strips are flexible and used often for decorative lights in many places. LED strips are available in different colors and are mainly used to create a soft glow, highlight specific areas, or add decorative light effects.
LED strips are available in two primary varieties:
- Addressable LED Strips: In this type, you can control the color and brightness of each LED separately. Each LED has its own unique address that allows this individual control.
- Non-Addressable LED Strips: With these strips, you can change the color and brightness too, but the change affects all the LEDs on the strip at the same time.
This guide is about Non-Addressable LED Strips. For Addressable LED Strips, see the other guides provided.
- Arduino UNO R4 - NeoPixel LED Strip tutorial
- Arduino UNO R4 - WS2812B LED Strip tutorial
- Arduino UNO R4 - DotStar LED Strip tutorial
Non-Addressable LED Strip Pinout
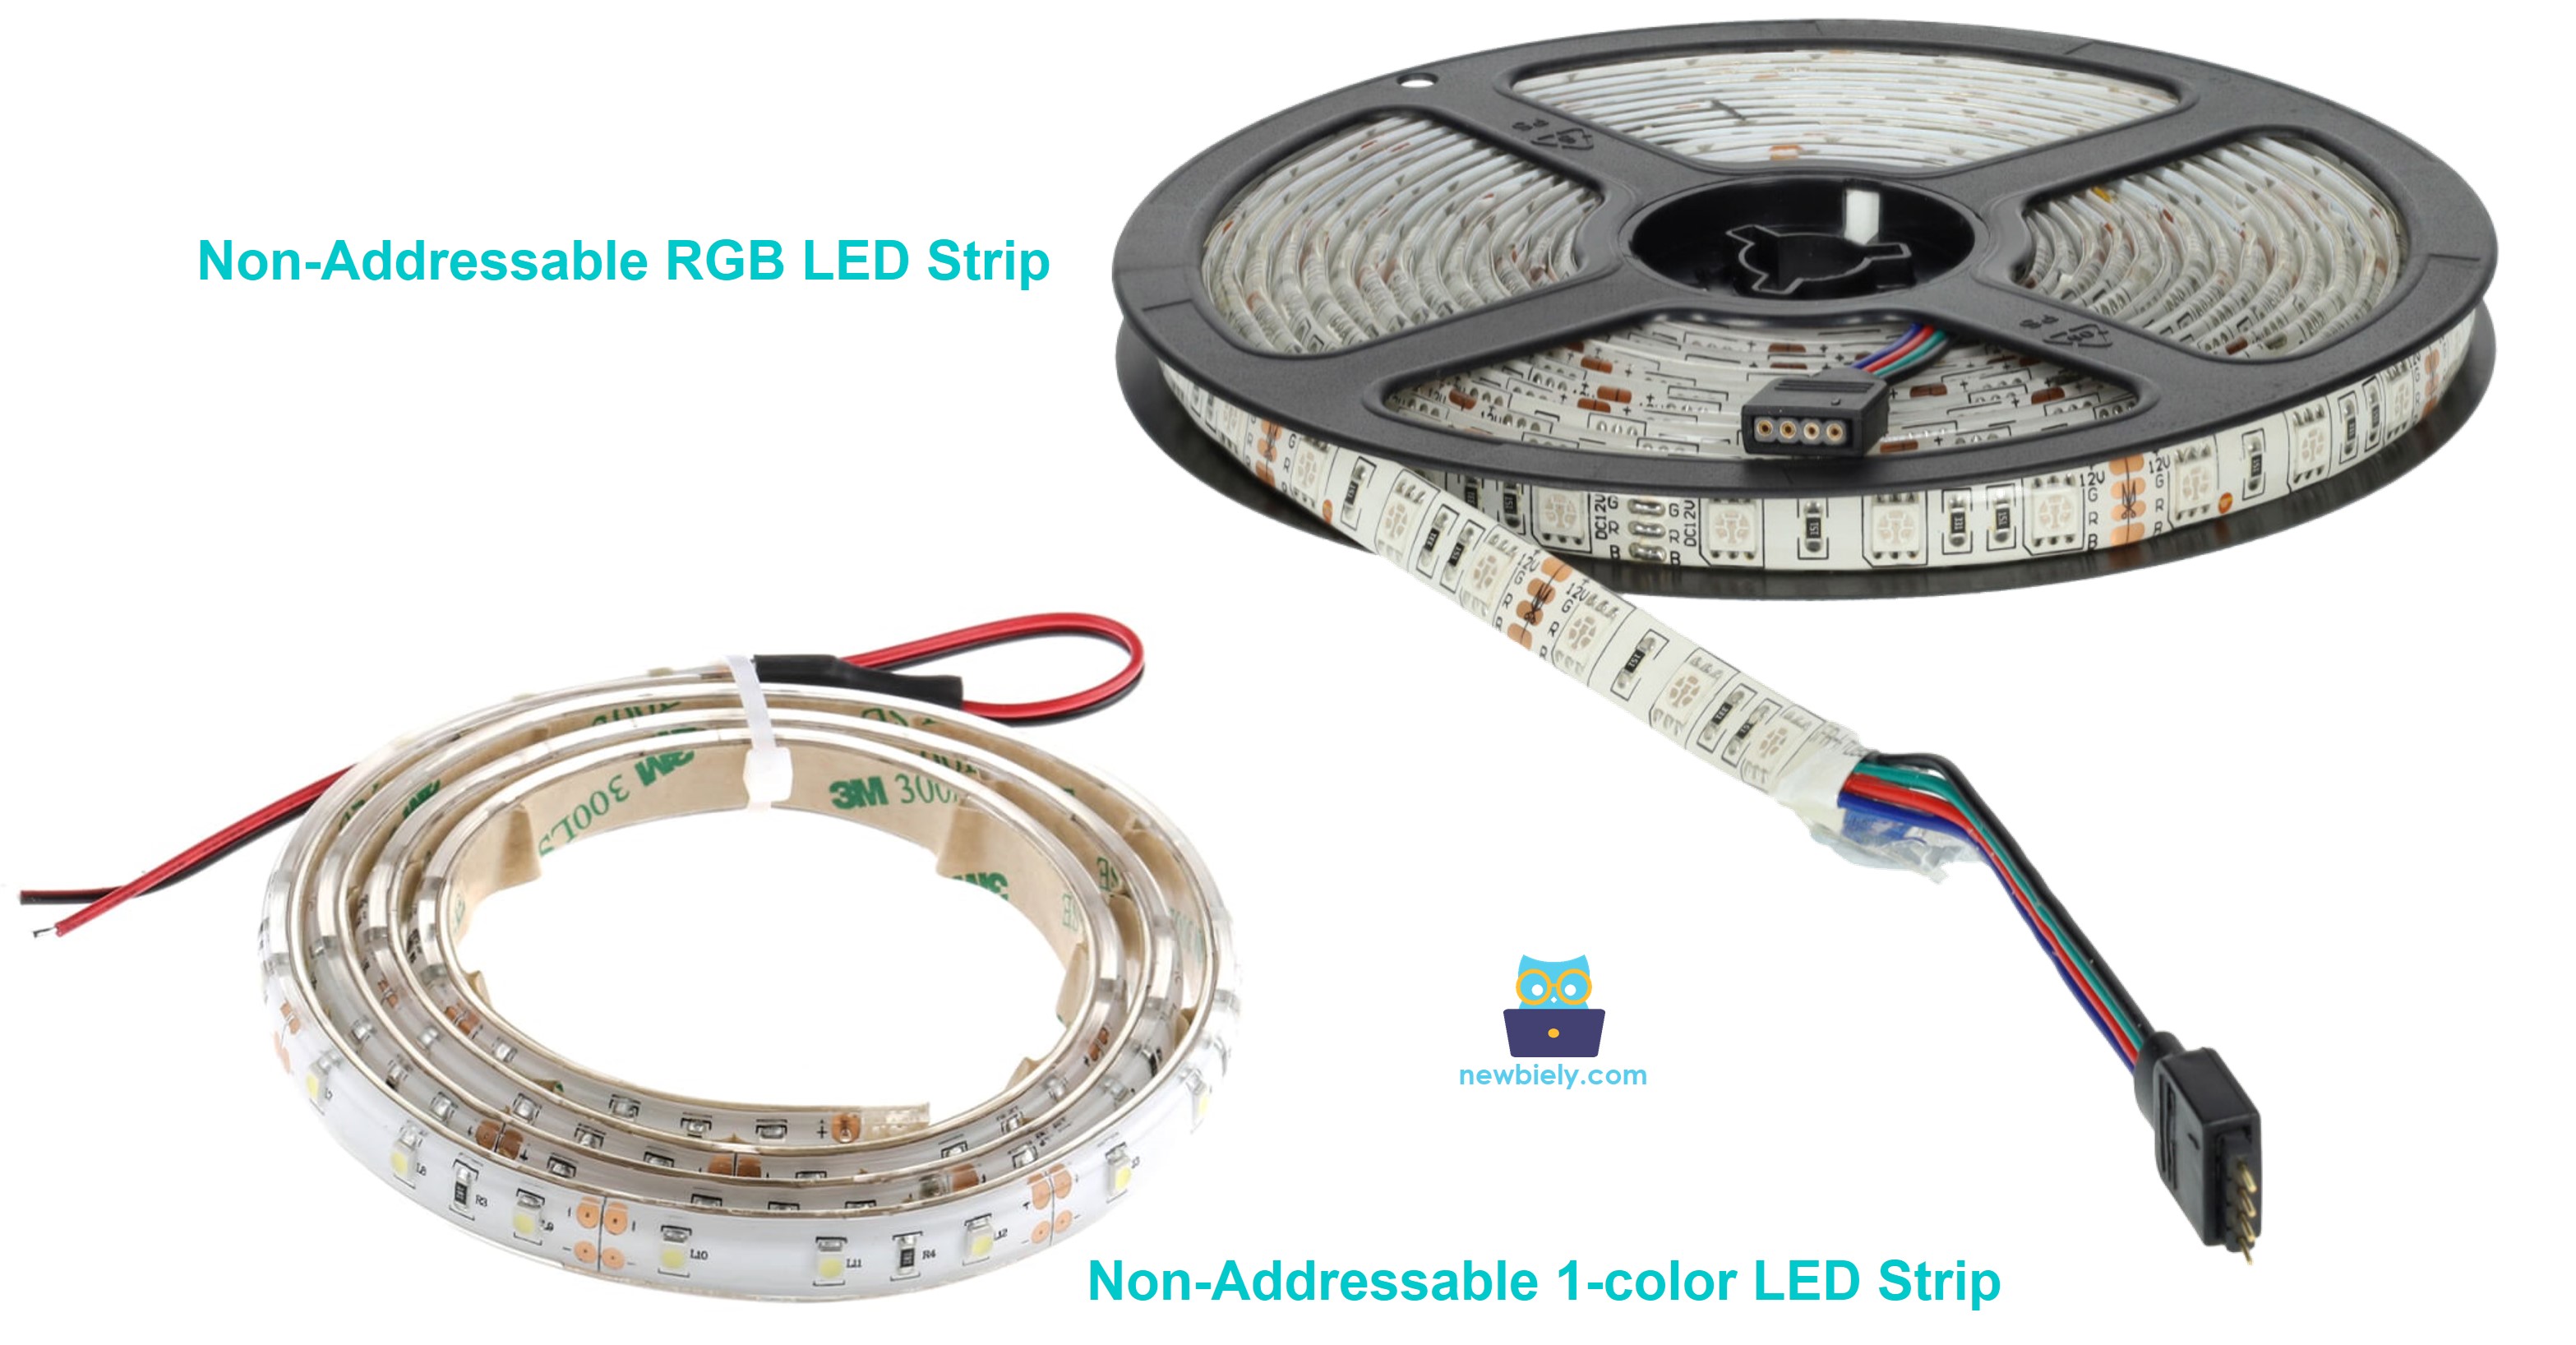
There are two main types of Non-Addressable LED Strips.
- Non-Addressable 1-color LED strip: Comes in only one color set by the manufacturer.
- Non-Addressable RGB LED strip: Can show many colors.
A Non-Addressable 1-color LED Strip typically has two pins:
- 12V/24V pin: Connect this to the positive pin of a 12V or 24V DC power supply.
- GND pin: Connect this to the negative pin of a 12V or 24H DC power supply.
A Non-Addressable RGB LED Strip typically has four pins:
- 12V/24V pin: Connect this to the positive pin of a 12V or 24V DC power supply.
- R pin: Use this pin for red color control. Connect it to the power supply's negative pin to activate red color.
- G pin: Use this pin for green color control. Connect it to the power supply's negative pin to activate green color.
- B come: Use this pin for blue color control. Connect it to the power supply's negative pin to activate blue color.
We will learn how to control both types using the Arduino UNO R4, one at a time.
How to Control a Non-Addressable 1-color LED strip.
When you connect a 12V LED strip to a 12V power supply, it will light up. To control this 12V LED strip using an Arduino UNO R4, you must use a relay. The Arduino UNO R4 controls the 12V LED strip through the relay. If you are not familiar with relays, such as their pinouts, functions, or programming, you can learn more by visiting the Arduino UNO R4 - Relay tutorial at Arduino UNO R4 - Relay tutorial.
Wiring Diagram.
Wiring Diagram between Arduino UNO R4 and Non-Addressable 1-color LED strip.
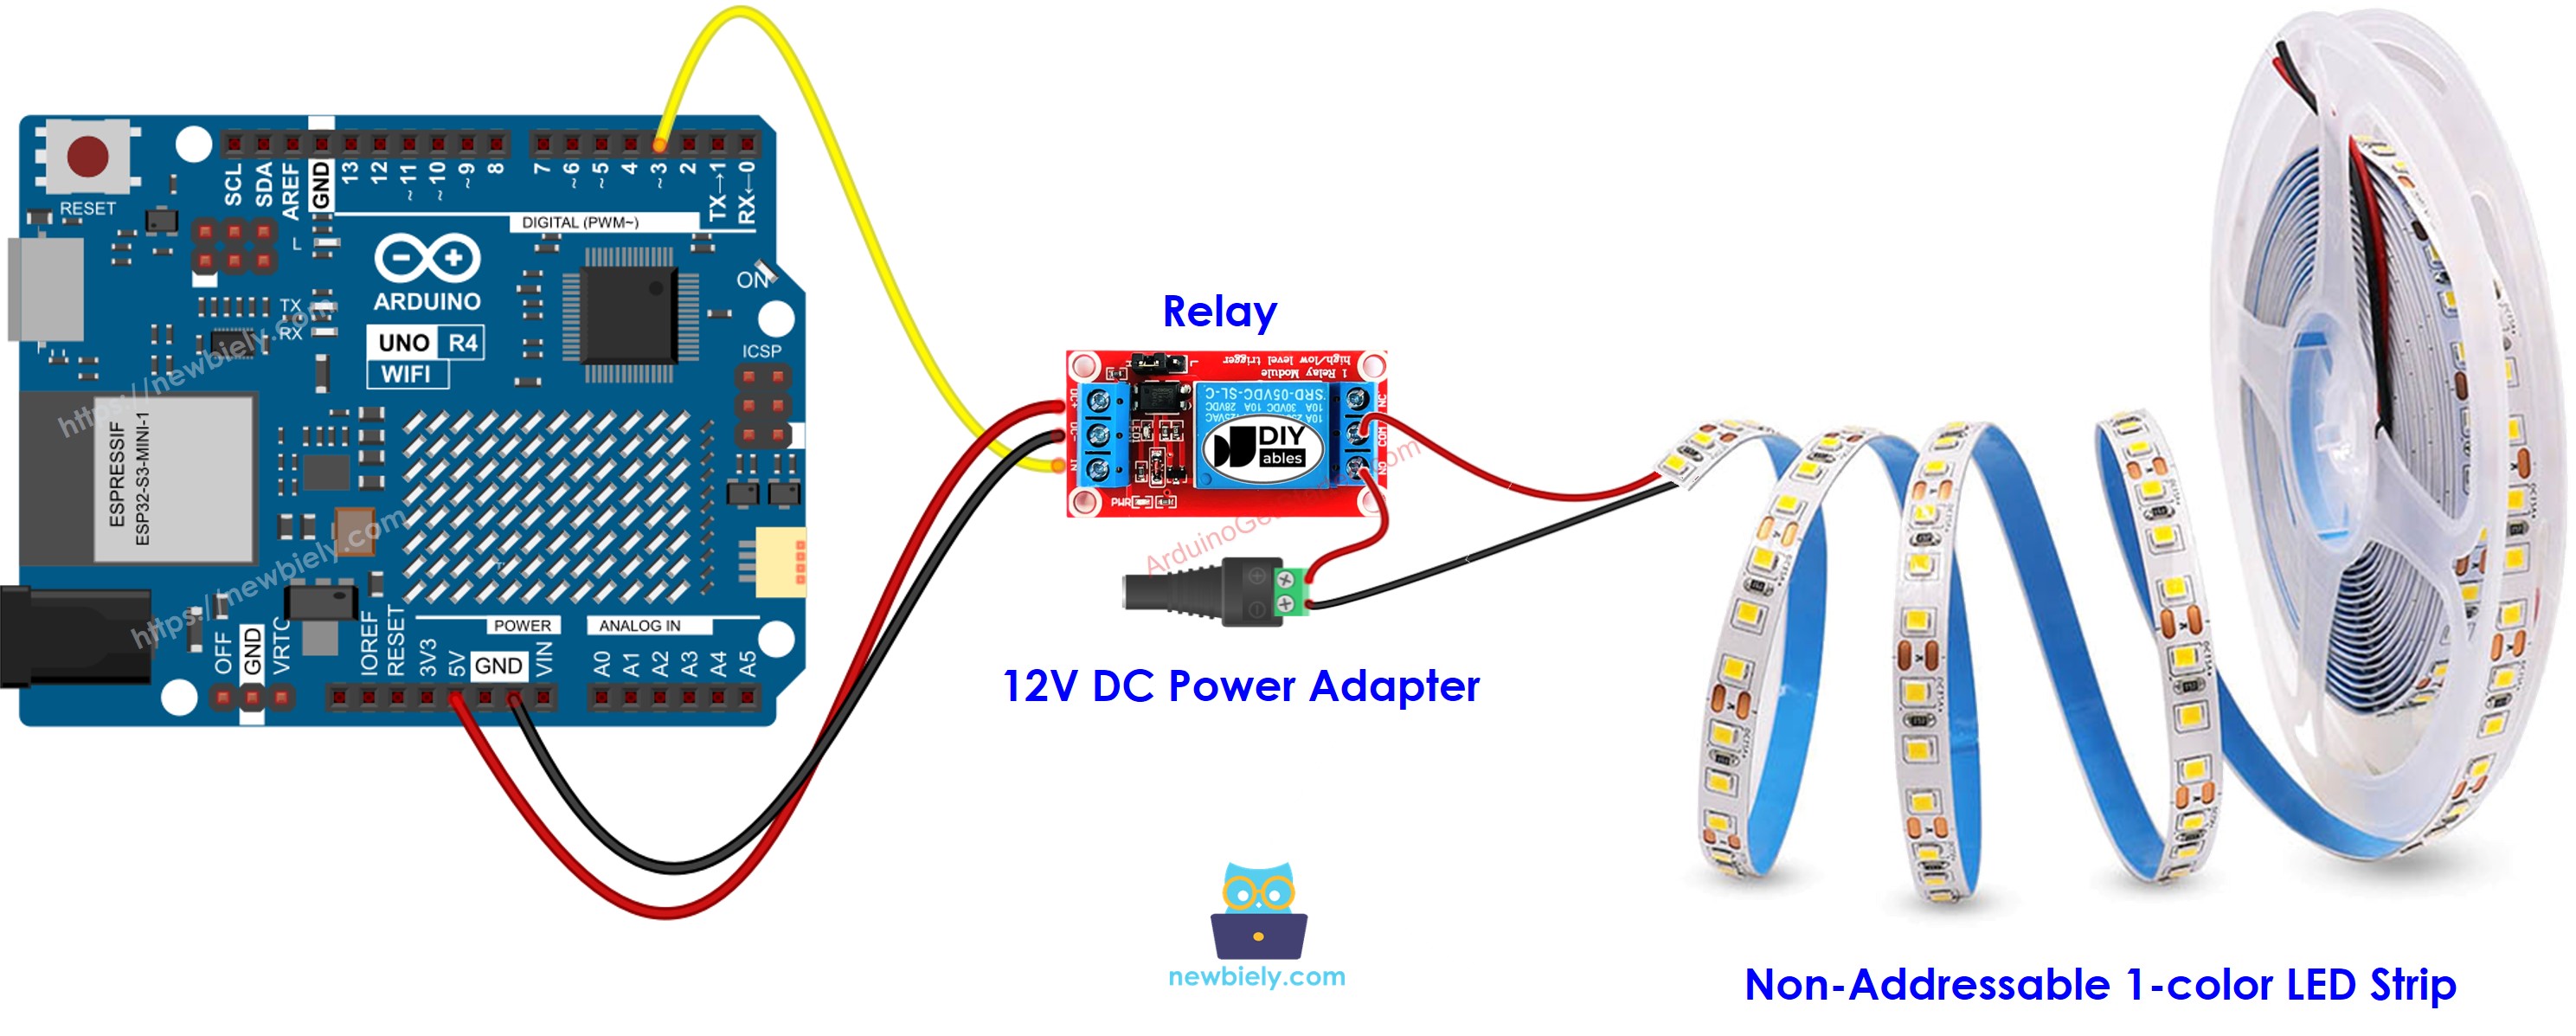
This image is created using Fritzing. Click to enlarge image
Wiring Diagram between Arduino UNO R4 and Non-Addressable RGB LED strip.
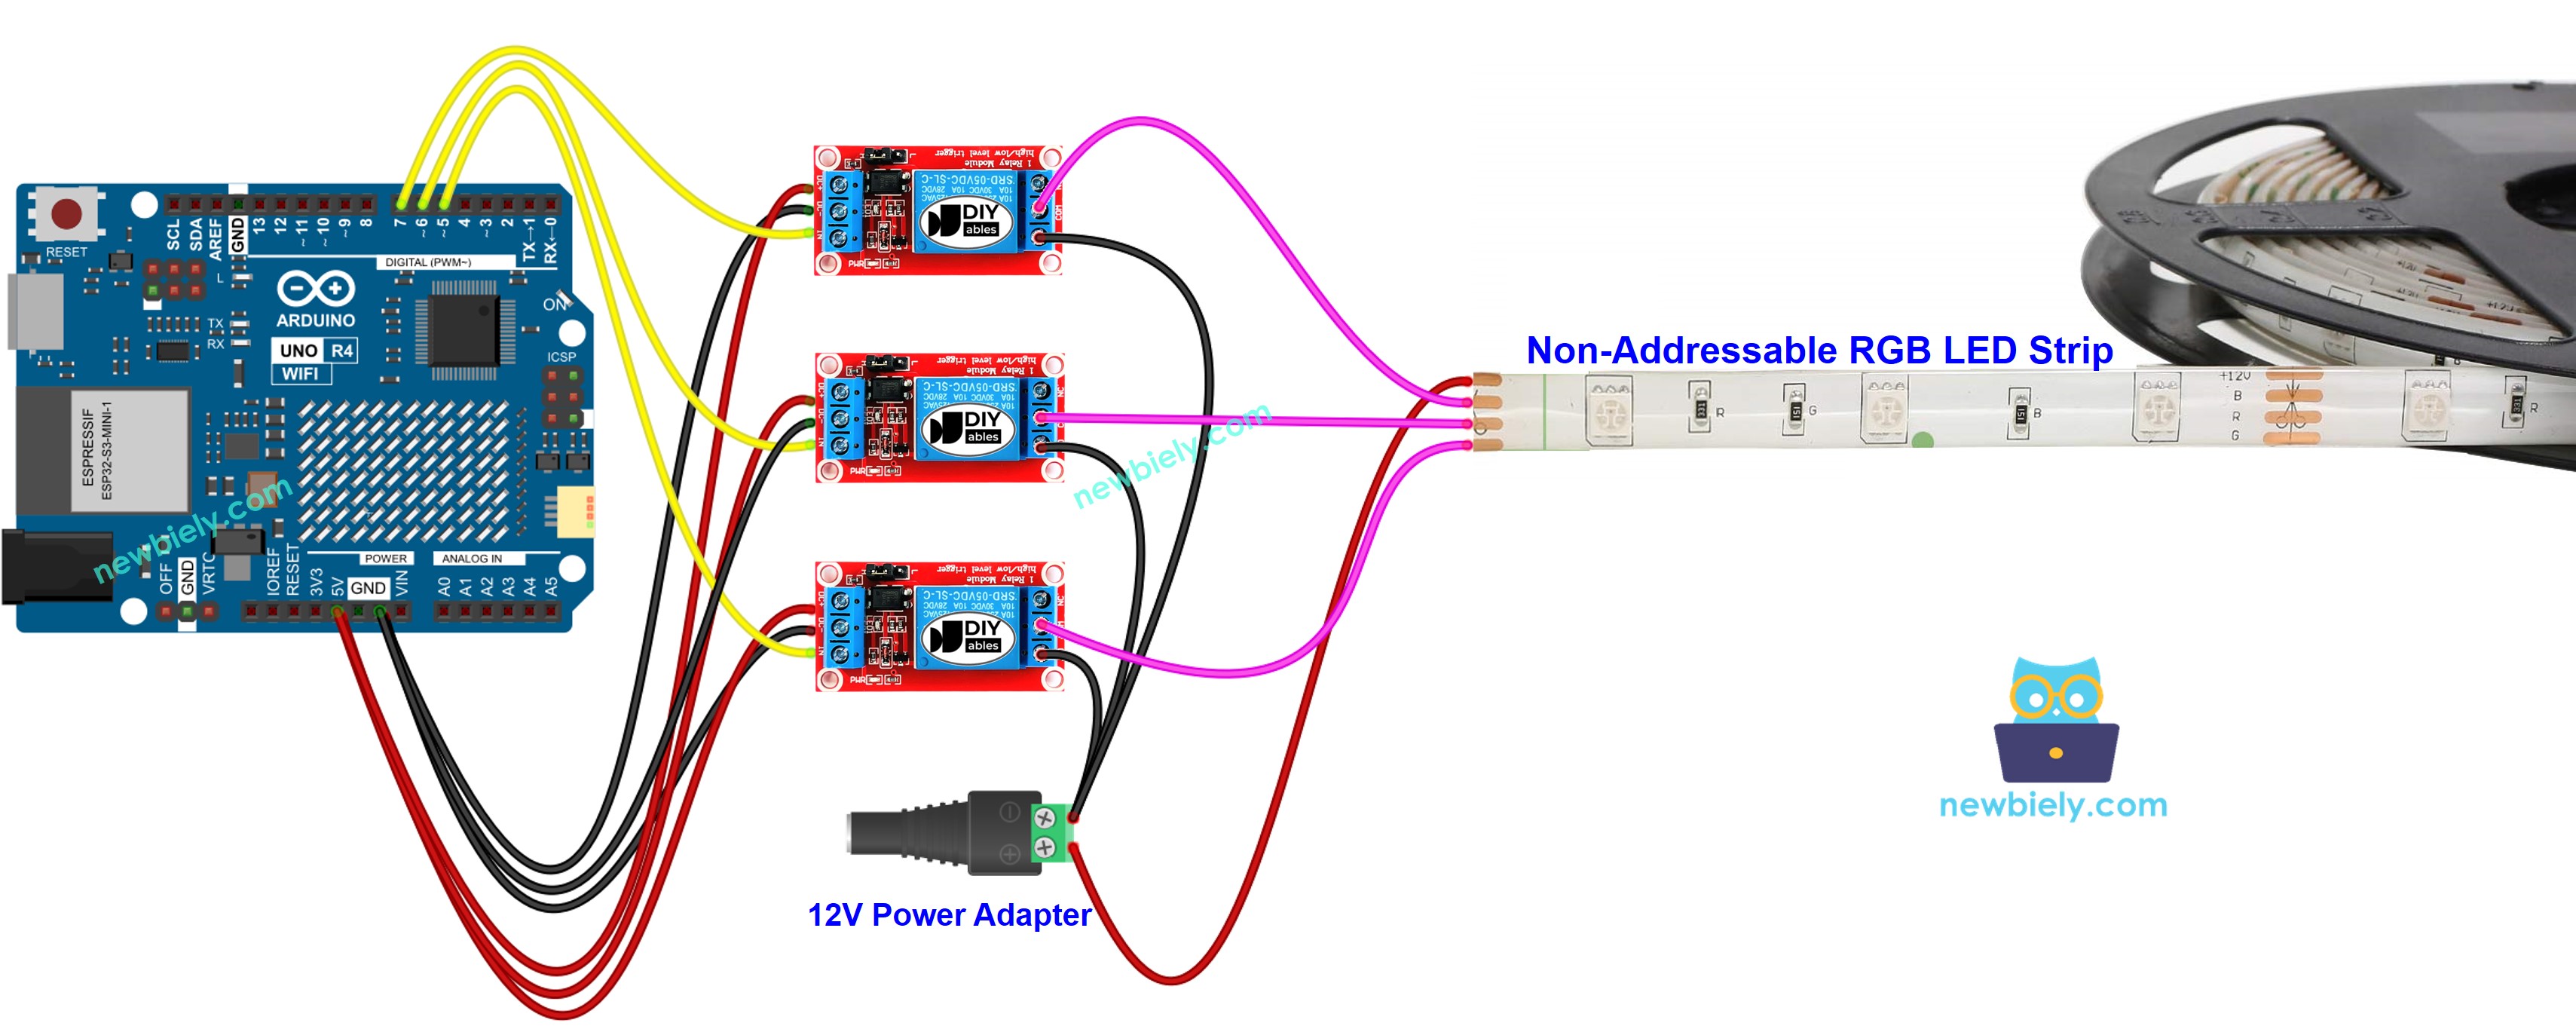
This image is created using Fritzing. Click to enlarge image
See The best way to supply power to the Arduino Uno R4 and other components.
Arduino UNO R4 Code
Arduino UNO R4 Code for controlling Non-Addressable 1-color LED strip.
This code will continuously turn the LED strip on for 5 seconds and then off for 5 seconds.
Arduino UNO R4 Code for controlling Non-Addressable RGB LED strip.
The code below repeatedly changes the colors of the RGB LED strip (red, green, blue, yellow, magenta, cyan, and white).
Detailed Instructions
Follow these instructions step by step:
- If this is your first time using the Arduino Uno R4 WiFi/Minima, refer to the tutorial on setting up the environment for Arduino Uno R4 WiFi/Minima in the Arduino IDE.
- Wire the the LED strip to Arduino Uno R4 according to the provided diagram.
- Connect the Arduino Uno R4 board to your computer using a USB cable.
- Launch the Arduino IDE on your computer.
- Select the appropriate Arduino Uno R4 board (e.g., Arduino Uno R4 WiFi) and COM port.
- Copy the code provided above and paste it into the Arduino IDE.
- Click the Upload button in the Arduino IDE to transfer the code to your Arduino UNO R4.
- Observe the condition of the LED strip.
Code Explanation
The explanation is in the comments of the Arduino code above.
To adjust the brightness and colors of a non-addressable LED strip, we must use a driver like L298N driver instead of a relay.