Arduino UNO R4 - Automated Light Control with Motion Sensor and LED Strip
In this Arduino UNO R4 tutorial, We will learn how to build an automated light control system using an HC-SR501 motion sensor and LED strip. This DIY Arduino project guides you through wiring, programming, and setup to activate the LED strip when motion is detected. Perfect for beginners, this project is ideal for:
- Automatic stair lighting: Illuminate stairs when someone approaches.
- Under-bed lighting: Glow when you step on the floor.
- Christmas tree lights: Light up when people are nearby.
With the Arduino UNO R4, HC-SR501 sensor, and LED strip, you can create a smart lighting system that’s energy-efficient. Follow this step-by-step Arduino programming guide to master your DIY smart home automation project.
Hardware Preparation
Or you can buy the following kits:
| 1 | × | DIYables STEM V4 IoT Starter Kit (Arduino included) | |
| 1 | × | DIYables Sensor Kit (18 sensors/displays) |
Additionally, some of these links are for products from our own brand, DIYables .

Overview of LED Strip and Motion Sensor
To learn about LED strips and motion sensors (their pinouts, how they works, and how to program Arduino Uno R4 to interact with them), please refer to these tutorials:
Wiring Diagram
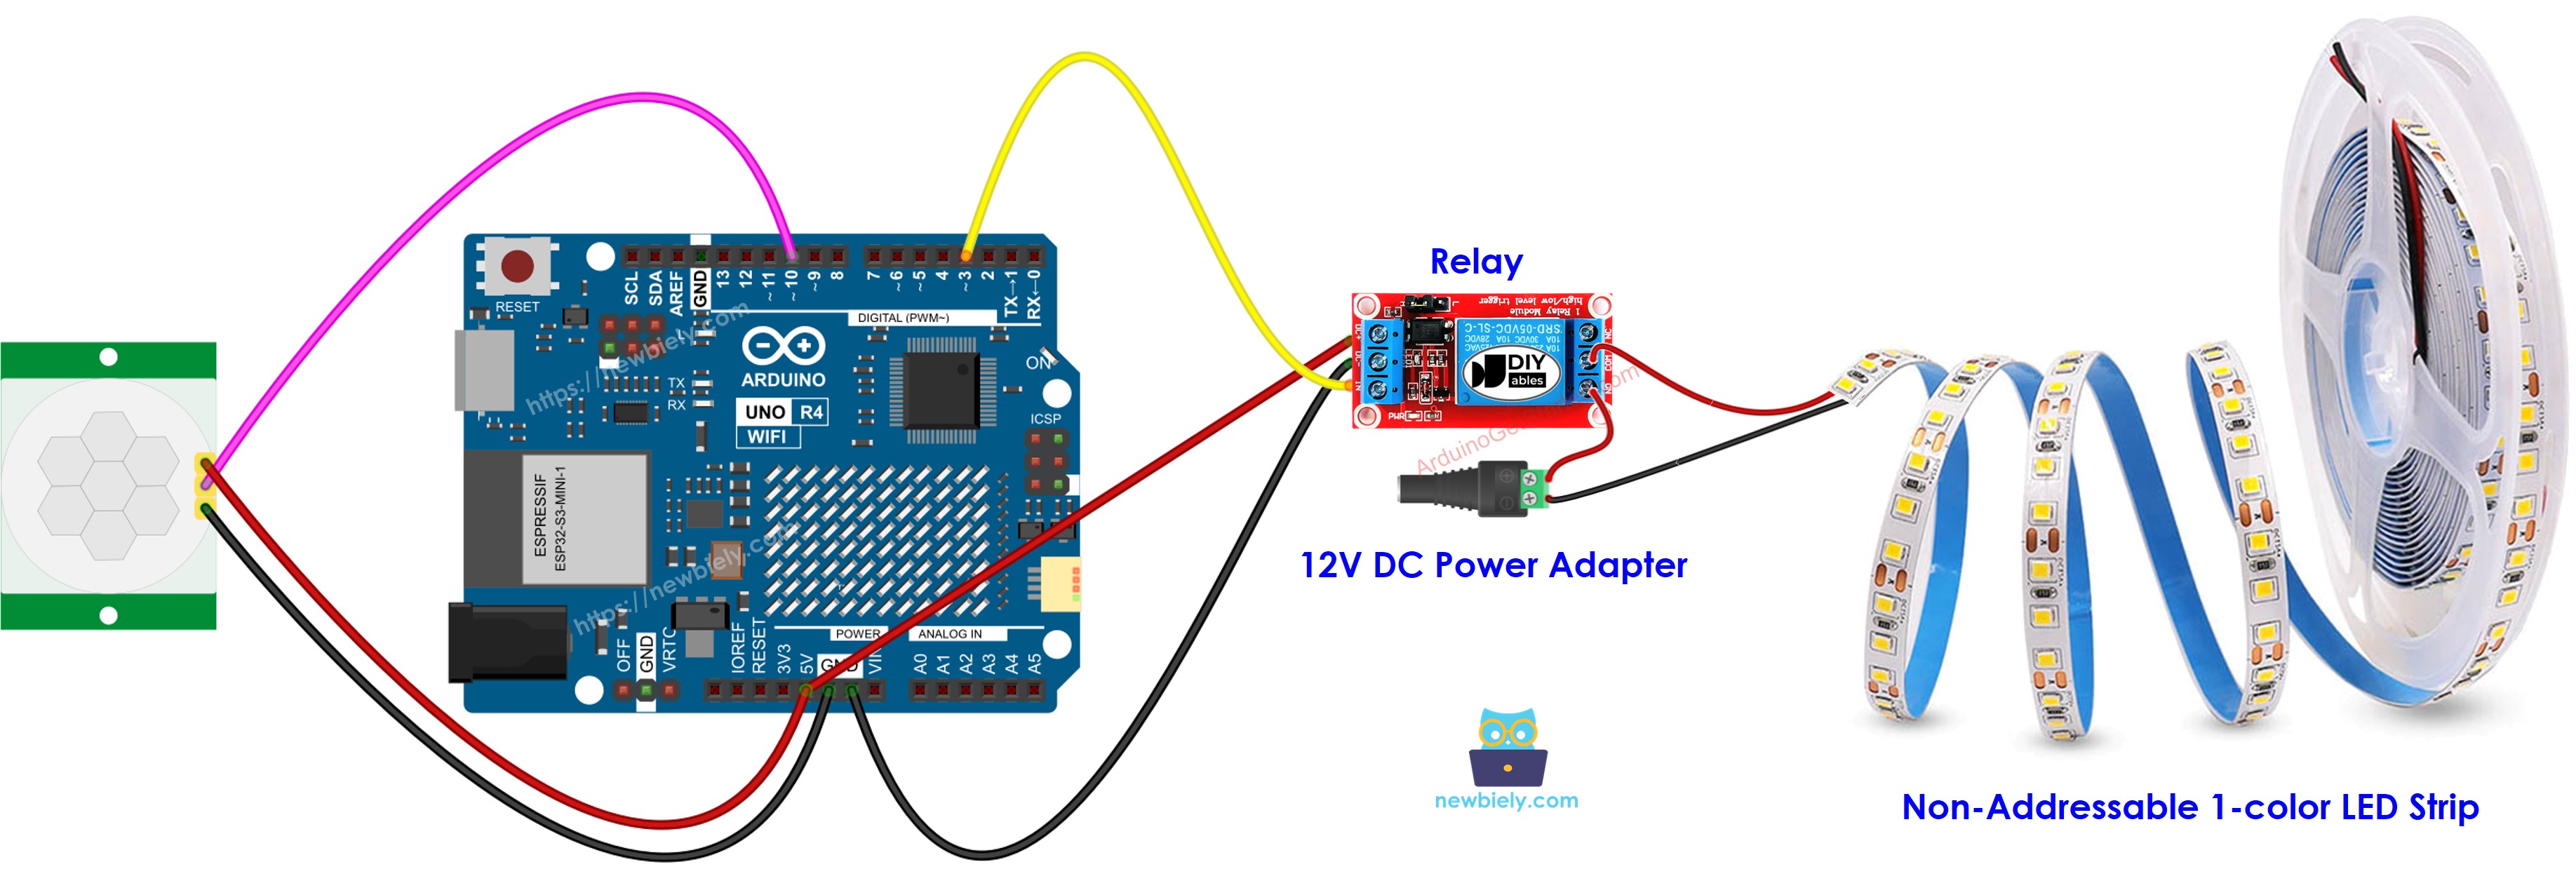
This image is created using Fritzing. Click to enlarge image
See The best way to supply power to the Arduino Uno R4 and other components.
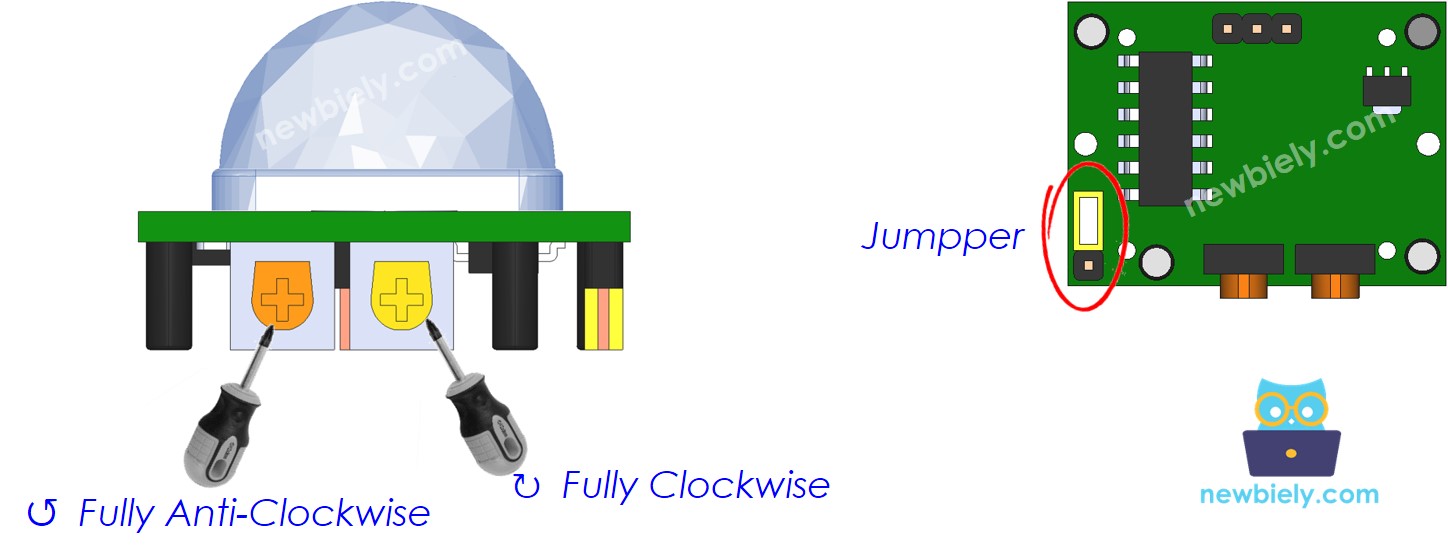
Initial Setting
| Time Delay Adjuster | Screw it in anti-clockwise direction fully. |
| Detection Range Adjuster | Screw it in clockwise direction fully. |
| Repeat Trigger Selector | Put jumper as shown on the image. |
Arduino UNO R4 Code - Motion Sensor Controls LED strip
Detailed Instructions
Follow these instructions step by step:
- If this is your first time using the Arduino Uno R4 WiFi/Minima, refer to the tutorial on setting up the environment for Arduino Uno R4 WiFi/Minima in the Arduino IDE.
- Wire the motion sensor, LED strip to Arduino Uno R4 according to the provided diagram.
- Connect the Arduino Uno R4 board to your computer using a USB cable.
- Launch the Arduino IDE on your computer.
- Select the appropriate Arduino Uno R4 board (e.g., Arduino Uno R4 WiFi) and COM port.
- Copy the provided code and open it with Arduino IDE
- Press the Upload button in Arduino IDE to send the code to Arduino UNO R4
- Wave your hand near the sensor
- Look at the LED strip
Video Tutorial
Summary
In this Arduino UNO R4 tutorial, you’ve learned how to create a smart automated light control system using an HC-SR501 motion sensor and an LED strip. By following the step-by-step guide, you mastered Arduino programming, wiring, and setup to activate lights when motion is detected. This DIY Arduino project is perfect for applications like automatic stair lighting, under-bed lighting, or Christmas tree lights, offering an energy-efficient smart home automation solution. With the skills gained, you can now adapt this Arduino UNO R4 project to other creative lighting ideas, enhancing your home with responsive, motion-activated illumination.