Arduino UNO R4 - Motion Sensor - Relay
Welcome! This tutorial will show you how to use an Arduino UNO R4 with a motion sensor and a relay. It’s simple and clear, perfect for beginners. The motion sensor detects movement, and the relay can turn devices ON or OFF. For example, you can control a light, motor, or LED strip. By the end, you will know how to:
- Turn the relay ON when the motion sensor detects movement.
- Turn the relay OFF when there is no movement.
You will learn to program the Arduino UNO R4 to read the motion sensor and control the relay. Connect the relay to a device like a light bulb or fan, and the motion sensor will manage it. This project is great for anyone who wants to start with Arduino and make their home smarter. Let’s get started!
Hardware Preparation
Or you can buy the following kits:
| 1 | × | DIYables STEM V4 IoT Starter Kit (Arduino included) | |
| 1 | × | DIYables Sensor Kit (18 sensors/displays) |
Additionally, some of these links are for products from our own brand, DIYables .

Overview of Relay and Motion Sensor
If you are not familiar with relay and motion sensor (pinout, their functions, and programming), please refer to the following tutorials to learn more:
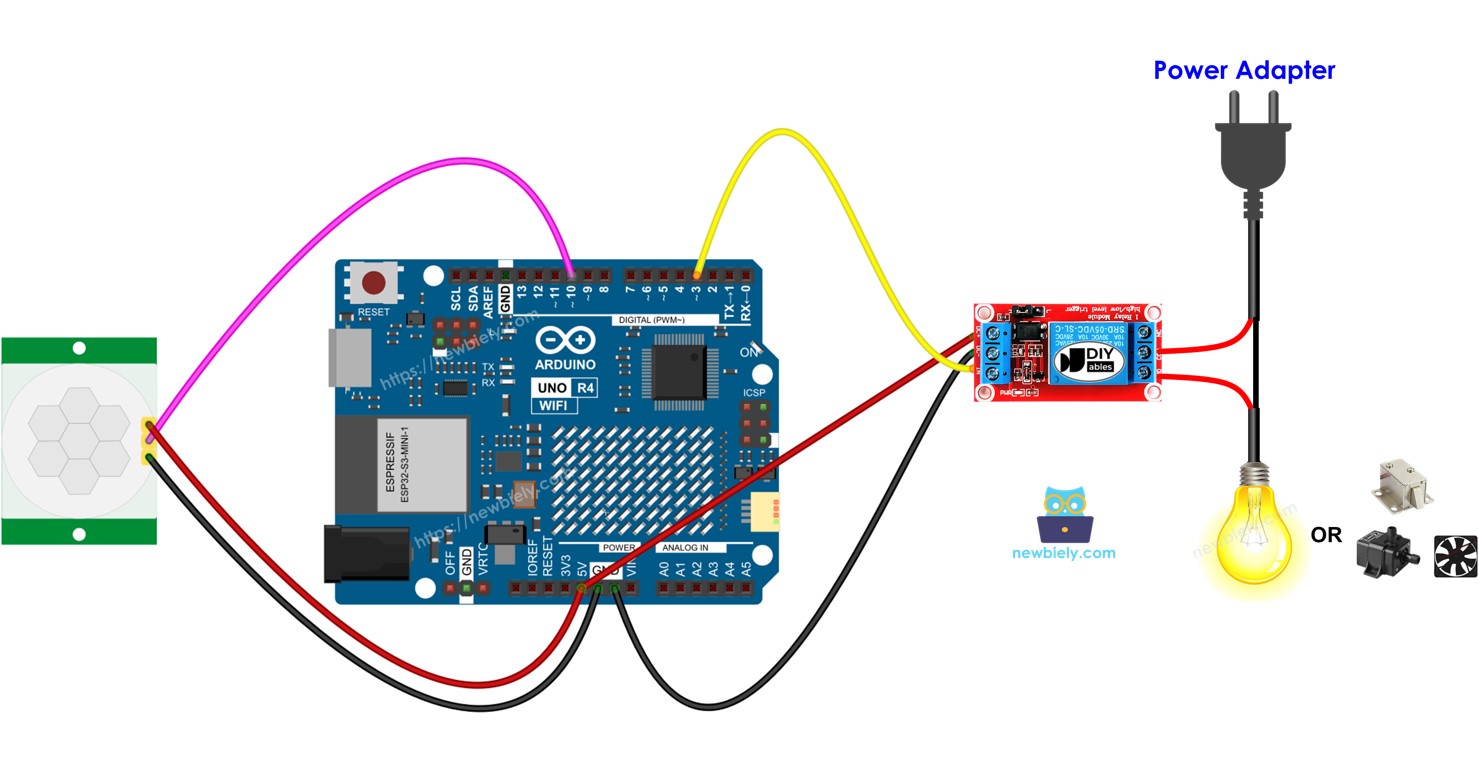
Wiring Diagram
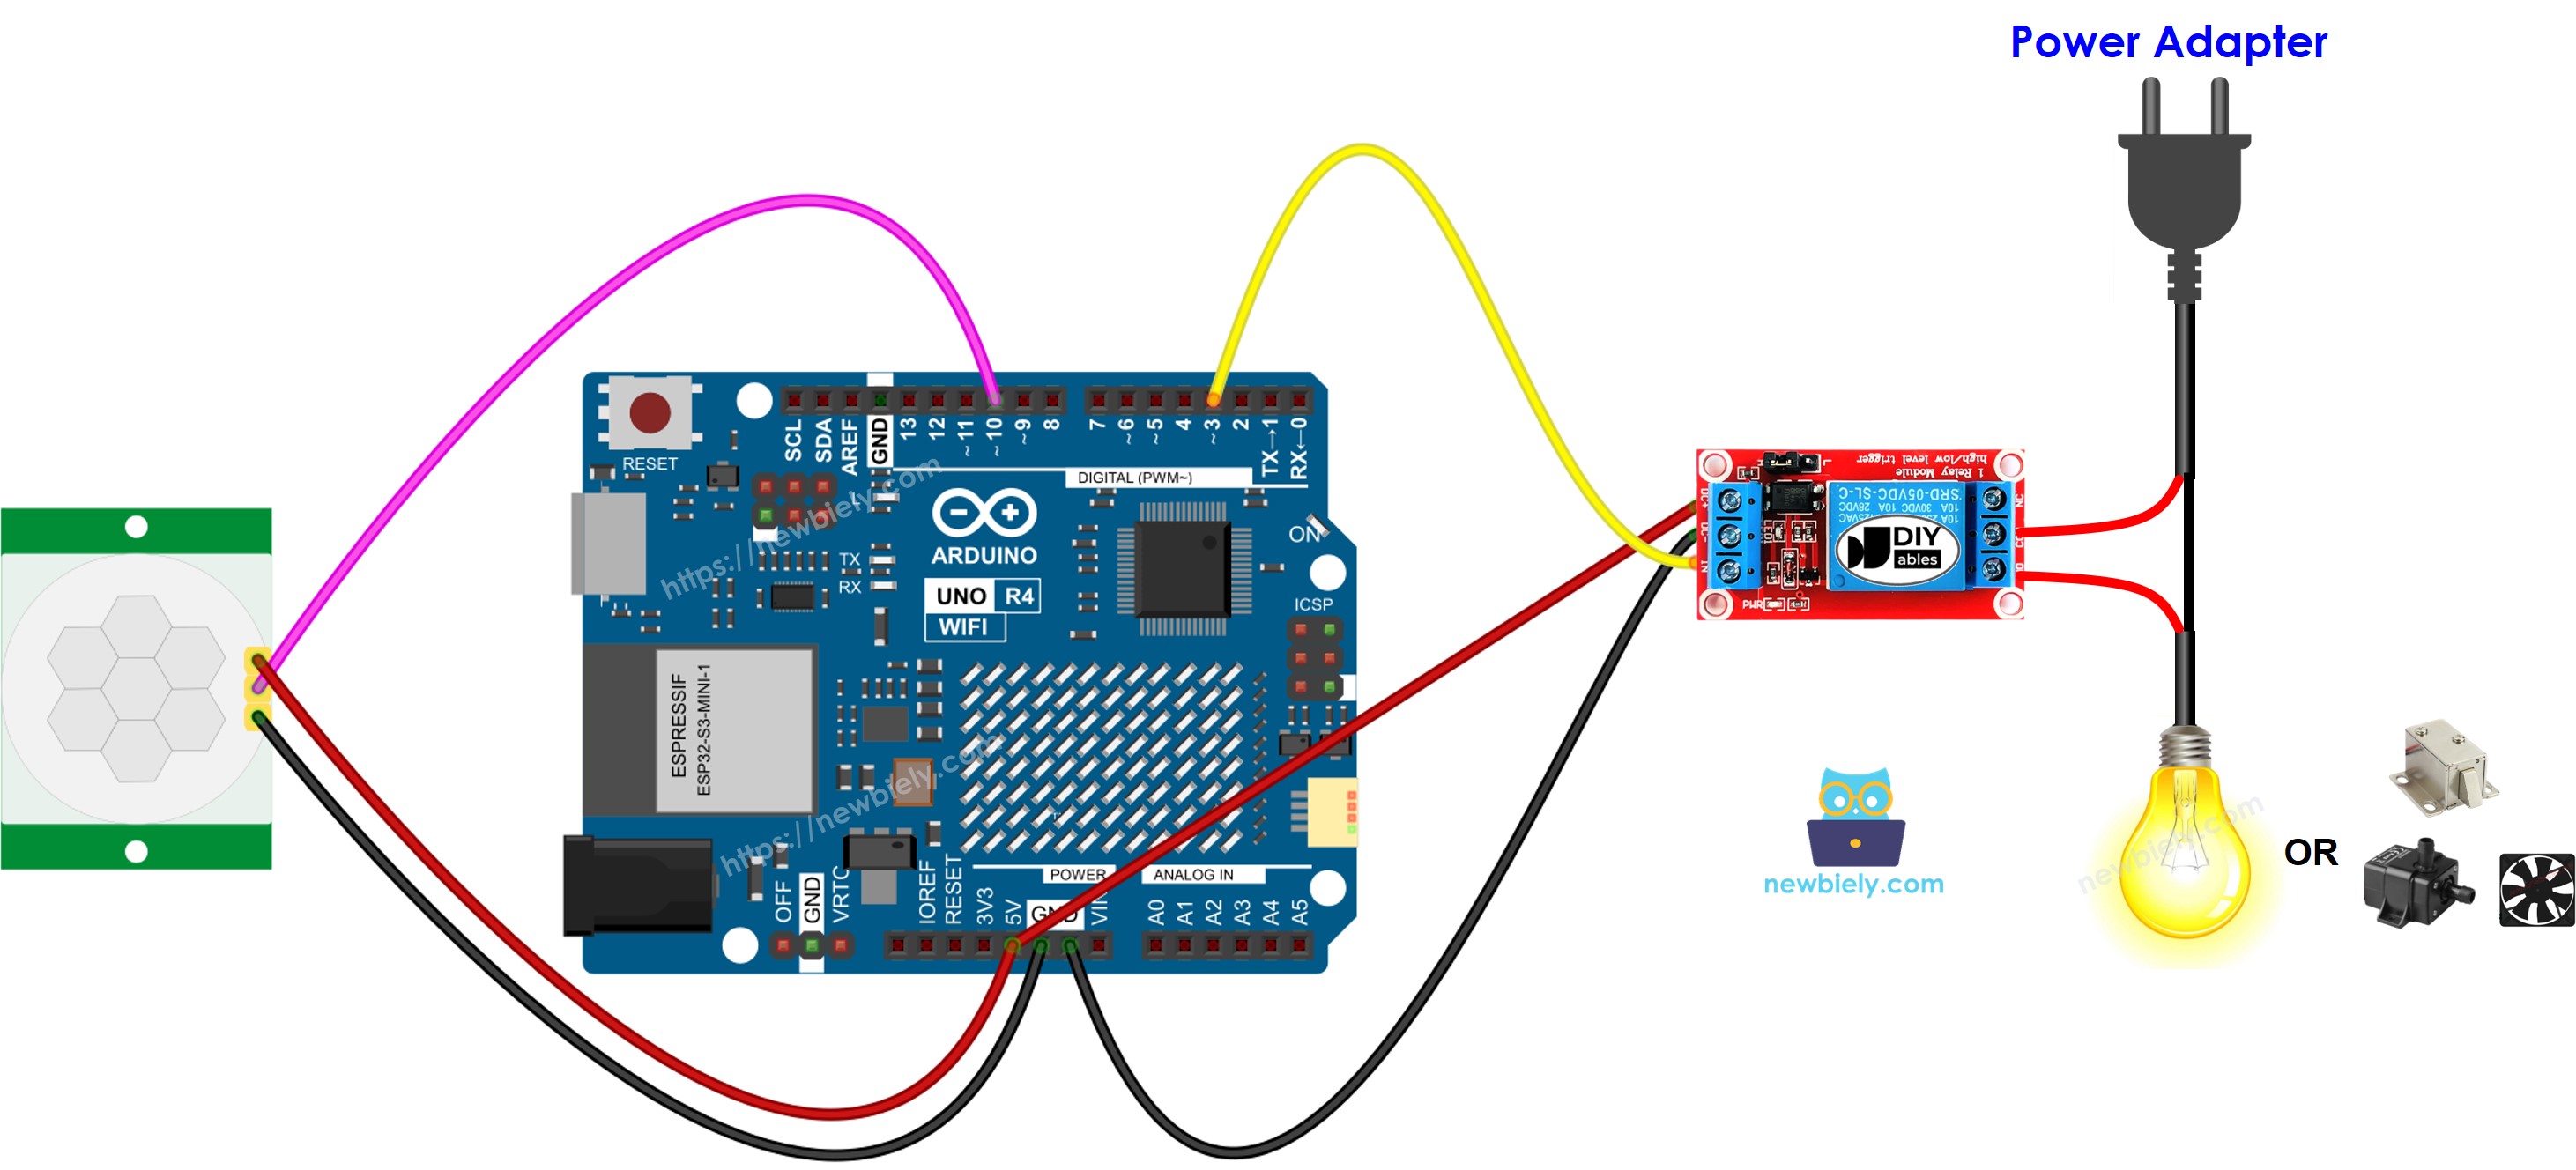
This image is created using Fritzing. Click to enlarge image
See The best way to supply power to the Arduino Uno R4 and other components.
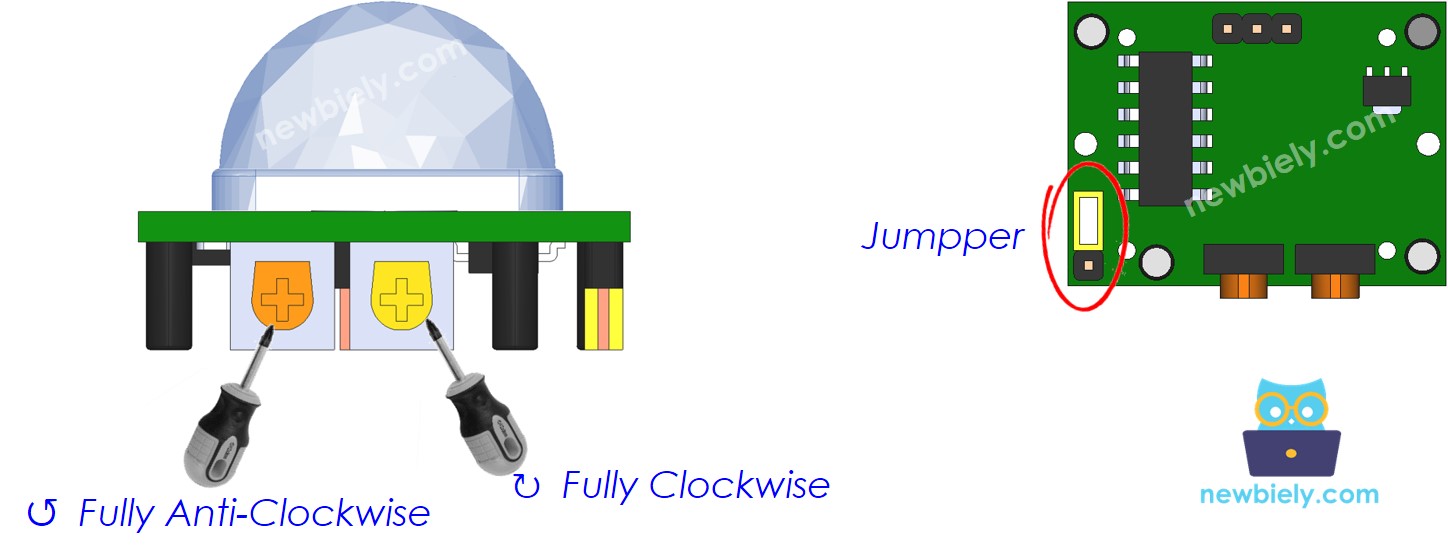
Initial Setting
| Time Delay Adjuster | Screw it in anti-clockwise direction fully. |
| Detection Range Adjuster | Screw it in clockwise direction fully. |
| Repeat Trigger Selector | Put jumper as shown on the image. |
Arduino UNO R4 Code
Detailed Instructions
Follow these instructions step by step:
- If this is your first time using the Arduino Uno R4 WiFi/Minima, refer to the tutorial on setting up the environment for Arduino Uno R4 WiFi/Minima in the Arduino IDE.
- Wire the components according to the provided diagram.
- Connect the Arduino Uno R4 board to your computer using a USB cable.
- Launch the Arduino IDE on your computer.
- Select the appropriate Arduino Uno R4 board (e.g., Arduino Uno R4 WiFi) and COM port.
- Connect the Arduino UNO R4 to your computer using a USB cable.
- Open the Arduino IDE and choose the correct board and port.
- Paste the provided code into the Arduino IDE.
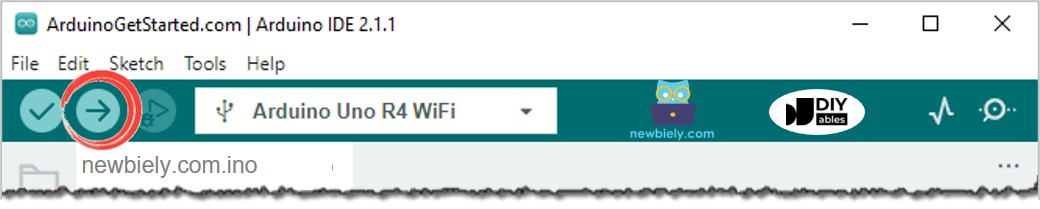
- Click the Upload button in the Arduino IDE to send the code to the Arduino UNO R4.
- Wave your hand in front of the sensor
- Observe the relay's status change
Code Explanation
Look at the explanations in the comments inside the source code!