Arduino UNO R4 - Button - Servo Motor
In this tutorial, we'll learn how to control a servo motor with a button using an Arduino Uno R4. Pressing the button will rotate the servo motor to 90 degrees, and pressing it again will move it back to 0 degrees. This process repeats each time the button is pressed.
The tutorial is divided into two sections:
Without debouncing: The servo motor responds to button presses without handling signal noise.
With debouncing: The code includes debounce logic to prevent false triggers and ensure reliable button presses.
This project is great for beginners to understand servo motor control, button inputs, and debouncing techniques with Arduino Uno R4.
Or you can buy the following kits:
Disclosure: Some of the links provided in this section are Amazon affiliate links. We may receive a commission for any purchases made through these links at no additional cost to you.
Additionally, some of these links are for products from our own brand,
DIYables .
Buy Note: For controlling multiple servo motors, use the PCA9685 16 Channel PWM Servo Driver Module to save MCU pins and simplify wiring.

If you are not familiar with servo motors and buttons, including their pinout, how they operate, or how to program them, please refer to the following tutorials for more information.
#include <Servo.h>
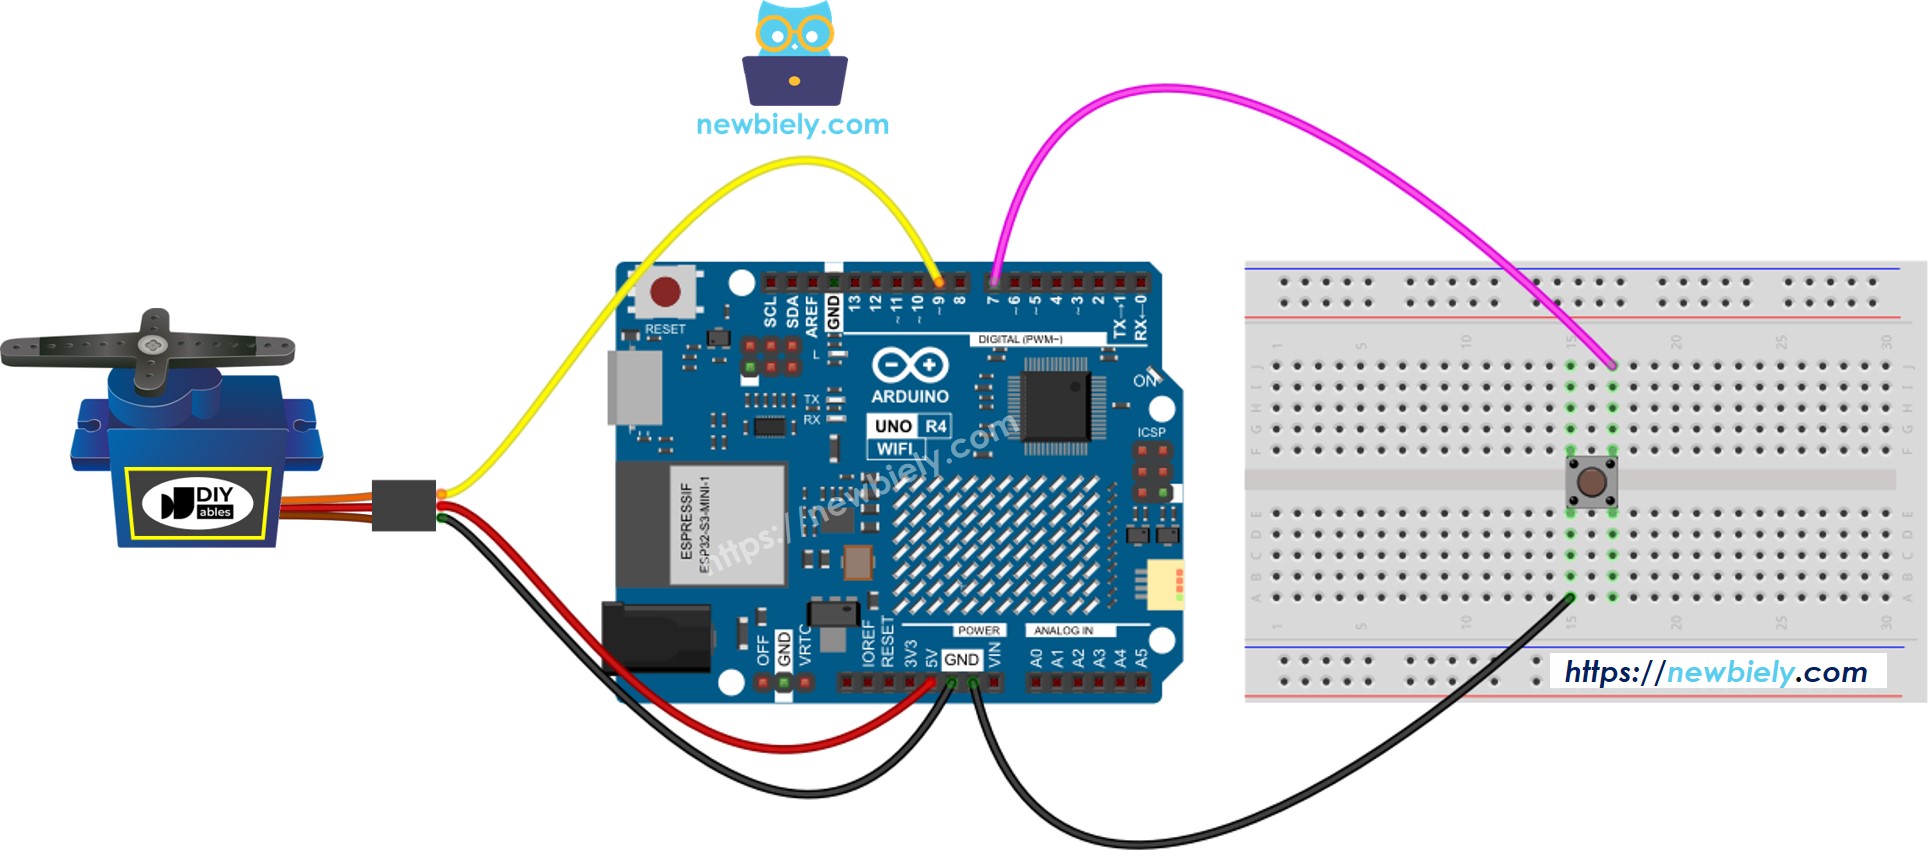
#define BUTTON_PIN 7
#define SERVO_PIN 9
Servo servo;
int angle = 0;
int lastButtonState;
int currentButtonState;
void setup() {
Serial.begin(9600);
pinMode(BUTTON_PIN, INPUT_PULLUP);
servo.attach(SERVO_PIN);
servo.write(angle);
currentButtonState = digitalRead(BUTTON_PIN);
}
void loop() {
lastButtonState = currentButtonState;
currentButtonState = digitalRead(BUTTON_PIN);
if(lastButtonState == HIGH && currentButtonState == LOW) {
Serial.println("The button is pressed");
if(angle == 0)
angle = 90;
else
if(angle == 90)
angle = 0;
servo.write(angle);
}
}
Follow these instructions step by step:
Wire the components according to the provided diagram.
Connect the Arduino Uno R4 board to your computer using a USB cable.
Launch the Arduino IDE on your computer.
Select the appropriate Arduino Uno R4 board (e.g., Arduino Uno R4 WiFi) and COM port.
Copy and paste the above code into the Arduino IDE.
Click the Upload button in the Arduino IDE to transfer the code to the Arduino UNO R4.
Press the button multiple times.
Observe the movement of the servo motor.
※ NOTE THAT:
Sometimes the given code doesn't work properly. To ensure it always functions correctly, we need to use button debouncing. Button debouncing can be challenging for beginners. However, with the help of the ezButton library, it becomes much easier.
Why is debouncing important? ⇒ see Arduino UNO R4 - Button Debounce tutorial
#include <Servo.h>
#include <ezButton.h>
#define BUTTON_PIN 7
#define SERVO_PIN 9
ezButton button(BUTTON_PIN);
Servo servo;
int angle = 0;
void setup() {
Serial.begin(9600);
button.setDebounceTime(50);
servo.attach(SERVO_PIN);
servo.write(angle);
}
void loop() {
button.loop();
if(button.isPressed()) {
Serial.println("The button is pressed");
if(angle == 0)
angle = 90;
else
if(angle == 90)
angle = 0;
servo.write(angle);
}
}
Install the ezButton library. See
How To
Copy the code and open it in Arduino IDE
Click the Upload button in Arduino IDE to transfer the code to Arduino UNO R4
Press the button multiple times
Observe how the servo motor moves