Arduino UNO R4 - Motion Sensor - Servo Motor
Welcome! This tutorial will guide you through using an Arduino UNO R4 with a motion sensor and a servo motor. It’s clear and simple, ideal for beginners. The motion sensor detects movement, and the servo motor rotates to a specific angle. You can use this to control things like a gate, a camera, or a small robotic arm. By the end, you will learn how to:
- Rotate the servo motor to 90 degrees when the motion sensor detects movement.
- Return the servo motor to 0 degrees when there is no movement.
You will understand how to program the Arduino UNO R4 to read the motion sensor and control the servo motor. Connect the servo motor to a device, and the motion sensor will handle it. This project is perfect for anyone starting with Arduino and wanting to create fun, interactive projects. Let’s begin!
Hardware Preparation
Or you can buy the following kits:
| 1 | × | DIYables STEM V4 IoT Starter Kit (Arduino included) | |
| 1 | × | DIYables Sensor Kit (18 sensors/displays) |
Additionally, some of these links are for products from our own brand, DIYables .
Buy Note: For controlling multiple servo motors, use the PCA9685 16 Channel PWM Servo Driver Module to save MCU pins and simplify wiring.

Overview of Servo Motor and Motion Sensor
If you are not familiar with servo motors and motion sensors (their pin connections, functions, and programming methods), please refer to the tutorials below:
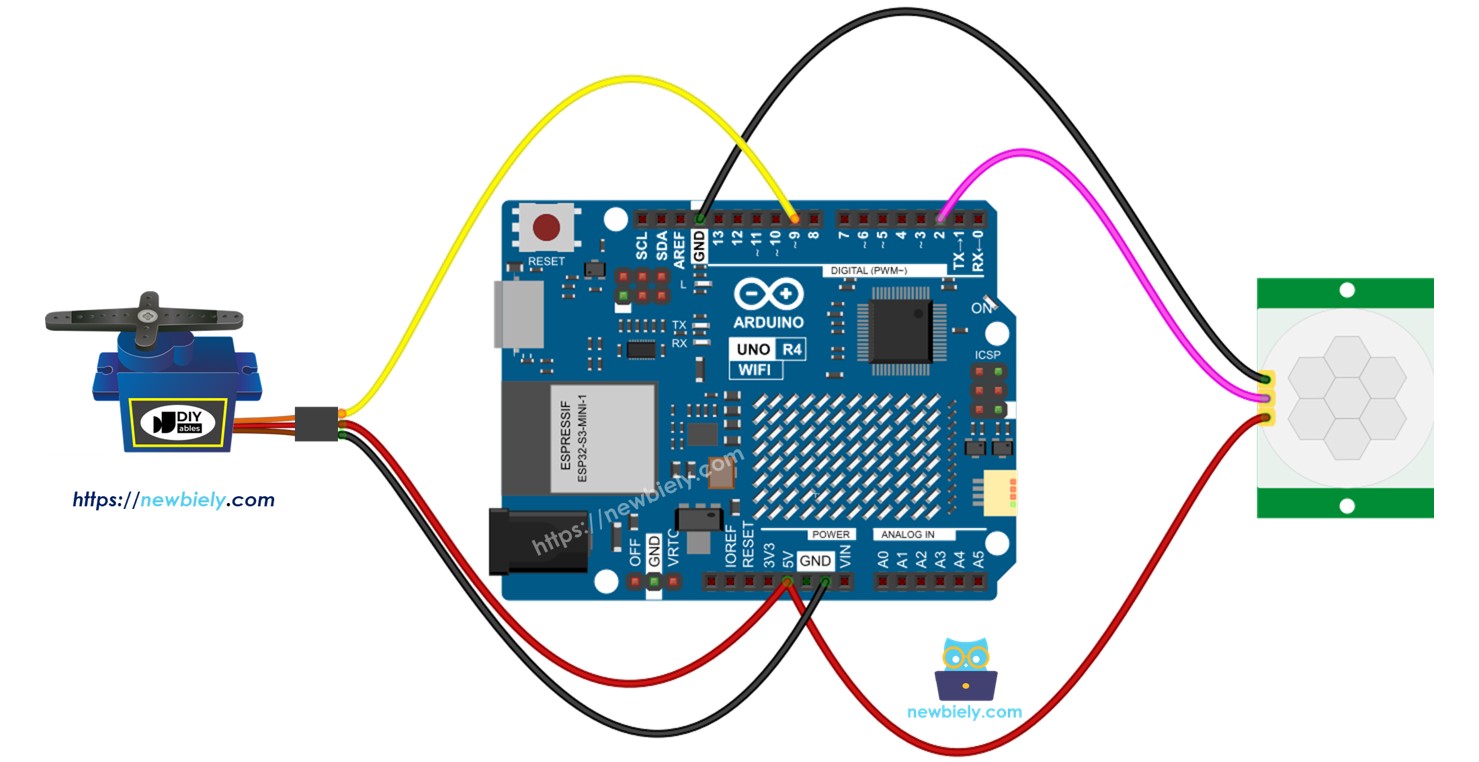
Wiring Diagram
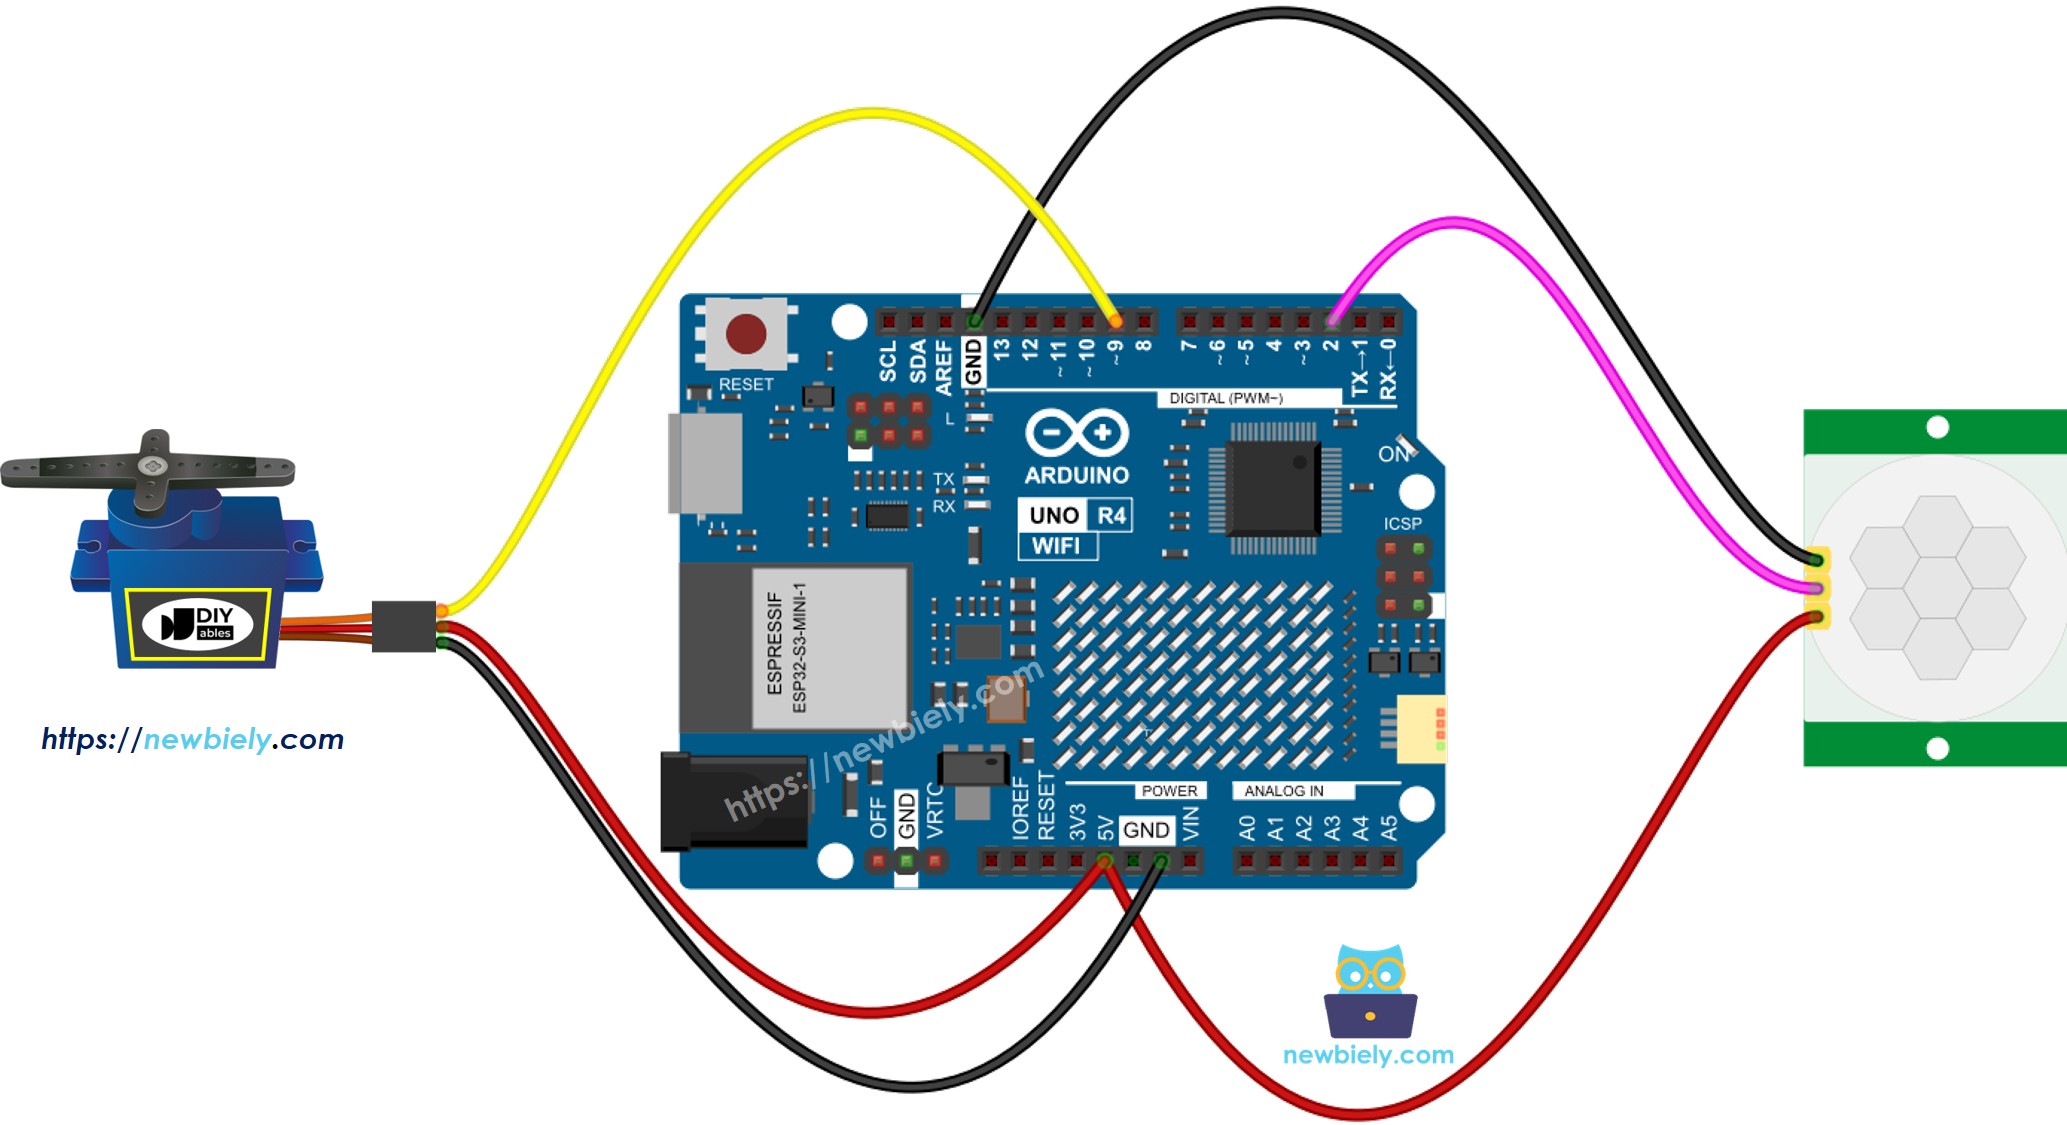
This image is created using Fritzing. Click to enlarge image
See The best way to supply power to the Arduino Uno R4 and other components.
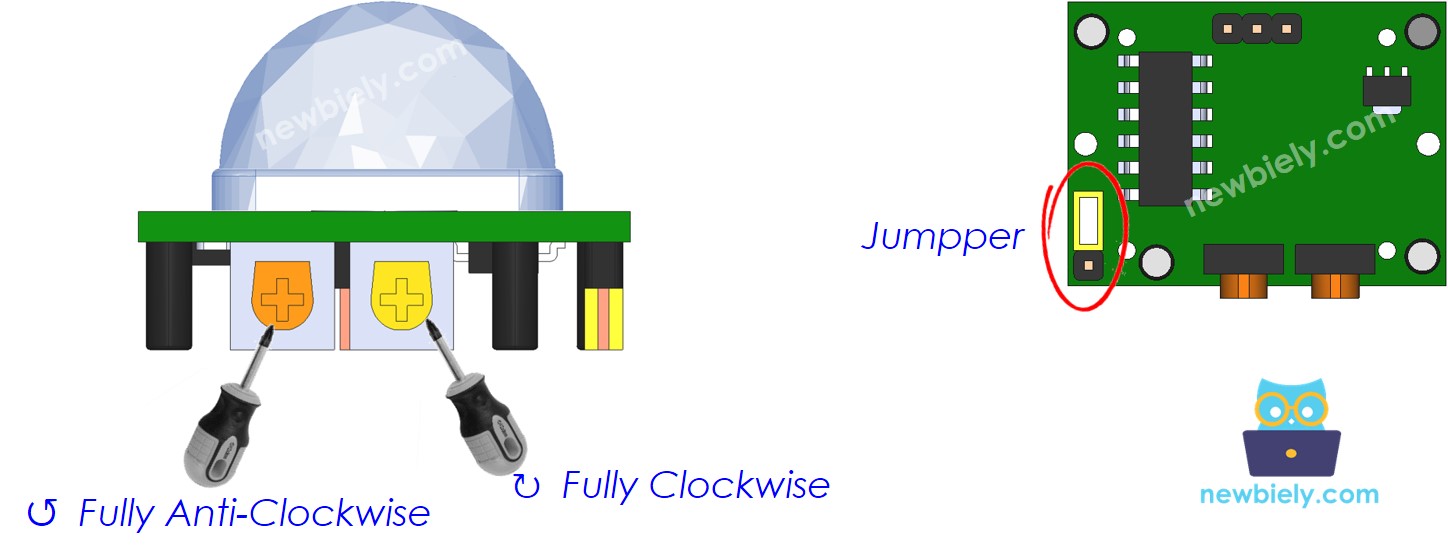
Initial Setting
| Time Delay Adjuster | Screw it in anti-clockwise direction fully. |
| Detection Range Adjuster | Screw it in clockwise direction fully. |
| Repeat Trigger Selector | Put jumper as shown on the image. |
Arduino UNO R4 Code - Motion Sensor Controls Servo Motor
Detailed Instructions
Follow these instructions step by step:
- If this is your first time using the Arduino Uno R4 WiFi/Minima, refer to the tutorial on setting up the environment for Arduino Uno R4 WiFi/Minima in the Arduino IDE.
- Wire the components according to the provided diagram.
- Connect the Arduino Uno R4 board to your computer using a USB cable.
- Launch the Arduino IDE on your computer.
- Select the appropriate Arduino Uno R4 board (e.g., Arduino Uno R4 WiFi) and COM port.
- Plug the Arduino UNO R4 into your computer using the USB cable.
- Start the Arduino IDE, choose the correct board and port.
- Paste the provided code into the Arduino IDE.
- Press the Upload button in the Arduino IDE to transfer the code to the Arduino UNO R4.
- Wave your hand in front of the sensor.
- Watch the servo motor move in response.
Arduino UNO R4 with HC-SR501 Motion Sensor - Video Tutorial
The below is a step-by-step video tutorial demonstrating how to use the HC-SR501 motion sensor with the Arduino UNO R4. At the end of the video, you will see how to make an automated open door system with a servo and buzzer using the code below: