Arduino UNO R4 - Automatic Irrigation System
We'll learn how to build an automatic irrigation system for your garden using Arduino UNO R4, a soil moisture sensor, a relay, and a pump.
- When the soil is dry, Arduino UNO R4 automatically activates a relay to start a pump for watering plants.
- When the soil is wet, Arduino UNO R4 automatically activates a relay to stop the pump.
Hardware Preparation
Or you can buy the following kits:
| 1 | × | DIYables STEM V4 IoT Starter Kit (Arduino included) | |
| 1 | × | DIYables Sensor Kit (18 sensors/displays) |
Additionally, some of these links are for products from our own brand, DIYables .
Buy Note: Many soil moisture sensors available in the market are unreliable, regardless of their version. We strongly recommend buying the sensor with TLC555I Chip from the DIYables brand using the link provided above. We tested it, and it worked reliably.

Overview of soil moisture sensor and Pump
To learn about the pump and soil moisture sensor (pinout, operation, programming), refer to the tutorials listed below:
- Arduino UNO R4 - Controls Pump tutorial
Wiring Diagram
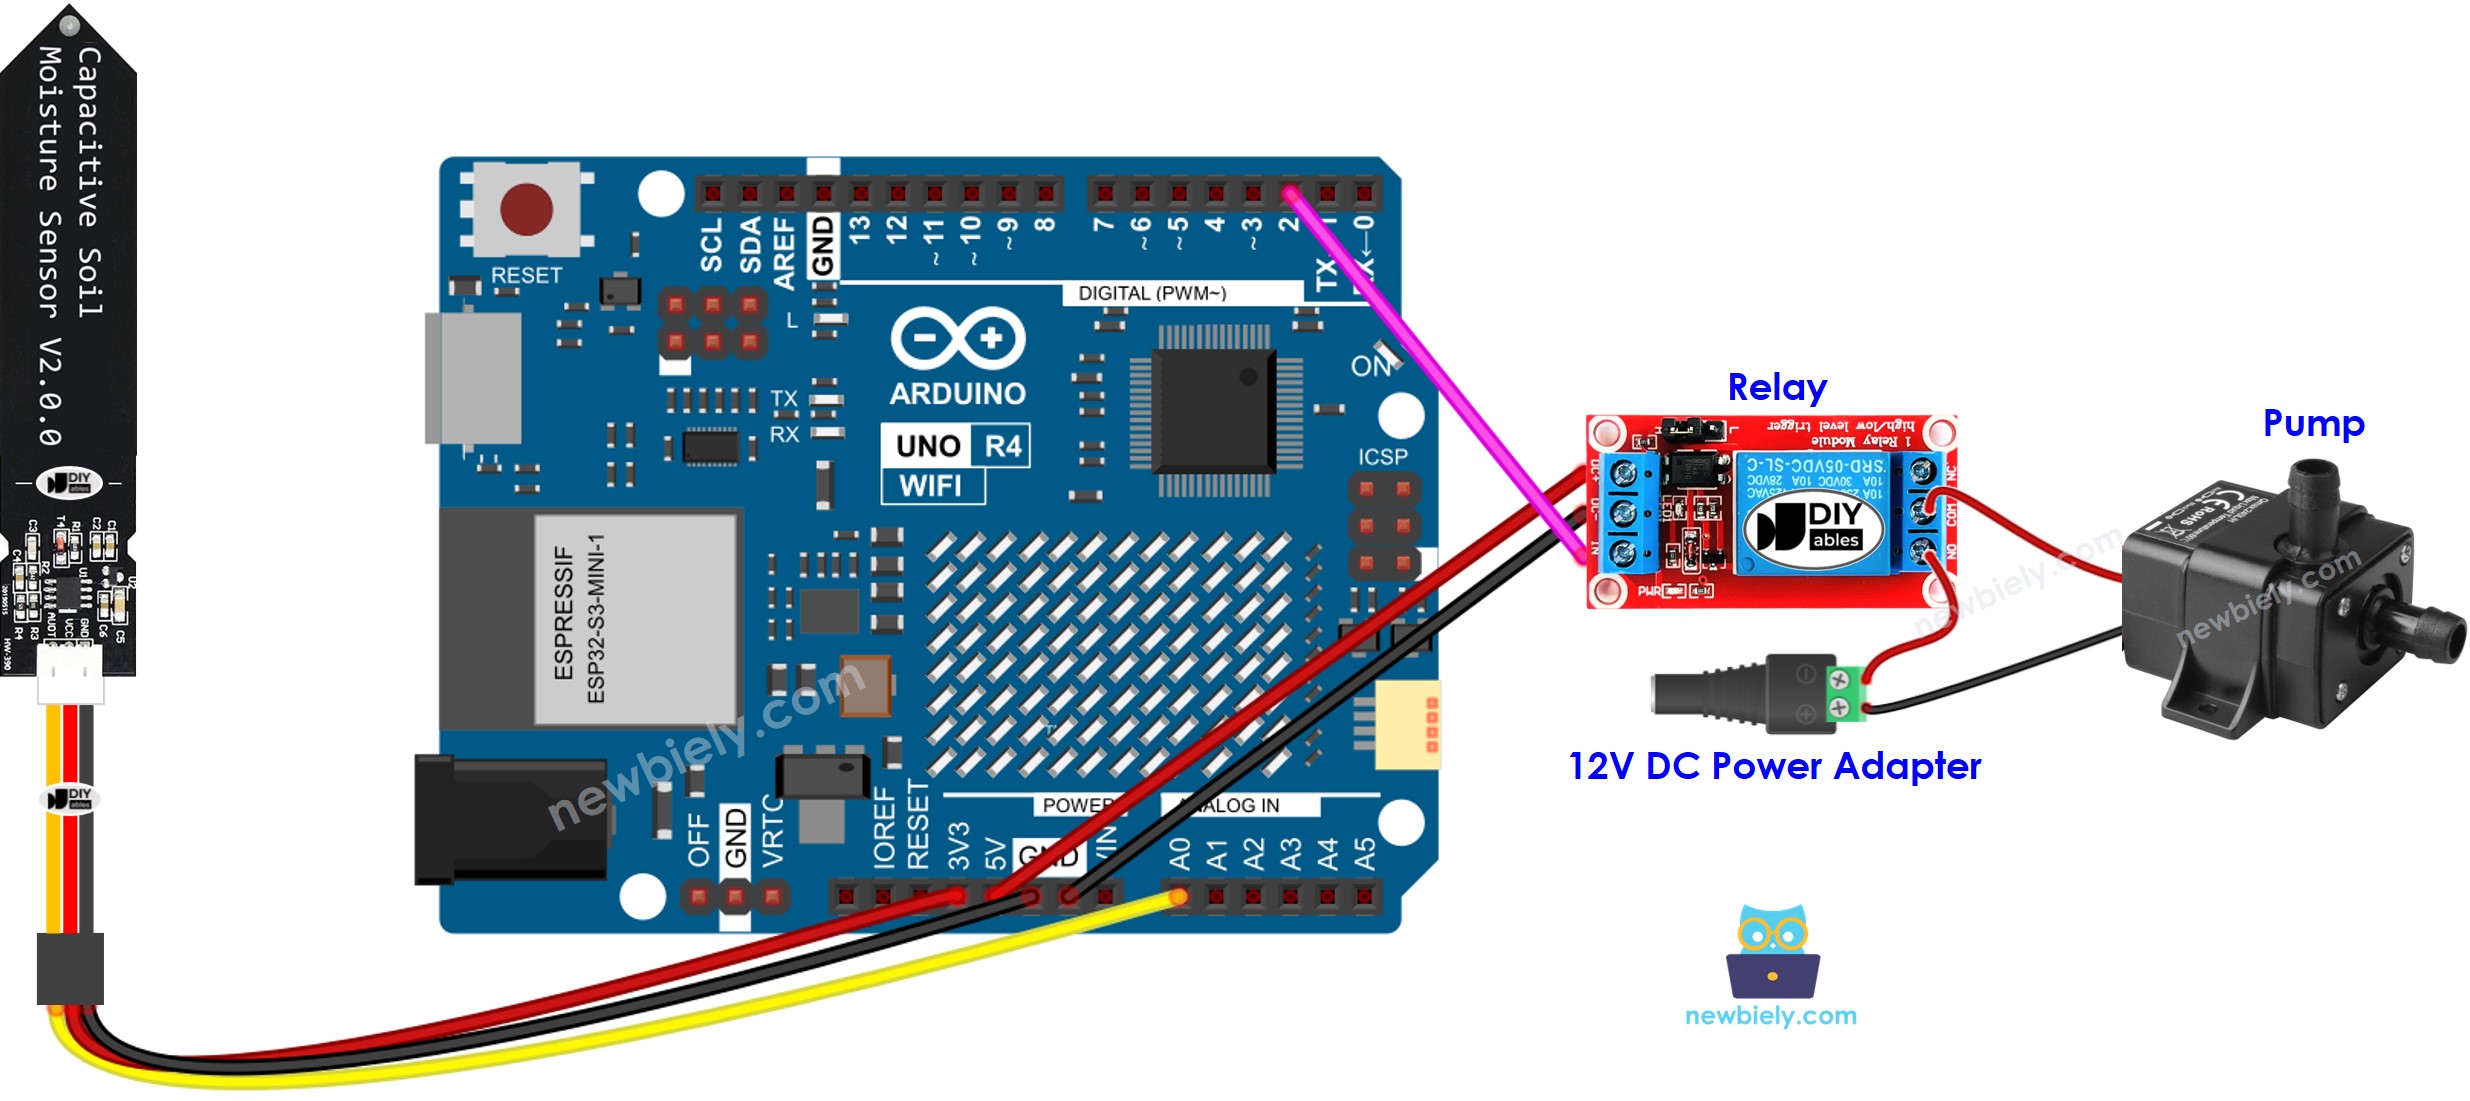
This image is created using Fritzing. Click to enlarge image
See The best way to supply power to the Arduino Uno R4 and other components.
Arduino UNO R4 Code
Detailed Instructions
Follow these instructions step by step:
- If this is your first time using the Arduino Uno R4 WiFi/Minima, refer to the tutorial on setting up the environment for Arduino Uno R4 WiFi/Minima in the Arduino IDE.
- Wire the components according to the provided diagram.
- Connect the Arduino Uno R4 board to your computer using a USB cable.
- Launch the Arduino IDE on your computer.
- Select the appropriate Arduino Uno R4 board (e.g., Arduino Uno R4 WiFi) and COM port.
- Adjust your equipment to find the point where it changes from wet to dry, following the instructions here: Arduino UNO R4 - Calibrates Soil Moisture Sensor.
- Enter the updated value for this point into the program.
- Open the Serial Monitor in the Arduino IDE.
- Load the program onto your Arduino UNO R4.
- Check the Serial Monitor to see what it displays.
Code Explanation
Check the explanations in the source code comments, line by line!