How to Power Arduino UNO R4
You may have found information online about three different ways to power the Arduino UNO R4: using the USB port, the barrel jack, or the Vin pin. But which one is the safest and most effective, especially if you also need to power extra components like sensors, displays, or motors? In this tutorial, we will show you the best methods to power your Arduino UNO R4 for both simple and more complex projects, helping you keep all your devices stable and protected.

In detail, we will learn:
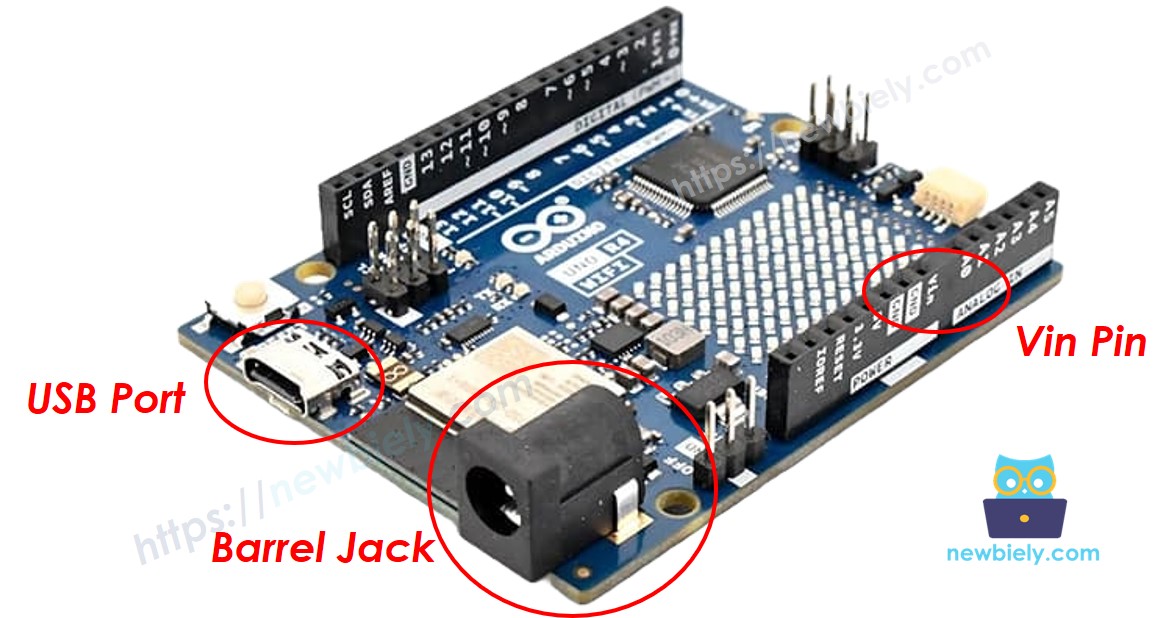
- Three ways to power the Arduino UNO R4
- The best way to power the Arduino UNO R4
- Powering Arduino UNO R4 and external components
- Recommended setup with a power splitter
Hardware Preparation
Or you can buy the following kits:
| 1 | × | DIYables STEM V4 IoT Starter Kit (Arduino included) | |
| 1 | × | DIYables Sensor Kit (30 sensors/displays) | |
| 1 | × | DIYables Sensor Kit (18 sensors/displays) |
Additionally, some of these links are for products from our own brand, DIYables .
Three Ways to Power the Arduino UNO R4

- Power via USB Port (5V): This method provides a stable 5V directly from your computer or a USB power adapter. It is simple and safe for most Arduino projects because the voltage does not need further regulation.
- Power via Barrel Jack (6-24V): If you supply 6-24V through the barrel jack, the Arduino’s onboard regulator will reduce it to 5V. However, many readily available power adapters are 9V or 12V. Using these higher voltages can cause the Arduino to become quite hot.
- Power via Vin Pin (6-24V): Similarly, if you supply 6-24V through the Vin pin, the onboard regulator will step it down to 5V. Again, However, most commonly available power adapters are 9V or 12V. Using 9V or 12V adapters can make the Arduino run hot or overheat.
What Is the Best Way to Power the Arduino UNO R4?
When you power the board via the barrel jack or the Vin pin, you must use a voltage in the 6-24V range. However, many power adapters are available in 5V, 9V, or 12V:
- If you use a 5V power source via the barrel jack or Vin pin, it might work but can be unstable, because there is not enough voltage for the onboard regulator to work properly.
- Using 9V or 12V is more stable, but it often makes the Arduino board hot.
Therefore, the best option is to power the Arduino UNO R4 from a 5V power source using the USB port.
Powering External Components
Many projects require not only the Arduino but also other components, such as sensors, displays, and motors. Powering these external parts directly from the Arduino’s 5V pin is not recommended because it can draw too much current through the board’s regulator, potentially damaging the Arduino. Therefore, we need to power the external component such as sensors, displays, motors separately. The next part with show how to do it.
Many projects need not only the Arduino but also other parts like sensors, displays, and motors. It is not recommended to power these external parts directly from the Arduino’s 5V pin. This is because they can use too much current, which may damage the Arduino’s voltage regulator, potentially damaging the Arduino Uno R4 board.
Instead, you should power the external components—such as sensors, displays, and motors—separately. The next section will show you how to do this.
Recommended Setup with a Power Splitter
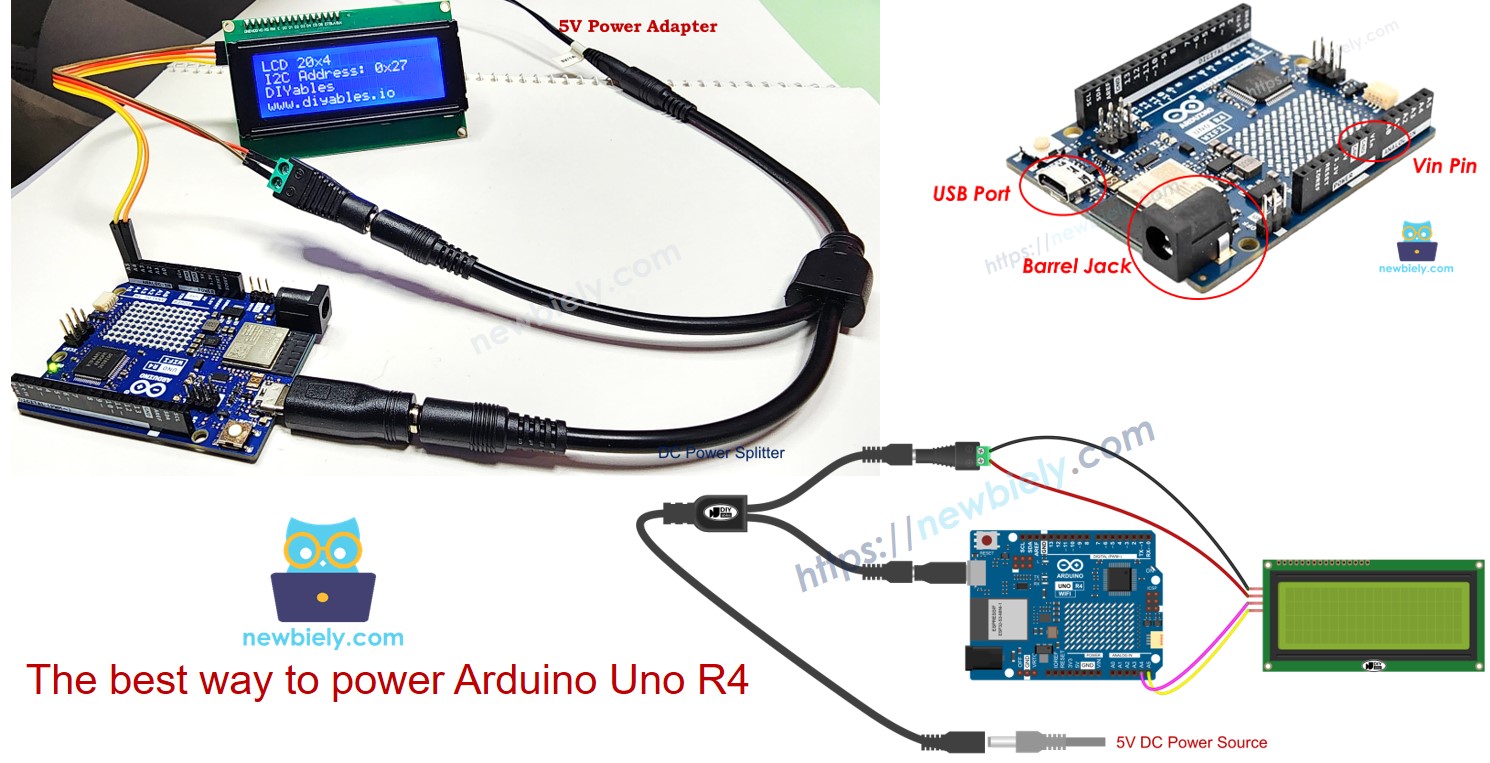
The ideal solution is to use a 5V power source along with a power splitter set. This splitter will divide the 5V output into two lines:
- USB-C connector for the Arduino
- Screw terminal block for external components and sensors
This way, each part of your project gets a stable 5V supply without risking damage to the Arduino UNO R4.
Wiring Diagram
Below is an example of the best way to power both the Arduino UNO R4 and an LCD display:
The below wiring diagram shown the best way to power Arduino Uno R4 and LCD display:

Practical Example
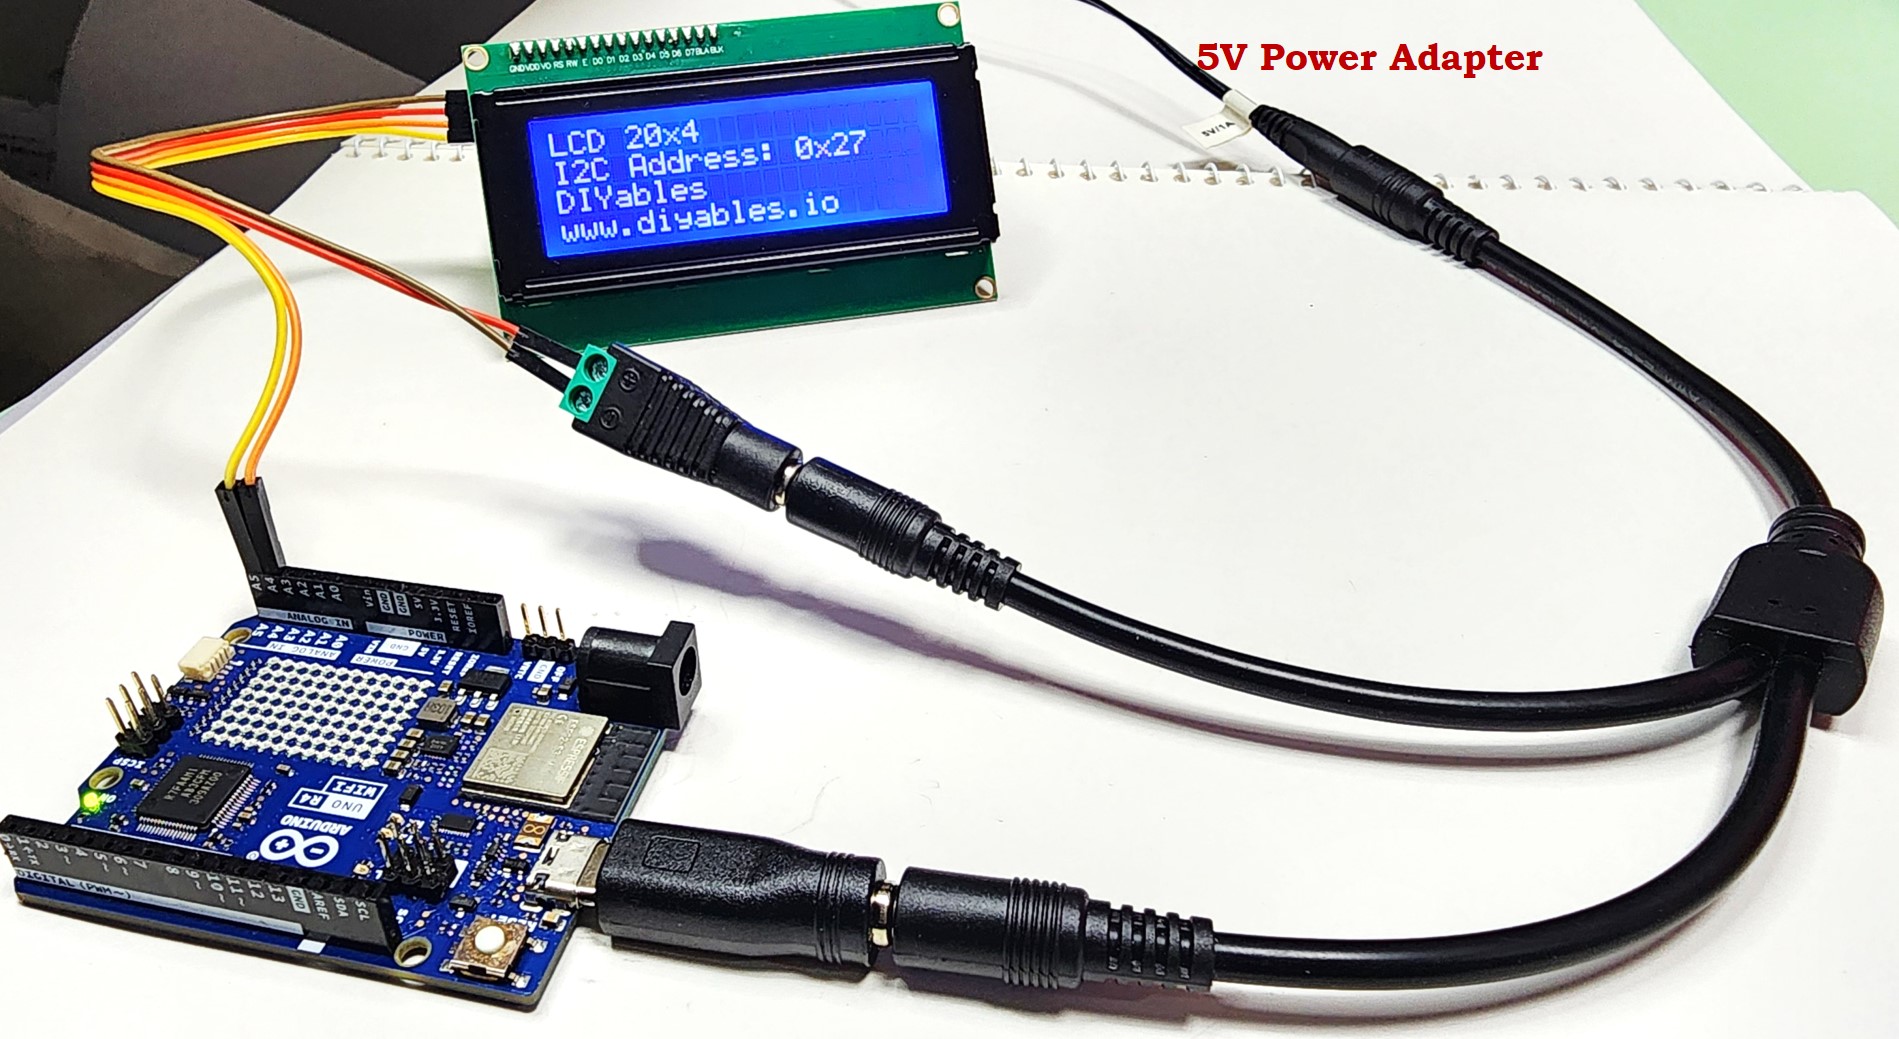
In this photo, you can see how to power the Arduino UNO R4 and additional components in a real project:

