
ESP32 S3 - OLED 128x32 Display
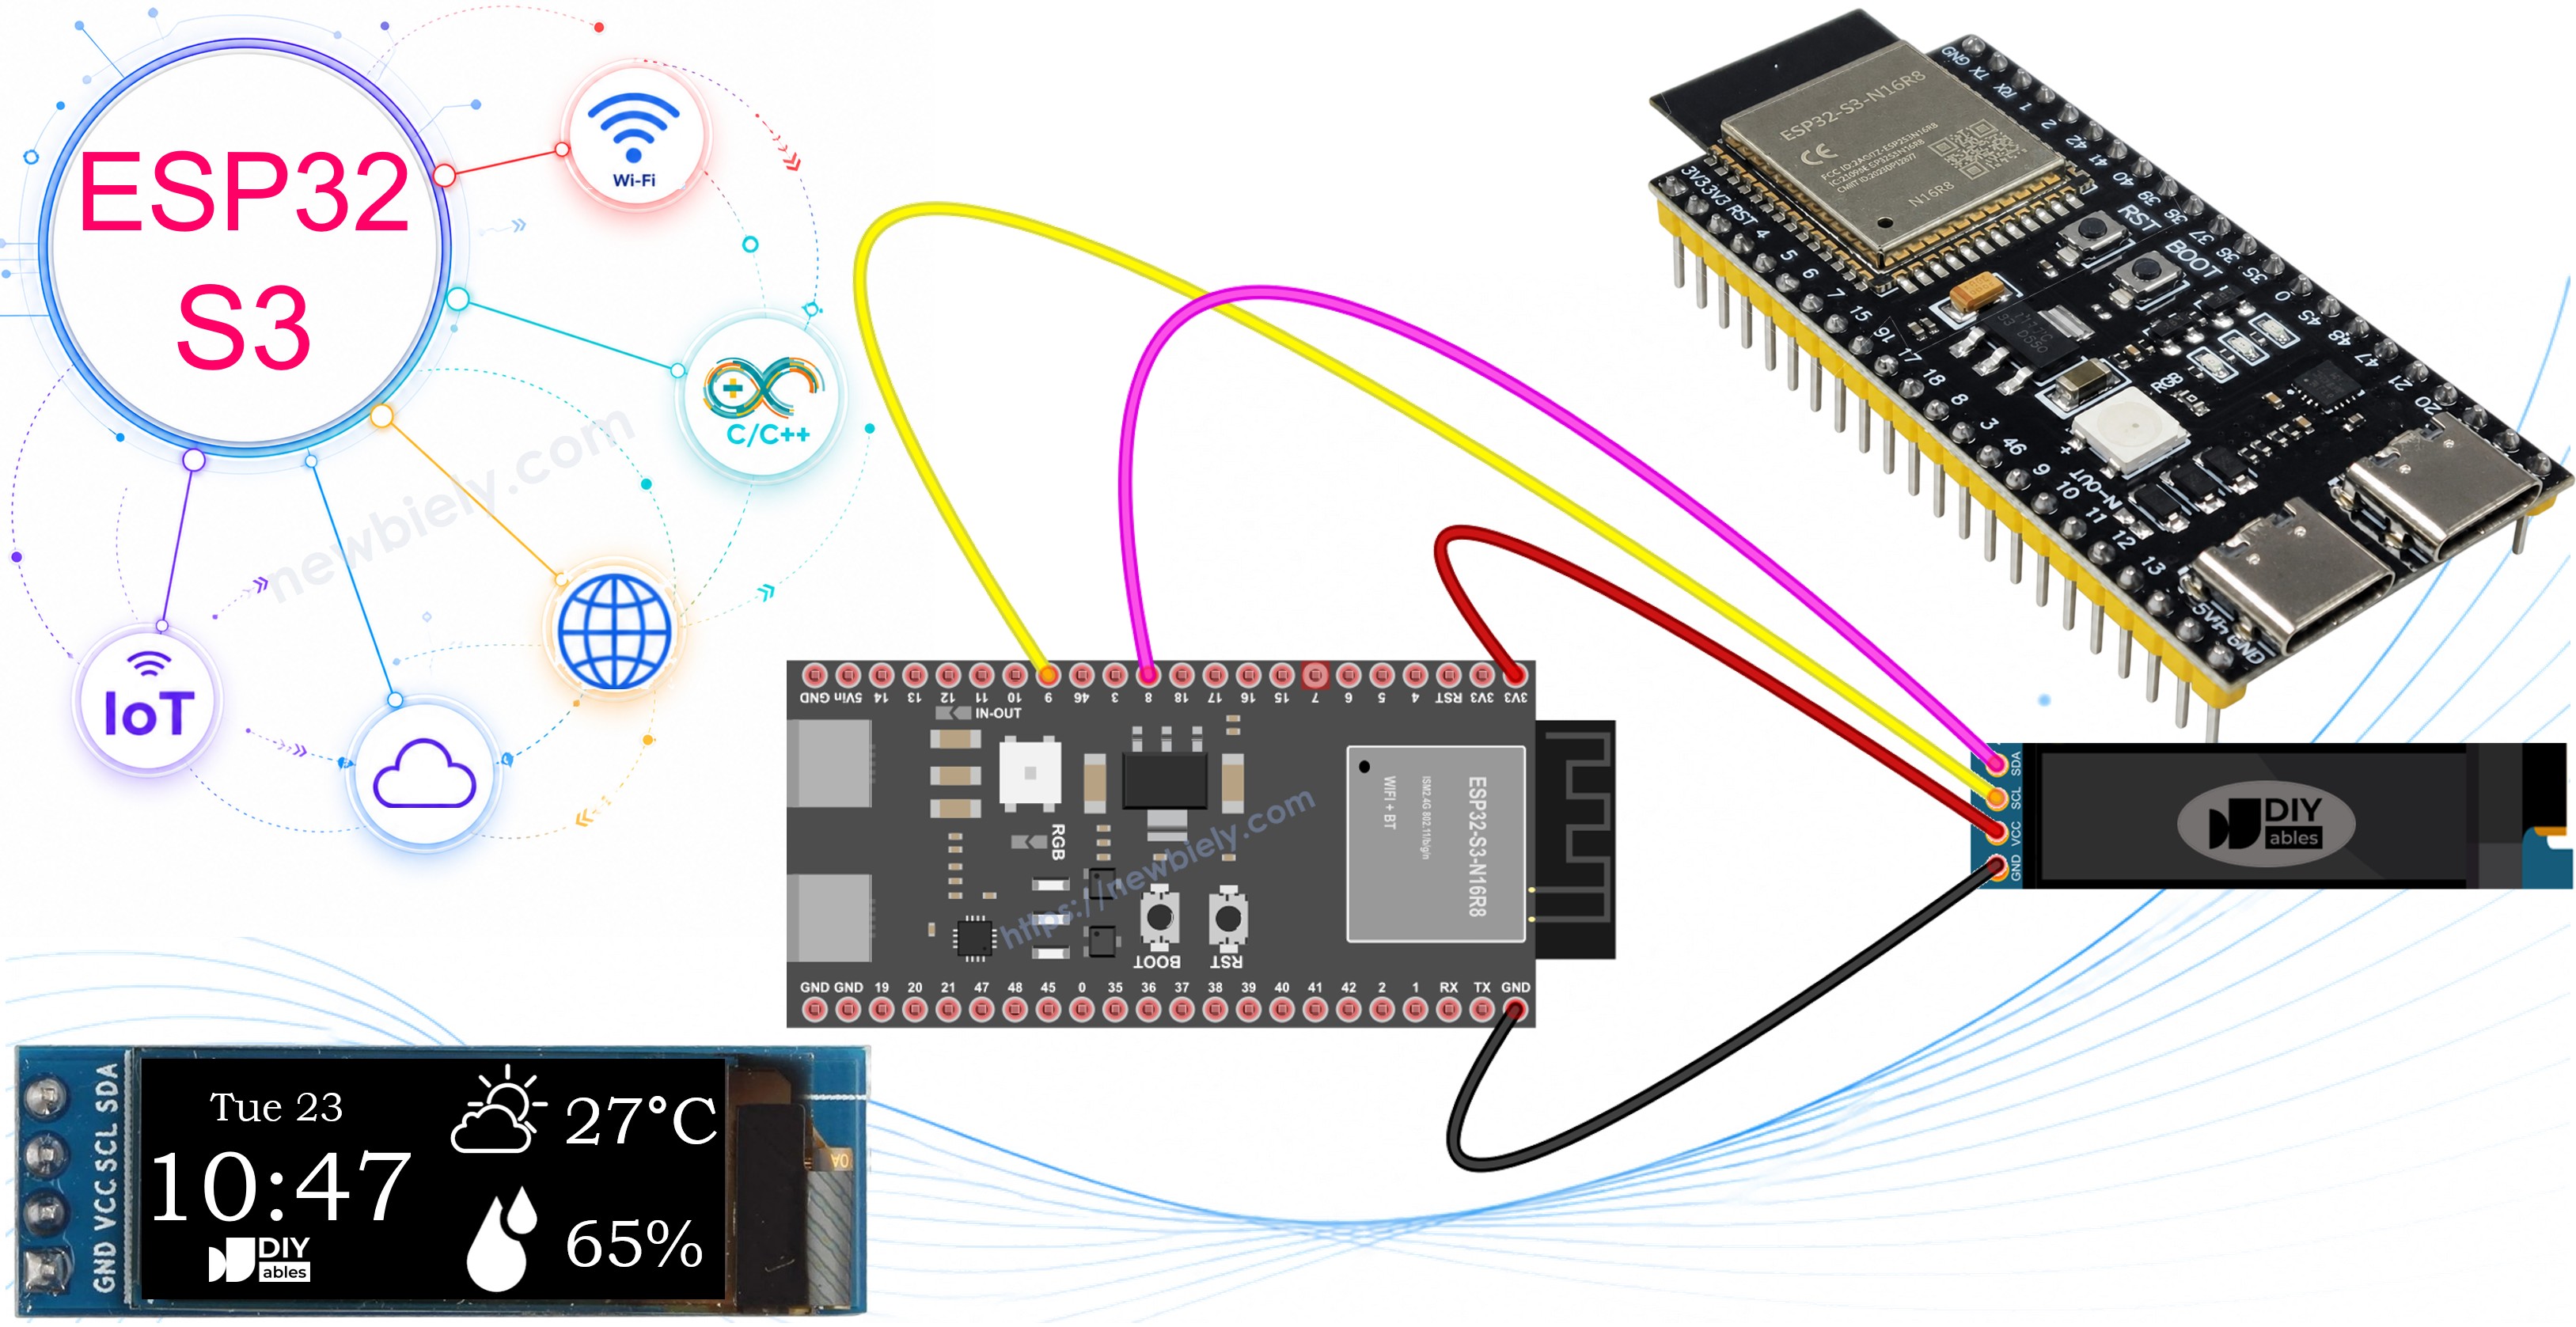
The OLED 128x32 display is a compact, high-contrast screen that makes it easy to visualize data, show status messages, and render simple graphics in your ESP32 S3 projects. This tutorial walks you through connecting the SSD1306-driven OLED to your ESP32 S3 board via I2C and programming it to display text, numbers, shapes, and custom images.
What you'll build:
- A wired OLED 128x32 display connected to the ESP32 S3 over I2C
- A sketch that displays formatted text and numbers on screen
- A drawing sketch that renders shapes and graphics
- A bitmap image display using a custom converted array
Display Technology:
OLED (Organic Light-Emitting Diode) displays produce their own light, eliminating the need for a backlight. Each pixel emits light independently, providing perfect blacks, high contrast ratios, and wide viewing angles compared to traditional LCD displays.
Hardware Preparation
Or you can buy the following kits:
| 1 | × | DIYables ESP32 S3 Starter Kit (ESP32 S3 included) | |
| 1 | × | DIYables Sensor Kit (18 sensors/displays) |
Additionally, some of these links are for products from our own brand, DIYables .
Overview of OLED 128x32 Display
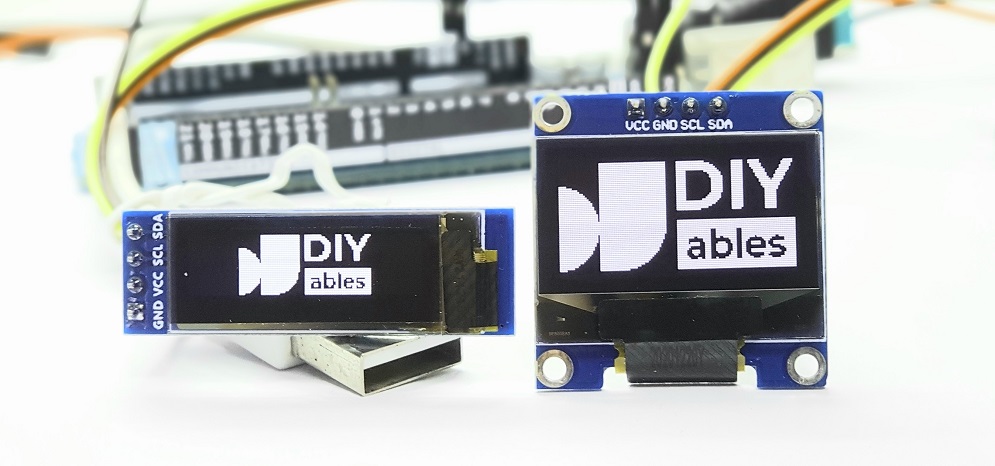
The OLED 128x32 is a compact monochrome display module that uses self-illuminating OLED technology driven by the SSD1306 controller chip. Because each pixel generates its own light, the display delivers true blacks, extremely high contrast, and very fast response times without requiring a separate backlight circuit.
Key Specifications
The display measures approximately 0.91 inches diagonally and offers a resolution of 128 × 32 pixels, giving you 4,096 individually addressable pixels. It communicates over a two-wire I2C bus (default address 0x3C) and operates on 3.3 V to 5 V, drawing only 10–20 mA depending on how many pixels are lit. The monochrome color is white or blue on a black background, the viewing angle extends to roughly 170 degrees, and the pixel response time is under 1 ms.
OLED vs LCD Comparison:
| Feature | OLED | LCD |
|---|---|---|
| Backlight | None (self-lit) | Required |
| Contrast | Perfect (infinite) | Limited |
| Black Level | True black | Gray/lit |
| Viewing Angle | ~170° | ~120° |
| Power Usage | Low (black areas) | Constant |
| Thickness | Very thin | Thicker |
| Response Time | Fast (<1ms) | Slower |
OLED Display Pinout
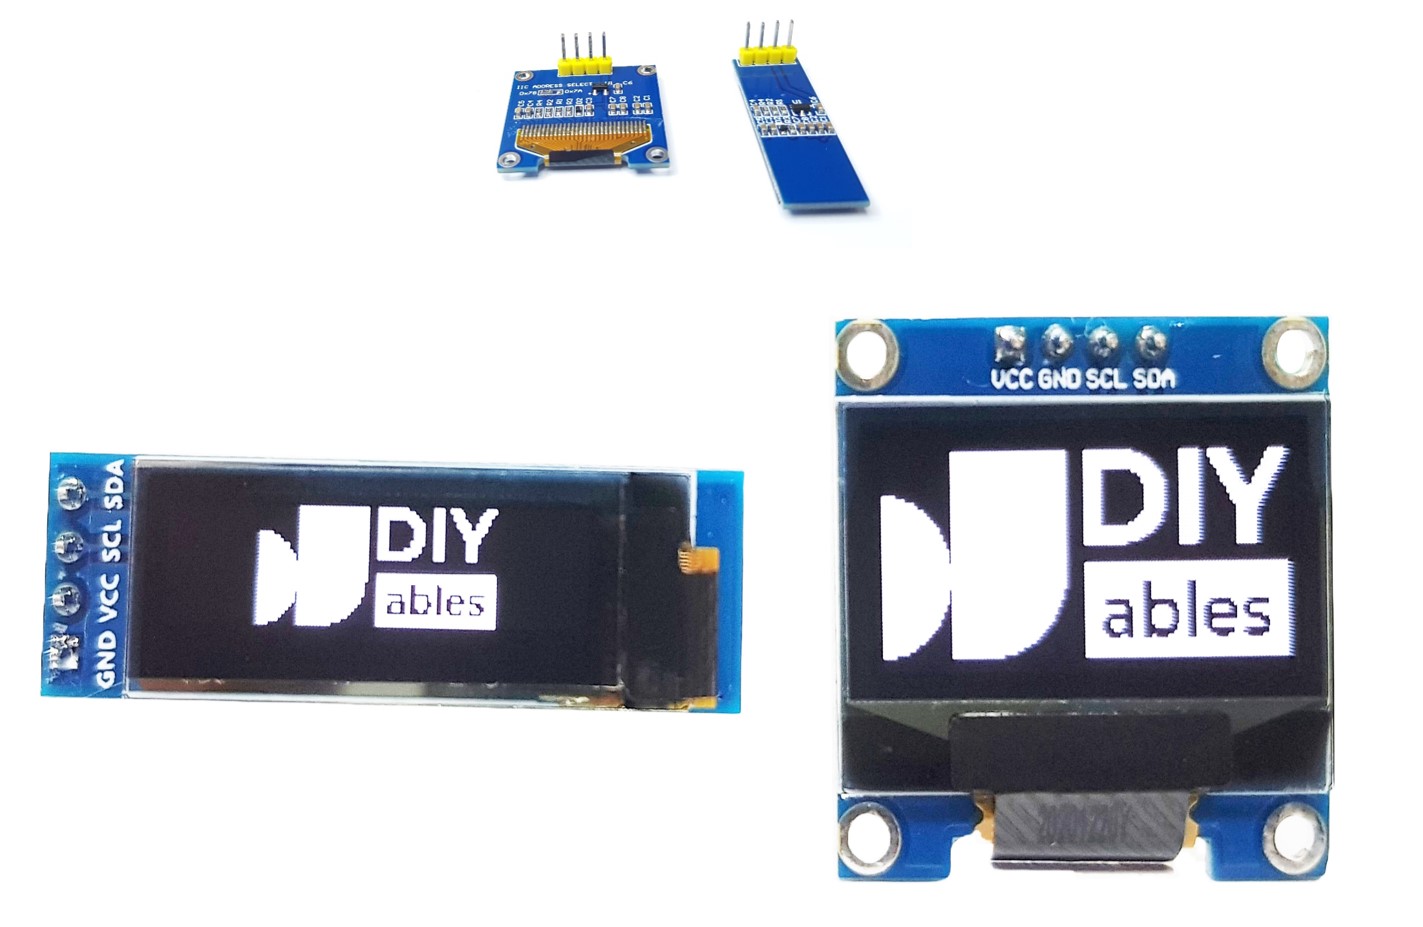
The OLED 128x32 module exposes four pins — two for power and two for the I2C data bus.
- VCC — Power supply pin (3.3 V or 5 V)
- GND — Ground reference (0 V)
- SCL — I2C Serial Clock (connect to ESP32 S3 SCL pin)
- SDA — I2C Serial Data (connect to ESP32 S3 SDA pin)
※ NOTE THAT:
- Pin connections on OLED modules may vary by manufacturer — always check the labels on your specific module
- This tutorial uses SSD1306 I2C driver OLED displays (tested with DIYables modules)
- Pin order varies: some modules have GND-VCC-SCL-SDA, others have VCC-GND-SCL-SDA
Wiring Diagram
Connect the OLED 128x32 display to your ESP32 S3 using the four I2C connections listed below. Keep your jumper wires short to minimize signal noise, and always double-check the pin labels on your specific OLED module before powering up.
Safety Notes
The ESP32 S3 operates at 3.3 V logic, and the OLED module is compatible with both 3.3 V and 5 V supplies. Powering the OLED from the ESP32 S3's 3.3 V rail is perfectly safe and is the recommended approach. The module draws only 10–20 mA, well within the board's power budget.
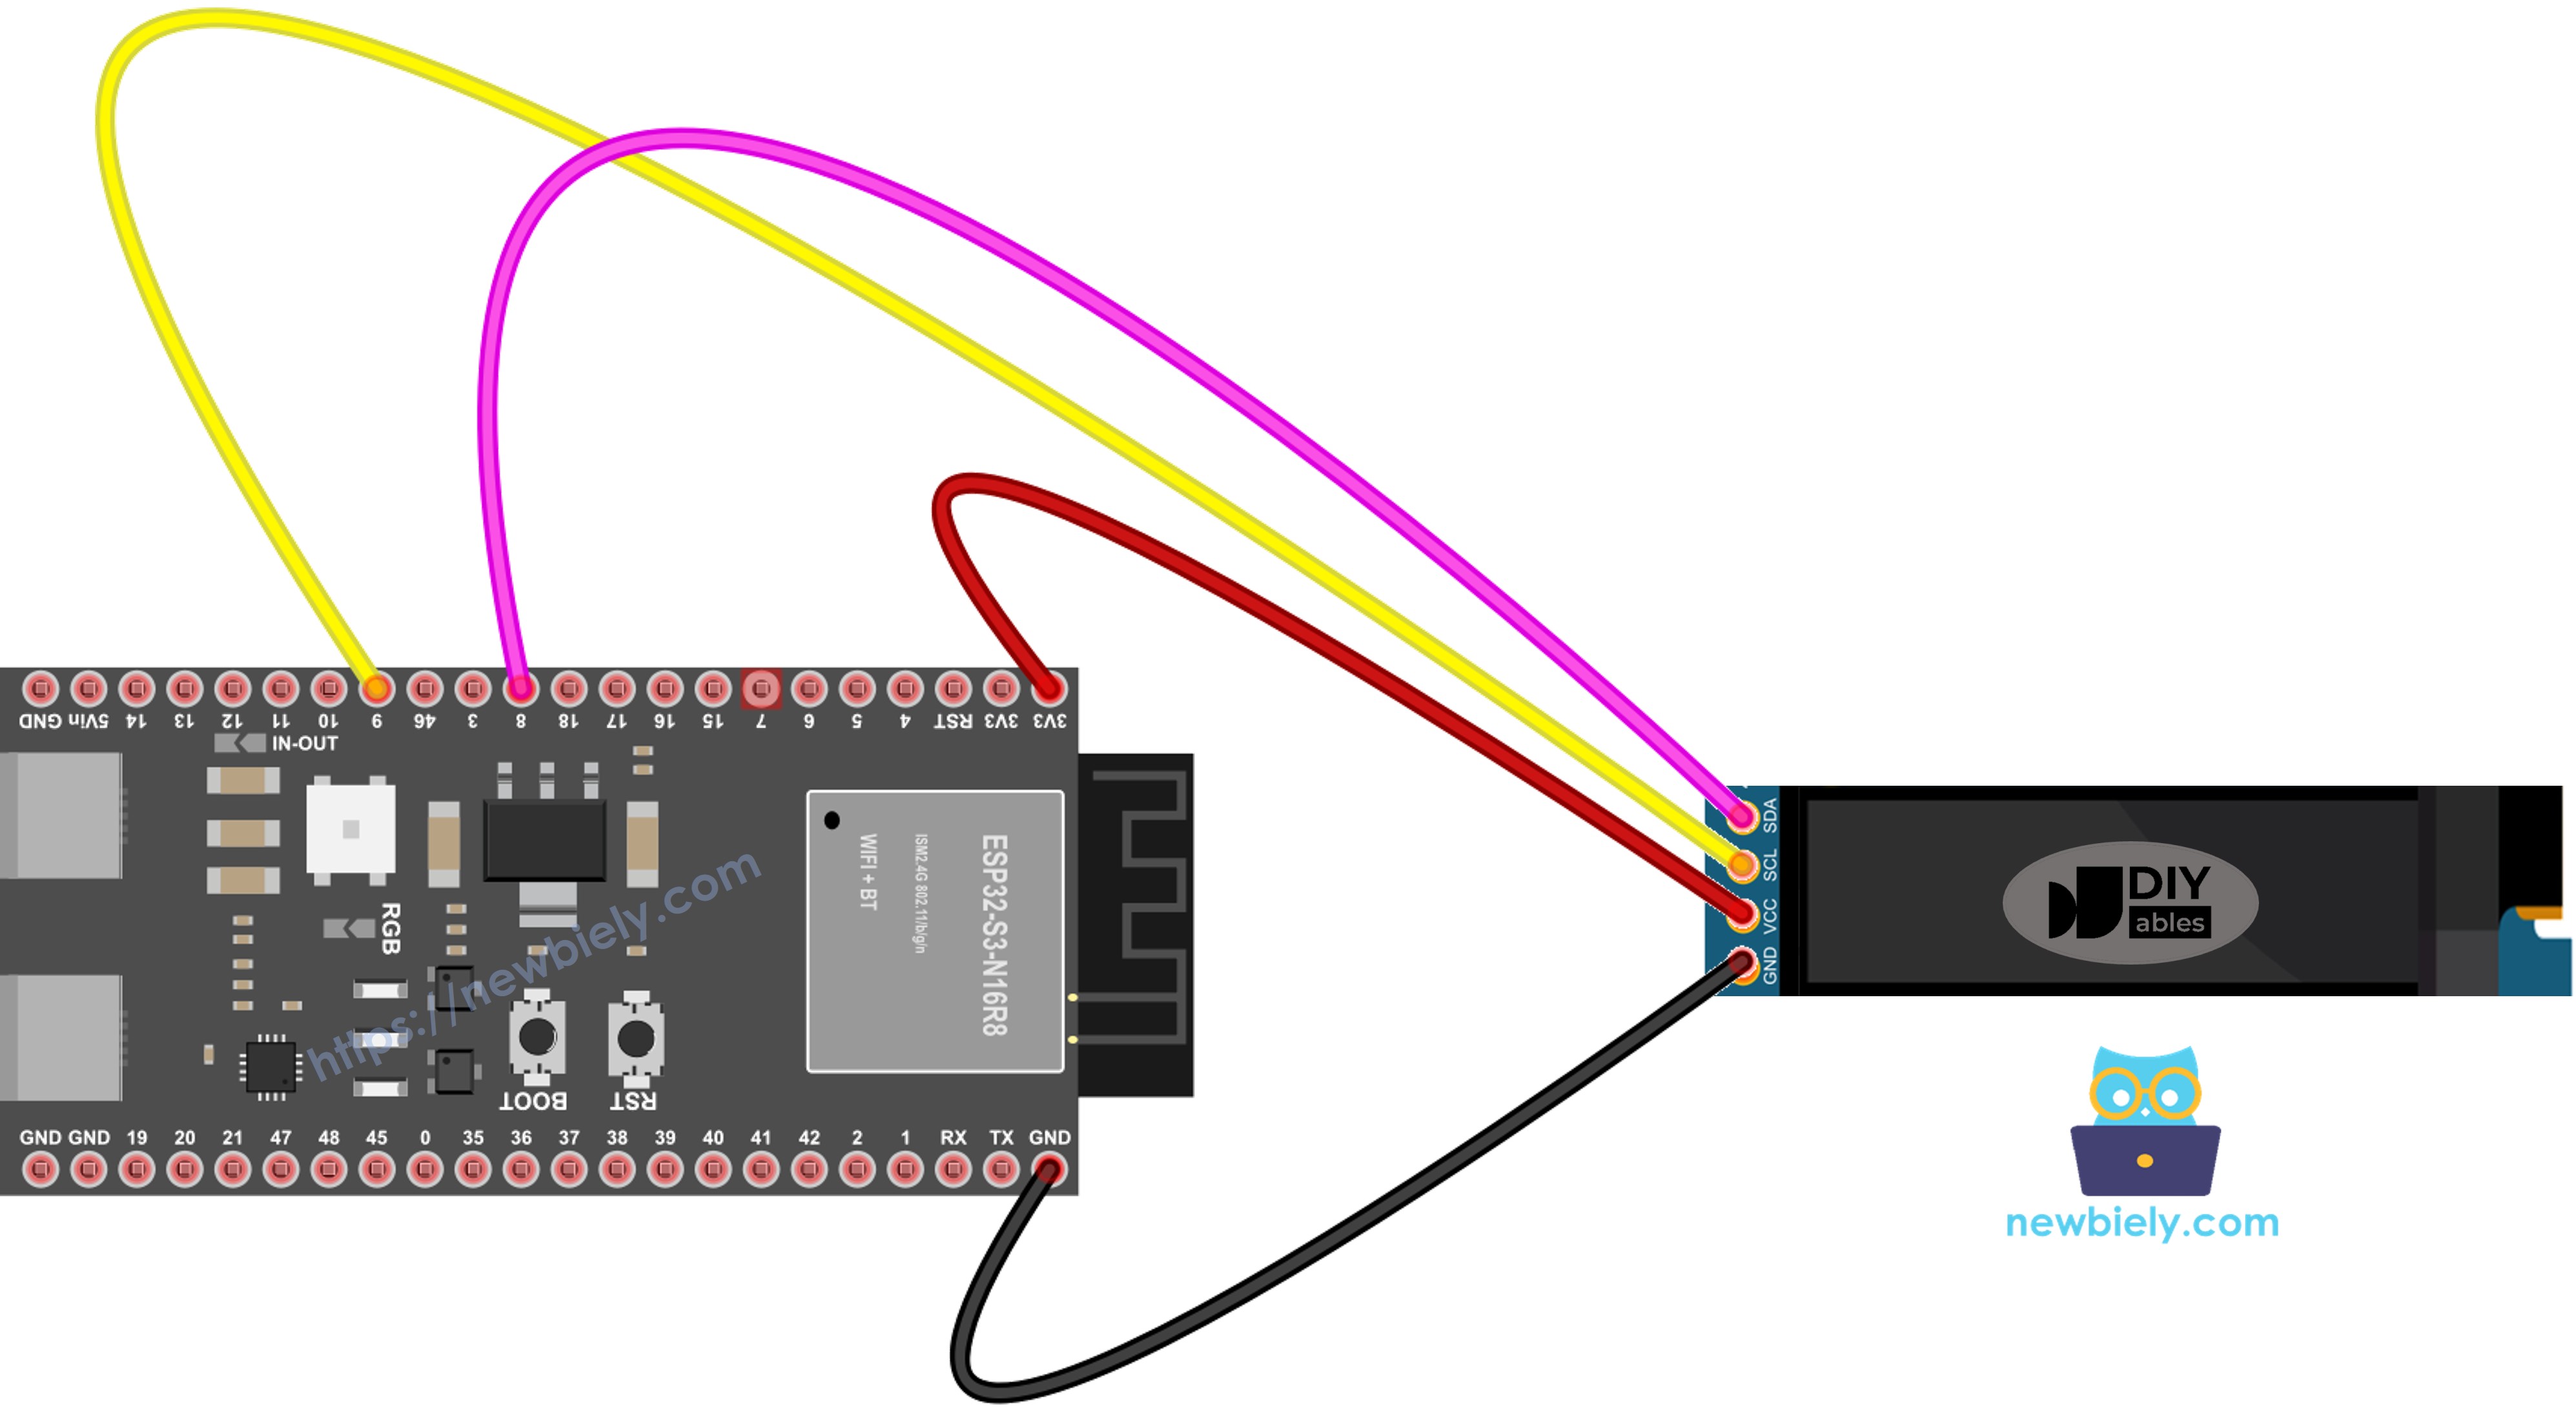
This image is created using Fritzing. Click to enlarge image
| OLED Module | ESP32 S3 |
|---|---|
| VCC | 3.3V |
| GND | GND |
| SDA | SDA |
| SCL | SCL |
Programming ESP32 S3 with OLED Display
Install SSD1306 OLED Library
- Click the Libraries icon on the left side of Arduino IDE
- Search for SSD1306
- Find the Adafruit SSD1306 library by Adafruit
- Click Install to add the library
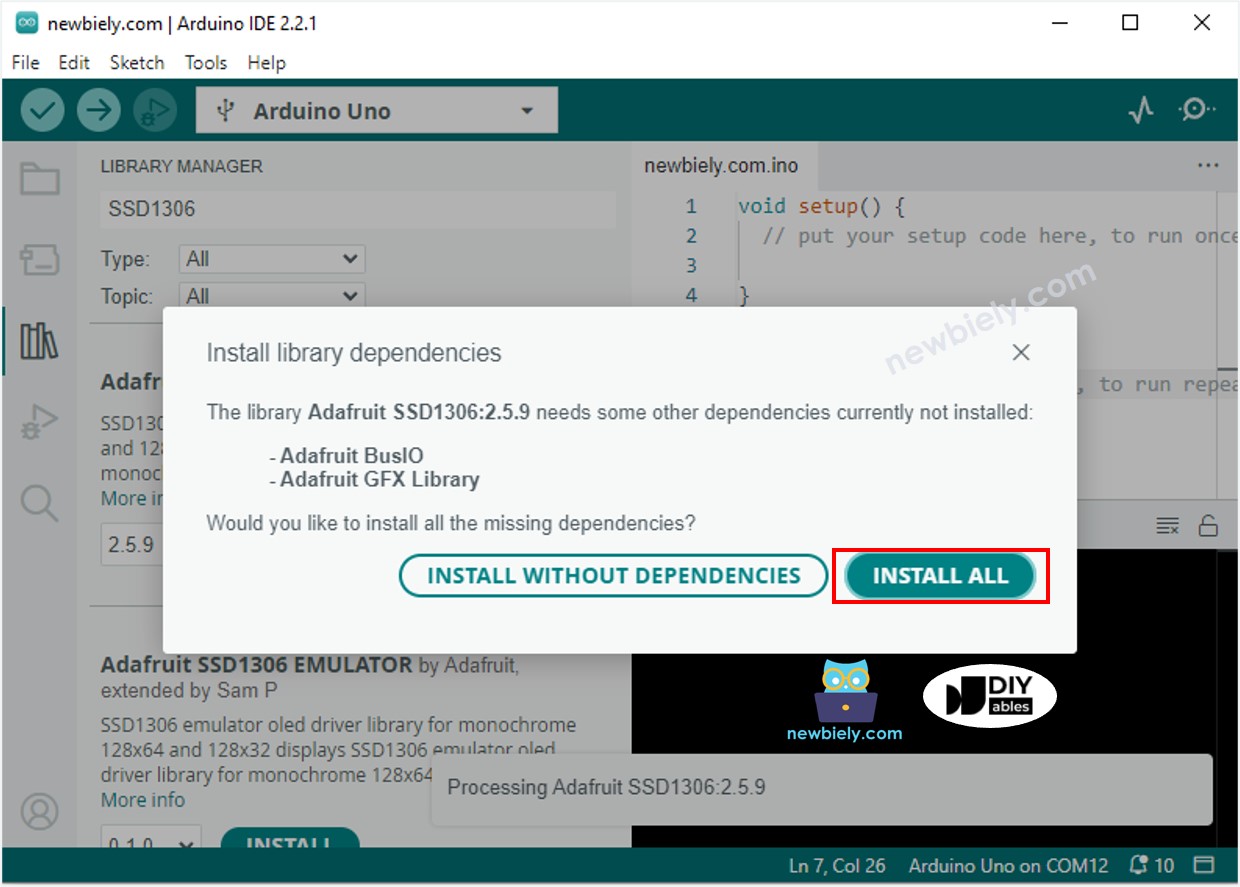
- Search for Adafruit SSD1306 created by Adafruit and click the Install button.
- When prompted to install dependencies, click Install All to add required libraries (including Adafruit GFX)
Basic OLED Programming Steps
Include Required Libraries:
Define Display Dimensions:
Create Display Object:
Initialize Display in setup():
After initializing the display, use drawing functions to compose your content, then call oled.display() to push the frame buffer to the screen.
ESP32 S3 Code - Display Text on OLED
The following code demonstrates how to configure the SSD1306 display and render formatted text on the ESP32 S3. It sets the text size, cursor position, and color, then calls oled.display() to commit the content to the screen. You can extend it to show live sensor readings by replacing the static strings with variable values.
Essential OLED Text Functions:
- oled.clearDisplay() – Clears all pixels on screen
- oled.setTextSize(n) – Sets text size (1-8, where 1 is smallest)
- oled.setCursor(x, y) – Sets starting position for text
- oled.setTextColor(WHITE) – Sets text color to white
- oled.setTextColor(BLACK, WHITE) – Sets text color to black with white background
- oled.print("text") – Prints text without newline
- oled.println("text") – Prints text with newline
- oled.println(number) – Prints number value
- oled.println(number, HEX) – Prints number in hexadecimal format
- oled.display() – Updates screen to show all changes
Scrolling Functions:
- oled.startscrollright(start, stop) – Scrolls text left to right
- oled.startscrollleft(start, stop) – Scrolls text right to left
- oled.startscrolldiagright(start, stop) – Scrolls diagonally (bottom-left to top-right)
- oled.startscrolldiagleft(start, stop) – Scrolls diagonally (bottom-right to top-left)
- oled.stopscroll() – Stops scrolling animation
Text Size Reference for 128x32 Display:
- Size 1: ~21 characters per line, 4 lines (6×8 pixels per character)
- Size 2: ~10 characters per line, 2 lines (12×16 pixels per character)
- Size 3: ~7 characters per line, 1 line (18×24 pixels per character)
Center Aligning Text on OLED Display
To learn how to center text and numbers both horizontally and vertically on the OLED 128x32 display using ESP32 S3, check out this detailed guide:
How to Vertical/Horizontal Center Align Text on OLED
Quick Centering Formula:
- Horizontal center: x = (128 - textWidth) / 2
- Vertical center: y = (32 - textHeight) / 2
- Text width = characters × 6 × textSize
- Text height = 8 × textSize
ESP32 S3 Code - Drawing Shapes on OLED
The following code shows how to use the Adafruit GFX drawing primitives to render lines, rectangles, circles, and triangles on the OLED. Each shape function takes pixel coordinates and a color constant — use WHITE to light a pixel and BLACK to turn it off.
Essential Drawing Functions:
- oled.drawPixel(x, y, color) – Draws single pixel at position
- oled.drawLine(x0, y0, x1, y1, color) – Draws line between two points
- oled.drawRect(x, y, width, height, color) – Draws rectangle outline
- oled.fillRect(x, y, width, height, color) – Draws filled rectangle
- oled.drawCircle(x, y, radius, color) – Draws circle outline
- oled.fillCircle(x, y, radius, color) – Draws filled circle
- oled.drawTriangle(x0, y0, x1, y1, x2, y2, color) – Draws triangle outline
- oled.fillTriangle(x0, y0, x1, y1, x2, y2, color) – Draws filled triangle
- oled.drawRoundRect(x, y, width, height, radius, color) – Draws rounded rectangle
- oled.fillRoundRect(x, y, width, height, radius, color) – Draws filled rounded rectangle
ESP32 S3 Code - Display Images on OLED
To display custom images on the OLED 128x32 display, convert your image to a bitmap array using the online converter tool.
Image Conversion Steps:
- Visit the Image to Bitmap Converter
- Upload your image file (JPG, PNG, etc.)
- Set width and height (max 128×32 for this display)
- Select settings: Monochrome, Horizontal orientation
- Click Convert and copy the generated bitmap array
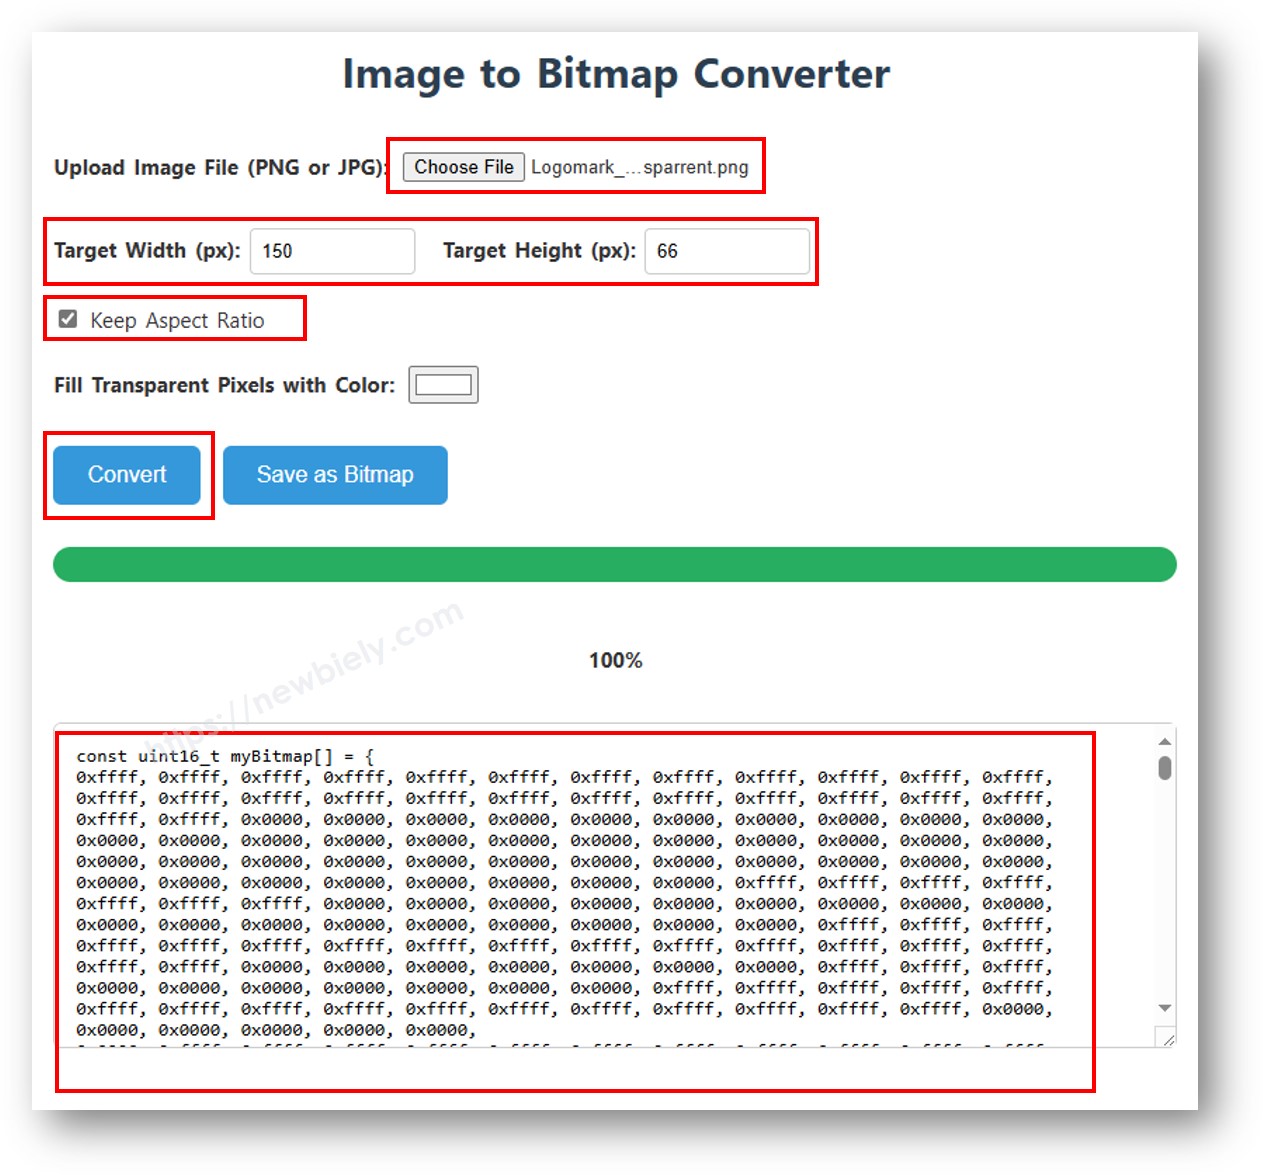
The following code demonstrates how to define a bitmap array and render it on the OLED using oled.drawBitmap(). Replace the ArduinoIcon array with the output of the converter tool, and update the width and height parameters to match your image dimensions.
Important Notes:
- Image dimensions must not exceed 128×32 pixels
- Resize images before conversion if too large
- Update width and height parameters in oled.drawBitmap() function to match your image size
- Replace the ArduinoIcon array with your converted bitmap array
Display Image Function:
- oled.drawBitmap(x, y, bitmap_array, width, height, color) – Draws bitmap image at position
Detailed Instructions
- New to ESP32 S3? Complete our Getting Started with ESP32 S3 guide first.
- Connect the OLED to your ESP32 S3: wire VCC to 3.3V, GND to GND, SDA to SDA, and SCL to SCL.
- Install the Adafruit SSD1306 and Adafruit GFX libraries via the Arduino IDE Library Manager.
- Copy one of the example sketches above (text, drawing, or image display) into a new Arduino sketch.
- Verify the I2C address in the code — most OLED modules use 0x3C; change to 0x3D if yours does not respond.
- Select the correct ESP32 S3 board and COM port in Arduino IDE, then upload the sketch.
- Observe the OLED — it should display text, graphics, or your bitmap image depending on the sketch.
- Customize the content — change text strings, cursor positions, or shape coordinates to suit your project.
- Pro Tip: Always call oled.clearDisplay() before composing new content and oled.display() after to refresh the screen cleanly and avoid visual artifacts.
Troubleshooting OLED Display Issues
Problem: Blank Screen (Nothing Displays)
- Check wiring: Verify SDA and SCL connections match your ESP32 S3 I2C pins, VCC to 3.3V, GND to GND
- Test I2C address: Run I2C scanner code to detect actual address
- Change address: Try 0x3D if 0x3C doesn't work in oled.begin() function
- Check power: Ensure 3.3V properly connected to VCC pin
- Verify connections: Push jumper wires firmly into breadboard holes
- Test module: Try OLED on another board to rule out faulty display
I2C Scanner Code:
Problem: Garbled or Partial Display
- Secure connections: Check for loose jumper wires
- Verify resolution: Ensure code uses 128×32 (not 128×64)
- Add initialization delay: Include delay(2000) after oled.begin()
- Reset display: Call oled.clearDisplay() and oled.display() after initialization
Problem: Text Too Small or Too Large
- Adjust text size: Use oled.setTextSize(1) for small, setTextSize(2) for medium
- Size 1: Fits ~21 characters per line (6×8 pixels each)
- Size 2: Fits ~10 characters per line (12×16 pixels each)
- Size 3: Fits ~7 characters per line (only 1 line on 32-pixel height)
Problem: Display Flickers
- Optimize refresh: Call oled.clearDisplay() once, then oled.display() once per update
- Add delay: Include delay(100) in loop to limit update speed
- Avoid rapid clearing: Don't repeatedly clear display unnecessarily
Problem: Only First Line Shows
- Check coordinates: Ensure Y position within 0-31 range (32 pixels tall)
- Set cursor properly: Use oled.setCursor(x, y) before each line
- Text size overflow: Large text sizes may push content off screen
Project Ideas with OLED Display
The OLED 128x32 pairs especially well with the ESP32 S3's built-in Wi-Fi and USB capabilities, opening up a wide range of practical display applications.
- Temperature and humidity monitor: Display DHT11 or DHT22 sensor readings in real-time on screen.
- Ultrasonic distance meter: Show HC-SR04 measurements alongside a visual progress bar.
- Wi-Fi signal strength indicator: Display RSSI values with a bar graph using the ESP32 S3's wireless radio.
- Scrolling message board: Create a news ticker with smooth scrolling text animation.
- Digital clock with RTC module: Show time and date from a DS3231 real-time clock.
- Button-controlled menu system: Navigate settings using push buttons and the OLED as the UI.
- Weather station display: Show temperature, humidity, and pressure from a BME280 sensor.
- Motion detector alert: Display PIR sensor status and cumulative trigger count.
- Battery voltage monitor: Show real-time battery level as a percentage bar.
- Simple game console: Create Pong, Snake, or a breakout game with button controls.
Video Tutorial
Watch the step-by-step video walkthrough for this ESP32 S3 project below.
Challenge Yourself
These exercises are designed to build your OLED programming skills progressively, from simple customizations to fully interactive applications.
- Beginner: Change text size, color, and cursor position to create a custom display layout with your own message.
- Beginner: Read temperature and humidity from a DHT11 sensor and display both values on separate lines of the OLED.
- Intermediate: Build an animated loading bar that fills from 0% to 100% using fillRect() with a loop.
- Intermediate: Create a scrolling text ticker that continuously loops a long message using the built-in scroll functions.
- Intermediate: Design a multi-page menu system navigated by push buttons, rendering each page on the OLED.
- Advanced: Plot real-time sensor data as a scrolling line graph, shifting pixel columns left on each new reading.
- Advanced: Create a mini game such as Pong or Snake with button controls and the OLED as the display.
- Advanced: Build a Wi-Fi-connected weather display that fetches live forecast data from an API and renders it on screen.