
ESP32 S3 - Rain Sensor
Learn how to use an ESP32 S3 with a rain sensor to detect rainfall and measure moisture levels. This beginner-friendly tutorial covers both digital and analog rain detection methods with simple wiring and code examples.
What you'll build:
- A rain detection system using the digital output pin of the sensor
- A rain intensity meter using the analog output pin for continuous readings
- A corrosion-resistant setup that powers the sensor only during readings
- A Serial Monitor display showing real-time rain status and moisture values
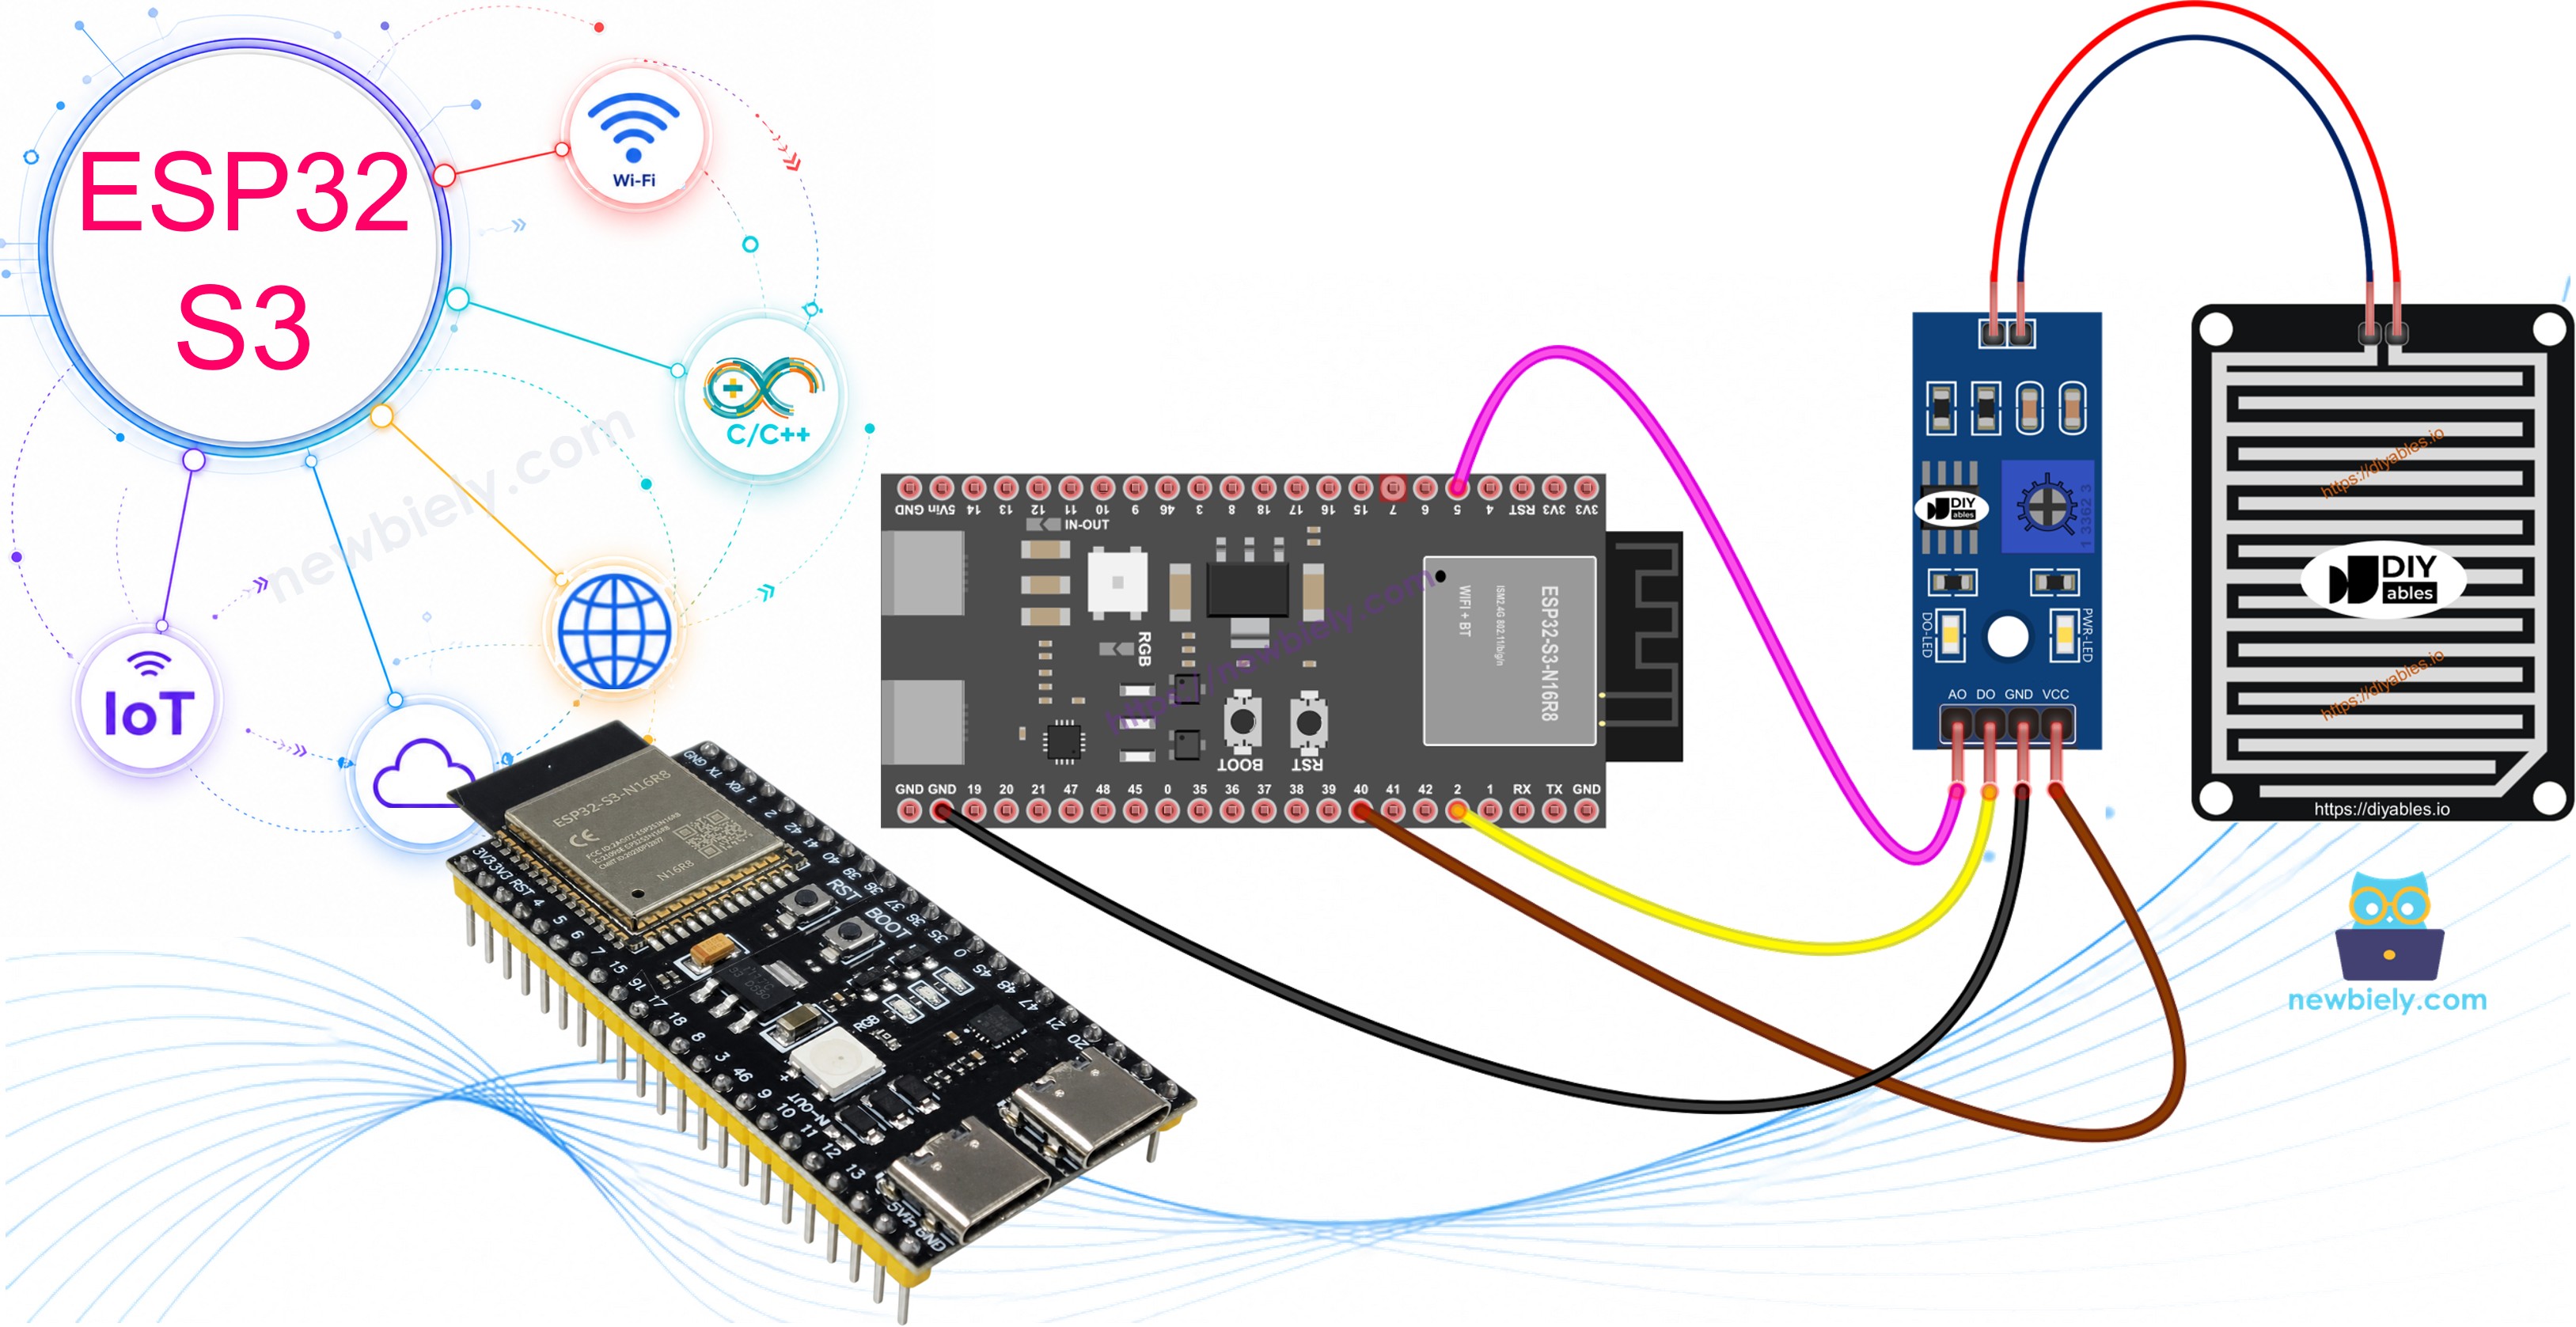
After completing this tutorial, you can modify the code to activate alarms, motors, or automated systems when rain is detected.
Hardware Preparation
Or you can buy the following kits:
| 1 | × | DIYables ESP32 S3 Starter Kit (ESP32 S3 included) | |
| 1 | × | DIYables Sensor Kit (18 sensors/displays) |
Additionally, some of these links are for products from our own brand, DIYables .
Overview of Rain Sensor
A rain sensor is an electronic module that detects and measures rainfall or snow levels through moisture detection on a sensing pad. It provides two output modes — digital for simple presence detection and analog for continuous intensity measurement — making it suitable for a wide range of weather-aware projects. The sensor operates between 3.3V and 5V, which makes it fully compatible with the ESP32 S3.
Key Specifications
- Dual output modes: digital (rain/no rain) and analog (intensity level)
- Adjustable sensitivity via built-in potentiometer
- Works with both rain and snow detection
- Operating voltage: 3.3V to 5V
- Quick response time for real-time detection
- Perfect for weather stations and automated systems
Two Main Components:
- Sensing Pad: Outdoor detection surface with exposed copper traces
- Electronic Module: Signal processor with analog and digital outputs
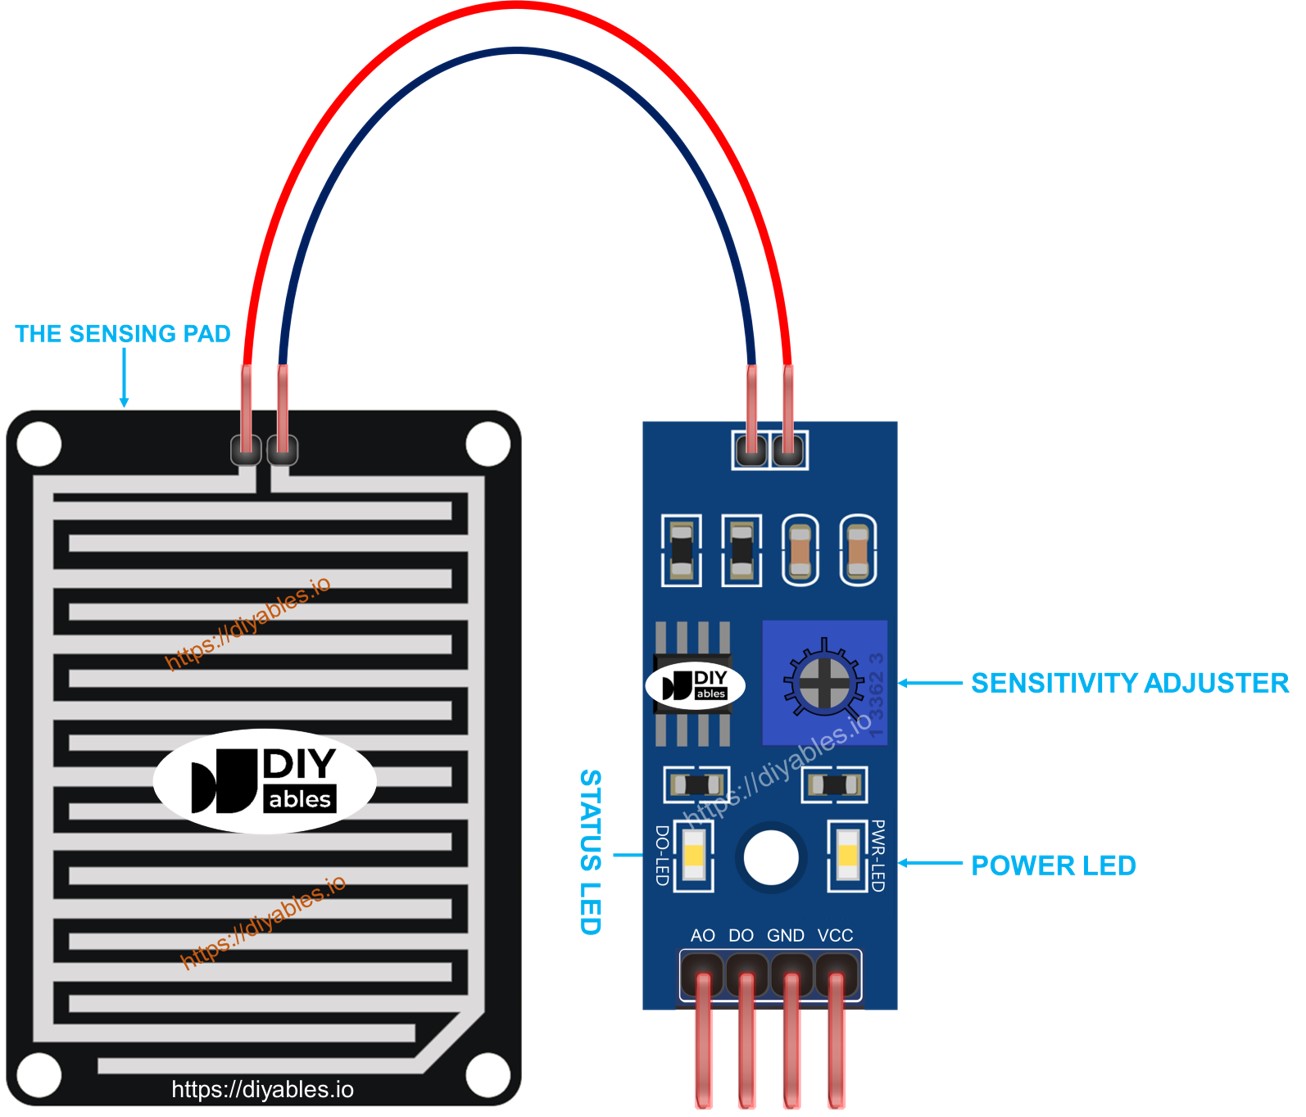
The Sensing Pad
The sensing pad is designed for outdoor placement where it faces rainfall or snow.
How it works:
- Contains exposed copper traces divided into two groups
- Power traces and sense traces remain separated when dry
- Water or snow bridges the traces, completing the circuit
- Either group can serve as power or sense trace
- Larger surface area provides better detection accuracy
The Electronic Module
The electronic module processes signals from the sensing pad and converts them to ESP32 S3-compatible outputs.
Pin Configuration:
- VCC pin: Power supply connection (3.3V to 5V)
- GND pin: Ground connection (0V)
- DO pin: Digital output (HIGH when dry, LOW when wet)
- AO pin: Analog output (varies with moisture intensity)
LED Indicators:
- PWR-LED: Power indicator (always on when powered)
- DO-LED: Rain detection indicator (on when rain detected)
Sensitivity Adjustment:
- Built-in potentiometer adjusts digital threshold
- Turn clockwise to increase sensitivity
- Turn counter-clockwise to decrease sensitivity
- Only affects DO pin, not AO pin readings
How It Works
Digital Output (DO Pin):
- Potentiometer sets the rain detection threshold
- When moisture exceeds threshold: DO pin goes LOW, LED turns on
- When moisture below threshold: DO pin stays HIGH, LED turns off
- Ideal for simple rain/no-rain detection projects
Analog Output (AO Pin):
- Provides continuous moisture level readings
- More water on pad = lower AO value
- Less water on pad = higher AO value
- Unaffected by potentiometer settings
- Best for measuring rainfall intensity
Important Note: Using an ESP32 S3 GPIO pin to power the sensor (instead of constant 5V/3.3V) significantly extends sensor lifespan by reducing electrochemical corrosion between readings.
Wiring Diagram
The rain sensor module offers flexible wiring options depending on whether you need digital detection, analog measurement, or both. Connecting VCC to a GPIO pin rather than a fixed power rail allows the ESP32 S3 to switch the sensor on only during measurements, which greatly reduces electrochemical corrosion on the sensing pad.
Safety Notes
Always ensure the sensing pad is placed outdoors and exposed to the elements while the electronic module remains sheltered. Avoid submerging the module in water, as only the sensing pad is designed for moisture contact. Using GPIO-controlled power (as shown in the wiring table below) is strongly recommended to maximize sensor longevity.
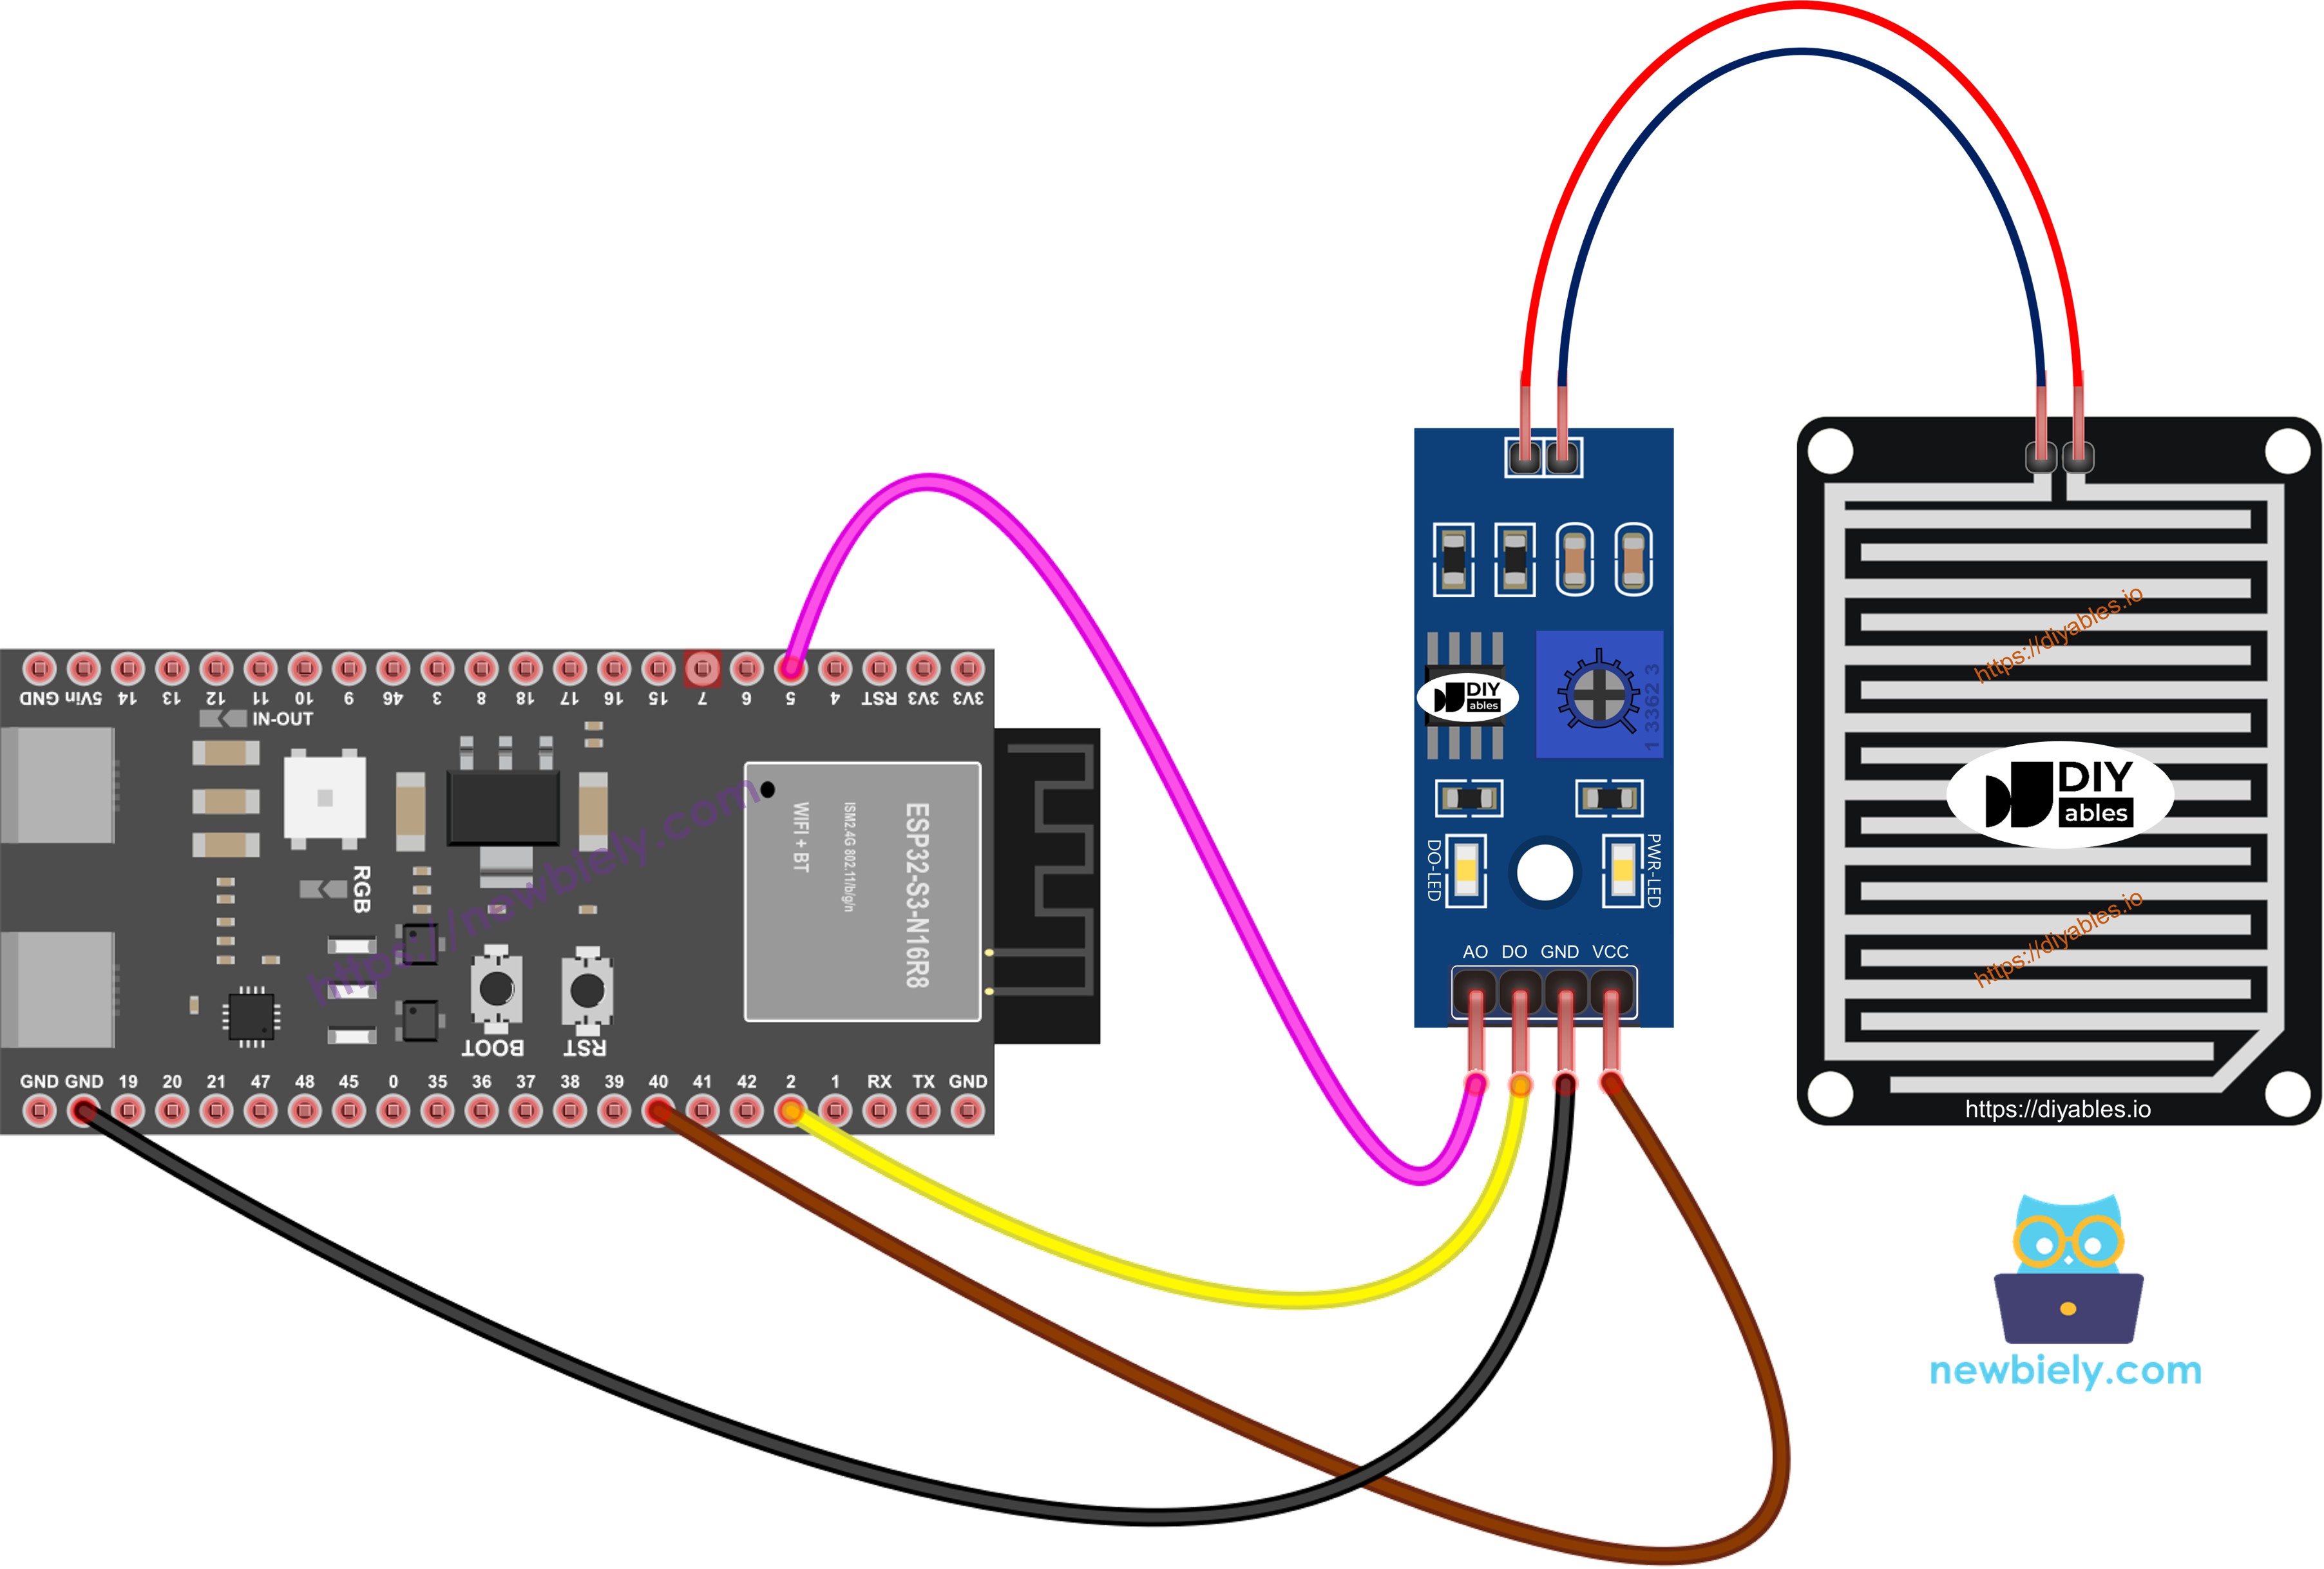
This image is created using Fritzing. Click to enlarge image
| Rain Sensor Pin | ESP32 S3 Pin |
|---|---|
| VCC | GPIO40 |
| GND | GND |
| DO | GPIO2 |
| AO | GPIO5 (GPIO5 / ADC1_CH4) |
ESP32 S3 Code - Read value from DO pin
The following code demonstrates how to detect rain using the digital output from the rain sensor. It powers the sensor only during each reading cycle to minimize corrosion, then reads the DO pin state and reports whether rain is present. The result is displayed on the Serial Monitor in a clear, timestamped format.
Detailed Instructions
- New to ESP32 S3? Complete our Getting Started with ESP32 S3 guide first.
- Upload the Code: Copy the code above and open it in Arduino IDE
- Select Your Board: Choose ESP32 S3 from the board menu
- Connect ESP32 S3: Plug in your ESP32 S3 via USB-C cable
- Upload: Click the Upload button to transfer code to ESP32 S3
- Test the Sensor: Drop water onto the rain sensor pad
- Open Serial Monitor: Set baud rate to 115200 to view results
- Adjust Sensitivity: If needed, turn the potentiometer to fine-tune detection
- Pro Tip: Test sensitivity adjustment with different water amounts to find the perfect threshold for your application
If the DO-LED stays constantly on or off regardless of water presence, adjust the potentiometer clockwise or counter-clockwise to calibrate the sensitivity threshold for your environment.
ESP32 S3 Code - Read value from AO pin
The following code shows how to measure rain intensity using the analog output from the rain sensor. The ESP32 S3 powers the sensor through GPIO40 only during each reading, reads the analog voltage on the AO pin, and prints a numerical moisture value to the Serial Monitor. Lower values indicate heavier rainfall, while higher values indicate drier conditions.
Detailed Instructions
- New to ESP32 S3? Complete our Getting Started with ESP32 S3 guide first.
- Upload the Code: Copy the code above and open it in Arduino IDE
- Select Your Board: Choose ESP32 S3 from the board menu
- Connect ESP32 S3: Plug in your ESP32 S3 via USB-C cable
- Upload: Click the Upload button to transfer code to ESP32 S3
- Test with Water: Gradually add water drops to the sensor pad
- Open Serial Monitor: Set baud rate to 115200 to view analog readings
- Observe Changes: Watch values decrease as moisture increases
- Pro Tip: Record your sensor's dry and wet values to create custom rain intensity ranges (light rain, moderate rain, heavy rain)
※ NOTE THAT:
This tutorial uses the analogRead() function to read values from an ADC (Analog-to-Digital Converter) connected to a sensor or component. The ESP32 S3's ADC is suitable for projects that do not require high accuracy. However, for projects needing precise measurements, keep the following in mind:
- The ESP32 S3's ADC is not perfectly accurate and might require calibration for correct results. Each ESP32 S3 board can vary slightly, so calibration is necessary for each individual board.
- Calibration can be challenging, especially for beginners, and might not always yield the exact results you want.
For projects requiring high precision, consider using an external ADC (e.g ADS1115) with the ESP32 S3 or using another Arduino, such as the Arduino Uno R4 WiFi, which has a more reliable ADC. If you still want to calibrate the ESP32 S3's ADC, refer to the ESP32 ADC Calibration Driver.
Application and Project Ideas
The ESP32 S3's built-in Wi-Fi and processing power makes it an excellent platform for rain-sensing applications that go beyond simple detection. Here are practical ways to put your rain sensor to work:
- Smart Home Automation: Automatically close windows and skylights when rain is detected
- Garden Watering System: Disable automatic sprinklers during rainfall to save water
- Weather Station: Build a complete weather monitoring system with rainfall data logging
- Car Alert System: Notify you via smartphone when rain starts and car windows are open
- Clothes Drying Monitor: Alert when outdoor laundry needs to be brought inside
- Greenhouse Controller: Adjust ventilation and irrigation based on rain detection
- Smart Umbrella Reminder: Send reminders to take an umbrella when rain is detected
Video Tutorial
Watch the step-by-step video walkthrough for this ESP32 S3 project below.
Challenge Yourself
These challenges are designed to help you apply what you've learned and push your ESP32 S3 rain sensor skills further, from simple LED indicators to full machine-learning forecasting systems.
- Beginner: Add an LED that lights up when rain is detected using the digital output
- Beginner: Create different alert messages for light rain vs heavy rain using analog thresholds
- Intermediate: Log rainfall data to an SD card with timestamps for long-term weather tracking
- Intermediate: Send email or push notifications when rain is detected using Wi-Fi connectivity
- Advanced: Build a complete weather station combining rain sensor with temperature and humidity sensors
- Advanced: Create a predictive system that tracks rainfall patterns and forecasts using machine learning