
ESP32 S3 - WS2812B LED Strip
The ESP32 S3 is a powerful microcontroller that makes controlling WS2812B RGB LED strips straightforward and efficient. With a single GPIO pin, you can independently control the color and brightness of every LED on the strip, enabling a wide range of dynamic lighting effects.
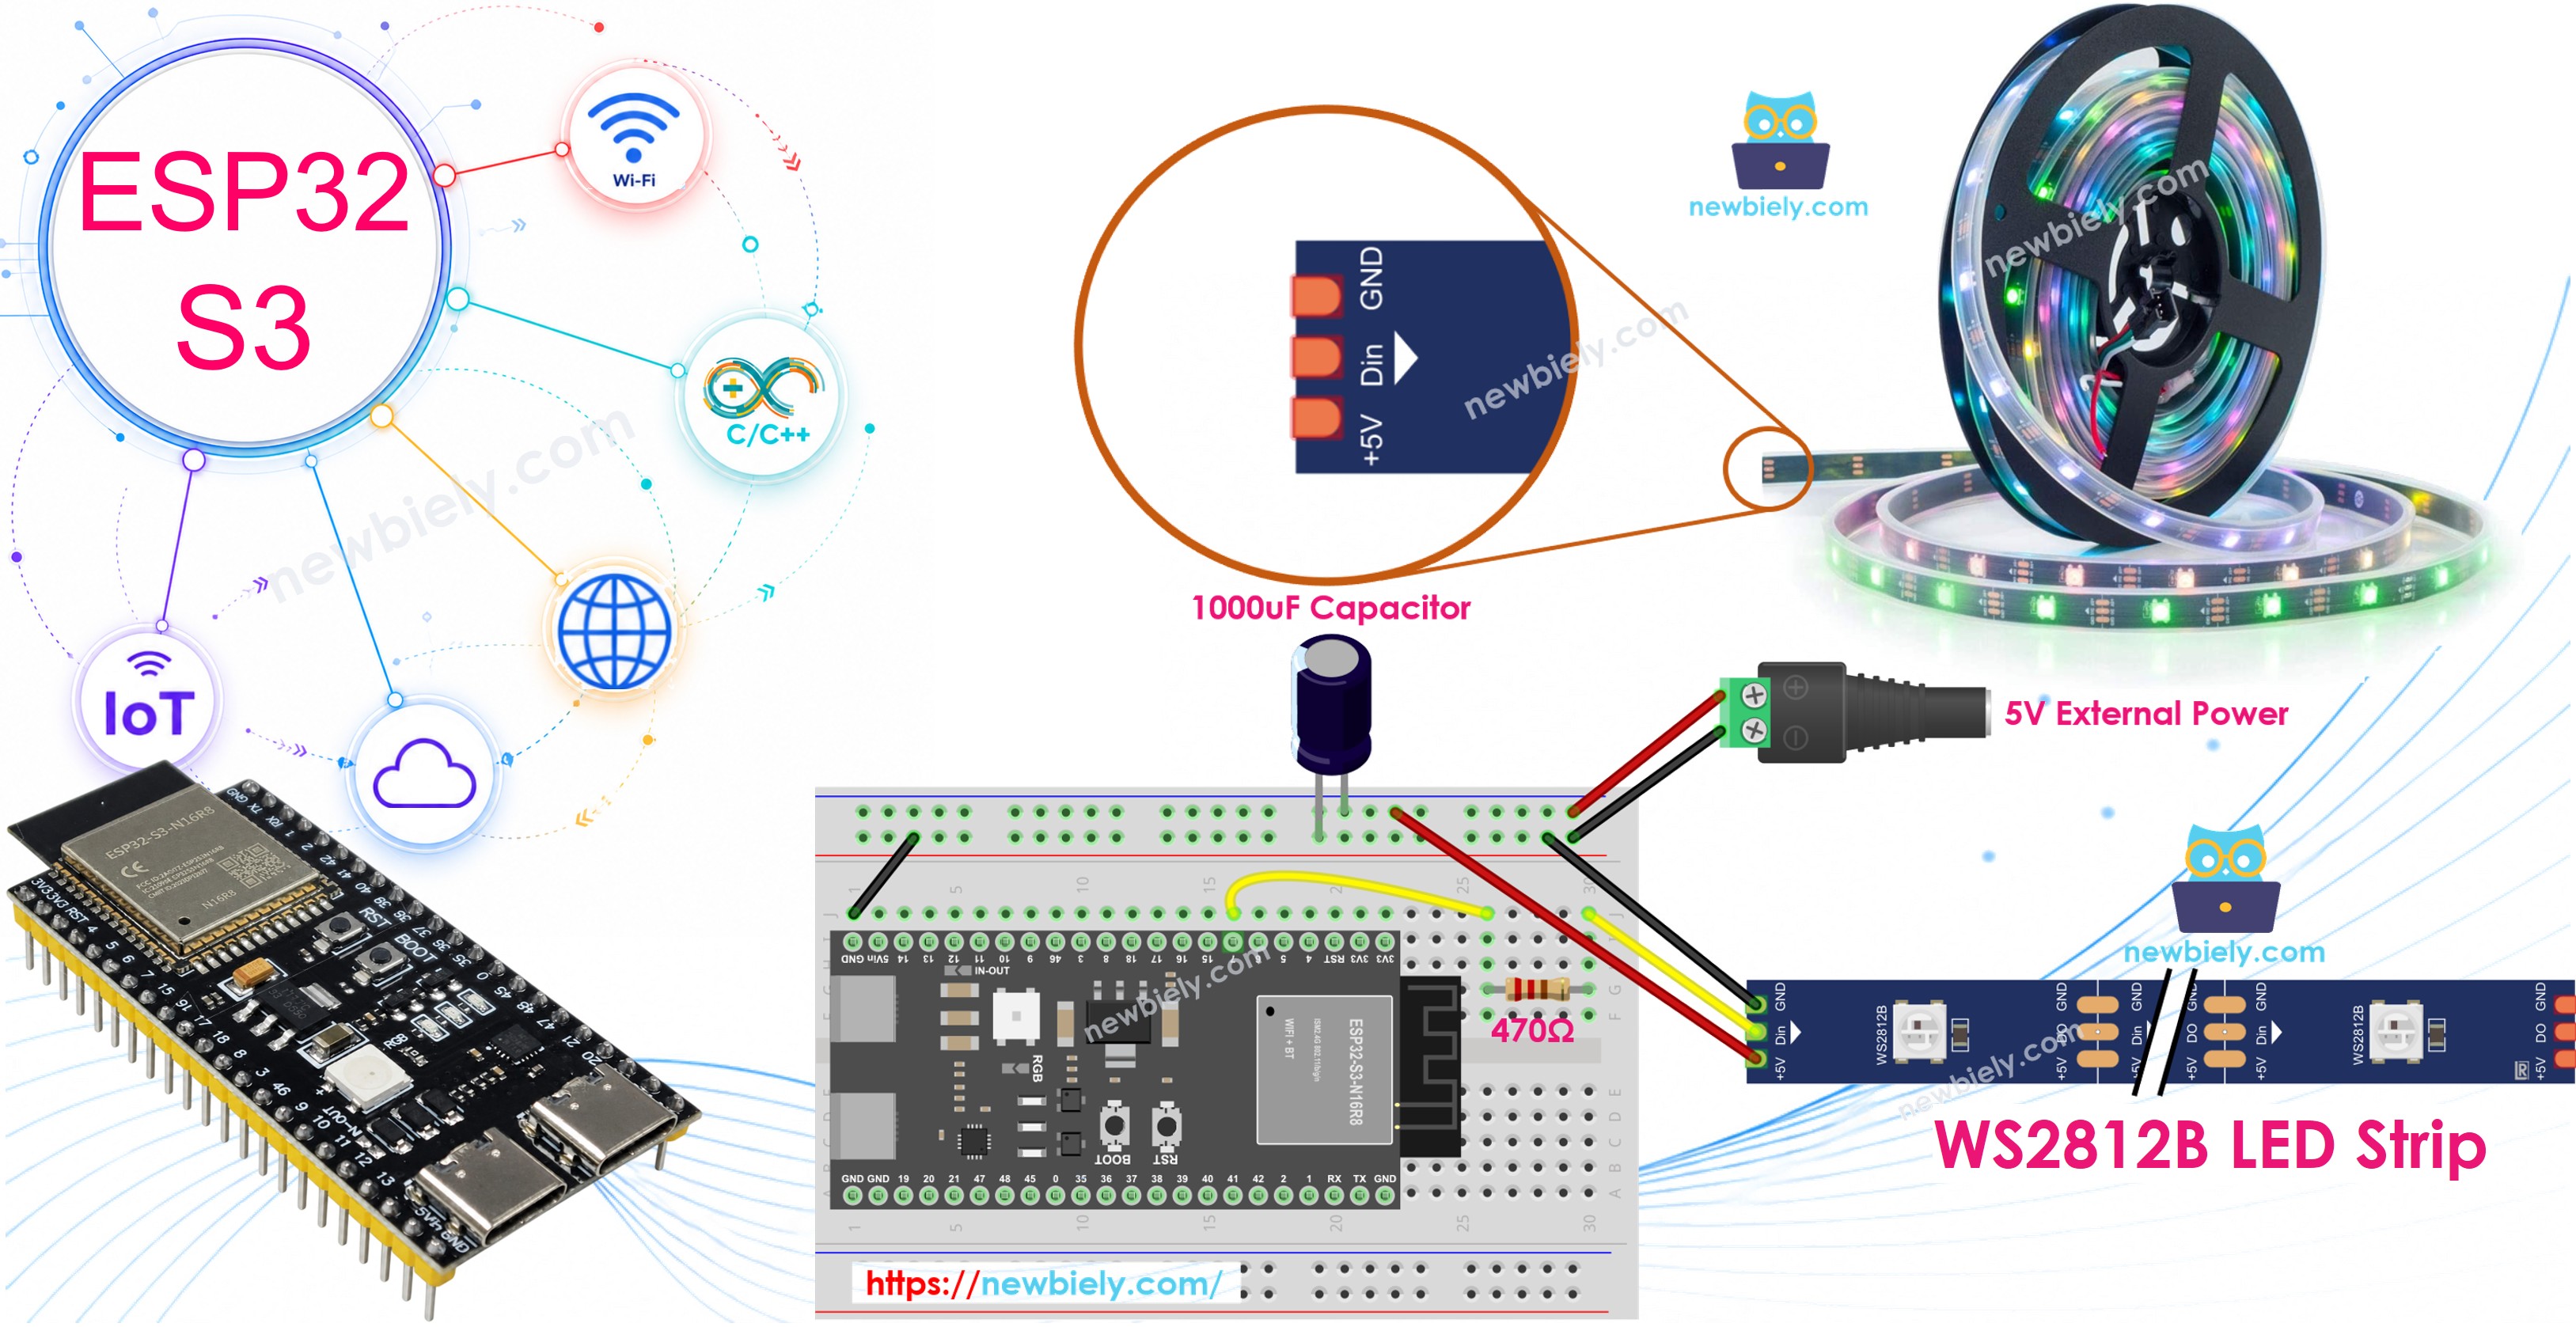
What you'll build:
- Turn LEDs on one by one in green with a delay between each pixel
- Turn off all LEDs simultaneously for two seconds
- Turn on all LEDs in red at the same time for two seconds
- Repeat the lighting sequence in an infinite loop
Hardware Preparation
Or you can buy the following kits:
| 1 | × | DIYables ESP32 S3 Starter Kit (ESP32 S3 included) | |
| 1 | × | DIYables Sensor Kit (18 sensors/displays) |
Additionally, some of these links are for products from our own brand, DIYables .
Overview of WS2812B RGB LED Strip
The WS2812B is an individually addressable RGB LED strip that integrates both the LED and control circuitry into each pixel, allowing you to control every LED independently using a single data line. Each pixel contains red, green, and blue sub-LEDs that can each be set to 256 brightness levels, giving you over 16 million possible colors per pixel. The strip operates at 5V and uses a single-wire protocol that makes it compatible with the ESP32 S3 GPIO pins.
Key Specifications
The WS2812B RGB LED Strip has three pins:
- GND pin: needs to be connected to GND (0V)
- VCC pin: needs to be connected to 5V of external power supply
- Din pin: receives the control signal and should be connected to an ESP32 S3 GPIO pin
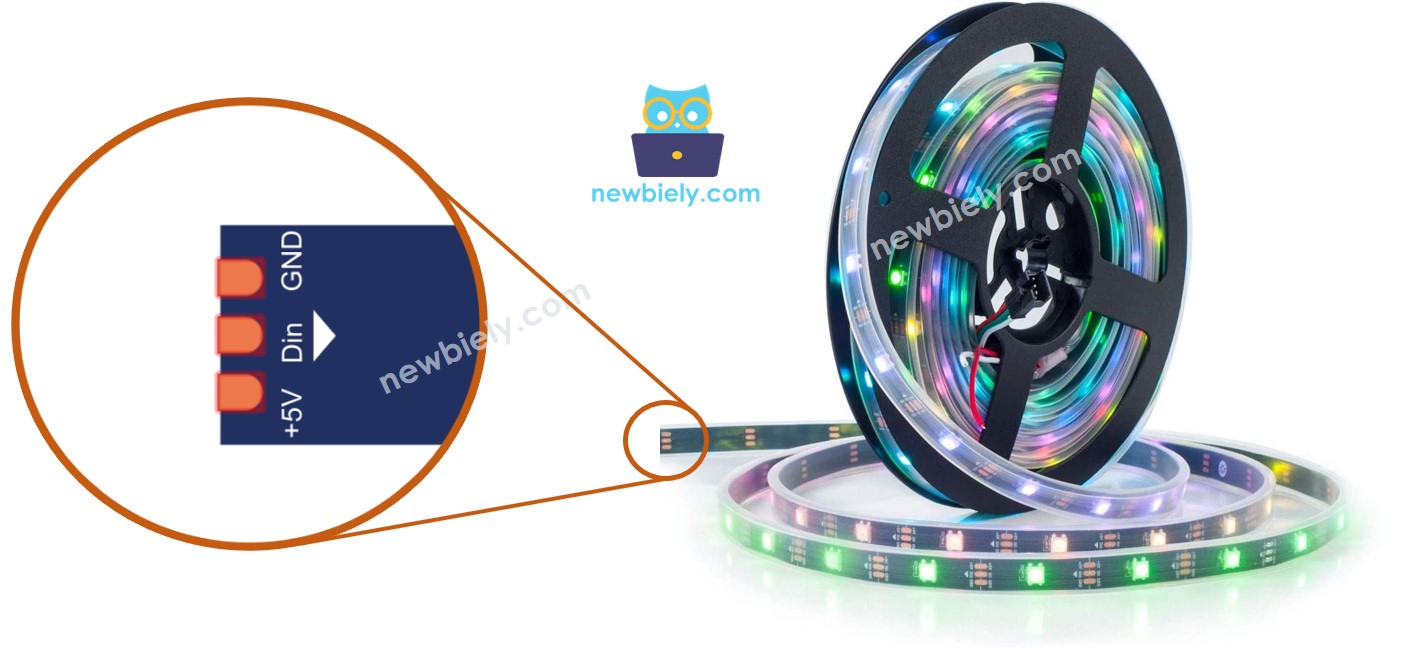
※ NOTE THAT:
The order of pins can vary between manufacturers. ALWAYS use the labels printed on the LED Strip.
Wiring Diagram
Connect the WS2812B LED strip to the ESP32 S3 by supplying 5V power from an external adapter to the VCC and GND pins of the strip, and linking the Din data line through a 470Ω resistor to a GPIO pin on the ESP32 S3. Place a 1000uF capacitor across the power supply lines near the strip to protect against voltage spikes when first powering on the circuit.
Safety Notes
Always use an external 5V power supply for the LED strip rather than drawing power from the ESP32 S3's 3.3V or USB pins, especially when driving more than a few LEDs. The 470Ω series resistor on the data line helps protect against signal ringing and reflections that can corrupt communication. The 1000uF capacitor placed across VCC and GND prevents inrush current from damaging the first LED in the strip at power-on.
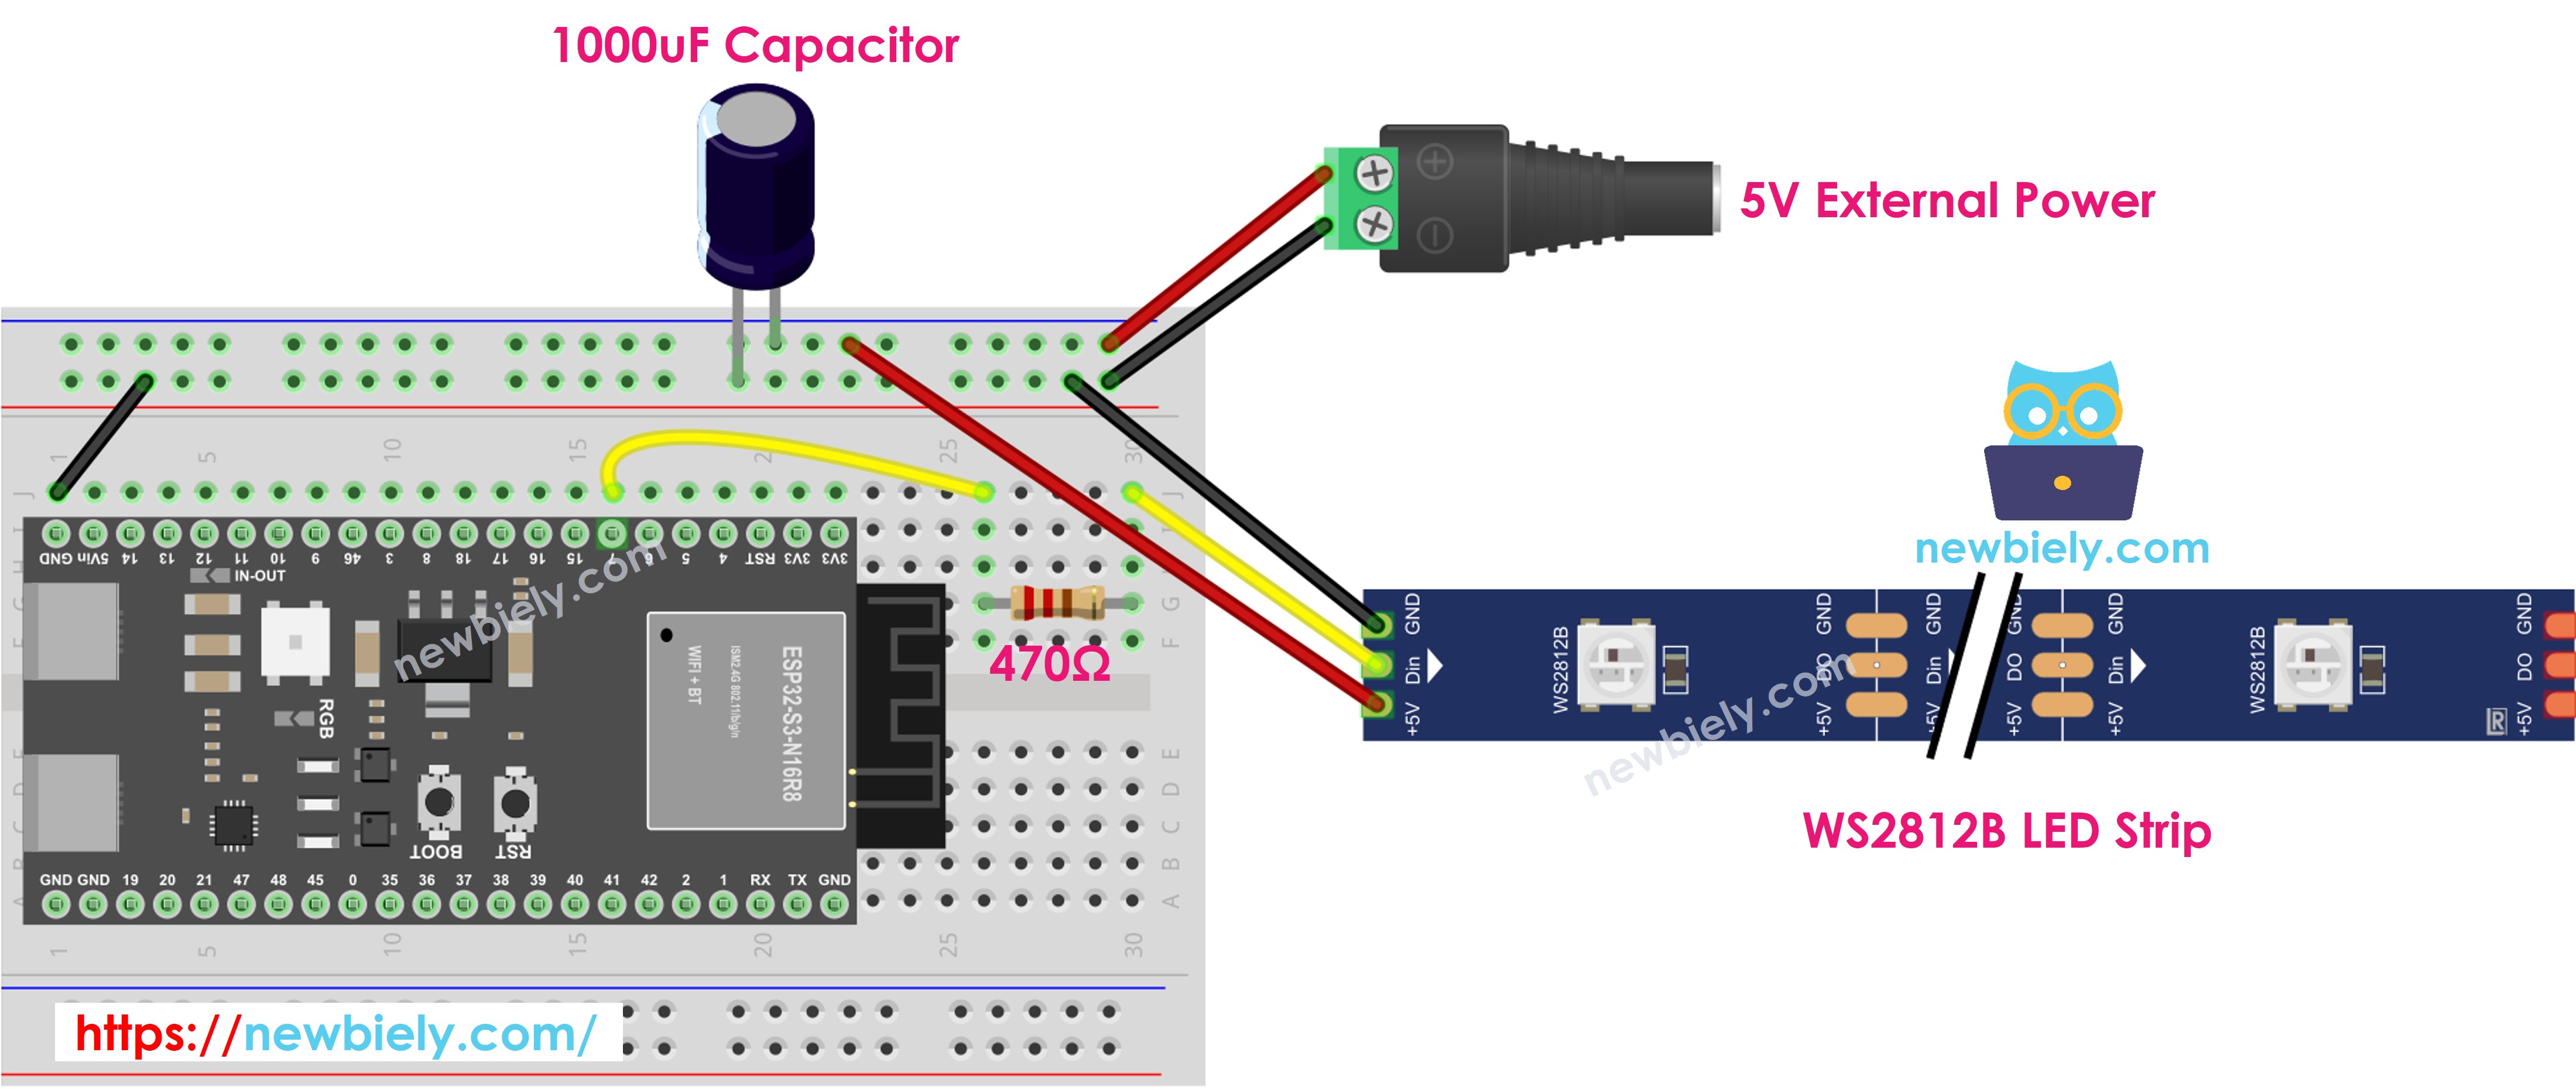
This image is created using Fritzing. Click to enlarge image
| Component Pin | Connects To |
|:---|:---|
| WS2812B GND | GND (external 5V supply) |
| WS2812B VCC | 5V (external power supply) |
| WS2812B Din | ESP32 S3 GPIO4 (via 470Ω resistor) |
| Capacitor + | 5V rail |
| Capacitor - | GND rail |
How To Program For WS2812B RGB LED Strip
Two popular libraries can be used to drive WS2812B LED strips with the ESP32 S3: the Adafruit NeoPixel library and the FastLED library. This tutorial uses the Adafruit NeoPixel library because it provides a clean, simple API that is easy to learn. The following code examples show the key functions you need to get started.
Declare a WS2812B object by specifying the number of pixels, the data pin, and the pixel type:
Initialize the WS2812B strip object in setup():
Set the color of each individual LED (called a pixel) using RGB values from 0 to 255:
Set the brightness for all LEDs on the strip at once:
※ NOTE THAT:
- WS2812B.setBrightness() applies to all pixels on the LED strip. To set brightness for each individual pixel, scale the color values instead.
- The values set by WS2812B.setBrightness() and WS2812B.setPixelColor() only take effect when WS2812B.show() is called.
ESP32 S3 Code
The following code demonstrates a complete WS2812B LED strip control sequence using the Adafruit NeoPixel library. It cycles through turning pixels green one by one, then turns them all off, then lights them all red simultaneously, repeating the cycle continuously. Upload this sketch to your ESP32 S3 after wiring everything as shown in the diagram above.
Detailed Instructions
- New to ESP32 S3? Complete our Getting Started with ESP32 S3 guide first.
- Click the Libraries icon on the left bar of the Arduino IDE.
- Search "Adafruit NeoPixel", then find the NeoPixel library by Adafruit.
- Click Install button to install the NeoPixel library.
- Search for Adafruit NeoPixel created by Adafruit and click the Install button.
- Copy the above code and open it with Arduino IDE.
- Select your ESP32 S3 board and the correct COM port under the Tools menu.
- Click Upload button on Arduino IDE to upload the code to your ESP32 S3.
- Observe the LED strip cycling through the green one-by-one effect, the all-off pause, and the all-red effect.
- Pro Tip: Try adjusting NUM_PIXELS to match your actual strip length, and experiment with different color values in WS2812B.Color(R, G, B) to create your own custom lighting patterns.
※ NOTE THAT:
For any complicated LED effect, we offer the paid programming service
Serial Monitor
Open the Serial Monitor at 9600 baud to observe the ESP32 S3 cycling through its LED strip control states. The following shows typical output during normal operation:
Applications
WS2812B LED strips controlled by the ESP32 S3 are widely used in projects that require dynamic, programmable lighting at low cost and with minimal wiring.
- Ambient lighting: Create responsive room lighting that changes color based on time of day, music, or sensor data.
- Status indicators: Use different colors and patterns to visually represent system states such as Wi-Fi connectivity, sensor alerts, or process progress.
- Decorative displays: Build holiday lighting, underglow effects for vehicles, or animated signs with custom color sequences.
- Gaming peripherals: Add reactive RGB lighting to custom keyboards, controllers, or desk setups that respond to in-game events.
- Wearable projects: Integrate LED strips into costumes, bags, or clothing for eye-catching wearable electronics effects.
Video Tutorial
Watch the step-by-step video walkthrough for this ESP32 S3 project below.
Challenges
The WS2812B LED strip opens the door to creative programming challenges that will sharpen your ESP32 S3 skills and produce visually impressive results.
- Beginner: Modify the code to cycle through red, green, and blue all-on states in sequence, holding each color for one second before switching to the next.
- Intermediate: Implement a rainbow effect that continuously shifts the hue of each pixel along the strip so that all colors of the spectrum appear simultaneously and scroll smoothly over time.
- Advanced: Use the ESP32 S3 Wi-Fi capability to build a web interface that lets users pick any color from a color picker and set the brightness in real time, pushing updates to the LED strip without restarting the board.