
ESP32 S3 - Ultrasonic Sensor
The HC-SR04 ultrasonic sensor is one of the most practical distance-measuring modules you can pair with the ESP32 S3, offering reliable non-contact detection from 2 cm to 400 cm. This tutorial walks you through everything you need — from wiring the sensor to writing and uploading the Arduino sketch — so you can add distance sensing to your ESP32 S3 projects with confidence.
What you'll build:
- A distance-measuring system using the ESP32 S3 and HC-SR04 ultrasonic sensor
- A sketch that triggers the sensor, reads the echo, and calculates the distance in centimeters
- Real-time distance output displayed on the Arduino IDE Serial Monitor
- A foundation you can extend into obstacle avoidance, parking assistants, or liquid level monitors
Hardware Preparation
Or you can buy the following kits:
| 1 | × | DIYables ESP32 S3 Starter Kit (ESP32 S3 included) | |
| 1 | × | DIYables Sensor Kit (18 sensors/displays) |
Additionally, some of these links are for products from our own brand, DIYables .
Overview of Ultrasonic Sensor
The HC-SR04 is a widely used distance sensor that emits ultrasonic pulses and listens for the echo to determine how far away an object is. It is inexpensive, easy to wire, and accurate enough for most hobbyist and maker applications, making it a natural fit for ESP32 S3 projects.
Key Specifications
The HC-SR04 operates at 5V DC and measures distances from 2 cm to 400 cm (approximately 0.8 to 157 inches) with an accuracy of up to 3 mm. Its measuring angle is 15 degrees, and it is triggered by a 10 µs TTL pulse on the TRIG pin. Because measurement is non-contact, the sensor can safely detect objects without touching them.
Ultrasonic Sensor Pinout
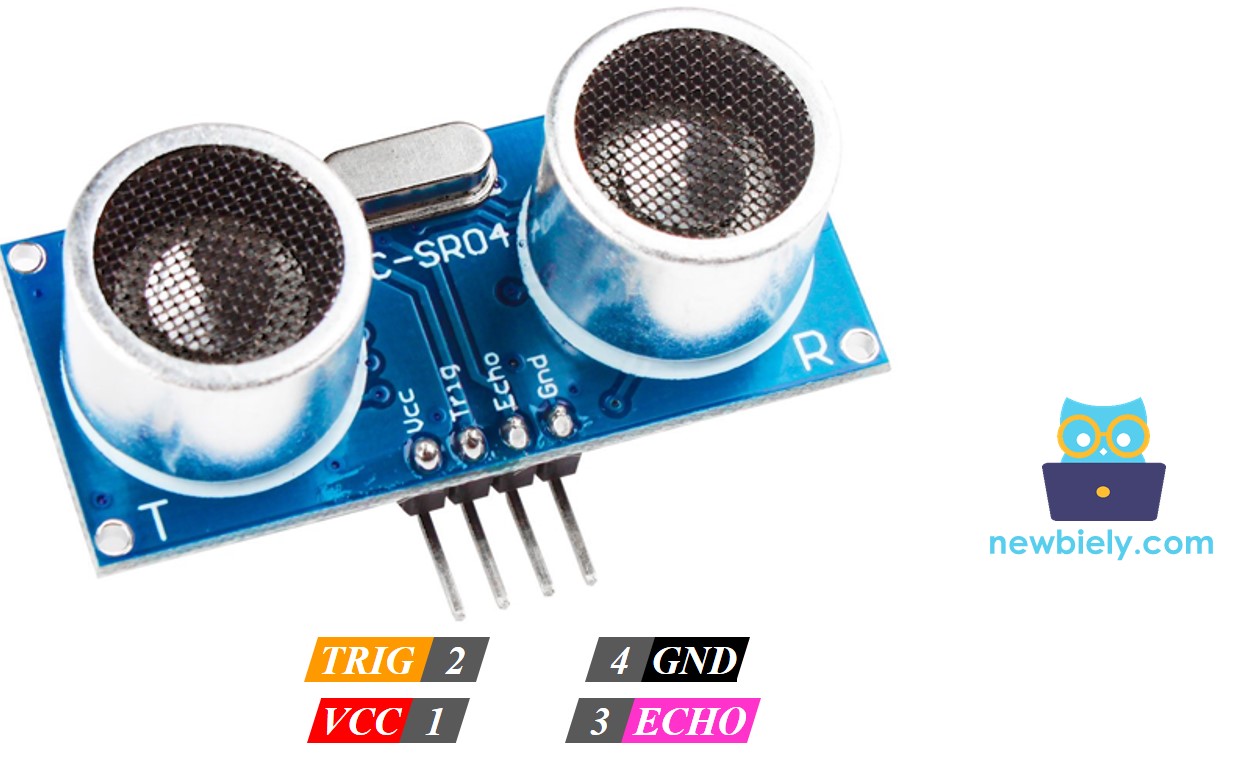
The HC-SR04 has four pins, each with a specific role in the measurement process:
- VCC — Connect to the 5V power supply
- GND — Connect to ground (0V)
- TRIG — Receives the trigger pulse from the ESP32 S3 to initiate a measurement
- ECHO — Outputs a pulse whose duration is proportional to the measured distance
How Ultrasonic Sensor Works
Wiring Diagram between Ultrasonic Sensor and ESP32 S3
Connecting the HC-SR04 to the ESP32 S3 requires just four wires and takes only a couple of minutes on a breadboard. Pay attention to the power connection — the HC-SR04 needs 5V, which the ESP32 S3 can supply via its 5V pin when powered over USB.
Safety Notes
Always connect the HC-SR04 VCC pin to the 5V rail, never to 3.3V, as the sensor will not operate correctly at lower voltage. Verify your connections before powering the board to avoid sending incorrect signals on the TRIG or ECHO lines.
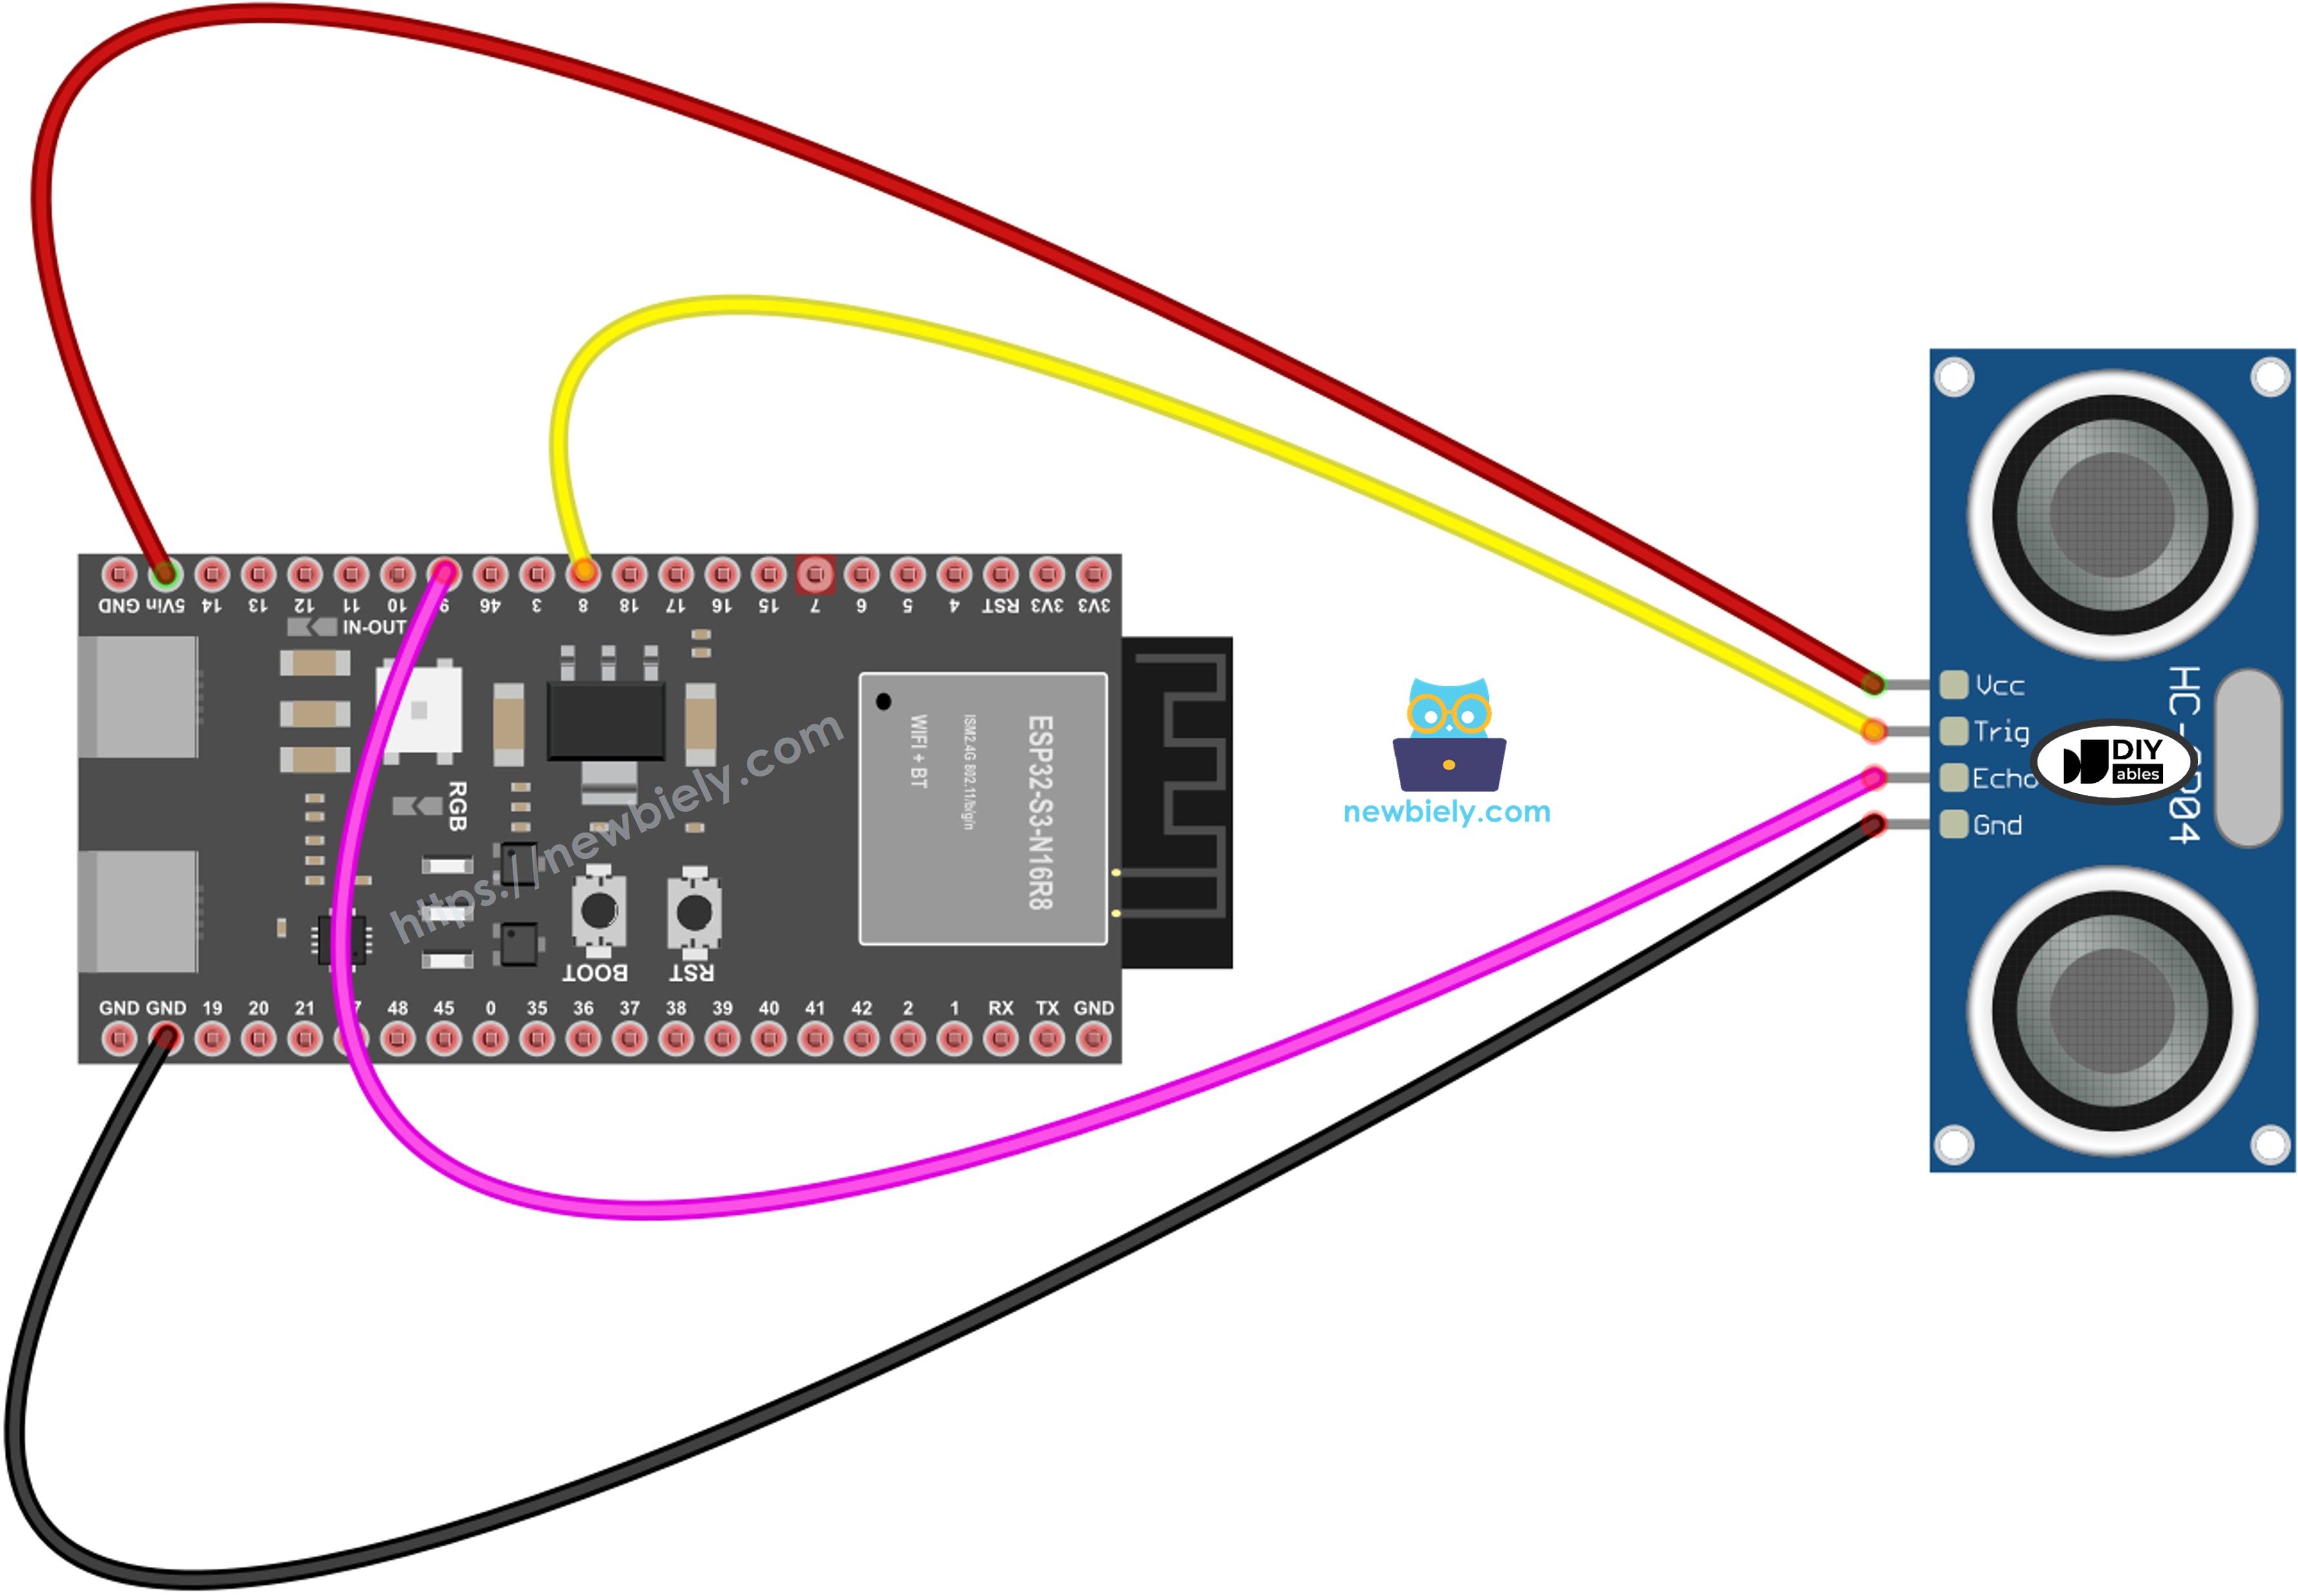
This image is created using Fritzing. Click to enlarge image
| Ultrasonic Sensor Pin | ESP32 S3 Pin |
|---|---|
| VCC | 5V |
| GND | GND |
| TRIG | GPIO8 |
| ECHO | GPIO9 |
How To Program Ultrasonic Sensor
Programming the HC-SR04 with the ESP32 S3 follows a straightforward three-step process that maps directly to the sensor's physical operation. Each step below shows the relevant snippet and explains what it does.
Step 1: Send trigger pulse
Generate a 10-microsecond HIGH pulse on the TRIG pin using digitalWrite() and delayMicroseconds():
Step 2: Measure echo pulse duration
Read the duration of the returning pulse on the ECHO pin using pulseIn(). The duration represents the round-trip travel time of the sound wave:
Step 3: Calculate distance
Convert the pulse duration to centimeters. Sound travels at roughly 340 m/s, and dividing by 2 accounts for the round trip:
ESP32 S3 Code
The following sketch puts all three steps together in a complete program that sends a trigger pulse every 500 milliseconds, reads the echo duration, converts it to centimeters, and prints the result to the Serial Monitor. It initializes both TRIG and ECHO pins in setup() and repeats the measurement loop continuously in loop().
Detailed Instructions
- New to ESP32 S3? Complete our Getting Started with ESP32 S3 guide first.
- Copy the sketch above and paste it into the Arduino IDE.
- Connect the ESP32 S3 to your computer using a USB Type-C cable.
- In the Arduino IDE, select the correct board (ESP32S3 Dev Module or equivalent) and COM port under Tools.
- Click the Upload button to compile and flash the sketch to the ESP32 S3.

- Once upload is complete, open the Serial Monitor from the Tools menu or the monitor icon.
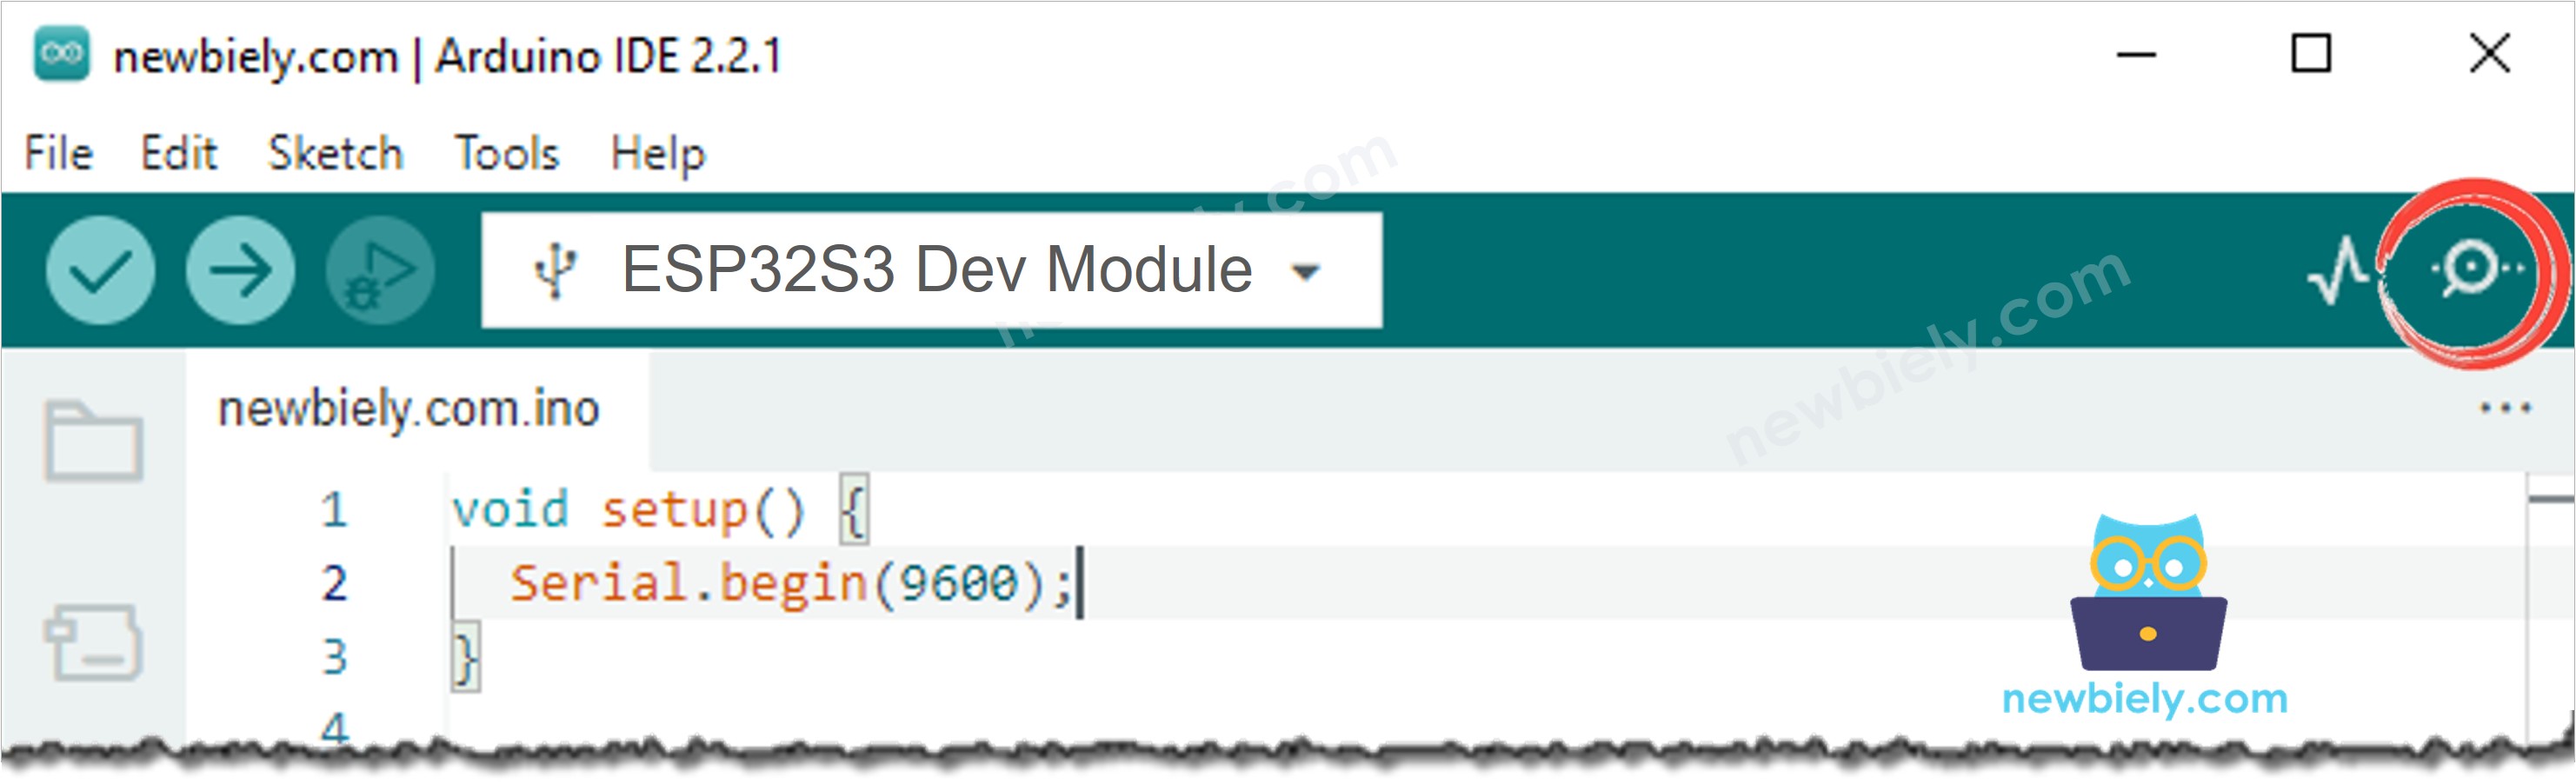
- Set the baud rate to 115200 in the Serial Monitor dropdown.
- Hold your hand at various distances in front of the sensor and watch the readings update in real time.
- Pro Tip: Keep objects at least 2 cm away from the sensor for accurate readings, and avoid soft or angled surfaces that absorb or deflect sound waves.
Line-by-line Code Explanation
The above ESP32 S3 code contains line-by-line explanation. Please read the comments in the code!
Serial Monitor Output
When you move your hand in front of the HC-SR04 ultrasonic sensor connected to the ESP32 S3, the Serial Monitor will display real-time distance readings similar to the following:
How to Filter Noise from Distance Measurements of Ultrasonic Sensor
Ultrasonic sensors can sometimes produce noisy or inconsistent readings due to environmental factors.
See How to Filter Noise from Distance Measurements of Ultrasonic Sensor
Temperature, humidity, and object surface texture all influence echo behavior, and nearby reflective surfaces can introduce spurious readings. Applying a simple median or moving-average filter in your ESP32 S3 sketch is an effective way to smooth out these variations and improve the reliability of your distance data.
Application and Project Ideas
The ESP32 S3 paired with an HC-SR04 ultrasonic sensor opens up a wide range of practical and creative projects across robotics, home automation, and IoT. Here are some directions worth exploring:
- Parking assistant: Build a distance alert system that warns drivers as they approach an obstacle in a garage.
- Automatic trash can: Create a touchless lid opener that activates when a hand comes within a set distance.
- Water level monitor: Measure water or liquid level in a tank without any contact with the liquid.
- Obstacle avoidance robot: Enable an autonomous robot to detect and steer around objects in its path.
- Security alarm: Trigger an alert or notification when an object enters a defined zone.
- Height measurement tool: Build a digital height-measuring station for quick, hands-free measurements.
- Smart doorbell: Detect when someone approaches your front door and send a notification via Wi-Fi on the ESP32 S3.
Video Tutorial
Watch the step-by-step video walkthrough for this ESP32 S3 project below.
Challenge Yourself
Once you have the basic distance readings working on your ESP32 S3, there are plenty of ways to deepen your understanding and extend the project. Try the challenges below in order of difficulty:
- Beginner: Modify the sketch to display distance in inches instead of centimeters.
- Beginner: Add an LED that lights up whenever an object is detected within 10 cm.
- Intermediate: Create a multi-zone warning system that changes the LED blink rate depending on how close an object is.
- Intermediate: Display the live distance reading on an OLED or LCD screen instead of the Serial Monitor.
- Advanced: Build a 2D position detector using two HC-SR04 sensors and triangulation math on the ESP32 S3.
- Advanced: Implement a median filter over five consecutive readings to suppress noise and achieve smoother, more accurate distance output.