
ESP32 S3 - Motion Sensor
Learn how to detect motion with your ESP32 S3 and the HC-SR501 PIR motion sensor. This beginner-friendly tutorial walks you through everything you need to build reliable motion detection projects using the ESP32 S3 board.
What you'll build:
- A circuit connecting the HC-SR501 motion sensor to the ESP32 S3
- Arduino code that reads the sensor and detects motion start and stop events
- Serial Monitor output showing real-time motion detection results
- A foundation you can extend with lights, alarms, or smart-home automations
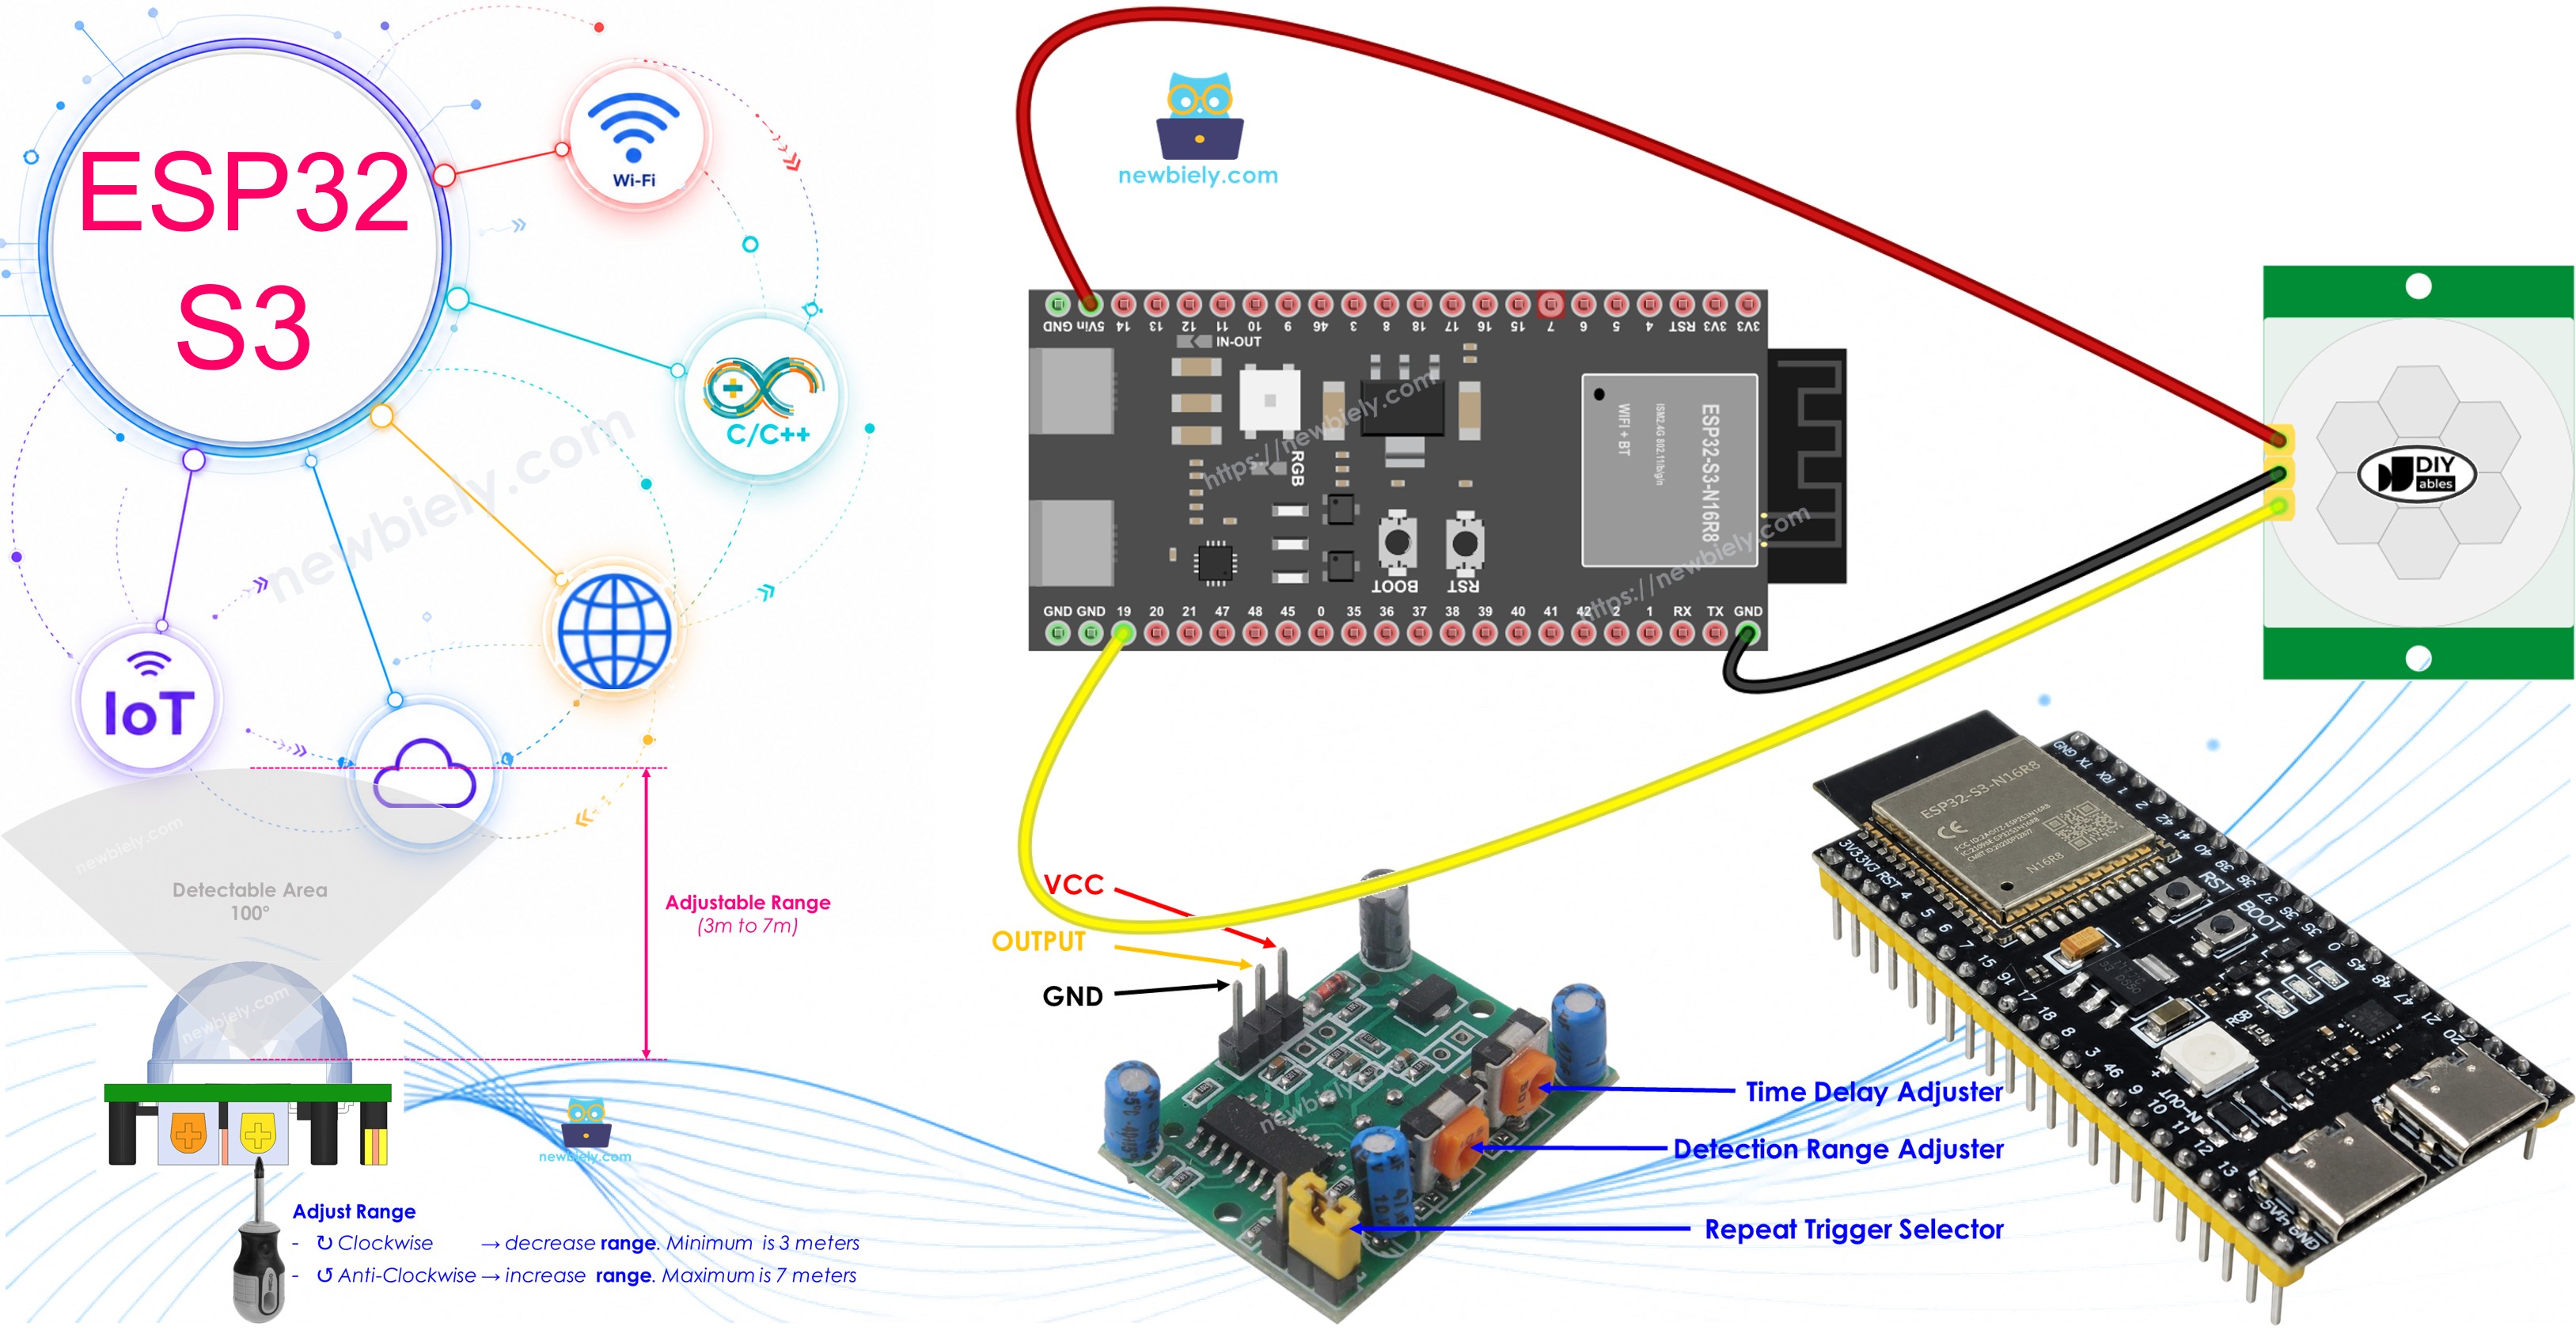
Hardware Preparation
Or you can buy the following kits:
| 1 | × | DIYables ESP32 S3 Starter Kit (ESP32 S3 included) | |
| 1 | × | DIYables Sensor Kit (18 sensors/displays) |
Additionally, some of these links are for products from our own brand, DIYables .
Overview of HC-SR501 Motion Sensor
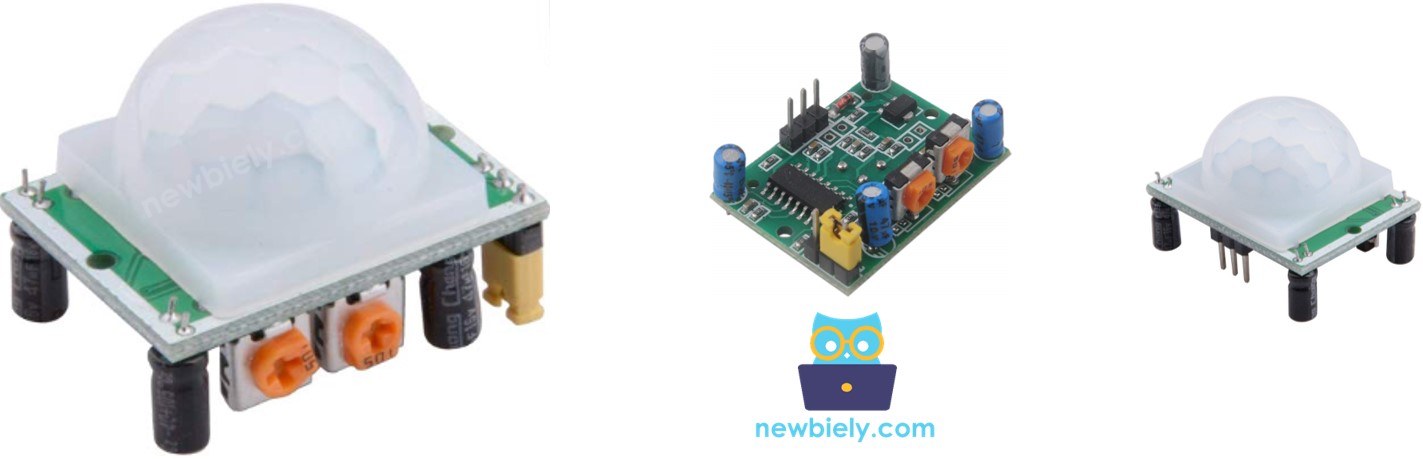
The HC-SR501 is a PIR (Passive Infrared) sensor that detects motion by sensing changes in infrared radiation emitted by warm objects. It outputs a simple digital signal — HIGH when motion is detected and LOW when the field is clear — making it straightforward to read with any ESP32 S3 digital input pin.
Key Specifications
The HC-SR501 operates on a 5V power supply and outputs a digital HIGH or LOW signal to indicate motion state. Its detection range reaches up to 7 meters with an adjustable sensitivity potentiometer, and a second potentiometer controls how long the output stays HIGH after a detection event. A jumper selects between single-trigger and repeatable-trigger modes, giving you flexibility for different application requirements. The sensor is low-cost and widely supported, making it a popular choice for beginners and professionals alike.
HC-SR501 Motion Sensor Pinout
The HC-SR501 exposes three pins for power and signal, plus two onboard potentiometers and a mode jumper.
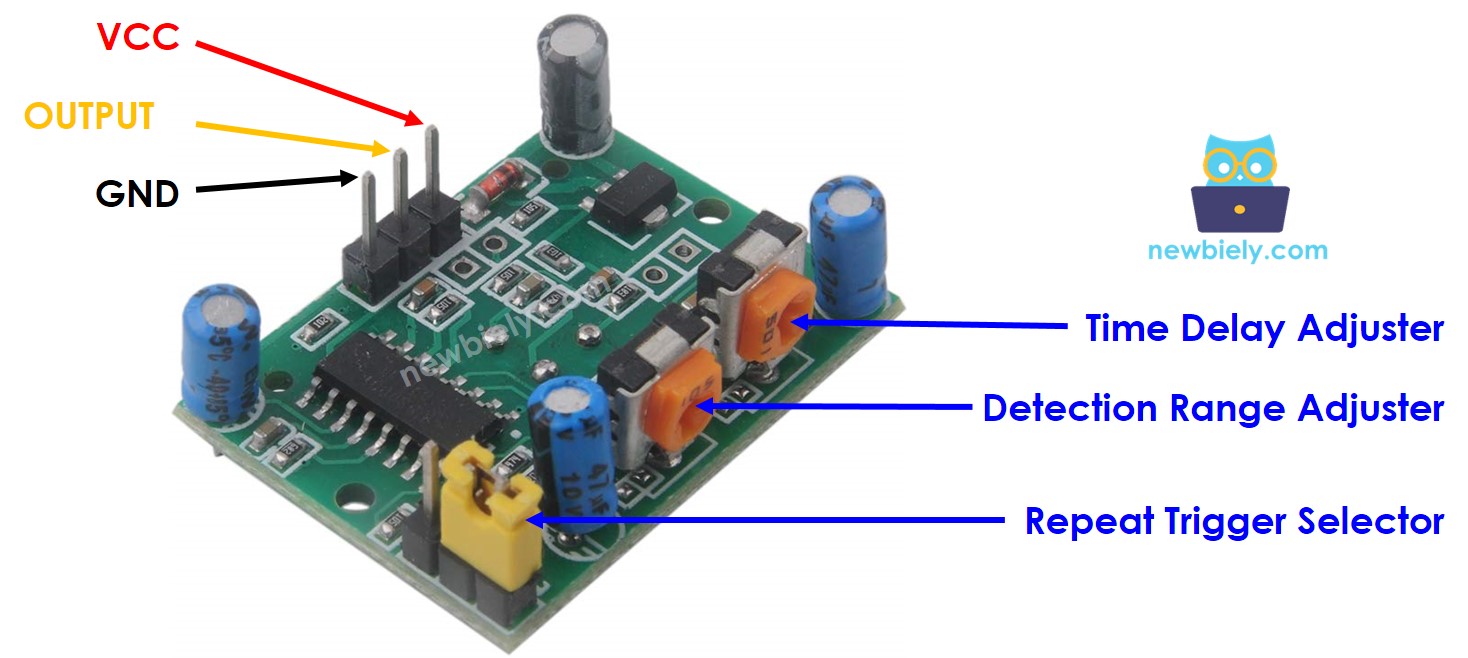
- VCC: Connect to 5V power supply
- GND: Connect to ground (0V)
- OUTPUT: Connect to an ESP32 S3 digital input pin — outputs LOW when no motion is detected, HIGH when motion is detected
- Detection Range Adjuster: Potentiometer to adjust the sensing distance
- Time Delay Adjuster: Potentiometer to set how long the output stays HIGH after a detection
- Repeat Trigger Selector: Jumper to choose between single or repeatable trigger modes
How HC-SR501 Motion Sensor Works
The HC-SR501 detects motion by sensing changes in infrared radiation emitted by warm objects such as people and animals. When an object moves through the sensor's field of view, the pyroelectric element registers a shift in the IR pattern and pulls the OUTPUT pin HIGH.
For a detection to occur, the object must emit infrared radiation and must be moving or changing position. A person walking across the room will reliably trigger the sensor, while someone standing completely still may not be detected. Likewise, a moving robot or vehicle that does not emit significant infrared energy will go unnoticed.
The video above demonstrates how the HC-SR501 motion sensor responds to movement in real-time.
Detecting the Presence of Humans
The HC-SR501 infers human presence from motion rather than detecting a person directly. When the sensor sees motion, you can reasonably conclude someone is present; when motion stops, the person may have left or simply paused.
This indirect approach has one practical limitation: a person who is present but perfectly still will not be detected, which can produce false negatives in some scenarios. Despite this, the sensor is highly effective for automatic lighting, security alarms, and energy-saving devices where active movement is the key trigger.
ESP32 S3 and HC-SR501 Motion Sensor
By connecting the HC-SR501 to the ESP32 S3, you gain a simple yet powerful motion-detection system. The ESP32 S3 reads the digital OUTPUT pin of the sensor and can respond by controlling lights, triggering alarms, logging events, or sending wireless notifications — all within a single compact board.
Wiring Diagram
Connect the HC-SR501 motion sensor to your ESP32 S3 as shown in the diagram below. The sensor requires a 5V supply for reliable operation, so use the 5V rail on the ESP32 S3 rather than the 3.3V rail.
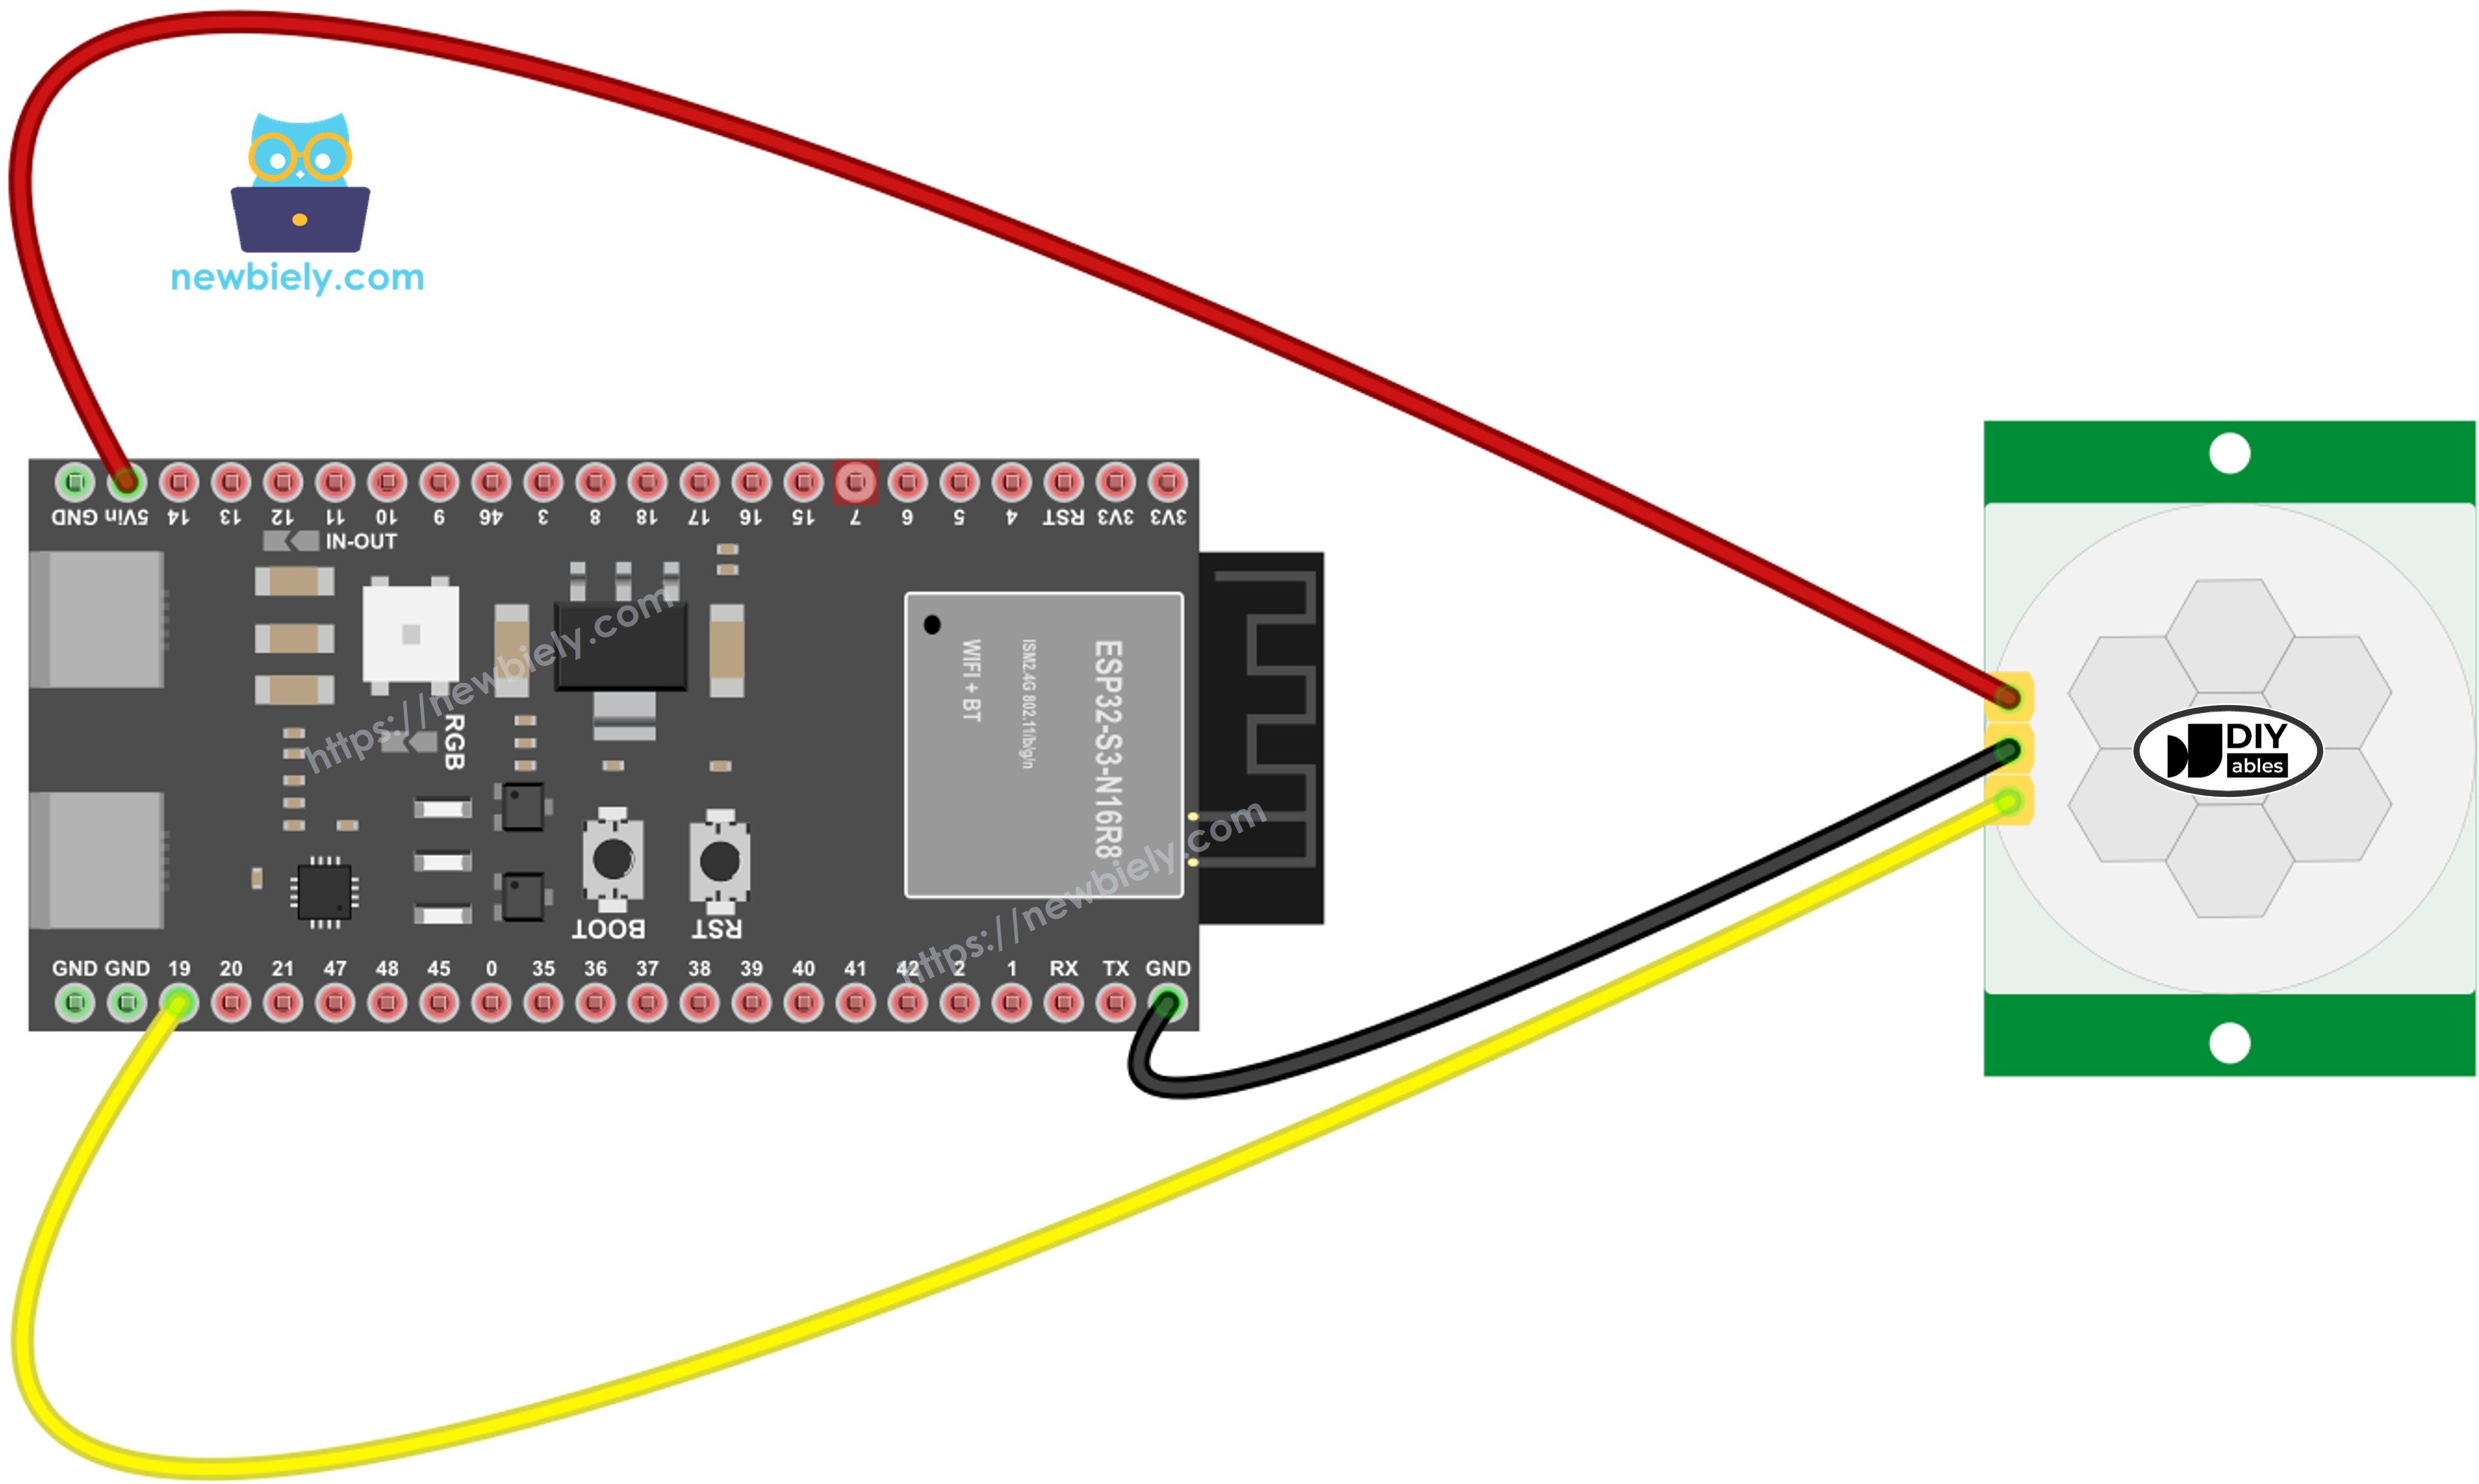
This image is created using Fritzing. Click to enlarge image
Safety Notes
Always power the HC-SR501 from the 5V pin of the ESP32 S3, never from 3.3V, as insufficient supply voltage leads to erratic or no detection. The OUTPUT signal from the sensor is safe for the ESP32 S3's GPIO pins because the sensor's output voltage is compatible with the input thresholds. Keep the sensor away from heat vents and direct sunlight during testing, as strong ambient infrared sources can cause false detections.
| HC-SR501 Pin | ESP32 S3 Pin |
|---|---|
| VCC | 5V |
| GND | GND |
| OUTPUT | GPIO19 |
Initial Sensor Settings
Before using the HC-SR501, configure these settings for optimal performance.
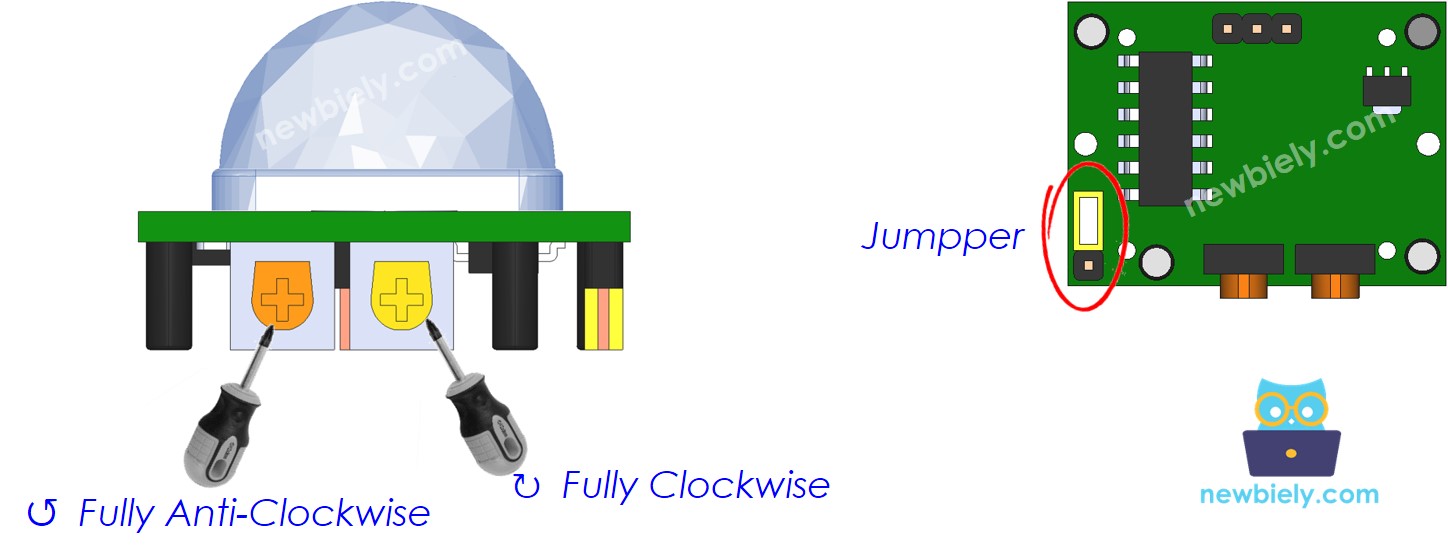
| Setting | Configuration |
|---|---|
| Detection Range Adjuster | Fully screw clockwise (minimum range for testing) |
| Time Delay Adjuster | Fully screw counter-clockwise (minimum delay) |
| Repeat Trigger Selector | Position jumper as shown in image above |
How To Program Motion Sensor
Programming the ESP32 S3 to read the HC-SR501 requires only a few lines of Arduino code. The core idea is to track the previous state of the sensor pin and compare it to the current state on every loop iteration, so you can detect the exact moment motion starts or stops.
Step 1: Configure ESP32 S3 Pin as Input
Step 2: Read the Sensor Output State
Step 3: Detect Motion Start (LOW to HIGH)
Step 4: Detect Motion Stop (HIGH to LOW)
ESP32 S3 Code
The following code monitors the HC-SR501 motion sensor and reports every motion start and stop event to the Serial Monitor. It configures pin D5 as a digital input, continuously tracks state transitions from LOW to HIGH and back, and prints a descriptive message for each event — giving you a clear real-time log of activity in front of the sensor.
Detailed Instructions
- New to ESP32 S3? Complete our Getting Started with ESP32 S3 guide first.
- Copy the code above and paste it into the Arduino IDE.
- Select your ESP32 S3 board from Tools > Board menu.
- Connect your ESP32 S3 to your computer via USB Type-C.
- Click the Upload button in the Arduino IDE to transfer the code.
- Open the Serial Monitor by clicking its icon or pressing Ctrl+Shift+M.
- Set the baud rate to 115200 in the Serial Monitor dropdown.
- Wave your hand in front of the HC-SR501 sensor and observe the output.
- Pro Tip: Start with the potentiometers at minimum sensitivity and delay, then gradually increase them to dial in the detection range and timing that suits your environment.
Serial Monitor Output
When you move in front of the sensor, you will see output similar to the following:
Project Ideas
The HC-SR501 paired with the ESP32 S3 opens the door to a wide range of practical applications, from simple automation to connected smart-home systems.
- Automatic Room Light: Turn lights on when motion is detected and off automatically after the room falls quiet.
- Security Alert System: Send push notifications or trigger a buzzer alarm when an intruder is detected.
- Energy Saver: Automatically power down displays or devices when no one is present in the room.
- Smart Pet Feeder: Detect when your pet approaches the feeding station and dispense food on demand.
- Visitor Counter: Log the number of people entering a room or building over time.
- Halloween Props: Trigger scary sounds or moving decorations when someone approaches.
Video Tutorial
Watch the step-by-step video walkthrough for this ESP32 S3 project below.
Challenge Yourself
Once your motion sensor is working, try these challenges to push your ESP32 S3 skills further — starting with beginner-friendly additions and progressing to more advanced connected features.
- Beginner: Add an LED that turns on when motion is detected and off when motion stops.
- Beginner: Count and display the total number of motion events detected since the board was powered on.
- Intermediate: Add a buzzer that sounds an alarm for 3 seconds whenever motion is detected.
- Intermediate: Use the sensor to control a relay that switches a desk lamp on and off.
- Advanced: Combine the motion sensor with an OLED display to show the timestamp of the last detection event.
- Advanced: Create a smart security system that sends email alerts when motion is detected outside of scheduled hours.