
ESP32 S3 - SD Card
Learn how to use a Micro SD Card with your ESP32 S3 to store and retrieve data for your IoT projects. This tutorial covers everything from wiring the SD Card module to reading, writing, and managing files.
What you'll build:
- A circuit connecting the ESP32 S3 to a Micro SD Card Module over SPI
- A sketch that opens or creates a file on the SD card
- Programs that write, read, and overwrite file contents
- A foundation for data-logging and file-management applications
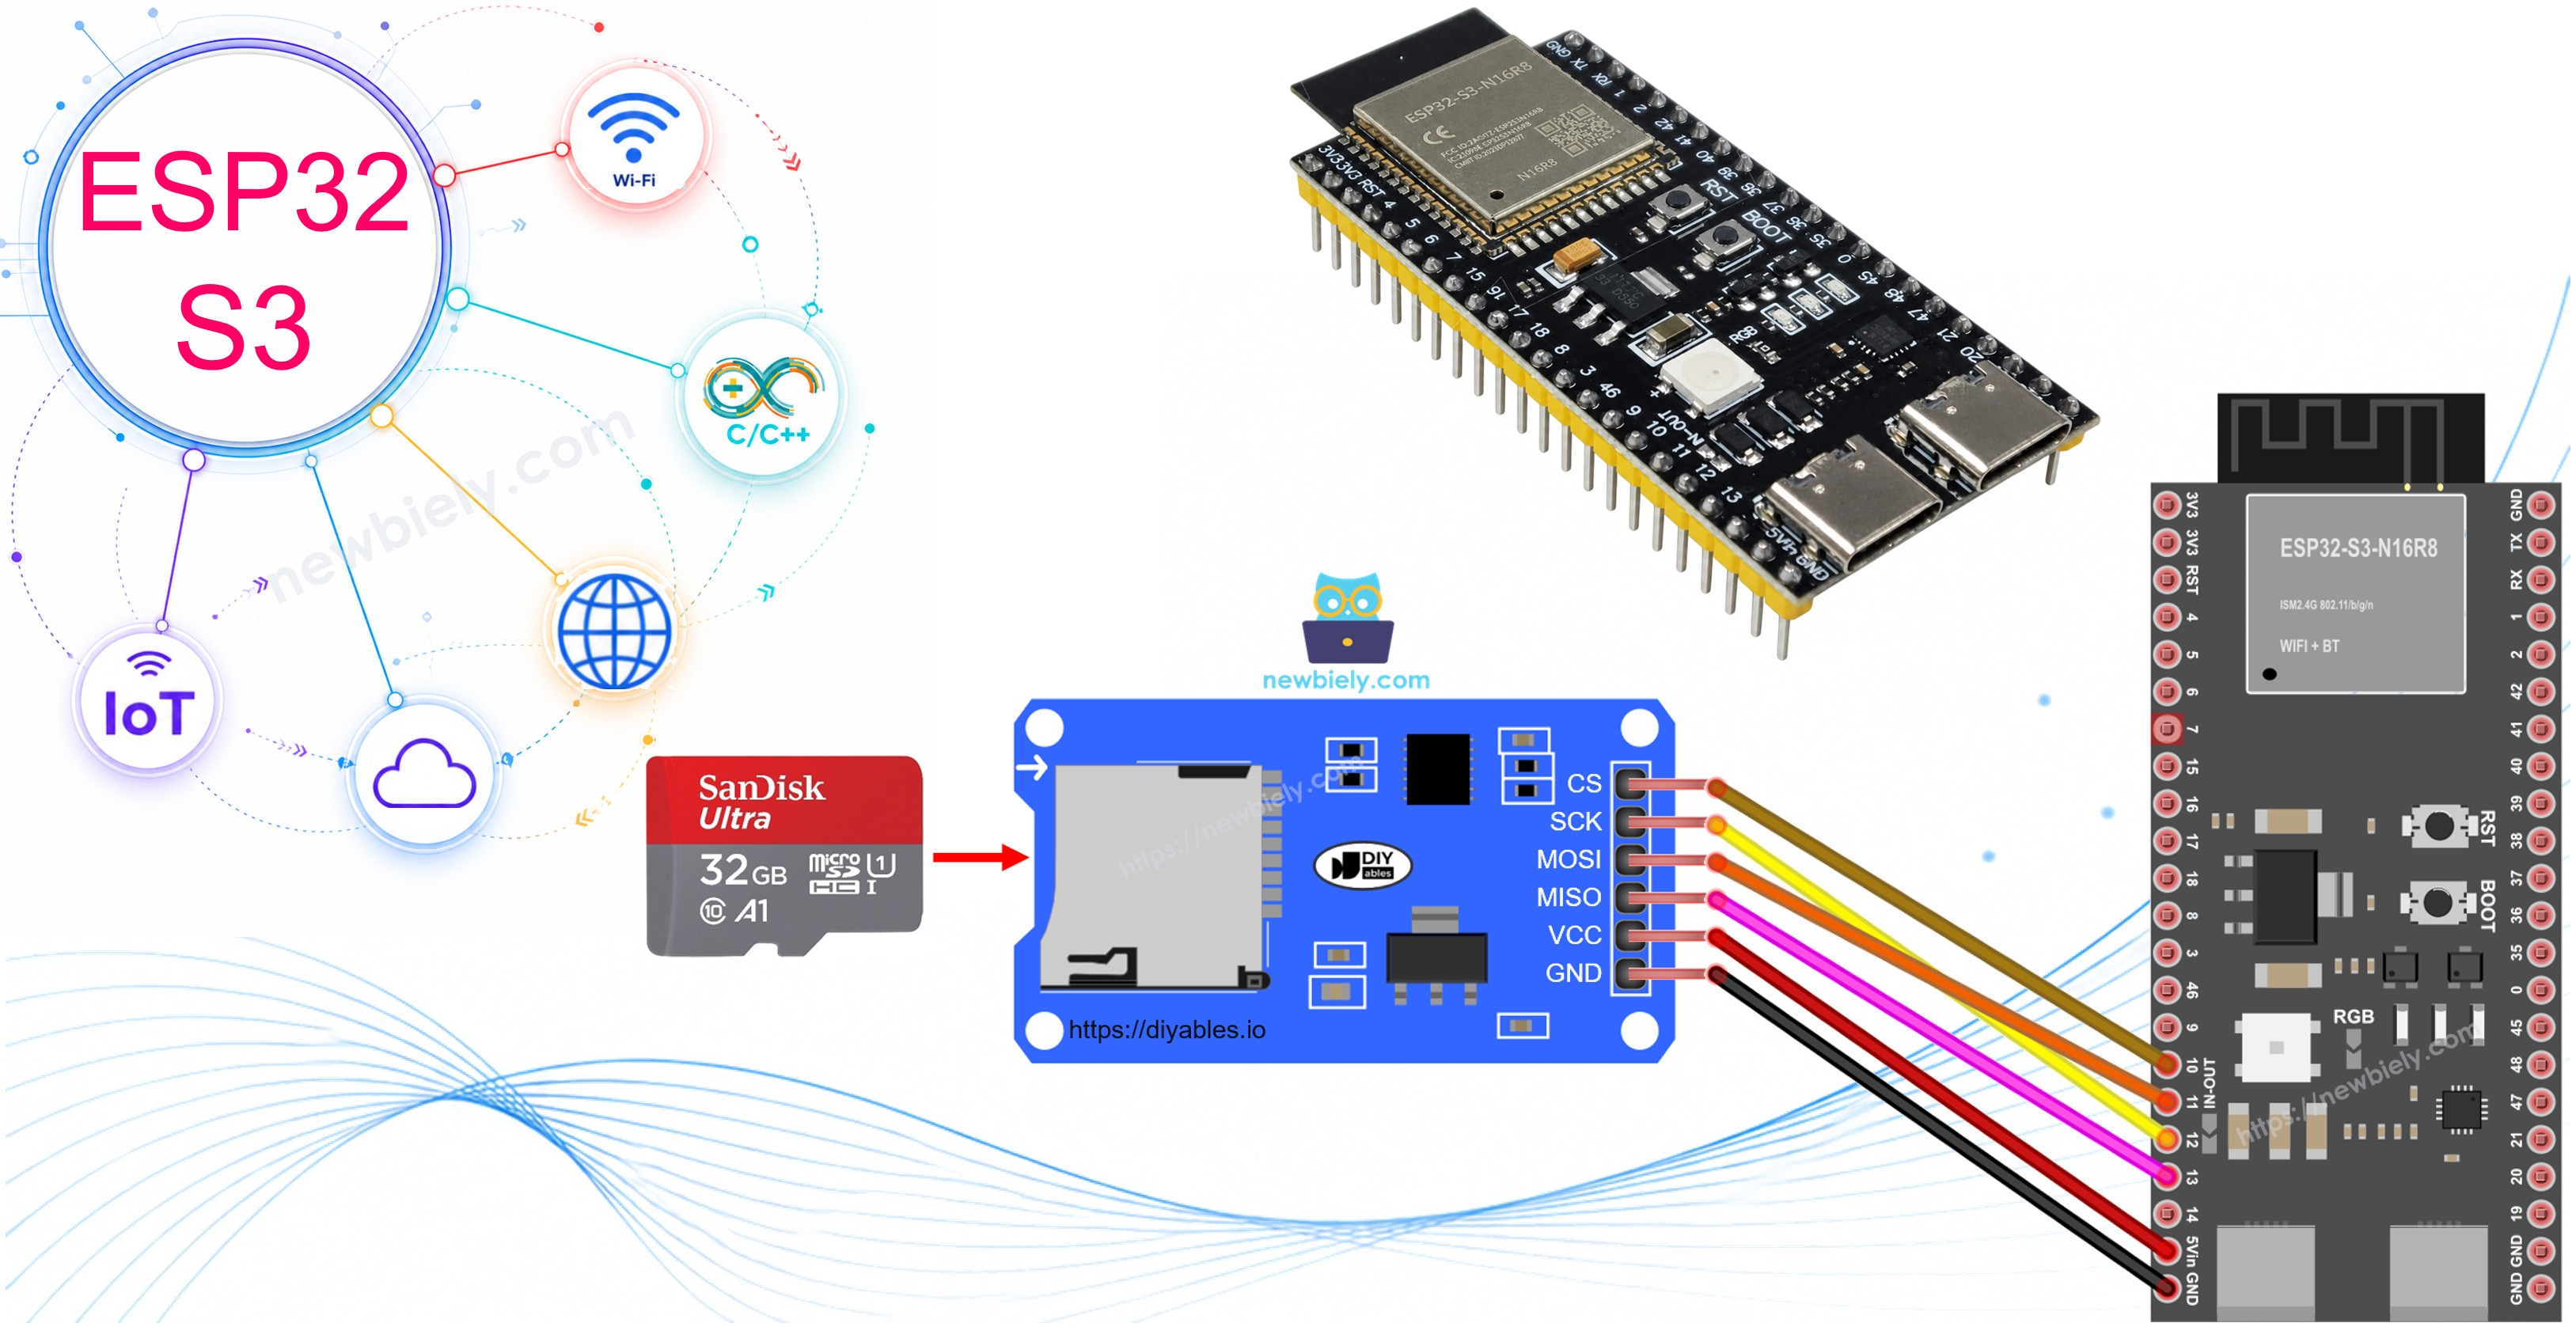
Hardware Preparation
Or you can buy the following kits:
| 1 | × | DIYables ESP32 S3 Starter Kit (ESP32 S3 included) | |
| 1 | × | DIYables Sensor Kit (18 sensors/displays) |
Additionally, some of these links are for products from our own brand, DIYables .
Overview of Micro SD Card Module
The Micro SD Card Module is an interface board that bridges your ESP32 S3 to a Micro SD Card using the SPI communication protocol. It handles voltage regulation and signal translation so that the ESP32 S3 can read and write card data reliably at 3.3 V logic levels.
Key Specifications
The module communicates over SPI and supports Micro SD Cards formatted as FAT16 or FAT32. It accepts an operating voltage between 3.3 V and 5 V, making it compatible with a wide range of microcontrollers. The six-pin interface exposes VCC, GND, MISO, MOSI, SCK, and SS lines, and the module is well-suited for data-logging, configuration storage, and serving static web content from standalone IoT devices.
Pinout
The Micro SD Card Module exposes six pins that map directly onto the SPI bus of the ESP32 S3.
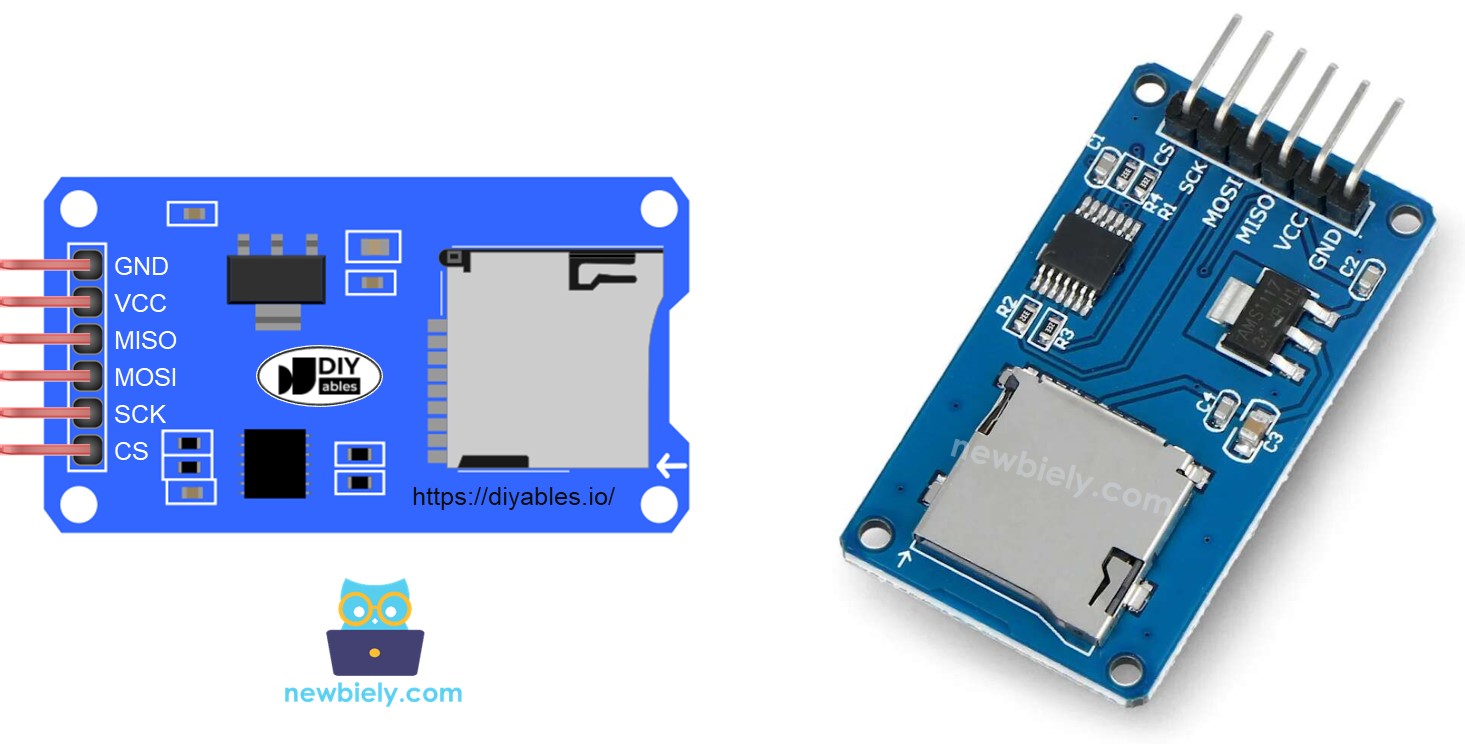
- VCC: Power supply — connect to the ESP32 S3 5 V pin
- GND: Ground — connect to any GND pin on the ESP32 S3
- MISO: Master In Slave Out — data line from the SD card to the ESP32 S3
- MOSI: Master Out Slave In — data line from the ESP32 S3 to the SD card
- SCK: Serial Clock — timing signal driven by the ESP32 S3
- SS: Slave Select — chip-enable line, connect to any spare digital pin defined as CS in your code
Preparation
Before starting, you need to prepare your Micro SD Card so the ESP32 S3 can access it correctly.
- Insert the Micro SD Card into a USB 3.0 SD Card Reader
- Connect the reader to your PC
- Format the Micro SD Card as FAT16 or FAT32 (search online for formatting instructions for your OS)
- Safely eject the card once formatting is complete
- Insert the formatted card into the Micro SD Card Module
Wiring Diagram
Connect the Micro SD Card Module to the ESP32 S3 following the diagram below, keeping all wires short and neat to reduce noise on the SPI bus. Double-check each connection before powering the board.
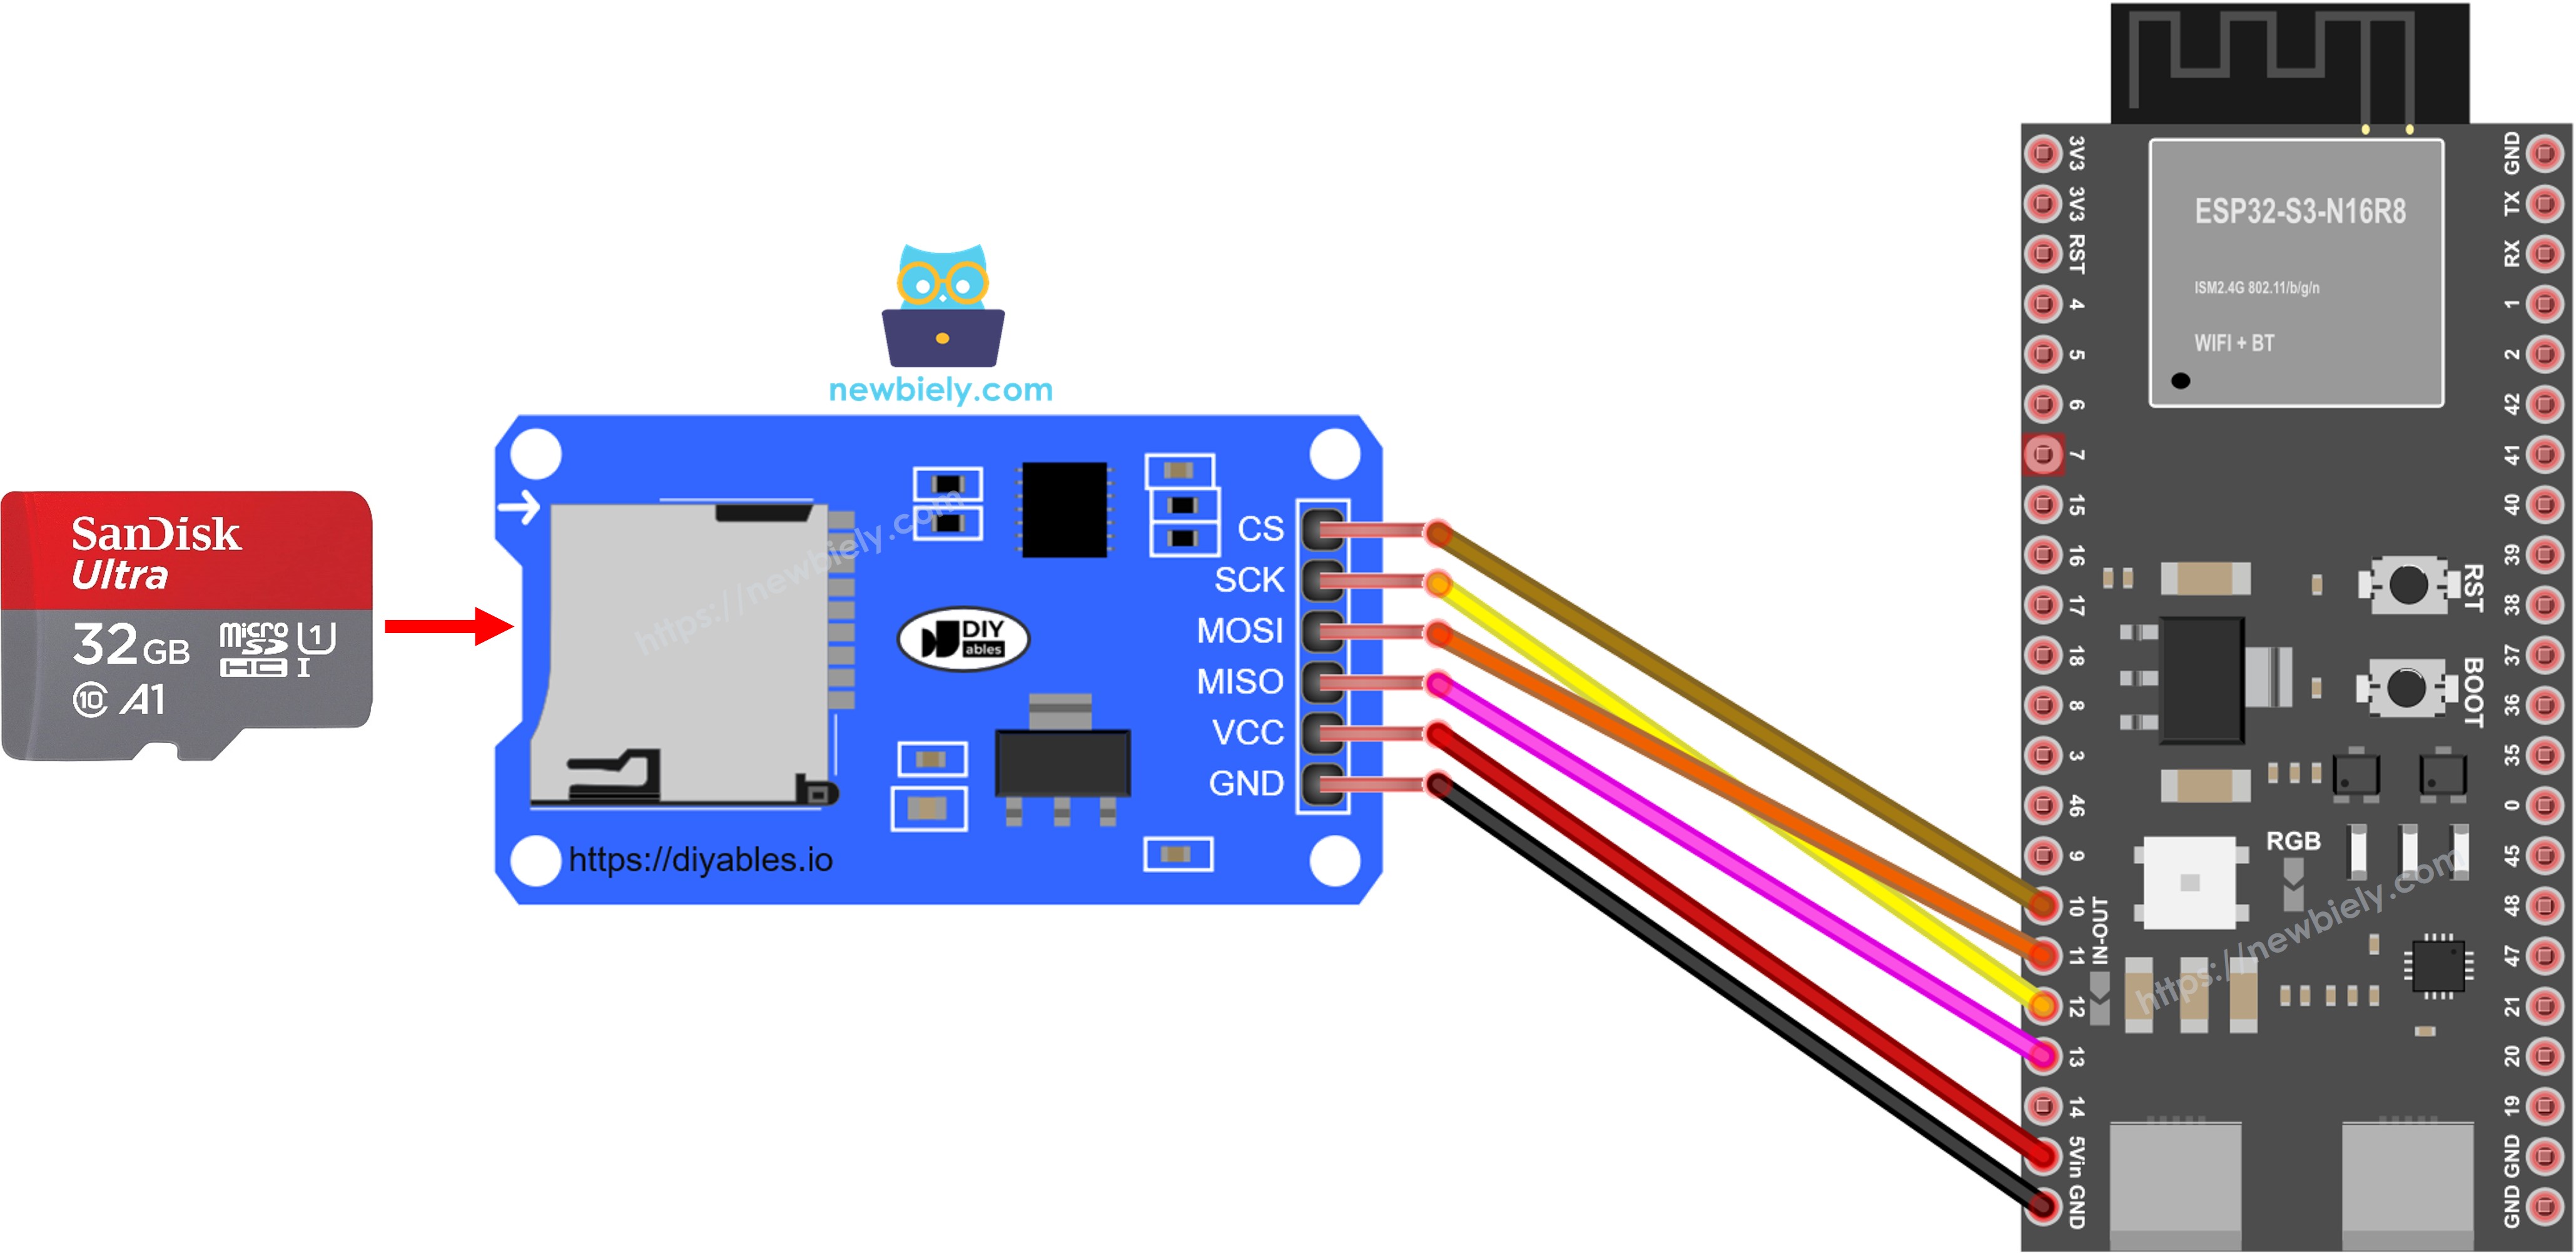
This image is created using Fritzing. Click to enlarge image
Safety Notes
Always verify that the SD card is fully seated in the module before running any code, as a loose card will cause initialization failures that can be difficult to diagnose. Use a quality, name-brand Micro SD Card to avoid intermittent read/write errors, and never remove the card while the ESP32 S3 is actively writing data to prevent file-system corruption.
| Micro SD Module Pin | ESP32 S3 Pin |
|---|---|
| VCC | 5V |
| GND | GND |
| MISO | GPIO13 (MISO) |
| MOSI | GPIO11 (MOSI) |
| SCK | GPIO12 (SCK) |
| SS | GPIO10 (CS) |
ESP32 S3 - How to open a file on Micro SD Card and create if not existed
Code Overview
The following code demonstrates how to initialize the SD card over SPI and open a named file, creating it automatically when it does not already exist. On each boot the sketch checks for the file, reports whether it was found or freshly created, and exits — giving you a clean, repeatable way to set up persistent storage before any data is written.
ESP32 S3 Code
Detailed Instructions
- New to ESP32 S3? Complete our Getting Started with ESP32 S3 guide first.
- Prepare the SD Card: Insert the formatted Micro SD Card into the SD Card Module
- Wire the Circuit: Connect the Micro SD Card Module to the ESP32 S3 following the wiring diagram above
- Connect ESP32 S3: Plug the ESP32 S3 into your PC using the USB Type-C cable
- Open Arduino IDE: Launch Arduino IDE on your computer
- Select Board: Choose ESP32 S3 from the board menu
- Select Port: Choose the correct COM port for your ESP32 S3
- Open Serial Monitor: Open the Serial Monitor before uploading (Tools > Serial Monitor)
- Copy Code: Copy the code provided above
- Paste Code: Paste it into a new Arduino IDE sketch
- Upload: Click the Upload button to flash the code to your ESP32 S3
- View Results: Check the Serial Monitor to see the file creation status
- Pro Tip: Always open Serial Monitor before uploading so you capture every initialization message from the very first boot.
Serial Monitor Output
First run (file doesn't exist yet):
Subsequent runs (file already exists):
※ NOTE THAT:
You may NOT see the output on Serial Monitor for the first run if your first upload is done before opening Serial Monitor.
Verify on PC:
- Remove the Micro SD Card from the module
- Insert it into your USB SD Card reader
- Connect the reader to your PC
- Open the SD card folder and verify the esp32.txt file was created
ESP32 S3 - How to write/read data to/from a file on Micro SD Card
Code Overview
The following code shows how to write text data to a file and immediately read it back, printing every character to the Serial Monitor. It opens or creates the target file, writes two lines of content, then seeks back to the beginning and streams each character out — giving you a straightforward way to confirm that what was written is what gets read.
Serial Monitor Output
Expected output:
※ NOTE THAT:
The data will be appended to the end of the file by default. If you reboot the ESP32 S3 with the above code, the text will be appended again and the Serial Monitor will show more lines:
Verify the file:
- Safely remove the Micro SD Card from the module
- Insert it into your USB SD Card reader
- Connect to your PC and open the file to view its contents
ESP32 S3 - How to read a file on Micro SD Card line-by-line
Code Overview
The following code demonstrates reading file contents line by line rather than character by character, which is far more practical when your file contains structured data or log entries. It uses readStringUntil('\n') to extract each line and numbers the output so you can instantly see how many lines the file contains.
Serial Monitor Output
Expected output:
※ NOTE THAT:
You may see more lines on Serial Monitor if the content of the file was not deleted before running this sketch.
ESP32 S3 - How to overwrite a file on Micro SD Card
Code Overview
The following code shows the simplest technique for overwriting a file: delete the existing file and create a new one with the same name before writing fresh content. Because the SD library appends by default, this delete-and-recreate pattern is the most reliable way to ensure the file contains only the data from the current run.
By default, content will append to the end of the file. The simplest way to overwrite a file is to delete the existing file and create a new one with the same name.
Serial Monitor Output
Expected output:
Test the overwrite:
- Press the reset button on your ESP32 S3
- Check the Serial Monitor output
- Verify that the content is NOT duplicated
- The file should contain only one set of lines
Verify on PC:
- Remove the Micro SD Card from the module
- Insert it into your USB SD Card reader
- Connect to your PC and open the file
- Confirm the content matches the expected output
Application Ideas
The ESP32 S3's processing power and built-in wireless connectivity make it an excellent companion for SD card–based storage in real-world deployments.
- Climate Data Logger: Record temperature and humidity readings at regular intervals for long-term environmental monitoring.
- Standalone Sensor Station: Store sensor readings locally without relying on a WiFi connection, then upload in batch when connectivity is available.
- GPS Location Logger: Log GPS coordinates with timestamps to track routes or asset movements.
- Security Event Log: Save motion-detection or door-contact events with timestamps to a rolling log file.
- Agricultural Monitor: Record soil-moisture, light, and temperature data over growing seasons for analysis.
- Power Consumption Meter: Store daily energy-usage statistics for appliances or solar installations.
Video Tutorial
Watch the step-by-step video walkthrough for this ESP32 S3 project below.
...VIDEO esp32-s3/micro-sd-card.mp4
...VIDEO
Challenge Yourself
The examples above give you a solid foundation — now push further with these progressively demanding exercises.
- Beginner: Modify the open-file sketch to create a file with your own custom name and write a personal message to it.
- Beginner: Add a timestamp to each written line using the millis() function so you can see when each entry was recorded.
- Intermediate: Write a sketch that logs simulated sensor values every five seconds and appends them with timestamps to a CSV file on the SD card.
- Intermediate: Build a Serial Monitor menu that lets you choose to read, write, or delete a file by sending single-character commands.
- Advanced: Implement a circular log that keeps only the last 100 entries, automatically deleting the oldest record when the limit is reached.
- Advanced: Create a multi-sensor data logger that writes each sensor's readings to a separate file and rotates files daily using a real-time clock module.