
ESP32 S3 - TM1637 4-Digit 7-Segment Display
The TM1637 4-digit 7-segment display is one of the easiest ways to add a visual readout to any ESP32 S3 project, using just two data pins and a simple library. This tutorial walks you through wiring, library setup, and five hands-on tutorials covering numbers, text, time, blinking effects, and individual digit control.
What you'll build:
- A number display that shows integers from -999 to 9999
- A text and temperature display with degree symbols
- A digital clock with a blinking colon separator
- Blinking and brightness animation effects
- Individual digit control for custom animations
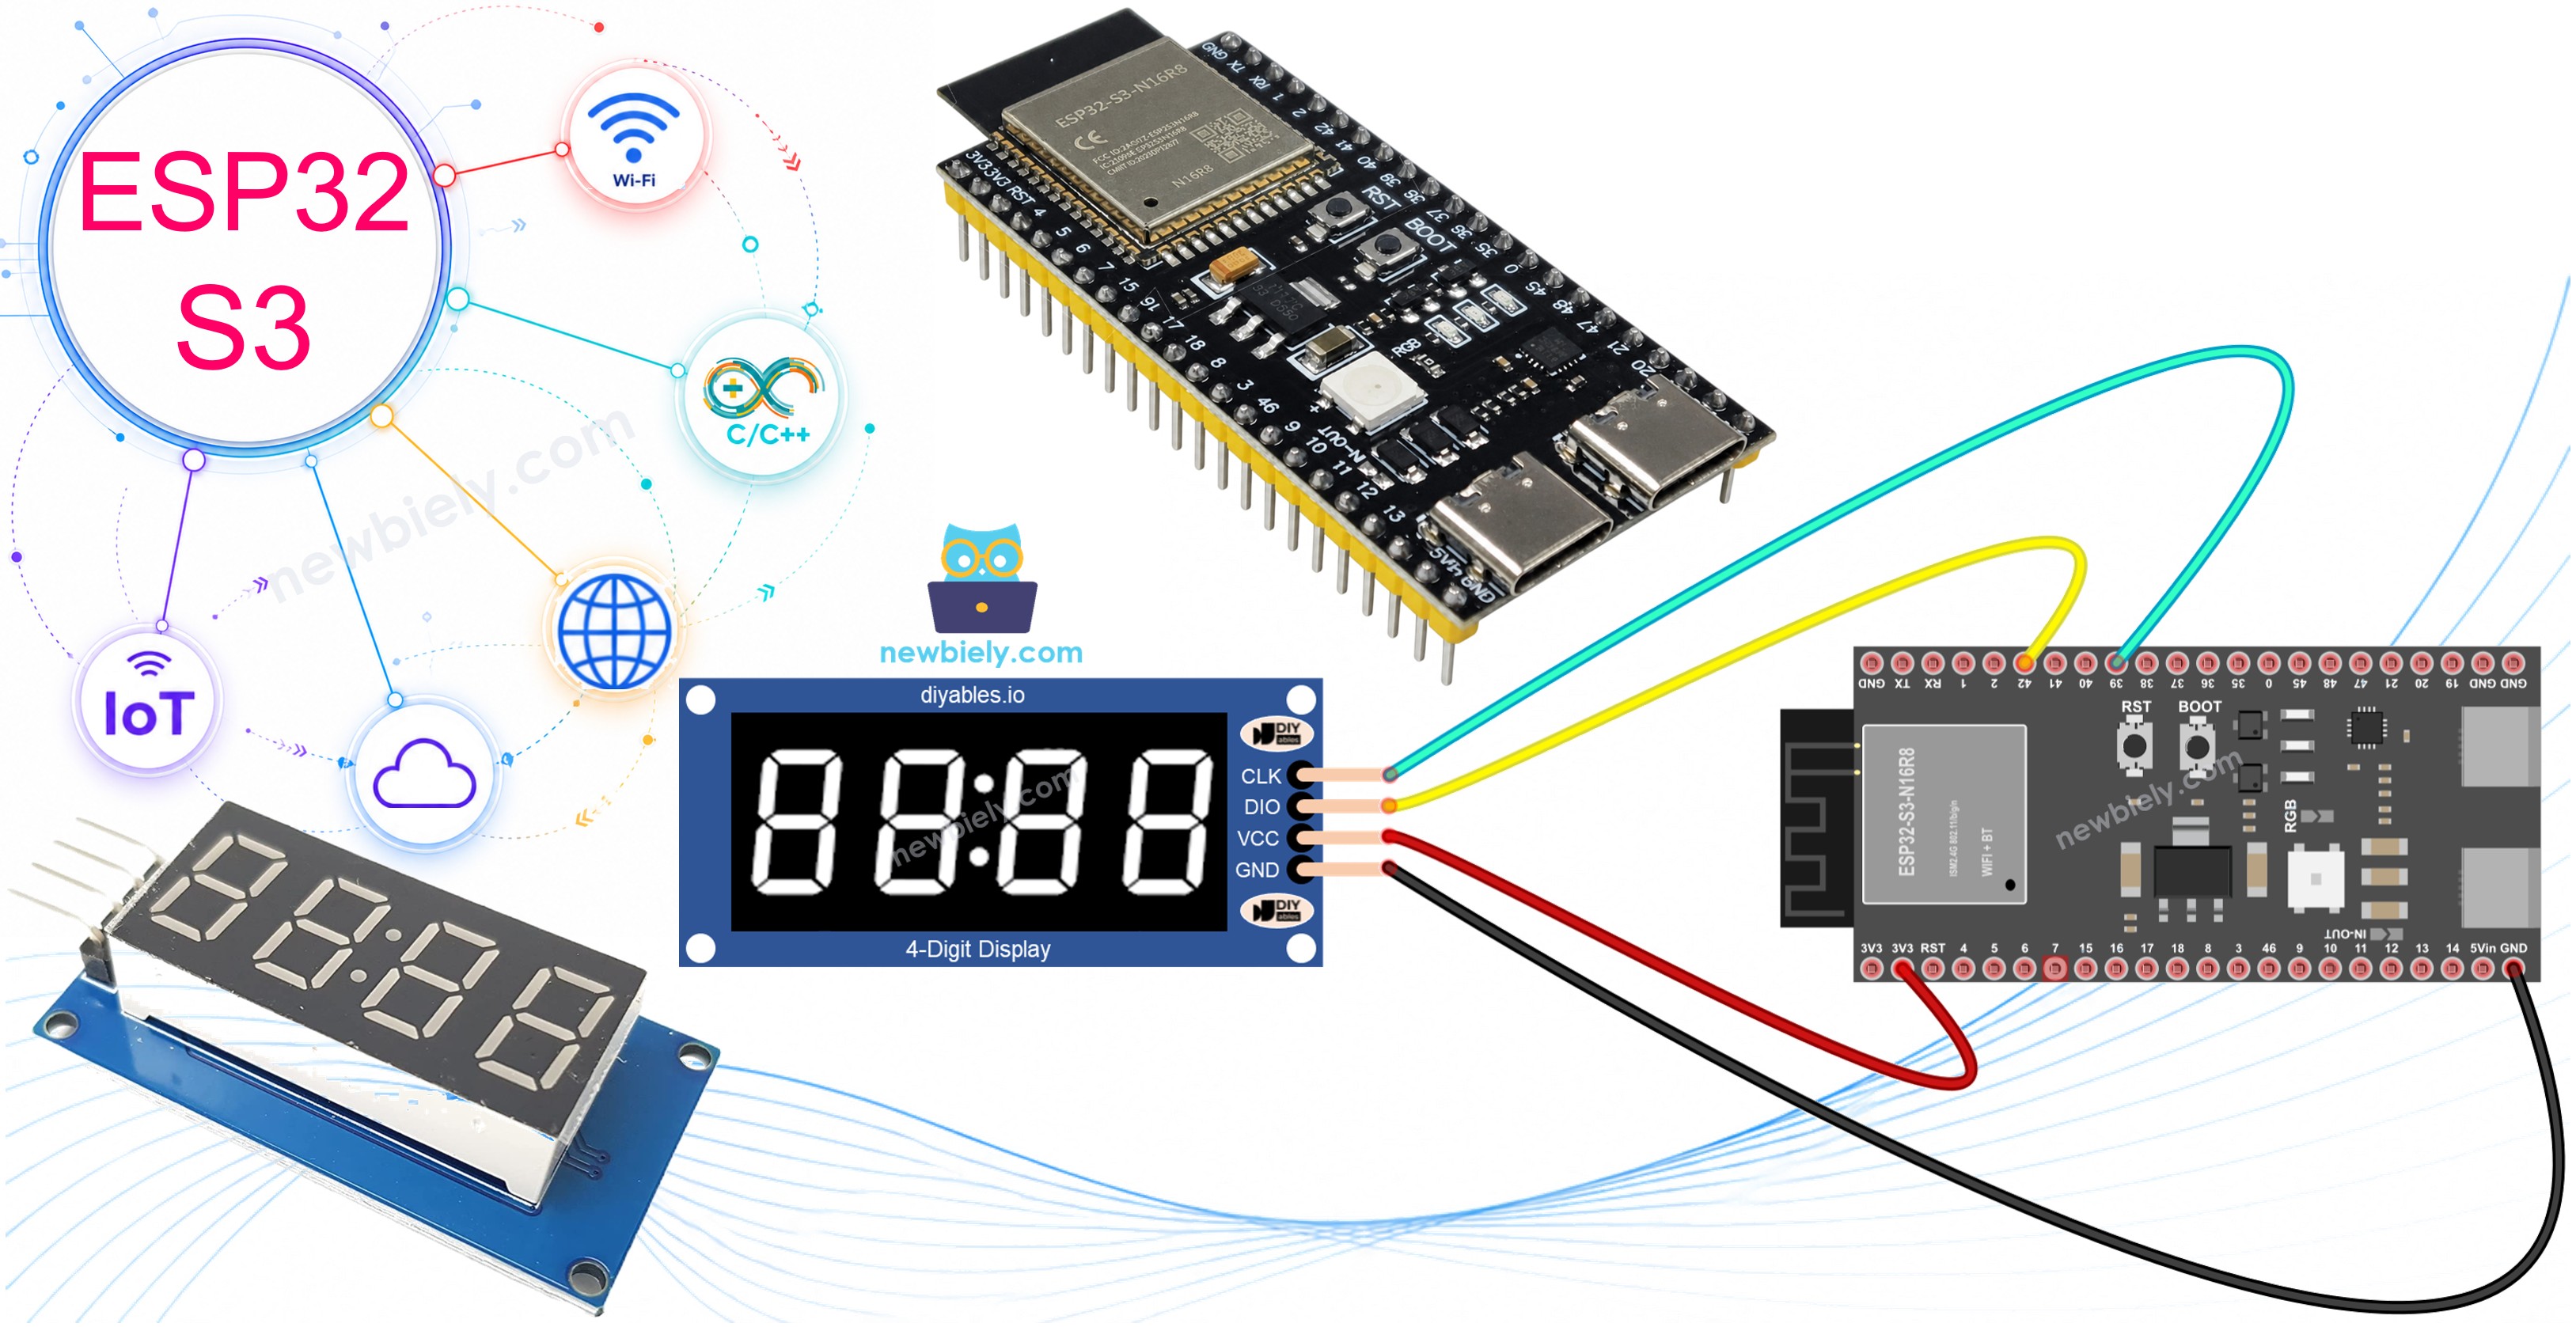
Hardware Preparation
Or you can buy the following kits:
| 1 | × | DIYables ESP32 S3 Starter Kit (ESP32 S3 included) | |
| 1 | × | DIYables Sensor Kit (18 sensors/displays) |
Additionally, some of these links are for products from our own brand, DIYables .
Overview of the TM1637 Display Module
The TM1637 is a dedicated LED driver chip that controls four 7-segment digits over a compact 2-wire serial interface, making it an ideal display solution for microcontroller projects where GPIO pins are scarce. It handles all the multiplexing and refresh timing internally, so the ESP32 S3 only needs to send data when the displayed value changes. The module operates on both 3.3 V and 5 V logic, which means it connects directly to the ESP32 S3's 3.3 V output without any level-shifting.
Key Specifications
The TM1637 module offers four digits, each composed of seven segments plus a decimal point. A built-in colon separator sits between the second and third digits, making it ideal for clock displays. Brightness is adjustable across eight levels (0 through 7) in firmware. The 2-wire interface uses a CLK line for synchronization and a bidirectional DIO line for data. Display contents remain lit without any constant refresh burden on the microcontroller.
TM1637 Pinout
The TM1637 module exposes four pins for power and communication.
- CLK: Clock signal input that synchronizes data transfers
- DIO: Bidirectional data input/output line
- VCC: Power supply, accepts 3.3 V or 5 V
- GND: Ground reference
Wiring Diagram
Connect the TM1637 4-digit display to your ESP32 S3 by matching each pin on the module to the corresponding pin on the board as shown in the table below. Using the 3.3 V rail keeps signal levels consistent with the ESP32 S3's GPIOs and avoids any risk of over-voltage on the data lines.
Safety Notes
Power the TM1637 from the ESP32 S3's 3.3 V output rather than 5 V so that the CLK and DIO signal voltages remain within the safe input range of the module's bidirectional DIO pin. Ensure all ground connections are shared between the display module and the board before applying power.
| TM1637 Pin | ESP32 S3 Pin |
|---|---|
| CLK | GPIO39 |
| DIO | GPIO42 |
| VCC | 3.3V |
| GND | GND |
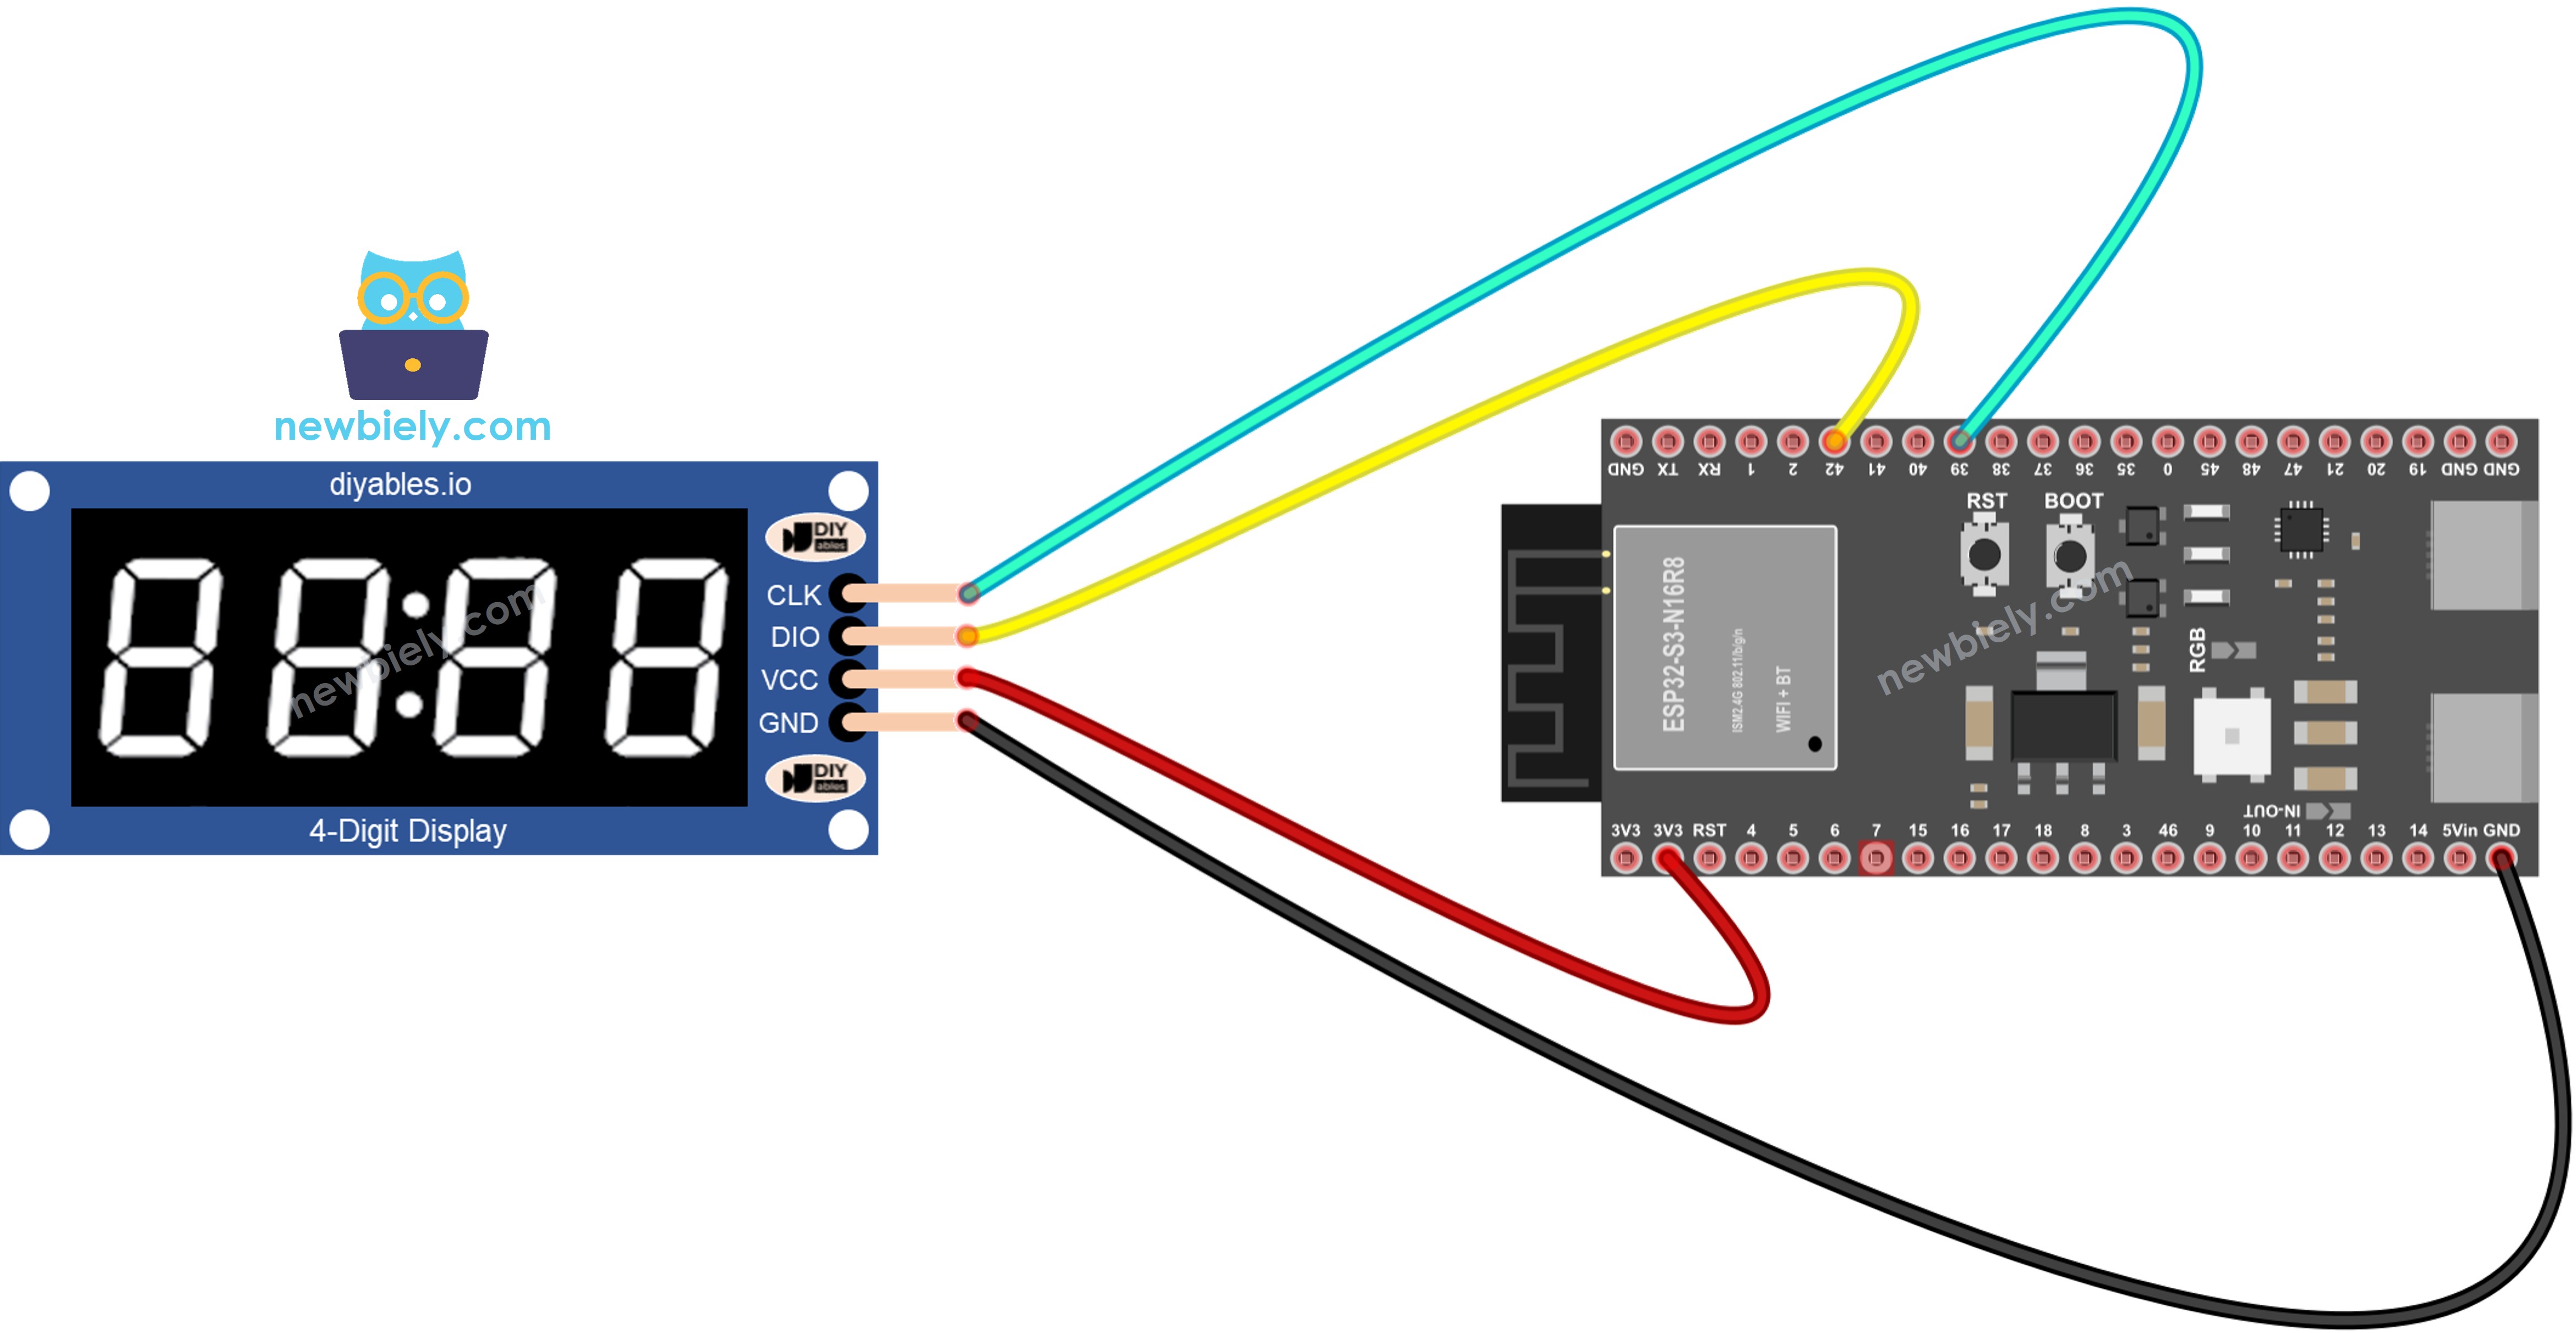
This image is created using Fritzing. Click to enlarge image
Installing the TM1637 Library
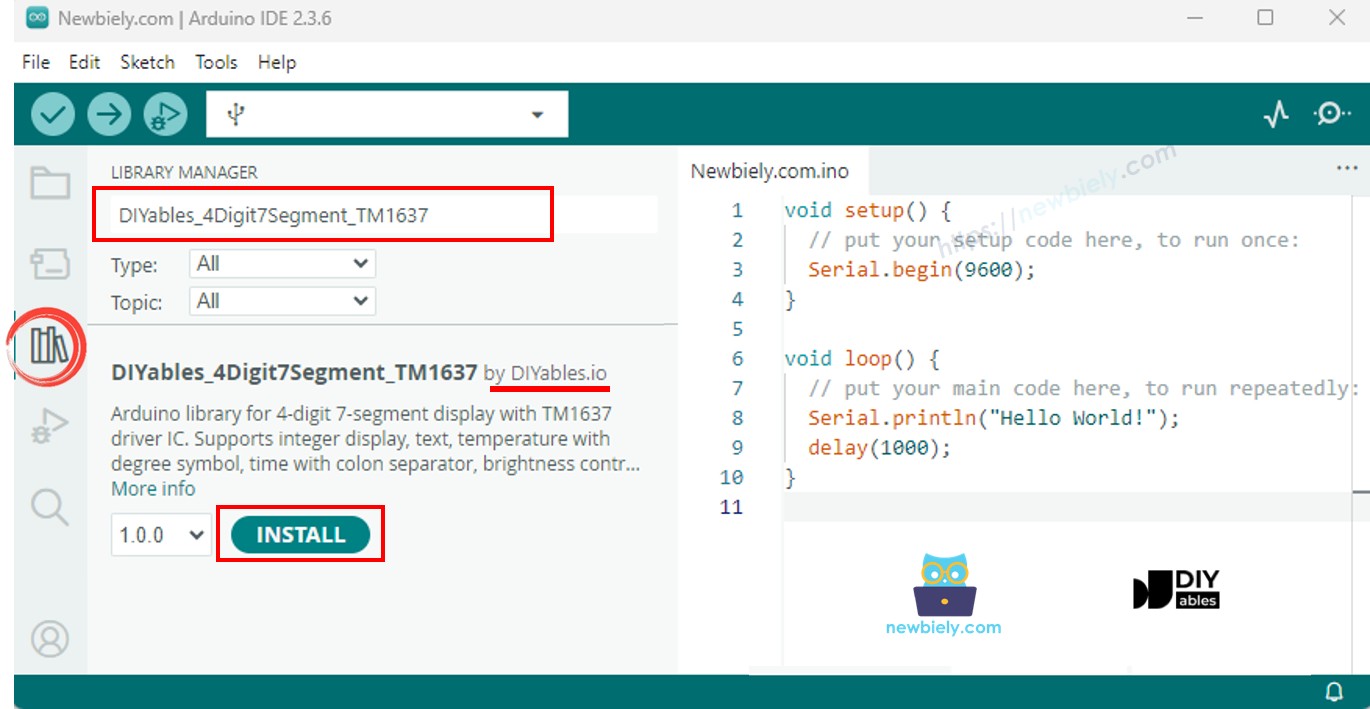
Before uploading any code you need to install the DIYables_4Digit7Segment_TM1637 library, which provides a clean, high-level API for all display operations. The library requires no additional dependencies and works across all Arduino-compatible platforms, so installation is straightforward through the Arduino IDE Library Manager.
- Open Arduino IDE and launch the Library Manager from the left sidebar
- Search for "DIYables_4Digit7Segment_TM1637" in the search box
- Click Install on the DIYables entry
- Confirm the library appears in your installed libraries list
Basic TM1637 Code Structure
The following code shows the minimum sketch needed to initialize the TM1637 display and show a 4-digit number on the ESP32 S3. It includes the library, defines the two GPIO pins, creates a display object, and calls begin() before printing.
Tutorial 1: Display Integer Numbers
The integer tutorial demonstrates how to display positive numbers, negative numbers, zero, and zero-padded values on the TM1637 using the ESP32 S3. It covers the full numeric range the driver supports and shows how to use the leading-zero option.
Detailed Instructions
- New to ESP32 S3? Complete our Getting Started with ESP32 S3 guide first.
- Wire the TM1637 module to the ESP32 S3 following the wiring diagram above
- Connect the ESP32 S3 to your computer with a USB-C cable
- Open Arduino IDE and select the correct board and port
- Copy the integer display sketch and paste it into Arduino IDE
- Click Upload to flash the code to your board
- Watch the different numbers cycling on the 7-segment display
- Open Serial Monitor at 115200 baud to read status messages
- Pro Tip: Use print(number, true) to display numbers with leading zeros such as "0042"
Serial Monitor Output
Integer Display Methods
| Method | Action | Syntax |
|---|---|---|
| print(int) | Display an integer (-999 to 9999) | display.print(1234) |
| print(int, true) | Display with leading zeros | display.print(42, true) |
| clear() | Clear all digits | display.clear() |
Tutorial 2: Display Text and Temperature
This tutorial shows how to render short text strings and temperature readings with degree symbols on the ESP32 S3 TM1637 display. The 7-segment hardware can represent a useful subset of letters, making it suitable for status labels and sensor readouts.
Detailed Instructions
- New to ESP32 S3? Complete our Getting Started with ESP32 S3 guide first.
- Confirm the TM1637 wiring is secure
- Upload the text and temperature sketch to the ESP32 S3
- Open Serial Monitor at 115200 baud
- Watch the display cycle through text messages and temperature readings
- Pro Tip: The TM1637 can render letters such as H, E, L, P, C, o, n, and e — experiment with four-character words that use only these glyphs
Serial Monitor Output
Text and Temperature Methods
| Method | Action | Syntax |
|---|---|---|
| print(const char*) | Display text (up to 4 chars) | display.print("HELP") |
| printTemperature(int, char) | Display temperature with degree/unit | display.printTemperature(25, 'C') |
| DEGREE | Degree symbol constant | display.DEGREE |
Tutorial 3: Display Time with Blinking Colon
The time tutorial creates a digital clock display on the ESP32 S3 with hours, minutes, and a colon that blinks at a one-second interval. The built-in colon separator on the TM1637 module makes it the perfect hardware choice for clock projects.
Detailed Instructions
- New to ESP32 S3? Complete our Getting Started with ESP32 S3 guide first.
- Upload the time display sketch to your ESP32 S3
- Watch "12:30" appear on the display with the colon blinking every 500 milliseconds
- Modify the hour and minute values in the code to set a different starting time
- Pro Tip: Use millis() and modulo arithmetic to create smooth one-second blink intervals without blocking the main loop
Serial Monitor Output
Time Display Methods
| Method | Action | Syntax | |
|---|---|---|---|
| printTime(int, int) | Display time HH | MM with colon | display.printTime(12, 30) |
| printTime(int, int, bool) | Display time, control colon state | display.printTime(12, 30, false) |
Tutorial 4: Blink the Display
This tutorial creates attention-grabbing blinking effects by toggling the ESP32 S3 TM1637 display on and off while preserving whatever content is currently shown. Because the TM1637 holds display data internally, you do not need to resend values after calling off().
Detailed Instructions
- New to ESP32 S3? Complete our Getting Started with ESP32 S3 guide first.
- Upload the blink demo sketch to your board
- Watch "1234" blink five times, then "HELP" blink five times
- Adjust the delay values to control the blink rate
- Pro Tip: The display content stays in memory when you call off() — no need to resend data when you call on() again
Serial Monitor Output
Blink and Brightness Methods
| Method | Action | Syntax |
|---|---|---|
| off() | Turn display off (data preserved) | display.off() |
| on() | Turn display back on | display.on() |
| setBrightness(int) | Set brightness 0-7 | display.setBrightness(4) |
Tutorial 5: Individual Digit Control
Individual digit control gives you the finest level of precision over the ESP32 S3 TM1637 display, letting you set each of the four positions to an independent number, character, or raw segment pattern. This capability is the foundation for scrolling text, animated sequences, and custom glyphs.
Detailed Instructions
- New to ESP32 S3? Complete our Getting Started with ESP32 S3 guide first.
- Upload the individual digit control sketch to your board
- Observe different digit combinations appearing at each position
- Try setSegments() for complete control over individual segments
- Pro Tip: Digit positions run 0–3 from left to right — use loops to create smooth scrolling animations
Serial Monitor Output
Individual Digit Control Methods
| Method | Action | Syntax |
|---|---|---|
| setNumber(int, int) | Set digit 0-9 at position 0-3 | display.setNumber(0, 1) |
| setChar(int, char) | Set character at position 0-3 | display.setChar(0, 'H') |
| setColon(bool) | Control colon on/off | display.setColon(true) |
| setSegments(int, uint8_t) | Set raw segments at position 0-3 | display.setSegments(0, 0x76) |
Troubleshooting TM1637 Display Issues
Common problems when using the TM1637 4-digit display with ESP32 S3 and their solutions.
| Issue | Possible Cause | Resolution |
|---|---|---|
| Display is blank | Wrong wiring or pin numbers | Verify CLK/DIO connections match code and VCC goes to 3.3V |
| Wrong characters | CLK and DIO swapped | Switch the two signal wires |
| Display too dim | Low brightness setting | Call setBrightness(7) for maximum |
| Library not found | Not installed | Install DIYables_4Digit7Segment_TM1637 from Library Manager |
| Upload fails | Board in wrong mode | Hold the BOOT button while pressing RESET, then retry upload |
| Flickering display | Loose connections | Check all wire connections and reseat jumper wires |
| Random characters | Electrical noise | Add 100nF capacitor between VCC and GND near module |
Real-World Applications
The ESP32 S3 combined with the TM1637 display is a versatile pairing that suits a wide range of practical embedded projects.
- Kitchen timer: Build a digital countdown timer with audible alert for cooking or workouts
- Temperature monitor: Display current room temperature from a sensor in real time
- Lap timer: Create a precision lap timer for races or gaming sessions
- Visitor counter: Design a people counter for a home entrance or office doorway
- Power monitor: Show voltage or current readings from a power monitoring circuit
- Score keeper: Build a scoreboard for games and competitions with button controls
- NTP clock: Make a real-time clock that synchronizes with NTP servers over the ESP32 S3's built-in Wi-Fi
Video Tutorial
Watch the step-by-step video walkthrough for this ESP32 S3 project below.
...VIDEO ...VIDEO
Challenge Yourself
These project challenges are designed to push your ESP32 S3 TM1637 skills beyond the basics and into genuinely useful standalone devices.
- Beginner: Add a button to cycle through display modes — time, temperature, and a counter
- Beginner: Create a stopwatch with start and stop button control
- Intermediate: Build a countdown timer that triggers a buzzer when reaching zero
- Intermediate: Display Wi-Fi signal strength as a numeric dBm value using the ESP32 S3's wireless stack
- Advanced: Create a scrolling text marquee that shows messages longer than four characters
- Advanced: Build a thermometer using a DHT22 sensor with the ESP32 S3 and TM1637 display
- Advanced: Make a real-time clock that syncs automatically with NTP servers over Wi-Fi
Platform Compatibility
The DIYables_4Digit7Segment_TM1637 library works across all Arduino-compatible platforms including ESP32, ESP8266, Arduino Uno, Nano, Mega, and more (architectures=*).