
ESP32 S3 - Soil Moisture Sensor
Learning to read soil moisture with your ESP32 S3 opens the door to smart gardening projects, automated irrigation systems, and environmental monitoring. This tutorial covers everything from wiring the sensor and reading raw analog values to calibrating thresholds and detecting wet or dry soil conditions.
What you'll build:
- A circuit connecting a capacitive soil moisture sensor to the ESP32 S3
- A sketch that reads and displays raw analog moisture values on the Serial Monitor
- A calibrated version that prints "WET" or "DRY" status based on your threshold
- A foundation for automated plant watering and smart garden applications
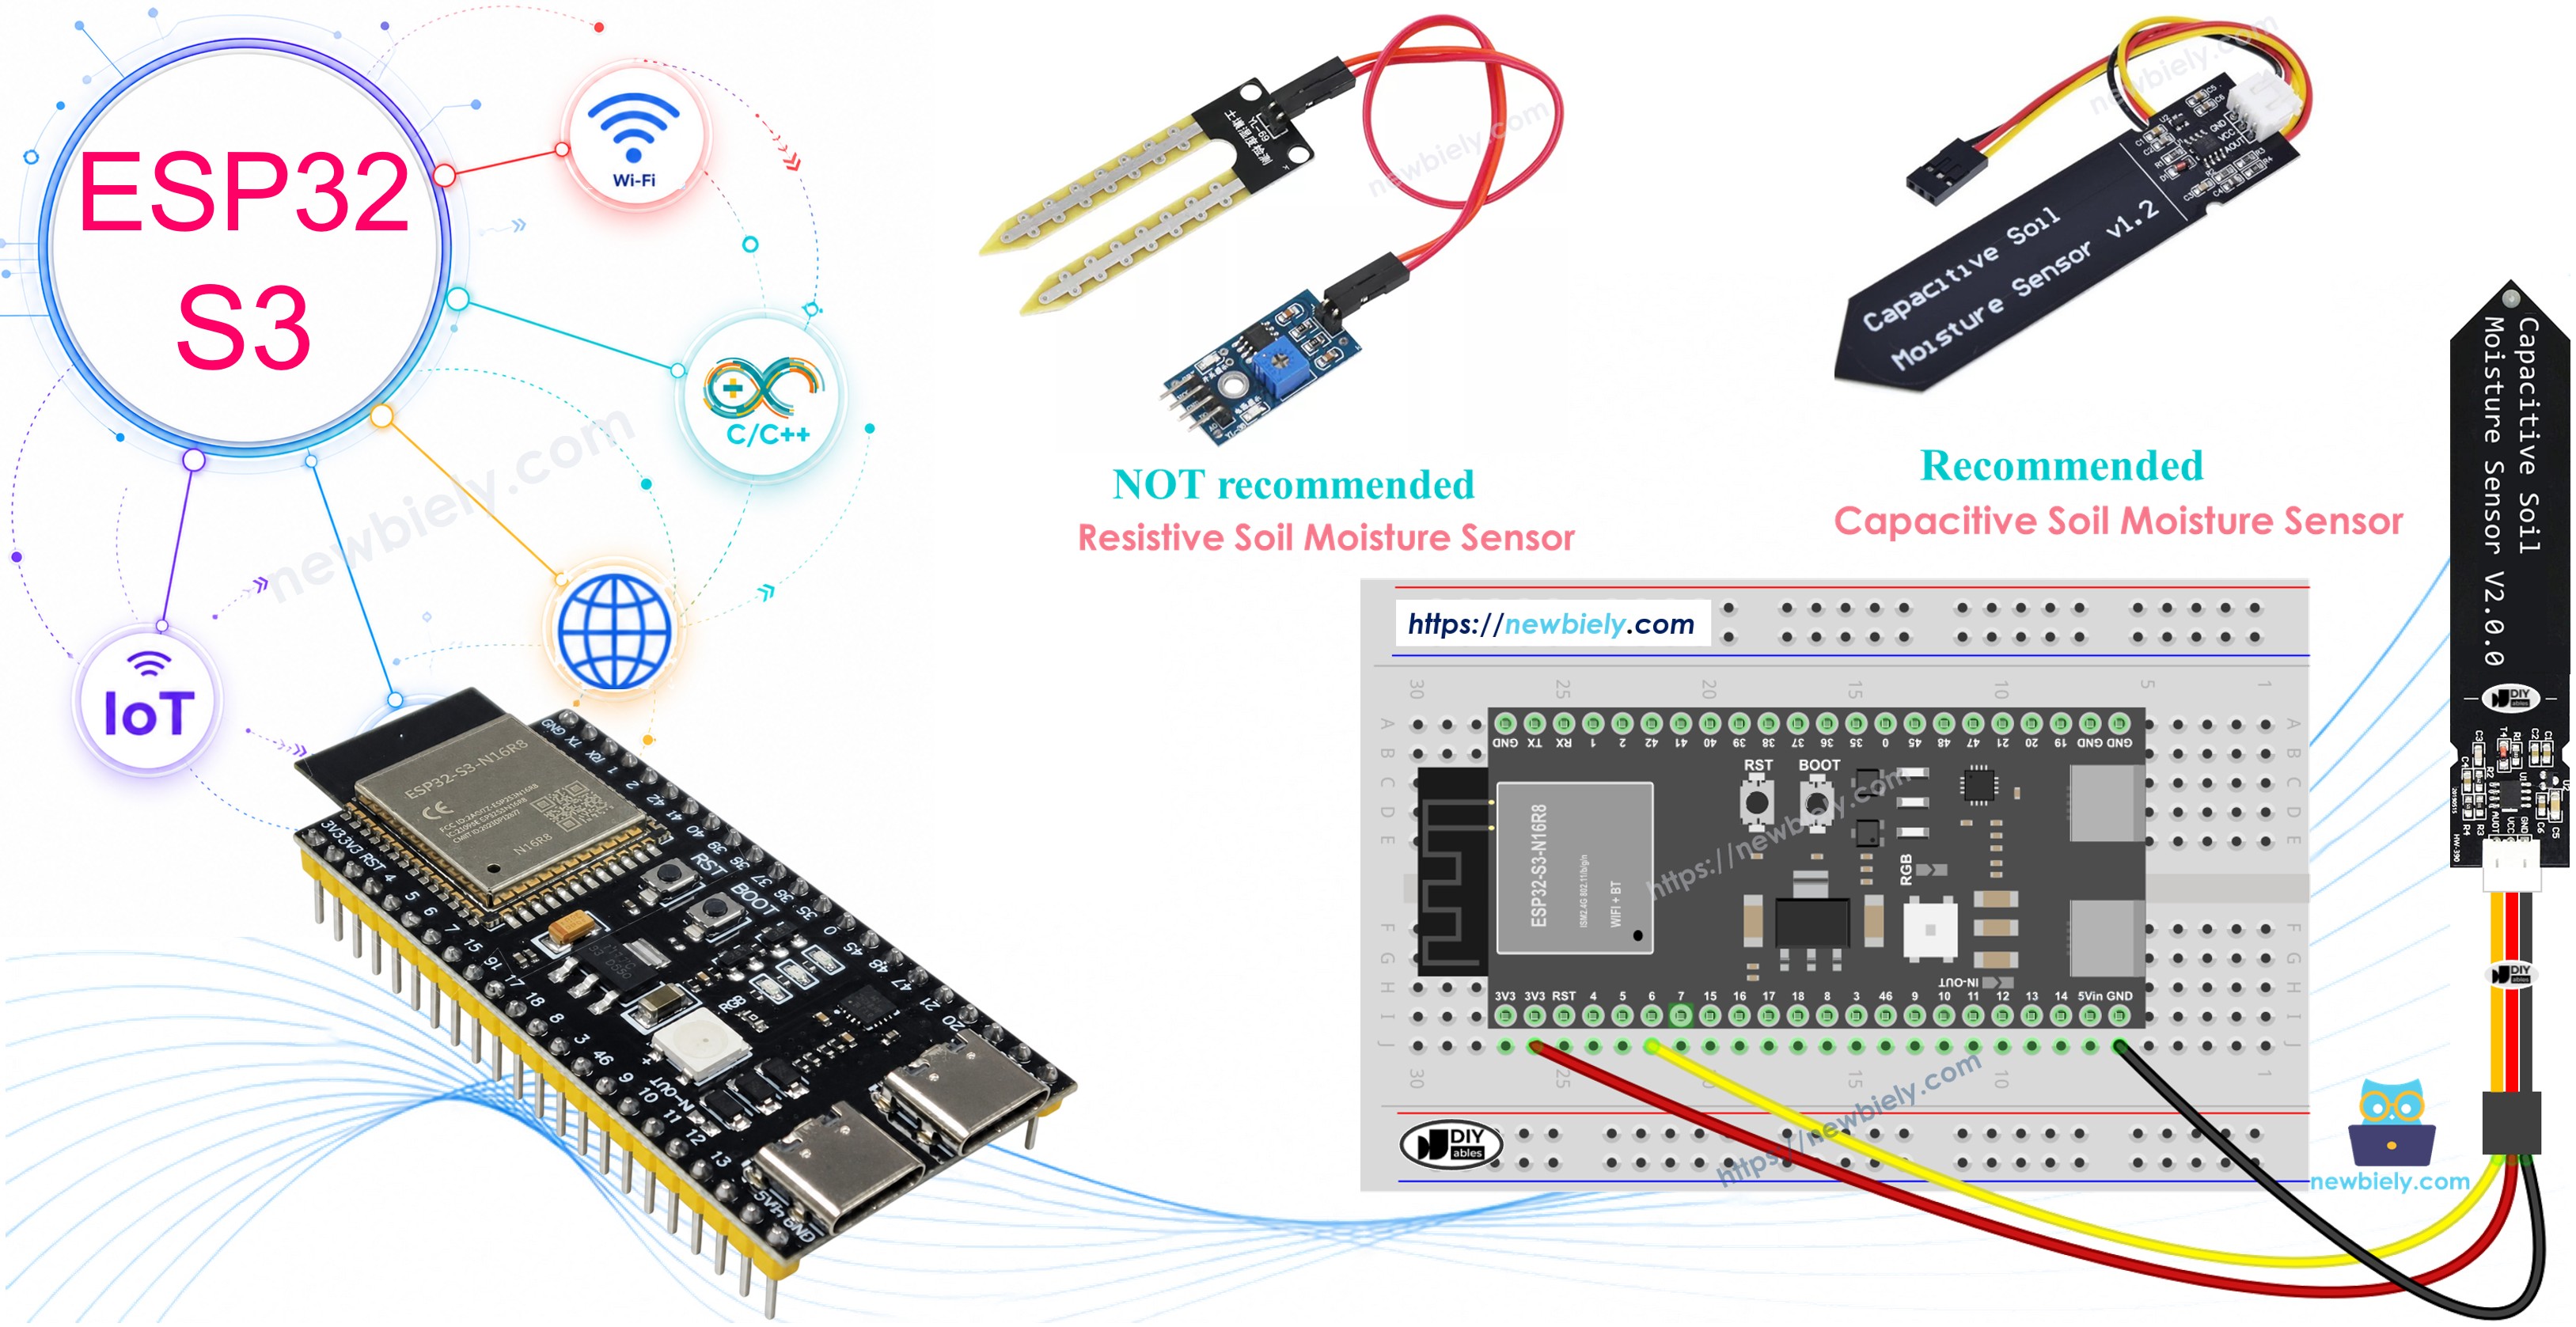
Hardware Preparation
Or you can buy the following kits:
| 1 | × | DIYables ESP32 S3 Starter Kit (ESP32 S3 included) | |
| 1 | × | DIYables Sensor Kit (18 sensors/displays) |
Additionally, some of these links are for products from our own brand, DIYables .
Buy Note: Many soil moisture sensors available in the market are unreliable, regardless of their version. We strongly recommend buying the sensor with TLC555I Chip from the DIYables brand using the link provided above. We tested it, and it worked reliably.
Overview of Soil Moisture Sensor
Soil moisture sensors measure the water content in soil by outputting an analog voltage signal that your ESP32 S3 reads through its ADC (Analog-to-Digital Converter). There are two main types available, and understanding their differences will help you choose the right one for your project.
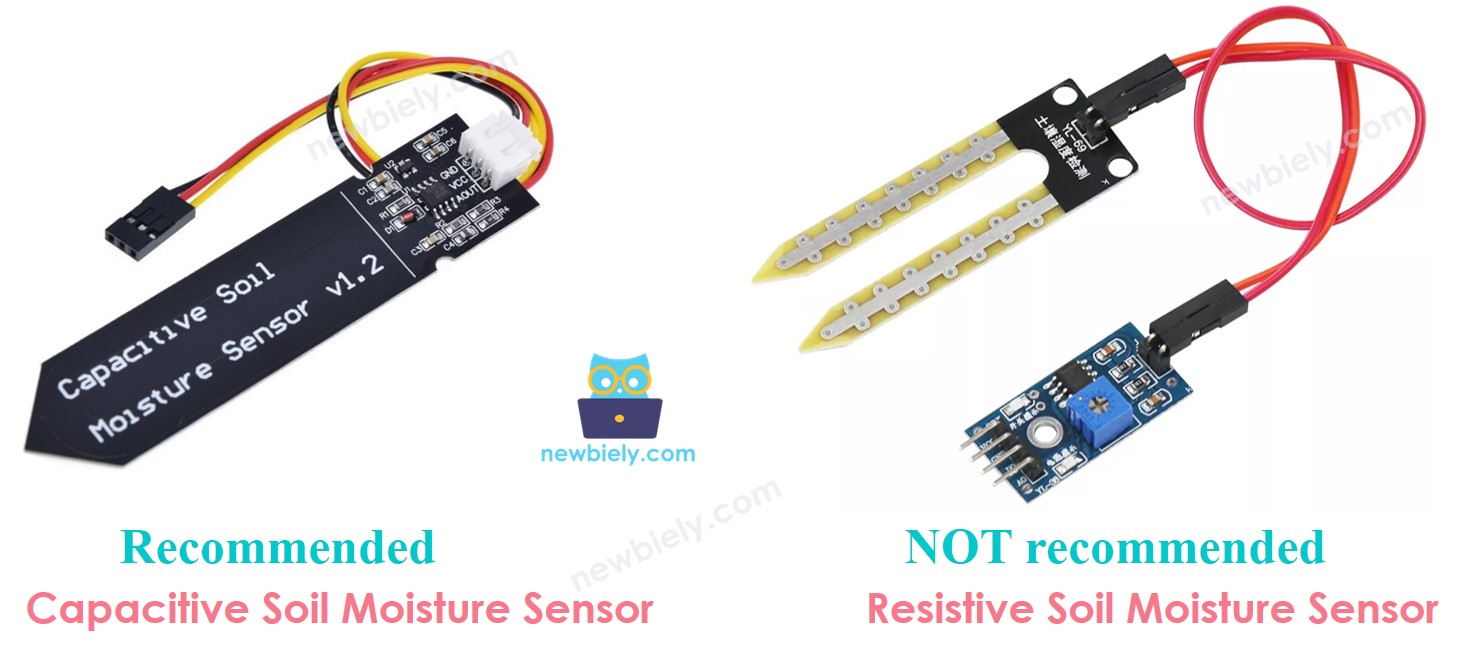
The resistive moisture sensor passes electrical current between two exposed metal probes to measure soil resistance. While inexpensive and simple, this design is prone to electrochemical corrosion over time, which degrades accuracy and requires frequent sensor replacement. The capacitive moisture sensor, by contrast, detects moisture through capacitance changes without exposing electrodes directly to soil. This eliminates corrosion, extends the sensor's lifespan significantly, and produces more consistent long-term readings — making it the preferred choice for permanent or semi-permanent installations.
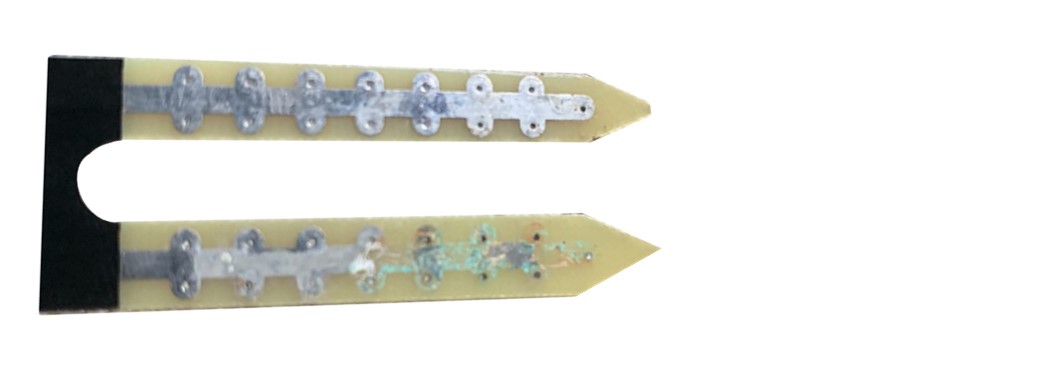
The rest of this ESP32 S3 soil moisture sensor tutorial focuses on the capacitive type for its superior reliability.
Key Specifications
The capacitive soil moisture sensor operates on 3.3V–5V power, making it directly compatible with the ESP32 S3's 3.3V rail. Its analog output voltage is inversely proportional to soil moisture: higher water content produces a lower output voltage, while drier soil produces a higher voltage. The sensor has no exposed electrodes in contact with soil, which prevents the corrosion problems found in resistive designs.
Capacitive Soil Moisture Sensor Pinout
The capacitive soil moisture sensor exposes three pins for connecting to your ESP32 S3.
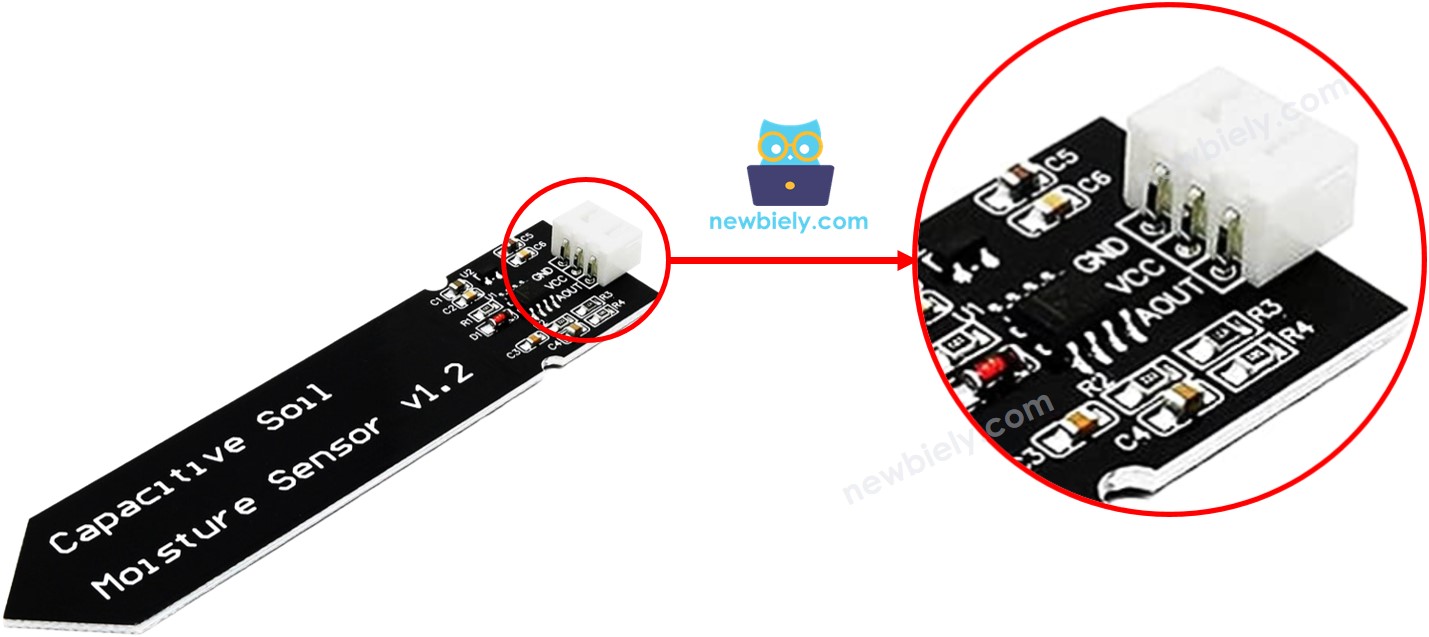
- GND: Ground connection — connect to GND (0V)
- VCC: Power supply — connect to 3.3V
- AOUT: Analog output pin — outputs a voltage inversely proportional to moisture level (higher moisture = lower voltage)
How the Capacitive Moisture Sensor Works
The ESP32 S3 reads the voltage on the AOUT pin through its built-in ADC. Because the relationship is inverse, you will observe lower ADC values when soil is wet and higher values when soil is dry. The sensor never touches or corrodes because it measures the dielectric properties of the surrounding soil through capacitance rather than direct electrical contact.
Wiring Diagram
Connect your capacitive soil moisture sensor to the ESP32 S3 using the pin assignments in the table below. The sensor runs comfortably on 3.3V, so no level shifting or additional components are required.
Safety Notes
Keep the circuit board (the top portion of the sensor with the electronics) above the soil or water line at all times. Only the probe section should be inserted into soil. If testing in liquid, use salt water rather than pure water — pure water has very low conductivity and will not affect the sensor readings. Operating the sensor at 3.3V on the ESP32 S3 is safe and avoids any voltage compatibility issues.
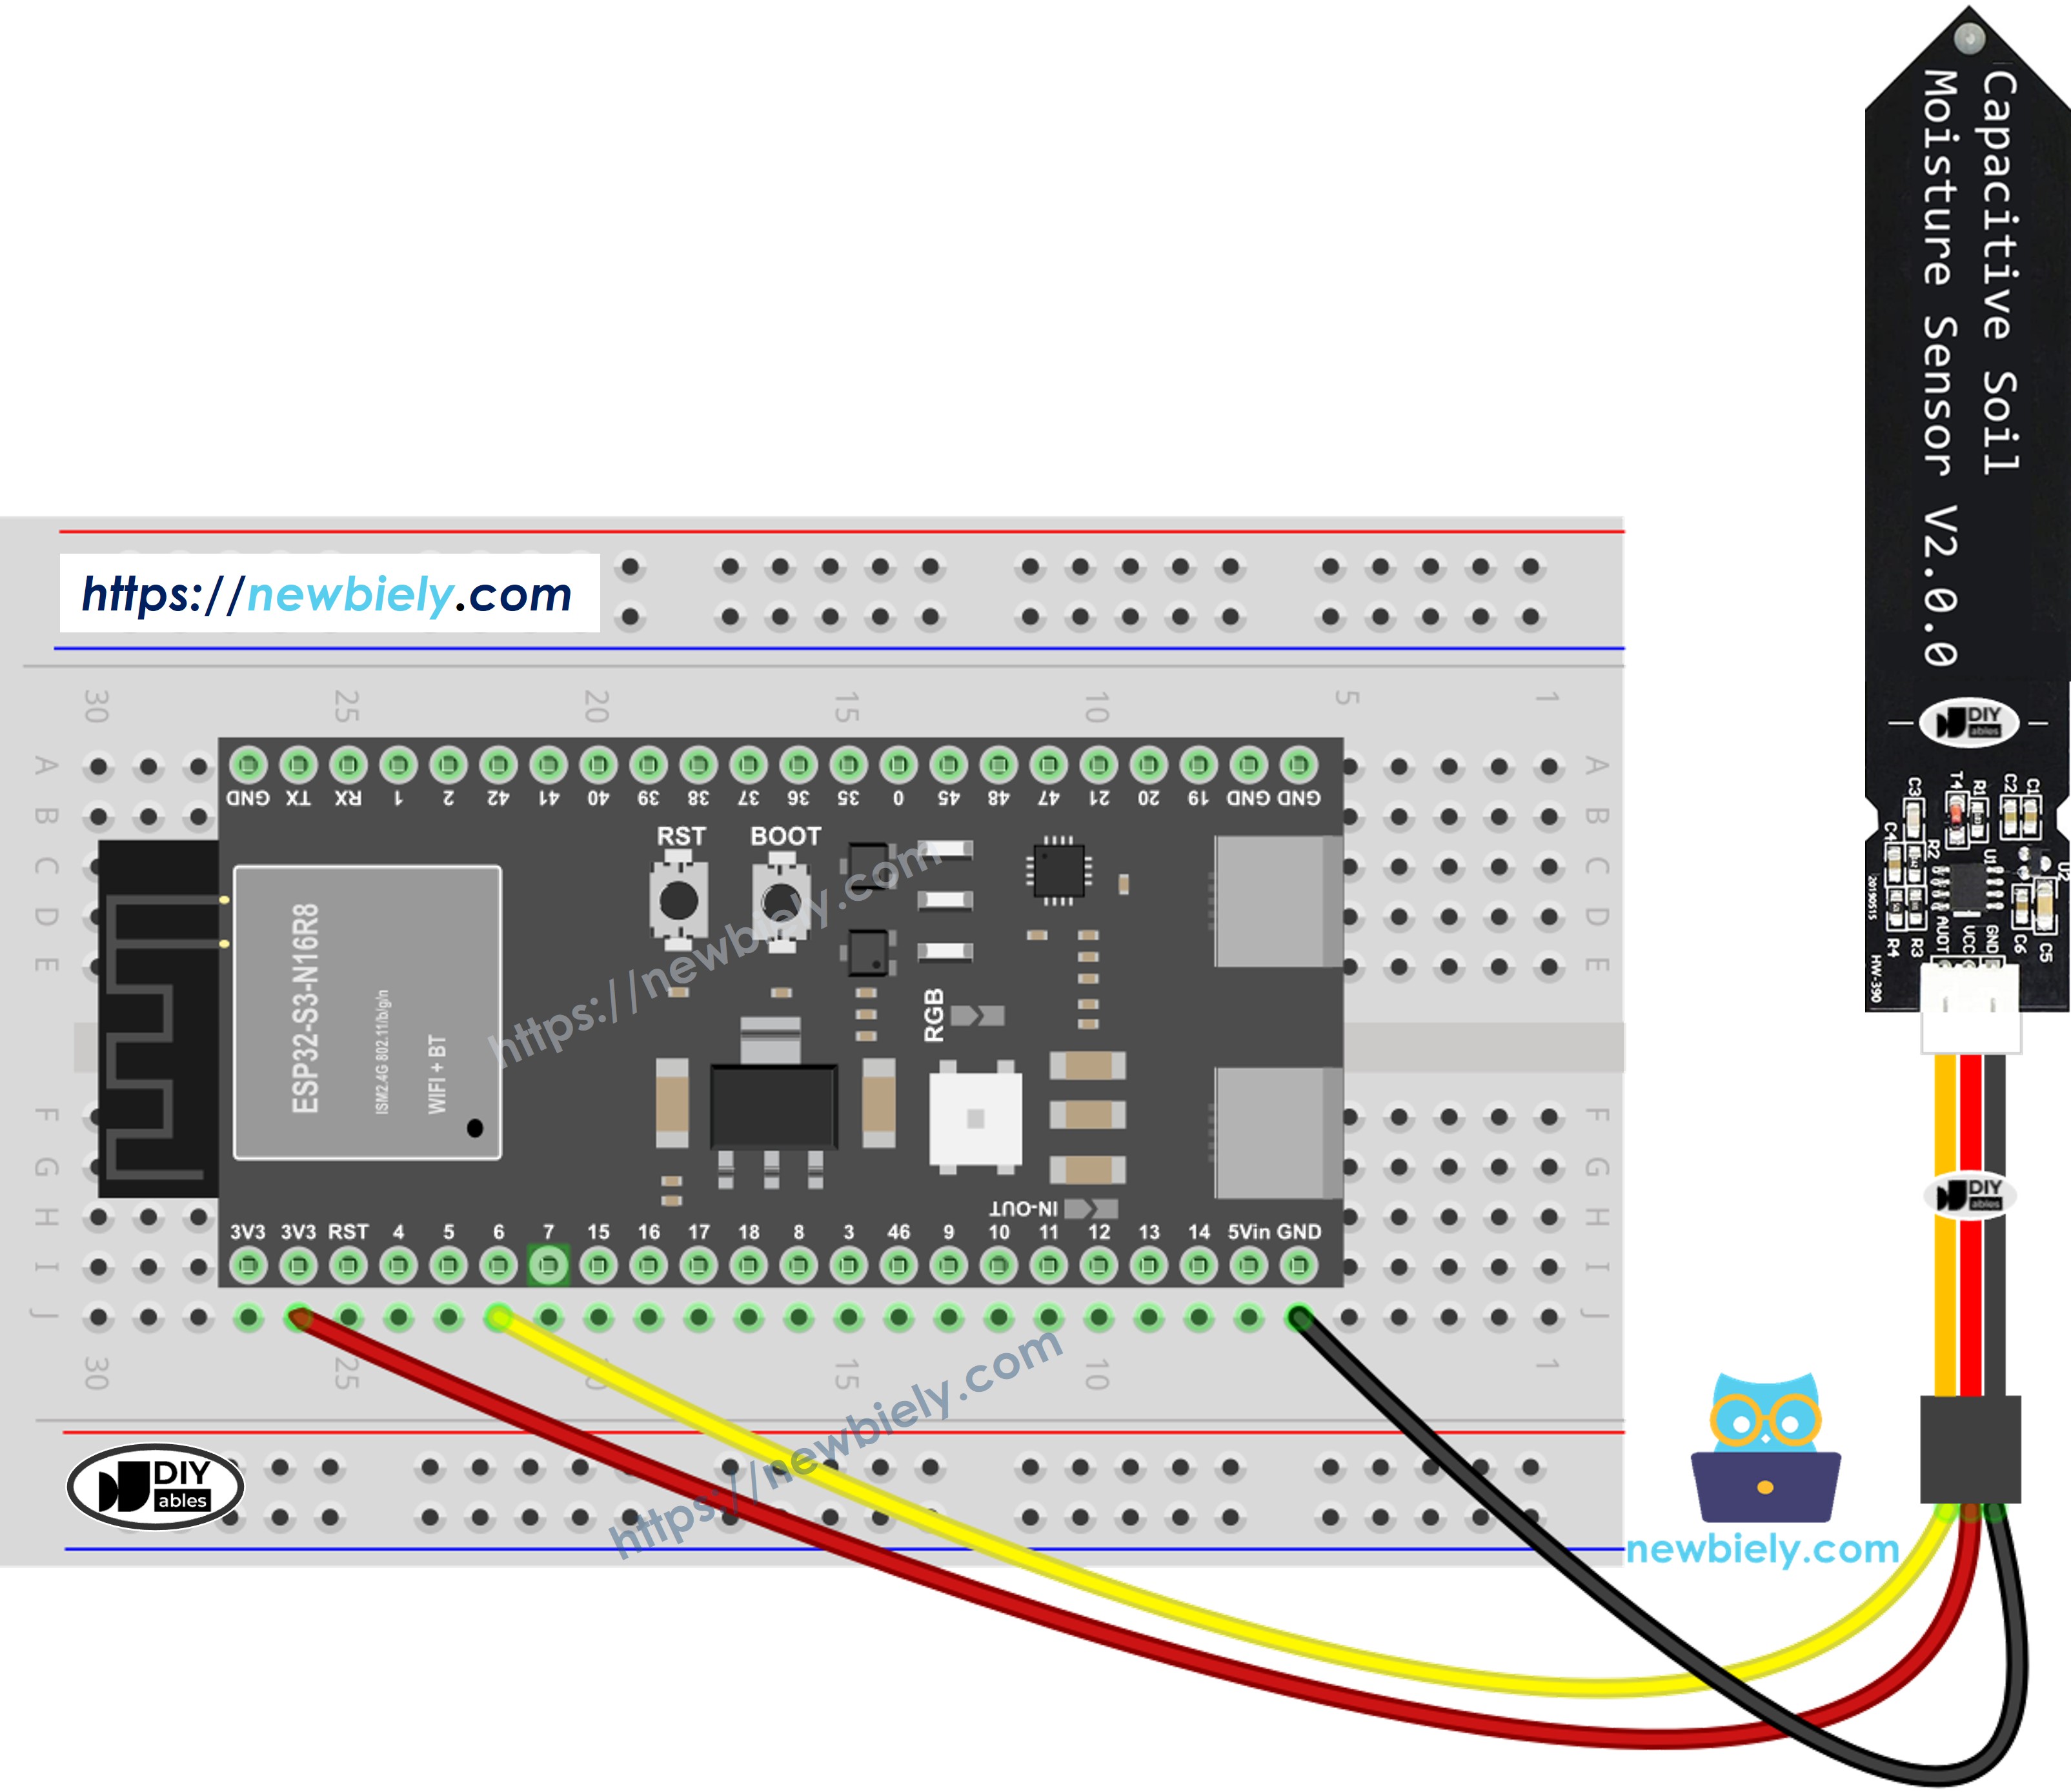
This image is created using Fritzing. Click to enlarge image
| Moisture Sensor Pin | ESP32 S3 Pin |
|---|---|
| GND | GND |
| VCC | 3.3V |
| AOUT | GPIO6 (ADC1_CH5) |
ESP32 S3 Code - Reading Moisture Values
The following sketch configures GPIO6 as an analog input, reads the moisture sensor value every 500 milliseconds, and prints the result to the Serial Monitor. Running this code first is the essential step for calibrating your sensor before moving on to wet/dry detection.
Detailed Instructions
- New to ESP32 S3? Complete our Getting Started with ESP32 S3 guide first.
- Wire the capacitive soil moisture sensor to your ESP32 S3 as shown in the diagram above.
- Connect the ESP32 S3 to your computer via USB Type-C cable.
- Open Arduino IDE and select the ESP32 S3 board and correct COM port.
- Copy the code above and paste it into Arduino IDE.
- Click the Upload button to program your ESP32 S3.
- Place the sensor probe in soil and open the Serial Monitor at 115200 baud.
- Observe how the values change as you slowly add water to the soil.
- Record your dry and wet readings — you will need them for calibration.
- Pro Tip: Use a consistent soil type and sensor insertion depth during calibration to get threshold values that transfer reliably across your project.
Serial Monitor Output
※ NOTE THAT:
- Do not use pure water for testing because it doesn't conduct electricity, so it won't impact sensor readings.
- Sensor readings never drop to zero. It's normal for values to be between 3100 and 2600, although this may change due to factors such as the depth of sensor placement, soil or water composition, and power supply voltage.
- Avoid burying the circuit part (located on top of the sensor) in soil or water, as this could potentially harm the sensor.
Calibration for Capacitive Soil Moisture Sensor
Because the capacitive soil moisture sensor outputs relative values that shift depending on soil type, water salinity, and insertion depth, calibration is a necessary step before your ESP32 S3 can make accurate wet or dry decisions. A threshold that works perfectly in loamy garden soil may be completely wrong for sandy or clay-heavy soil.
The calibration process is straightforward: run the first sketch on your ESP32 S3, insert the sensor into the actual soil you plan to monitor, and record readings at both extremes.
- Start dry: Note the Serial Monitor value for completely dry soil
- Add water gradually: Irrigate slowly while watching the values decrease
- Find the transition point: Identify the reading when the soil feels damp to the touch
- Record the threshold: Write down the value at that dry-to-wet transition
- Test fully saturated soil: Note the lowest value you observe when soil is fully wet
Typical calibration results for common garden soil fall in the range of 2200–2500 for dry conditions and 1200–1500 for wet conditions. Your threshold should be the midpoint between your recorded dry and wet extremes.
Determine if the Soil is Wet or Dry
After calibration, you can update the threshold constant in the following sketch and upload it to your ESP32 S3 to get clear "WET" or "DRY" status messages alongside the raw sensor reading.
Quick Steps for Wet/Dry Detection
- New to ESP32 S3? Complete our Getting Started with ESP32 S3 guide first.
- Replace the THRESHOLD value in the code with the number you recorded during calibration.
- Upload the updated code to your ESP32 S3.
- Insert the sensor probe into your soil at the intended monitoring depth.
- Open the Serial Monitor at 115200 baud.
- Add water to verify that the threshold correctly triggers the WET and DRY messages.
- Fine-tune the THRESHOLD value if needed based on your results.
- Pro Tip: Set your threshold slightly higher than the actual transition point so that the ESP32 S3 triggers a watering action before the soil becomes critically dry.
Serial Monitor Output - Wet/Dry Status
※ NOTE THAT:
This tutorial uses the analogRead() function to read values from an ADC (Analog-to-Digital Converter) connected to a sensor or component. The ESP32 S3's ADC is suitable for projects that do not require high accuracy. However, for projects needing precise measurements, keep the following in mind:
- The ESP32 S3's ADC is not perfectly accurate and might require calibration for correct results. Each ESP32 S3 board can vary slightly, so calibration is necessary for each individual board.
- Calibration can be challenging, especially for beginners, and might not always yield the exact results you want.
For projects requiring high precision, consider using an external ADC (e.g ADS1115) with the ESP32 S3 or using another Arduino, such as the Arduino Uno R4 WiFi, which has a more reliable ADC. If you still want to calibrate the ESP32 S3's ADC, refer to the ESP32 ADC Calibration Driver.
Application/Project Ideas
The ESP32 S3 paired with a capacitive soil moisture sensor is a versatile foundation for a wide range of smart gardening and environmental monitoring applications.
- Automatic Plant Watering System: Trigger a relay-controlled water pump when the ESP32 S3 detects soil has become too dry.
- Smart Garden Monitor: Transmit live moisture data to your smartphone via the ESP32 S3's built-in Wi-Fi using MQTT or HTTP notifications.
- Multi-Plant Monitor: Connect multiple sensors to separate ADC pins on the ESP32 S3 to track different plants or garden zones simultaneously.
- Data Logger: Record moisture readings over time to an SD card or cloud service for long-term plant care analysis and seasonal comparisons.
- Greenhouse Automation: Integrate the ESP32 S3 soil moisture readings with temperature and humidity sensors to control irrigation systems based on real-time environmental conditions.
- Plant Health Alert: Use an LED, buzzer, or push notification through the ESP32 S3's Wi-Fi to alert you the moment a plant needs watering.
Video Section
Watch the step-by-step video walkthrough for this ESP32 S3 project below.
...VIDEO P7tG-t4dXZ0
...VIDEO
Challenge Yourself
These exercises will build on your ESP32 S3 soil moisture sensor skills, progressing from simple output enhancements to more sophisticated multi-sensor and power-aware designs.
- Beginner: Add an LED that lights up on the ESP32 S3 whenever the soil moisture sensor reports a DRY condition.
- Beginner: Convert the raw ADC value to a moisture percentage (0–100%) and display it on the Serial Monitor alongside the raw reading.
- Intermediate: Build an automatic watering system using a relay module and a small water pump controlled by the ESP32 S3.
- Intermediate: Send moisture data from the ESP32 S3 to a web dashboard using its Wi-Fi capabilities so you can monitor your plants remotely.
- Advanced: Build a multi-sensor garden system that monitors three or more plants, each with its own threshold and watering control via the ESP32 S3.
- Advanced: Implement deep sleep mode on the ESP32 S3 so the board wakes periodically to check moisture and then returns to sleep, enabling months of battery-powered operation.