
ESP32 S3 - Limit Switch
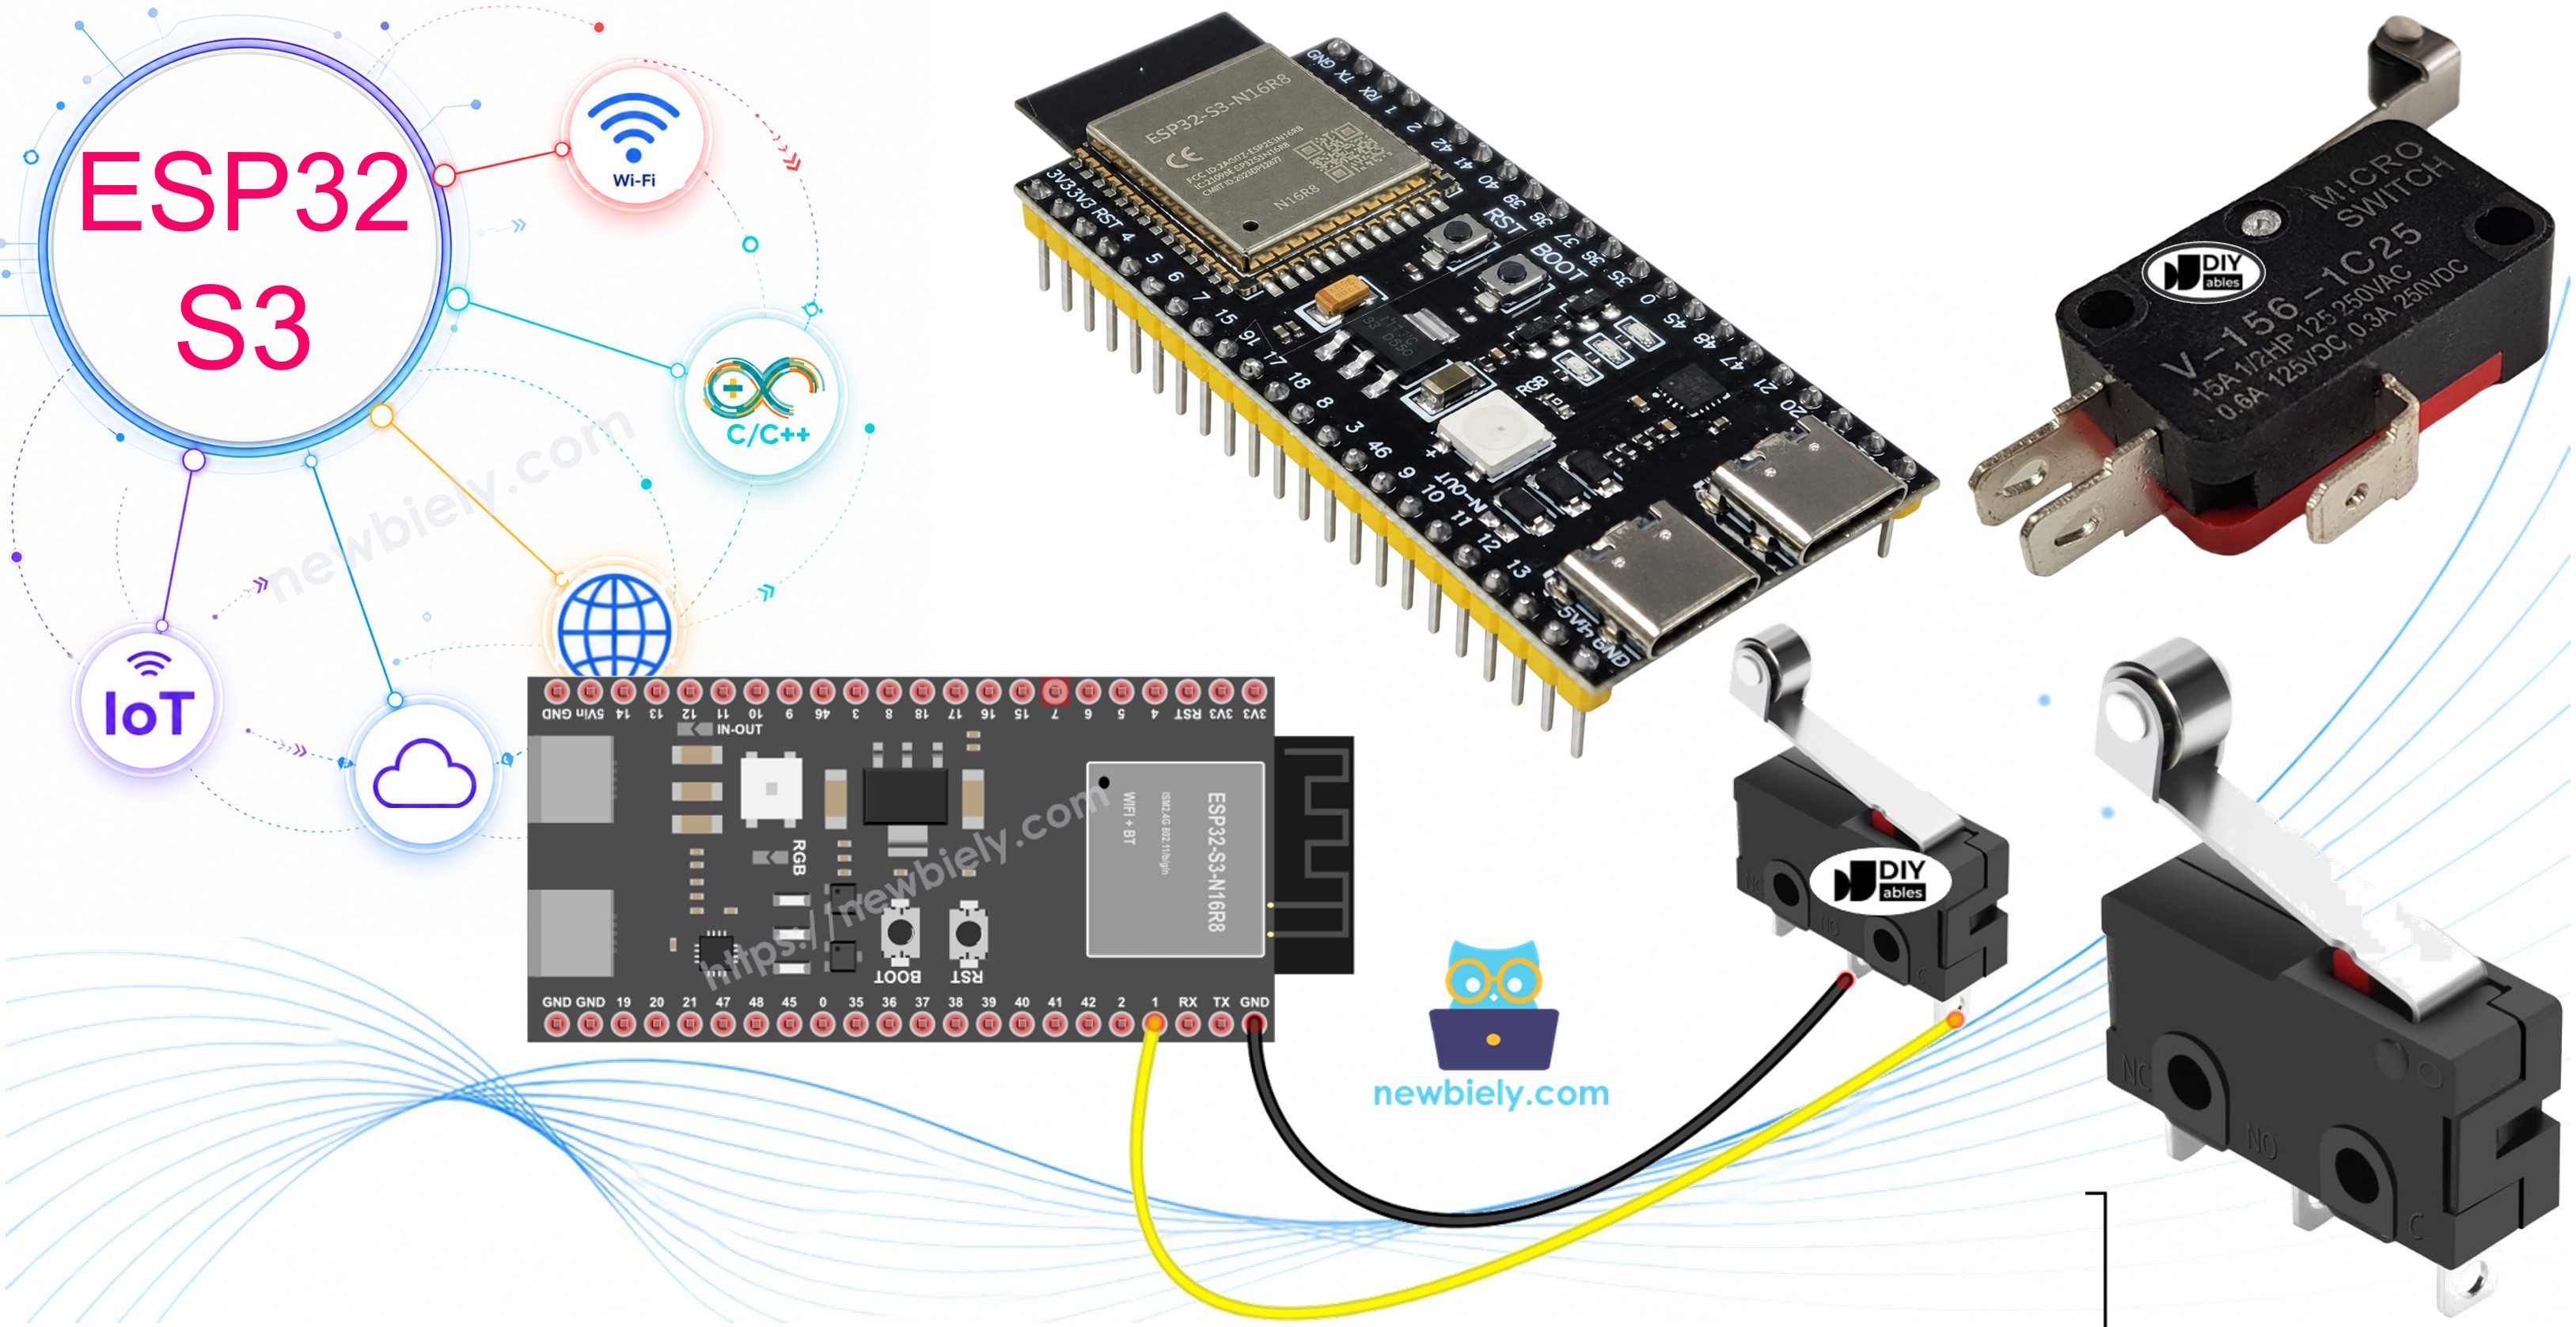
This tutorial instructs you how to use the Limit Switch with ESP32 S3. The ESP32 S3 reads the state of the limit switch and reports whether it is touched or untouched via the Serial Monitor.
It is important to note that this tutorial is specifically about using a Limit Switch, please do not confuse with the following:
What you'll build:
- Connect a Limit Switch to the ESP32 S3 using a breadboard
- Read the switch state (TOUCHED / UNTOUCHED) in real time
- Detect state transitions (UNTOUCHED → TOUCHED and TOUCHED → UNTOUCHED)
- Display live readings in the Arduino IDE Serial Monitor
Hardware Preparation
Or you can buy the following kits:
| 1 | × | DIYables ESP32 S3 Starter Kit (ESP32 S3 included) | |
| 1 | × | DIYables Sensor Kit (18 sensors/displays) |
Additionally, some of these links are for products from our own brand, DIYables .
Overview of Limit Switch
A Limit Switch gets its name from its primary purpose: detecting when a moving object has reached a defined limit or boundary. Unlike a standard pushbutton, a limit switch is typically built for repeated mechanical actuation and is often used in industrial and automation contexts where precise position detection is required.
Key Specifications
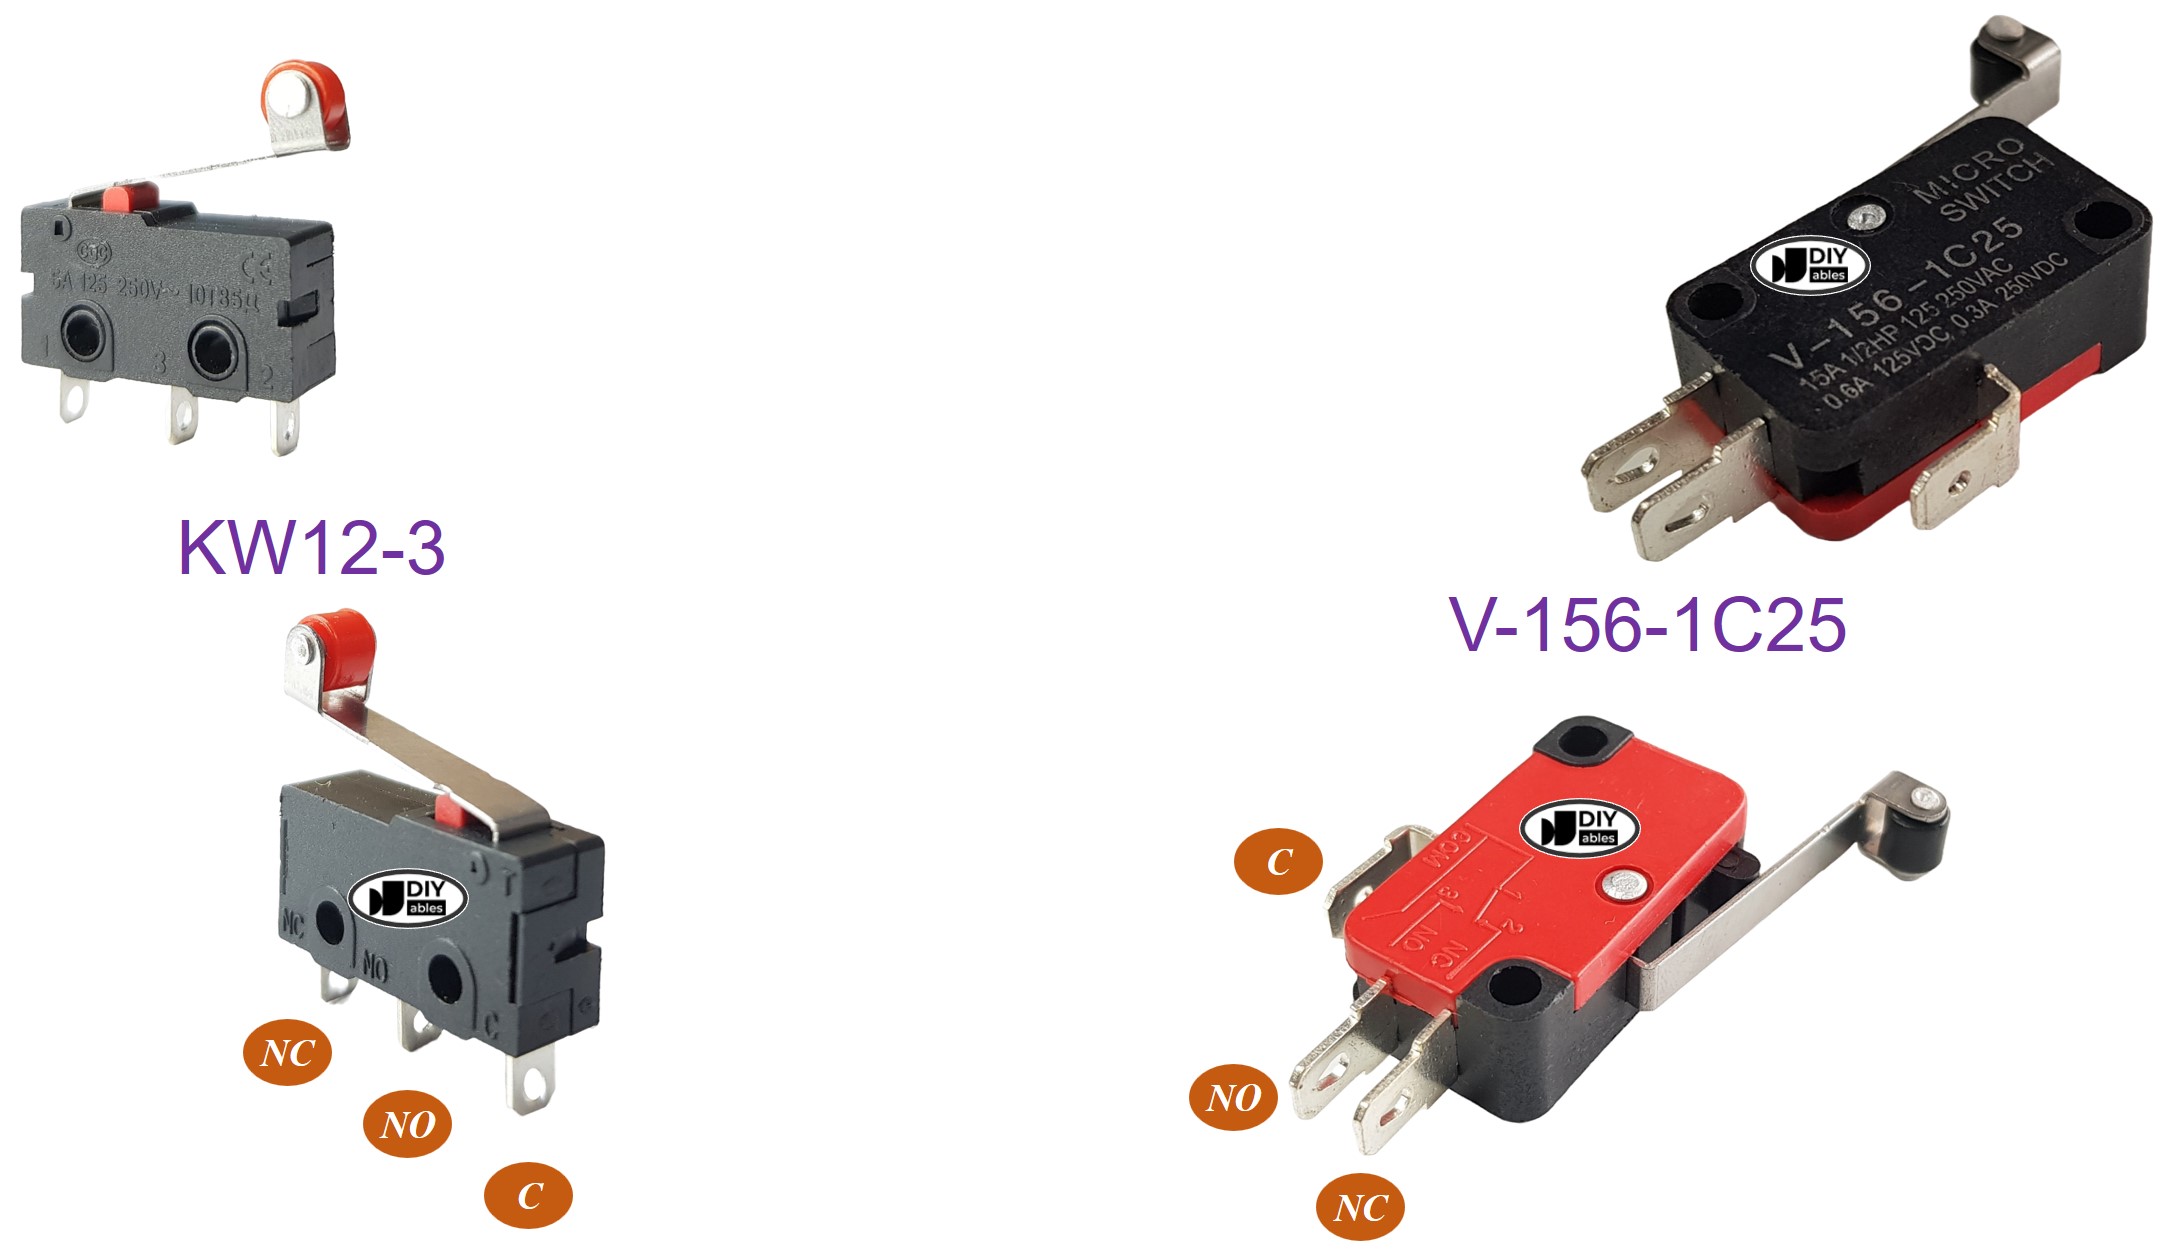
There exist various types of limit switches, but among the most commonly used are the KW12-3 and V-156-1C25. Each of these types features three pins:
- C pin: This is the common pin, it is used in both normally open and normally closed modes.
- NO pin: This is the normally open pin, it is used in the normally open mode.
- NC pin: This is the normally closed pin, it is used in the normally closed mode.
How It Works
A typical Limit Switch application uses only two pins — the C pin and one of the remaining two pins. This results in four different ways to connect a Limit Switch. The table below illustrates the wiring and the resulting input state on the ESP32 S3 for each of the four methods.
| C pin | NO pin | NC pin | ESP32 S3 Input Pin's State | |
|---|---|---|---|---|
| 1 | GND | ESP32 S3 Input Pin (with pull-up) | not connected | HIGH when untouched, LOW when touched |
| 2 | GND | not connected | ESP32 S3 Input Pin (with pull-up) | LOW when untouched, HIGH when touched |
| 3 | VCC | ESP32 S3 Input Pin (with pull-down) | not connected | LOW when untouched, HIGH when touched |
| 4 | VCC | not connected | ESP32 S3 Input Pin (with pull-down) | HIGH when untouched, LOW when touched |
By swapping the GND pin and ESP32 S3 Input Pin for each of the four ways, there are a total of eight different ways to connect an ESP32 S3 to a Limit Switch. Out of the eight ways, this tutorial focuses on the first method as the working example.
Wiring Diagram
Connect the Limit Switch to the ESP32 S3 using either a breadboard or a screw terminal breakout board, following the diagrams below. For a stable and secure connection, it is recommended to use a soldering iron to solder the wires and Limit Switch pins together, and then use heat shrink tubes for added safety.
Safety Notes
Always ensure the limit switch wiring matches the intended pull-up or pull-down configuration before powering the board to avoid unintended readings.
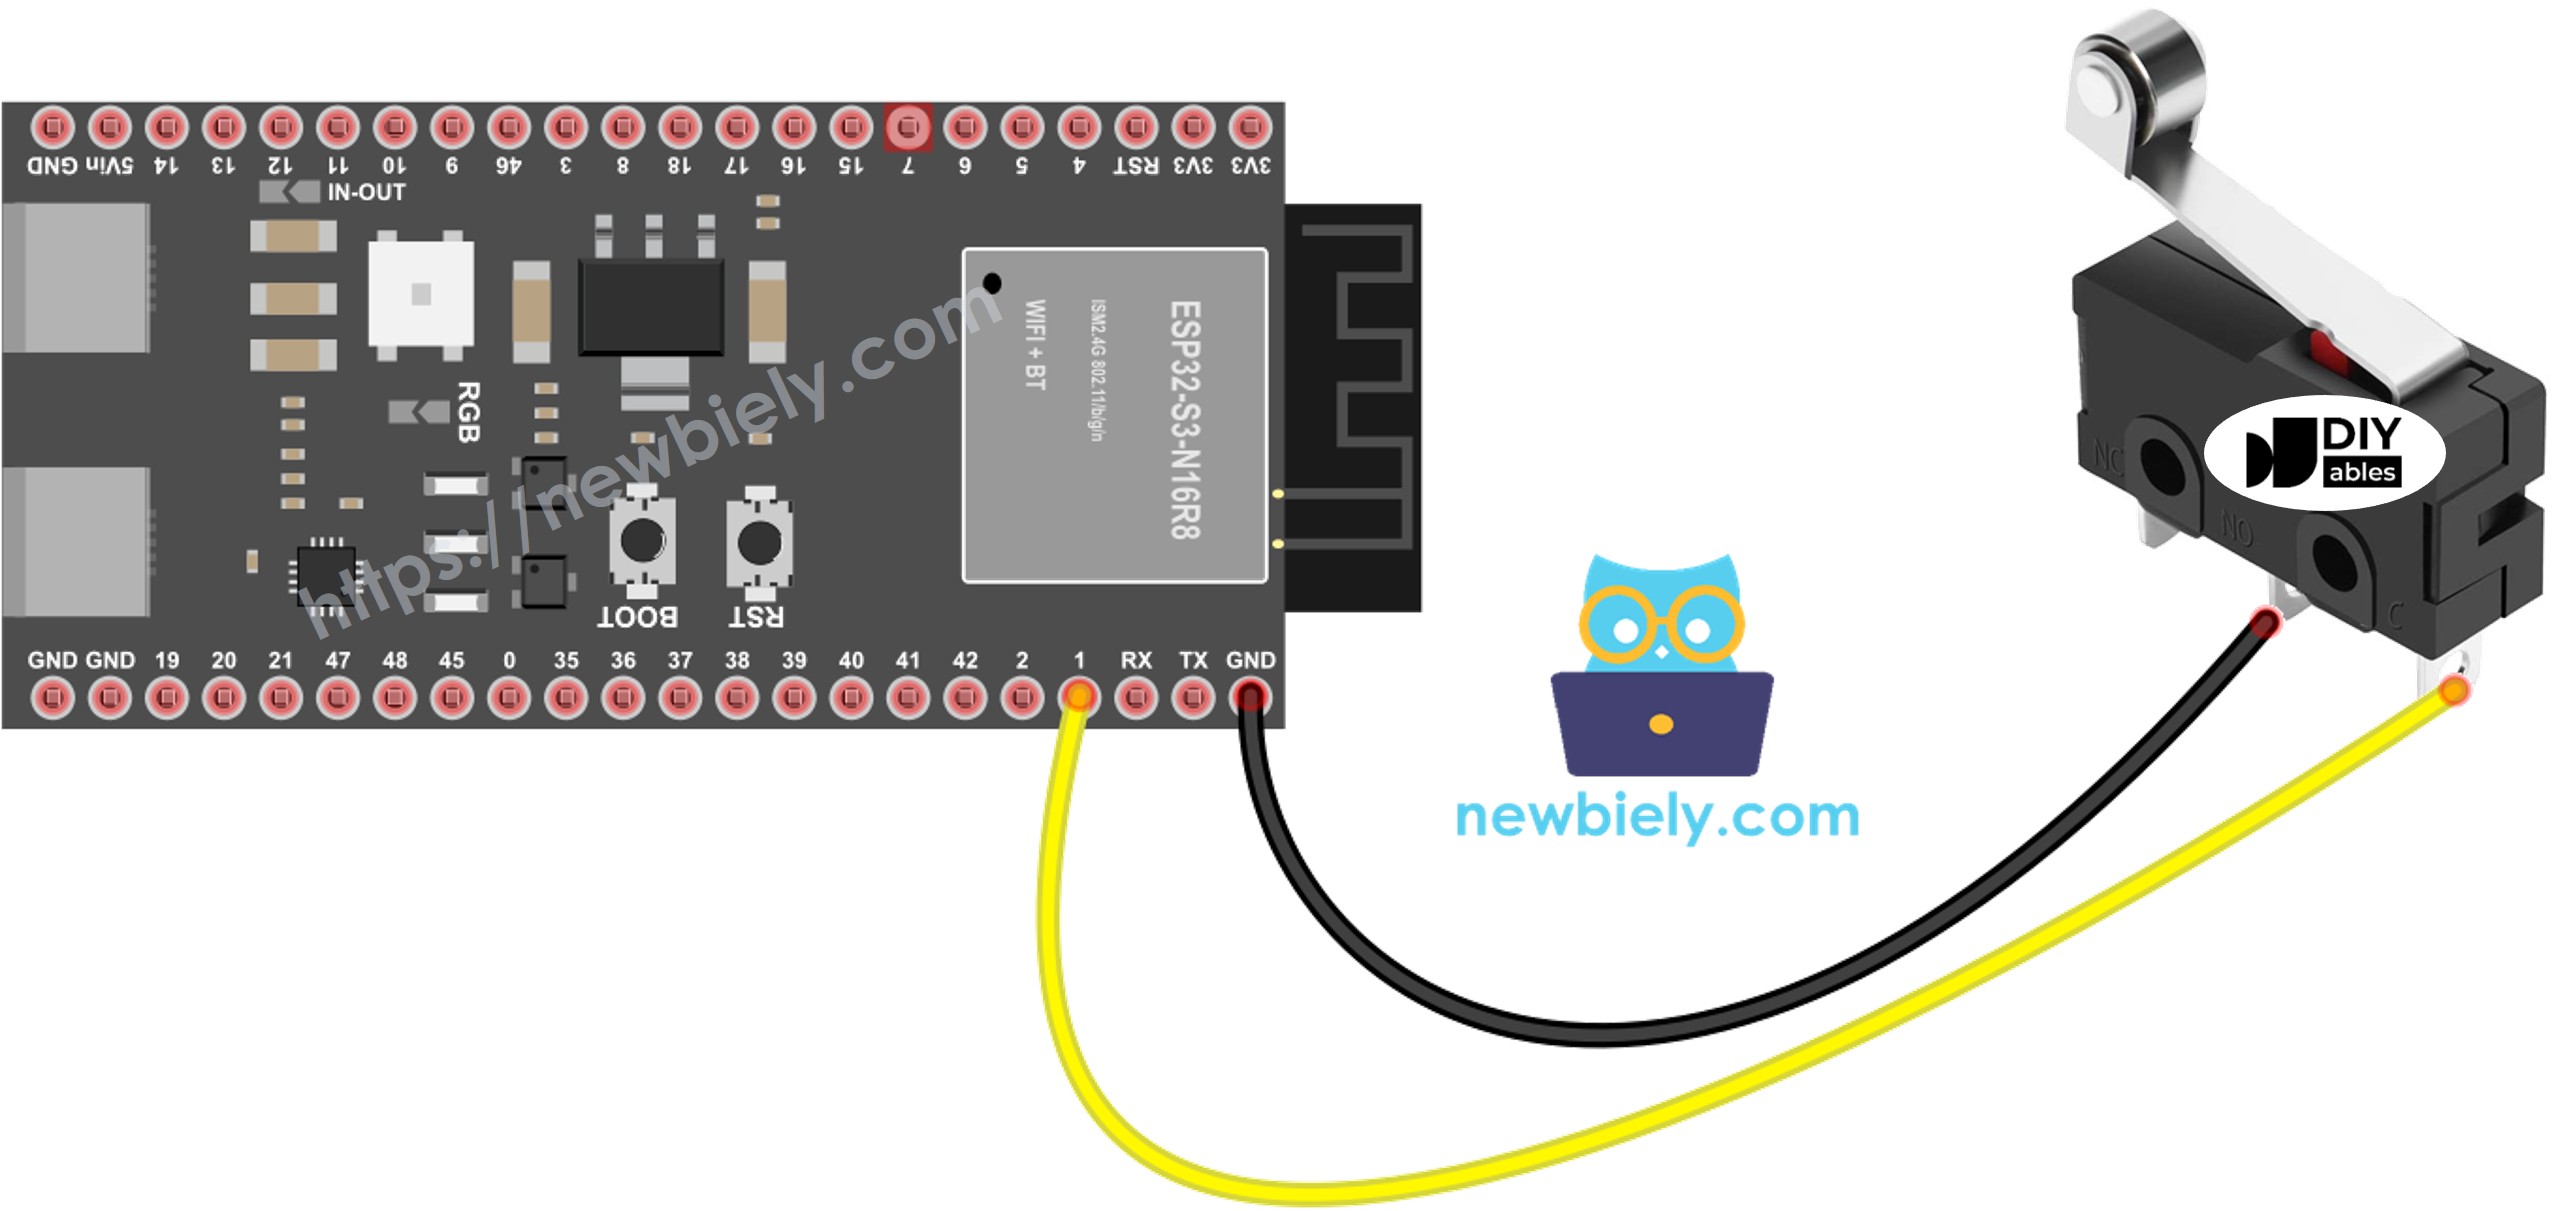
This image is created using Fritzing. Click to enlarge image
ESP32 S3 Code - Limit Switch
Similar to a button, a Limit Switch also requires debouncing (more information can be found at Why needs debounce for the button/limit switch?). The ezButton library offers built-in debouncing functionality and uses internal pull-up resistors, which simplifies the code considerably. The following code reads the limit switch state on every loop iteration and prints any state changes to the Serial Monitor.
※ NOTE THAT:
Two common use cases for a Limit Switch are:
- The first use case: If the switch is TOUCHED, perform a certain action. If the input state is UNTOUCHED, perform the opposite action.
- The second use case: If the switch's state changes from UNTOUCHED to TOUCHED (or TOUCHED to UNTOUCHED), perform a specific action.
Detailed Instructions
- New to ESP32 S3? Complete our Getting Started with ESP32 S3 guide first.
- Follow the wiring diagram provided above to connect your Limit Switch to ESP32 S3.
- Connect your ESP32 S3 to your PC using a USB cable.
- Open the Arduino IDE software.
- Install the ezButton library. Refer to the instructions
- Select the appropriate board and port in the Arduino IDE.
- Compile and upload the code to the ESP32 S3 board by clicking the Upload button in the Arduino IDE.
- Test the Limit Switch by touching and releasing it.
- Observe the output on the Serial Monitor in the Arduino IDE.
- Pro Tip: Try switching between the NO and NC pins to observe how the default state (TOUCHED vs UNTOUCHED) is inverted without changing a single line of code.
Serial Monitor
Applications
Limit switches are used in a wide range of real-world automation and safety scenarios where precise position or end-of-travel detection is needed. Here are some common applications:
- CNC Machine End Stop: Detect when a tool carriage reaches the end of its travel range and halt motion to prevent damage.
- 3D Printer Homing: Automatically home each axis by triggering when the print head reaches its minimum position.
- Conveyor Belt Control: Stop a conveyor belt when a product reaches a specific position on the line.
- Door or Gate Position Sensing: Detect whether a door or gate is fully open or fully closed for access control systems.
- Elevator Floor Detection: Signal the controller when an elevator car arrives at a designated floor level.
- Robotic Arm Safety: Prevent a robotic arm joint from exceeding its safe range of motion by triggering an emergency stop.
Video Tutorial
Watch the step-by-step video walkthrough for this ESP32 S3 project below.
Challenges
Limit switches are simple but powerful components — pushing their usage beyond basic state detection opens up many interesting projects. Here are some challenges to deepen your understanding:
- Beginner: Modify the code to turn on the ESP32 S3's built-in LED whenever the limit switch is in the TOUCHED state.
- Intermediate: Use two limit switches to represent the "home" and "end" positions of a simulated conveyor, and print a message each time the virtual object travels between them.
- Advanced: Implement a debounce counter that tracks how many times the limit switch has been triggered in total and displays a running count on the Serial Monitor, resetting back to zero after 100 presses.