
ESP32 S3 - Button - Long Press Short Press
This tutorial teaches you how to program your ESP32 S3 to detect both button long press and short press events. You will learn everything from basic wiring and debouncing techniques to combining multiple press types on a single button for more capable input handling.
What you'll build:
- A short press detector that measures press duration below a threshold
- A long press detector triggered on release or during the press
- A dual-mode button that distinguishes short and long press on the same pin
- A debounced version using the ezButton library for production-ready reliability
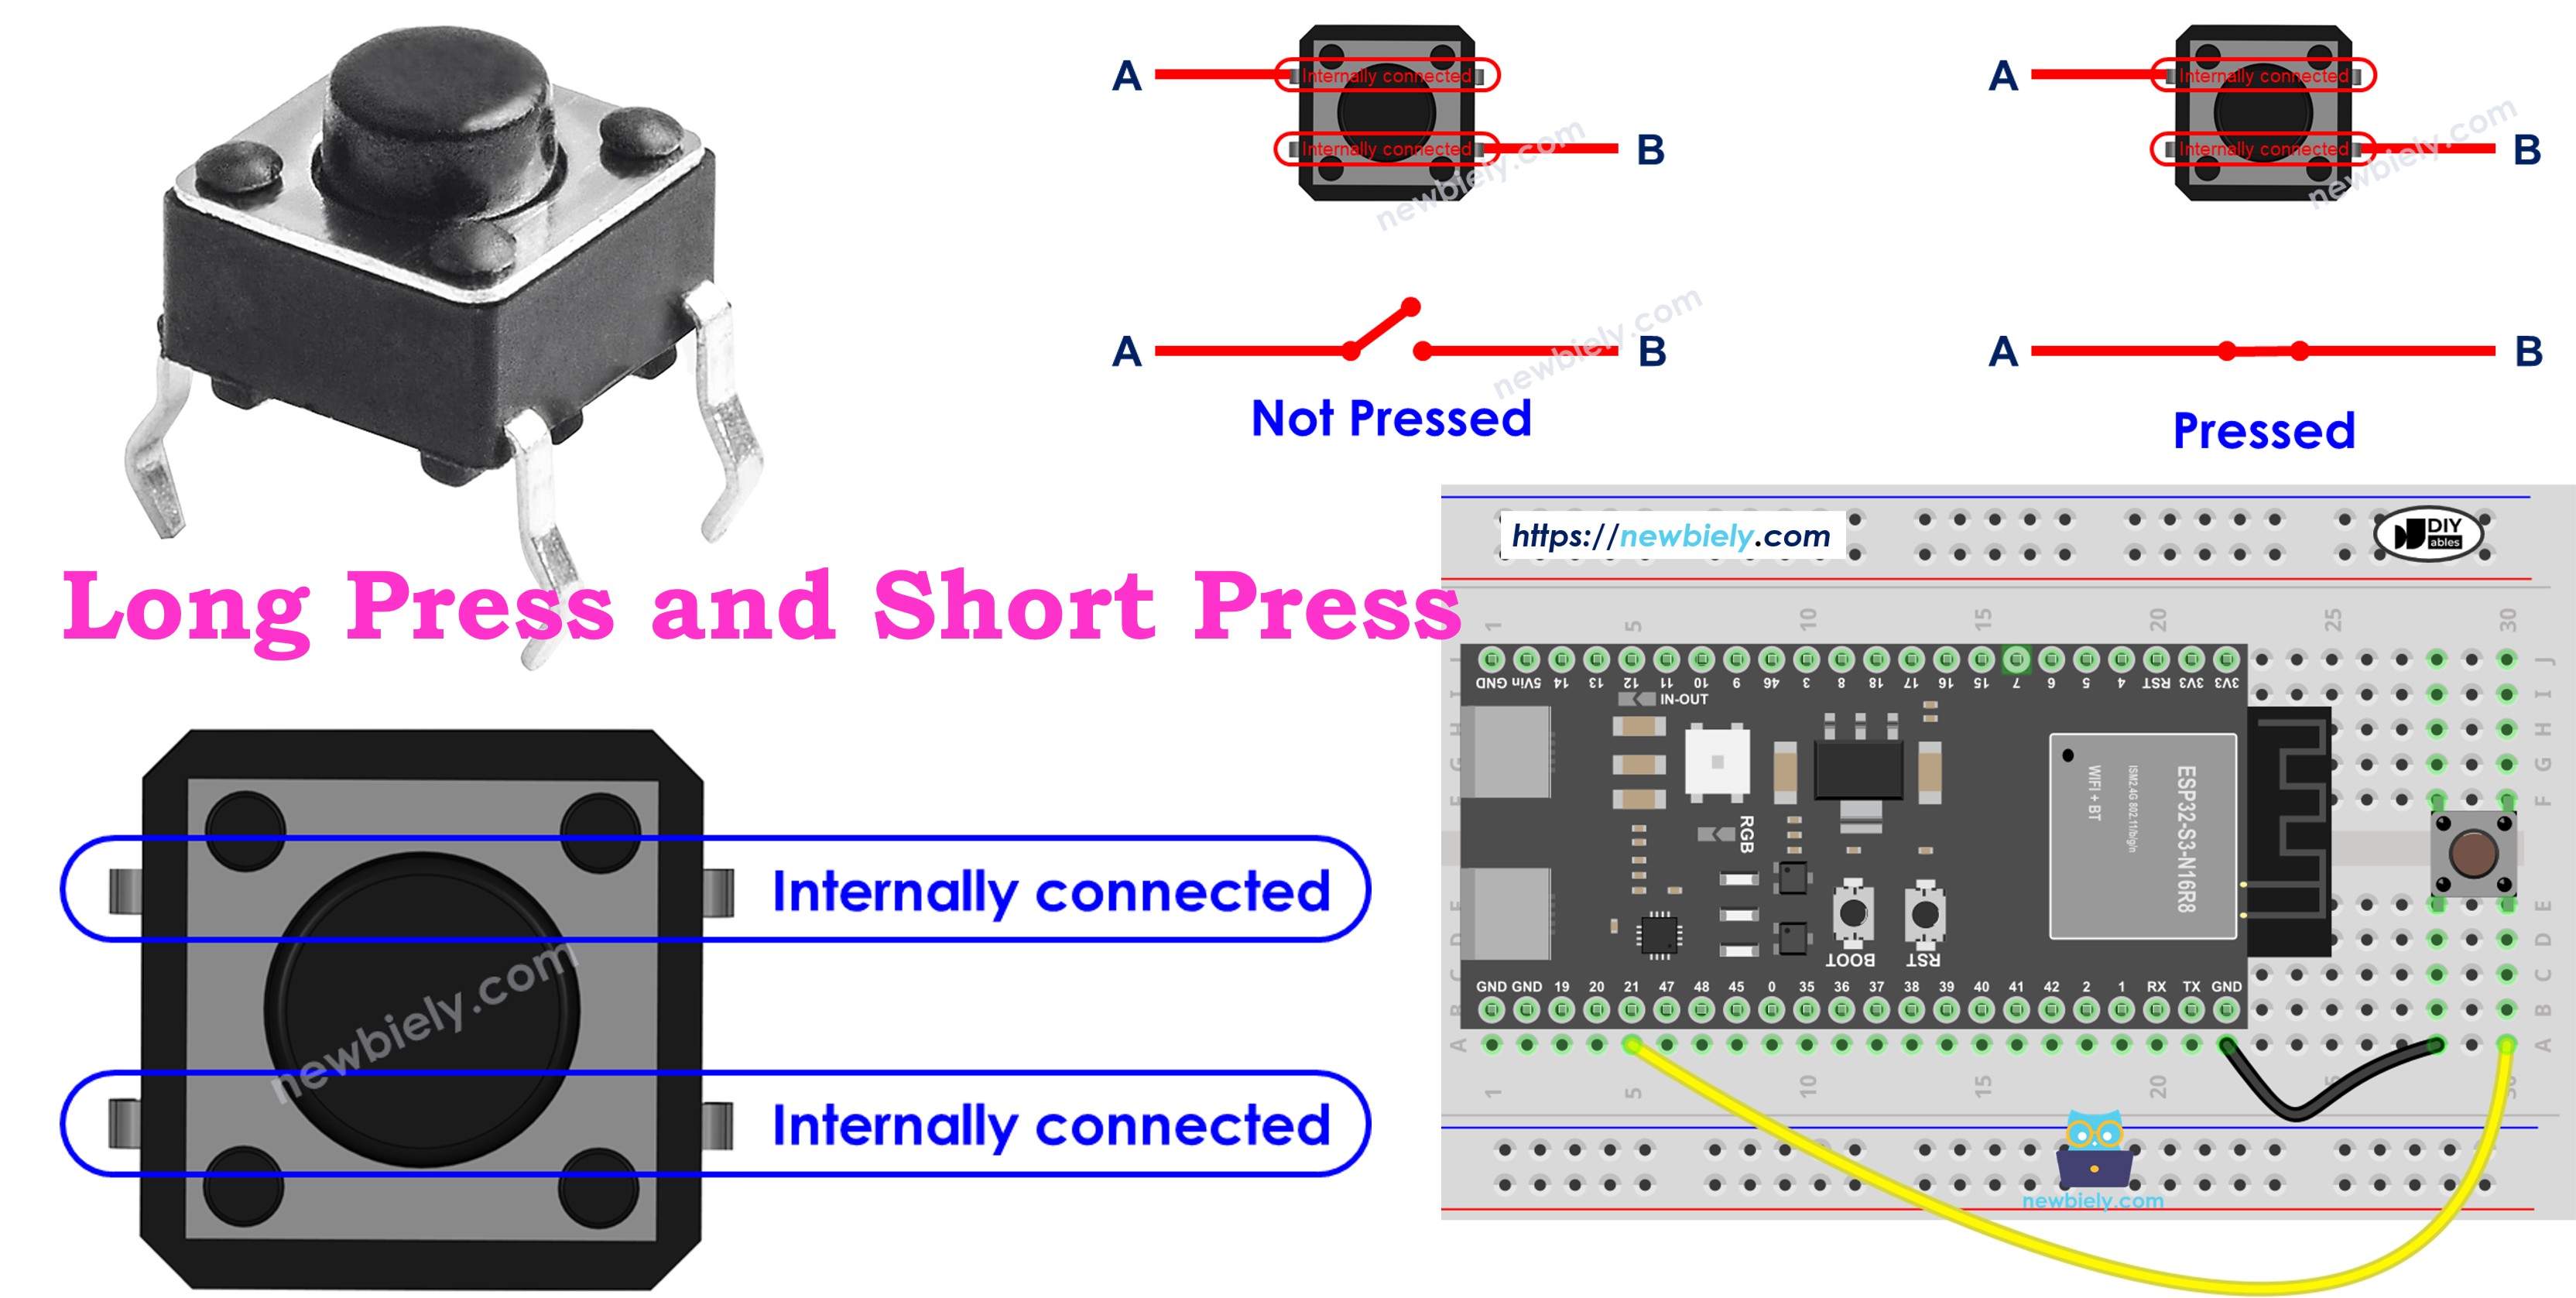
Hardware Preparation
Or you can buy the following kits:
| 1 | × | DIYables ESP32 S3 Starter Kit (ESP32 S3 included) | |
| 1 | × | DIYables Sensor Kit (18 sensors/displays) |
Additionally, some of these links are for products from our own brand, DIYables .
Wiring Diagram
Connect your button to the ESP32 S3 by wiring one terminal to a GPIO pin and the other terminal to GND. The internal pull-up resistor is enabled in software, so no external resistor is required.
Safety Notes
Always verify your wiring before powering the board. Using a breadboard makes it easy to make changes without soldering. Since this tutorial uses the internal pull-up resistor, the button state reads HIGH when released and LOW when pressed — keep this in mind when reading the code.
| Component Pin | ESP32 S3 Pin |
|---|---|
| Button Terminal 1 | GPIO 9 |
| Button Terminal 2 | GND |
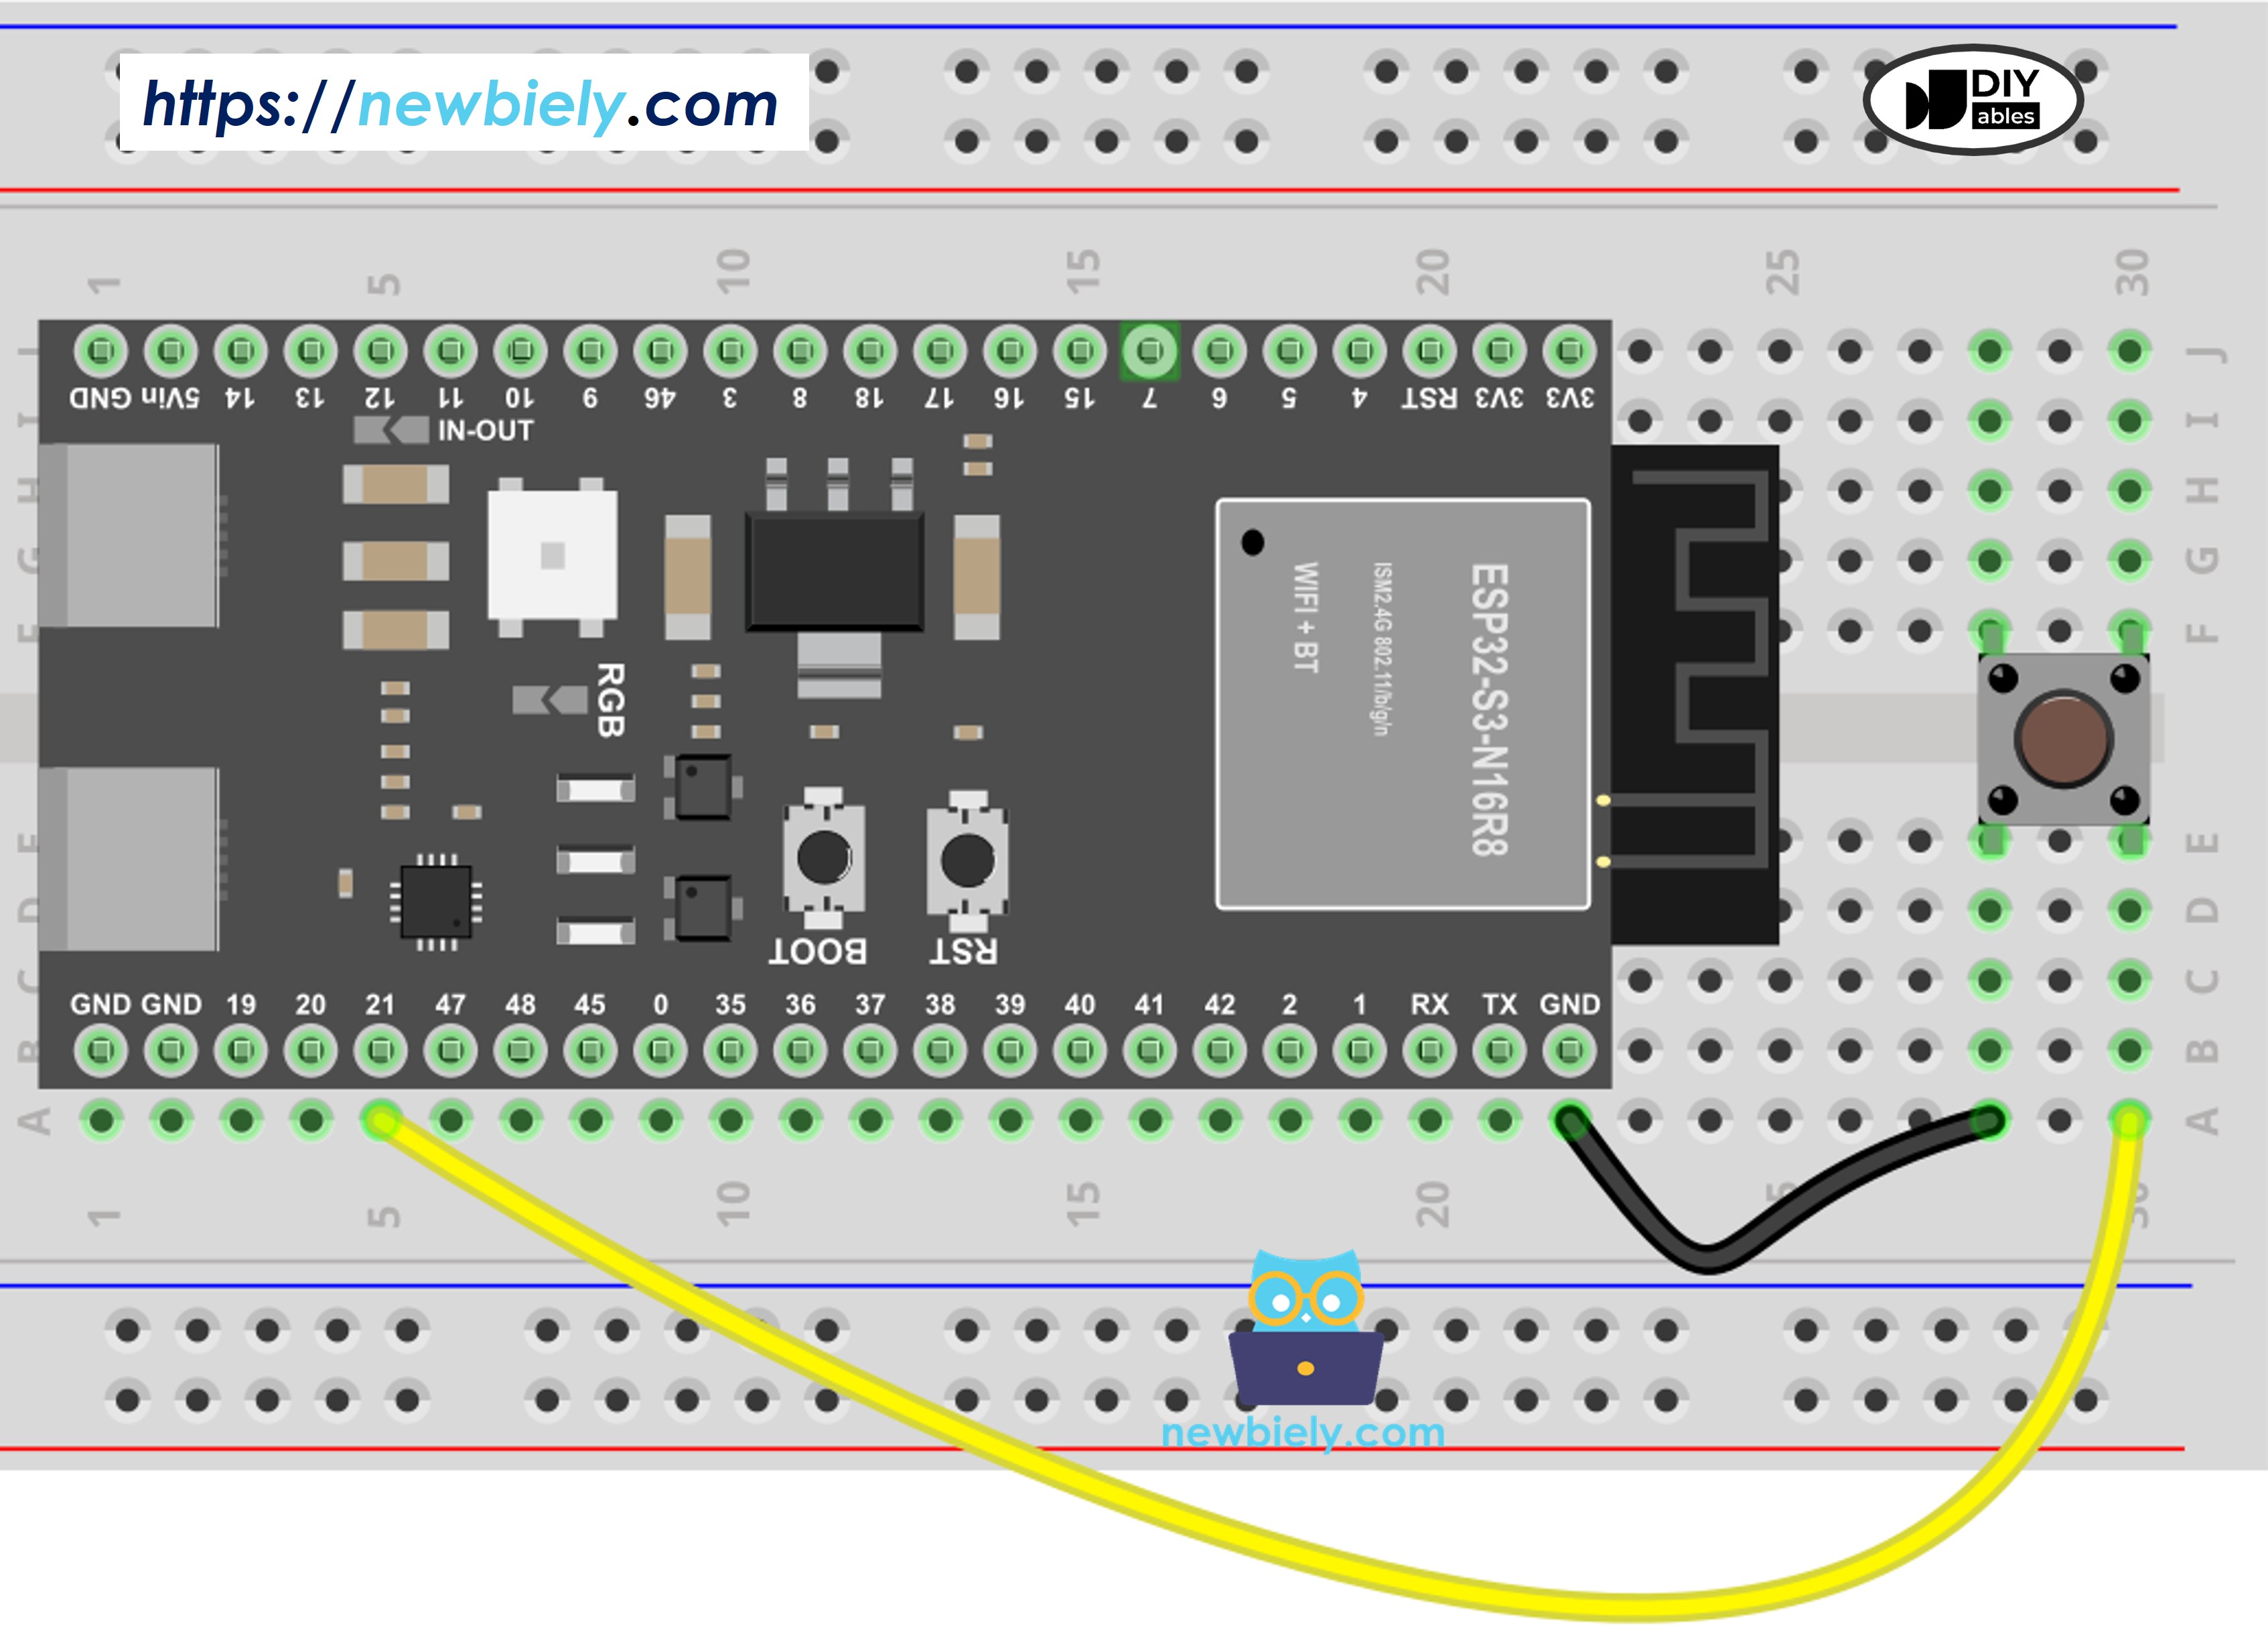
This image is created using Fritzing. Click to enlarge image
How To Detect Short Press
Detecting a short press on the ESP32 S3 involves measuring the duration between the button press event and the release event. If that duration falls below a defined threshold, the short press is confirmed.
Short press detection method:
- Measure the time between the pressed and released events
- If the duration is shorter than a pre-defined time, the short press event is detected
- Compare press duration against your SHORT_PRESS_TIME threshold
Step-by-step implementation:
- Define how long the maximum of short press lasts
- Detect the button is pressed and save the pressed time
- Detect the button is released and save the released time
- Calculate the press duration
- Determine the short press by comparing the press duration with the defined short press time
ESP32 S3 Code for detecting the short press
The following sketch reads the button state using the ESP32 S3's internal pull-up resistor, calculates the duration between press and release, and prints a message to the Serial Monitor when a short press is detected. The threshold is set to 500 ms by default, which you can adjust for your application.
Detailed Instructions
- New to ESP32 S3? Complete our Getting Started with ESP32 S3 guide first.
- Setup IDE: See how to setup environment for ESP32 S3 on Arduino IDE
- Upload Code: Copy the code above and upload it to your ESP32 S3 via Arduino IDE
- Wire Hardware: Connect the button to your ESP32 S3 following the wiring diagram
- Test Button: Press the button shortly several times
- Check Results: Open the Serial Monitor (115200 baud) to see the detection results
- Pro Tip: Adjust the SHORT_PRESS_TIME value to make short press detection faster or slower
※ NOTE THAT:
The Serial Monitor may print several short presses for a single press. This is a normal behavior of the button. This behavior is called the "chattering phenomenon". We will learn how to eliminate this issue later in this tutorial.
How To Detect Long Press
There are two methods for detecting long press button events on the ESP32 S3, each suited to different application requirements. The first method detects the long press after the button is released, while the second method detects it in real time as the button is being held down.
Two use cases for long press detection:
- The long-press event is detected right after the button is released
- The long-press event is detected while the button is being pressed
First method (detect on release):
- Measure the time duration between the pressed event and released event
- If the duration is longer than a pre-defined time, the long-press event is detected
Second method (detect during press):
- Measure the pressing time continuously while button is held
- If the duration exceeds the pre-defined time, immediately detect long-press
- Continue checking until the button is released
ESP32 S3 Code for detecting long press when released
This sketch measures the total press duration from the moment the button is pressed to when it is released. If the duration exceeds LONG_PRESS_TIME (1000 ms), the long press event is reported via the Serial Monitor. This method is best when you want to confirm the user held the button for the full duration before taking action.
Detailed Instructions
- New to ESP32 S3? Complete our Getting Started with ESP32 S3 guide first.
- Setup IDE: See how to setup environment for ESP32 S3 on Arduino IDE
- Upload Code: Copy and upload the above code to ESP32 S3 via Arduino IDE
- Test Long Press: Press and hold the button for more than one second, then release
- Check Serial Monitor: Open Serial Monitor at 115200 baud to see the results
- Pro Tip: This method is best when you need the action to happen after button release, not during the press
ESP32 S3 Code for detecting long press during pressing
This sketch continuously checks the press duration while the button is held and triggers the long press detection the instant the threshold is exceeded, without waiting for the button to be released. This is ideal for applications that require immediate feedback, such as triggering a factory reset while the button is still held.
Detailed Instructions
- New to ESP32 S3? Complete our Getting Started with ESP32 S3 guide first.
- Setup IDE: See how to setup environment for ESP32 S3 on Arduino IDE
- Upload Code: Upload the above code to your ESP32 S3 via Arduino IDE
- Test During Press: Press and hold the button for several seconds (don't release immediately)
- Observe Timing: Notice the detection happens while you're still pressing
- Pro Tip: This method provides instant feedback and is better for time-sensitive applications like factory reset functions
How To Detect Both Long Press and Short Press
By combining both press-duration checks in a single sketch, one button on your ESP32 S3 can control two entirely independent functions. This reduces component count and simplifies your circuit without sacrificing usability.
Short Press and Long Press after released
This sketch distinguishes short and long press events based on how long the button was held, making the determination only after the button is released. A single LONG_PRESS_TIME threshold separates the two behaviors, enabling two different actions from one button with no additional hardware.
Detailed Instructions
- New to ESP32 S3? Complete our Getting Started with ESP32 S3 guide first.
- Setup IDE: See how to setup environment for ESP32 S3 on Arduino IDE
- Upload Code: Upload the above code to ESP32 S3 via Arduino IDE
- Test Both Types: Try both long press (hold >1 second) and short press (quick tap)
- Check Serial Monitor: Open Serial Monitor to see which press type is detected
- Pro Tip: Set LONG_PRESS_TIME to match your user's expected behavior (typically 500–1500 ms works well)
※ NOTE THAT:
The Serial Monitor may show several short press detection when long press. This is the normal behavior of the button. This behavior is called the "chattering phenomenon". The issue will be solved in the last part of this tutorial.
Short Press and Long Press During pressing
This sketch detects long press immediately when the threshold is reached while still allowing short press to be detected on release if the threshold was never met. This gives the fastest possible response to long press actions while keeping short press detection fully functional.
Detailed Instructions
- New to ESP32 S3? Complete our Getting Started with ESP32 S3 guide first.
- Setup IDE: See how to setup environment for ESP32 S3 on Arduino IDE
- Upload Code: Upload the code to your ESP32 S3 via Arduino IDE
- Test Timing: Try quick taps and long holds to see the different behaviors
- Observe Response: Notice long press triggers immediately, not on release
- Pro Tip: This method prevents accidental long press triggers since users get instant feedback
Long Press and Short Press with Debouncing
Mechanical buttons generate electrical noise when their contacts open and close, causing the microcontroller to read multiple transitions for a single physical press. Debouncing filters out this noise and is essential for reliable long press and short press detection on the ESP32 S3.
The ezButton library handles all debouncing logic automatically, making it the recommended approach for beginners and production projects alike. It works reliably with multiple buttons and integrates cleanly with the press-duration timing logic used in previous sections.
Short Press and Long Press with debouncing after released
This sketch combines the ezButton library's debouncing with post-release press-type detection. It eliminates false detections from button chattering while accurately distinguishing short and long presses, giving you a production-ready input handler for your ESP32 S3 project.
Detailed Instructions
- New to ESP32 S3? Complete our Getting Started with ESP32 S3 guide first.
- Setup IDE: See how to setup environment for ESP32 S3 on Arduino IDE
- Install Library: Install ezButton library - See How To
- Upload Code: Upload the above code to ESP32 S3 via Arduino IDE
- Test Clean Detection: Try both long and short presses - no more duplicate detections
- Check Results: Open Serial Monitor to see clean, accurate button press detection
- Pro Tip: The ezButton library eliminates all chattering issues automatically — use it for all production projects
Short Press and Long Press with debouncing During Pressing
This sketch adds ezButton debouncing to the real-time long press detection approach, combining instant long press response with clean noise filtering. It is the most reliable method for ESP32 S3 projects where both accuracy and responsiveness are required.
Detailed Instructions
- New to ESP32 S3? Complete our Getting Started with ESP32 S3 guide first.
- Setup IDE: See how to setup environment for ESP32 S3 on Arduino IDE
- Install Library: Install ezButton library - See How To
- Upload Code: Upload the code to your ESP32 S3 via Arduino IDE
- Test Reliability: Press the button multiple times - notice no duplicate readings
- Compare Methods: This is the most reliable method for production ESP32 S3 projects
- Pro Tip: Use this method for critical applications like device resets or important controls where accuracy is essential
Why Needs Long Press and Short Press
Adding multi-press detection to your ESP32 S3 projects unlocks more functionality from a single button without increasing hardware complexity.
- Save pins: A single button can control two or more functions (short press for light, long press for fan)
- Prevent accidents: Use long press for critical functions like factory reset to avoid accidental activation
- Better UX: Users can perform multiple actions without additional hardware
- Cost savings: Fewer buttons means simpler circuits and lower component costs
- Space efficient: Ideal for compact ESP32 S3 projects with limited space
- Professional design: Multi-function buttons are standard in consumer electronics
Application Ideas
Long press and short press detection opens up a wide range of practical use cases for your ESP32 S3 projects.
- Smart home light controller: short press for on/off, long press for dimming mode
- Alarm system: short press to arm/disarm, long press for panic mode
- Timer device: short press to start/stop, long press to reset
- Multi-function thermostat: short press adjusts temperature, long press switches heating/cooling mode
- IoT door lock: short press to unlock temporarily, long press for permanent unlock
- Battery-powered sensor: short press to check status, long press to enter deep sleep mode
Video Section
Watch the step-by-step video walkthrough for this ESP32 S3 project below.