
ESP32 S3 - Log Data with Timestamp to SD Card
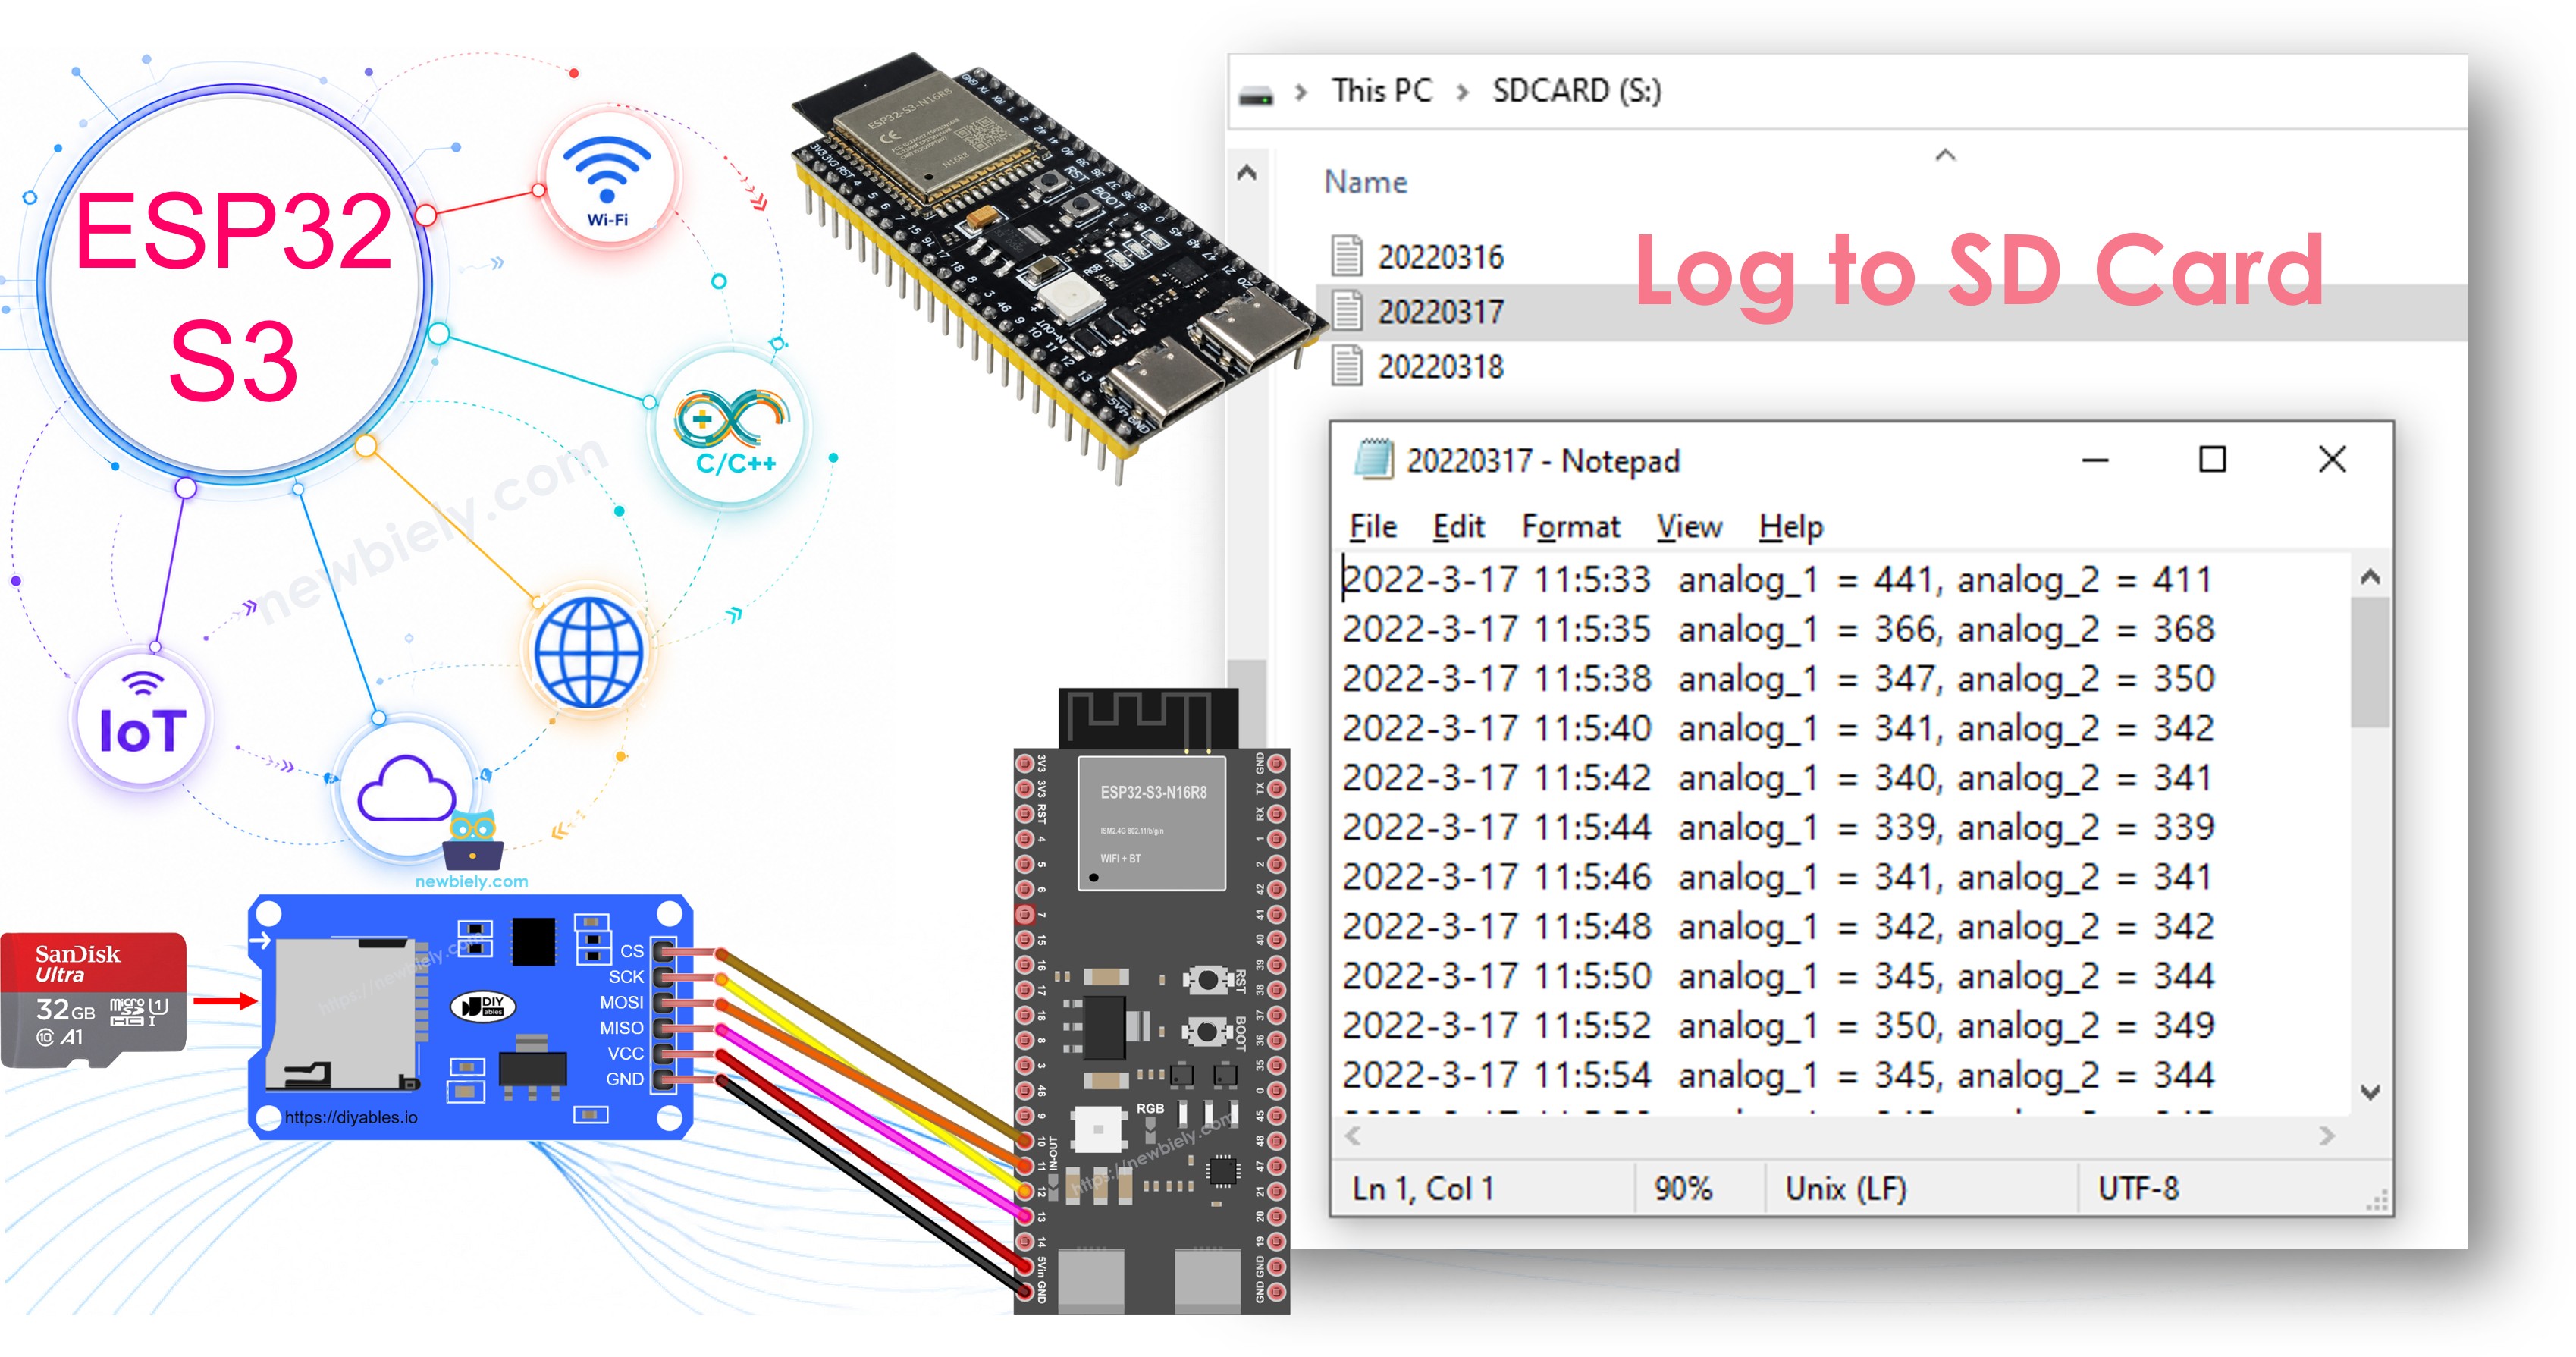
Learn how to build a timestamped data logger with the ESP32 S3 and a Micro SD Card Module. This tutorial shows you how to capture real-world data and pair it with accurate date and time information sourced from an RTC module before writing it persistently to the card.
What you'll build:
- A circuit connecting the ESP32 S3 to a Micro SD Card Module and a DS3231 RTC module
- A sketch that logs timestamped data entries to a single file on the Micro SD Card
- A second sketch that splits log output into daily files named by date
- A foundation for long-running IoT data-logging and monitoring applications
Hardware Preparation
Or you can buy the following kits:
| 1 | × | DIYables ESP32 S3 Starter Kit (ESP32 S3 included) | |
| 1 | × | DIYables Sensor Kit (18 sensors/displays) |
Additionally, some of these links are for products from our own brand, DIYables .
Overview of Micro SD Card Module and RTC Module
The Micro SD Card Module connects to the ESP32 S3 over the SPI bus and provides reliable FAT16/FAT32 file-system access for storing log files that can grow over days or weeks. The DS3231 RTC module keeps highly accurate time independently of the ESP32 S3's power state, ensuring that every log entry carries a meaningful date and time even after a board reset or power cycle. Together, these two modules form the backbone of a robust, standalone data-logging solution.
Key Specifications
Unfamiliar with the Micro SD Card Module or the RTC module, including their pinouts, functionality, and programming? Explore the comprehensive tutorials on these topics below:
- ESP32 S3 - Micro SD Card tutorial.
- ESP32 S3 - Write Variable to SD Card tutorial.
- ESP32 S3 - RTC module tutorial.
Wiring Diagram
Connect the Micro SD Card Module and the DS3231 RTC module to the ESP32 S3 following the diagram below, keeping wires short to minimise noise on the SPI bus. Double-check every connection before powering the board to avoid initialisation errors.
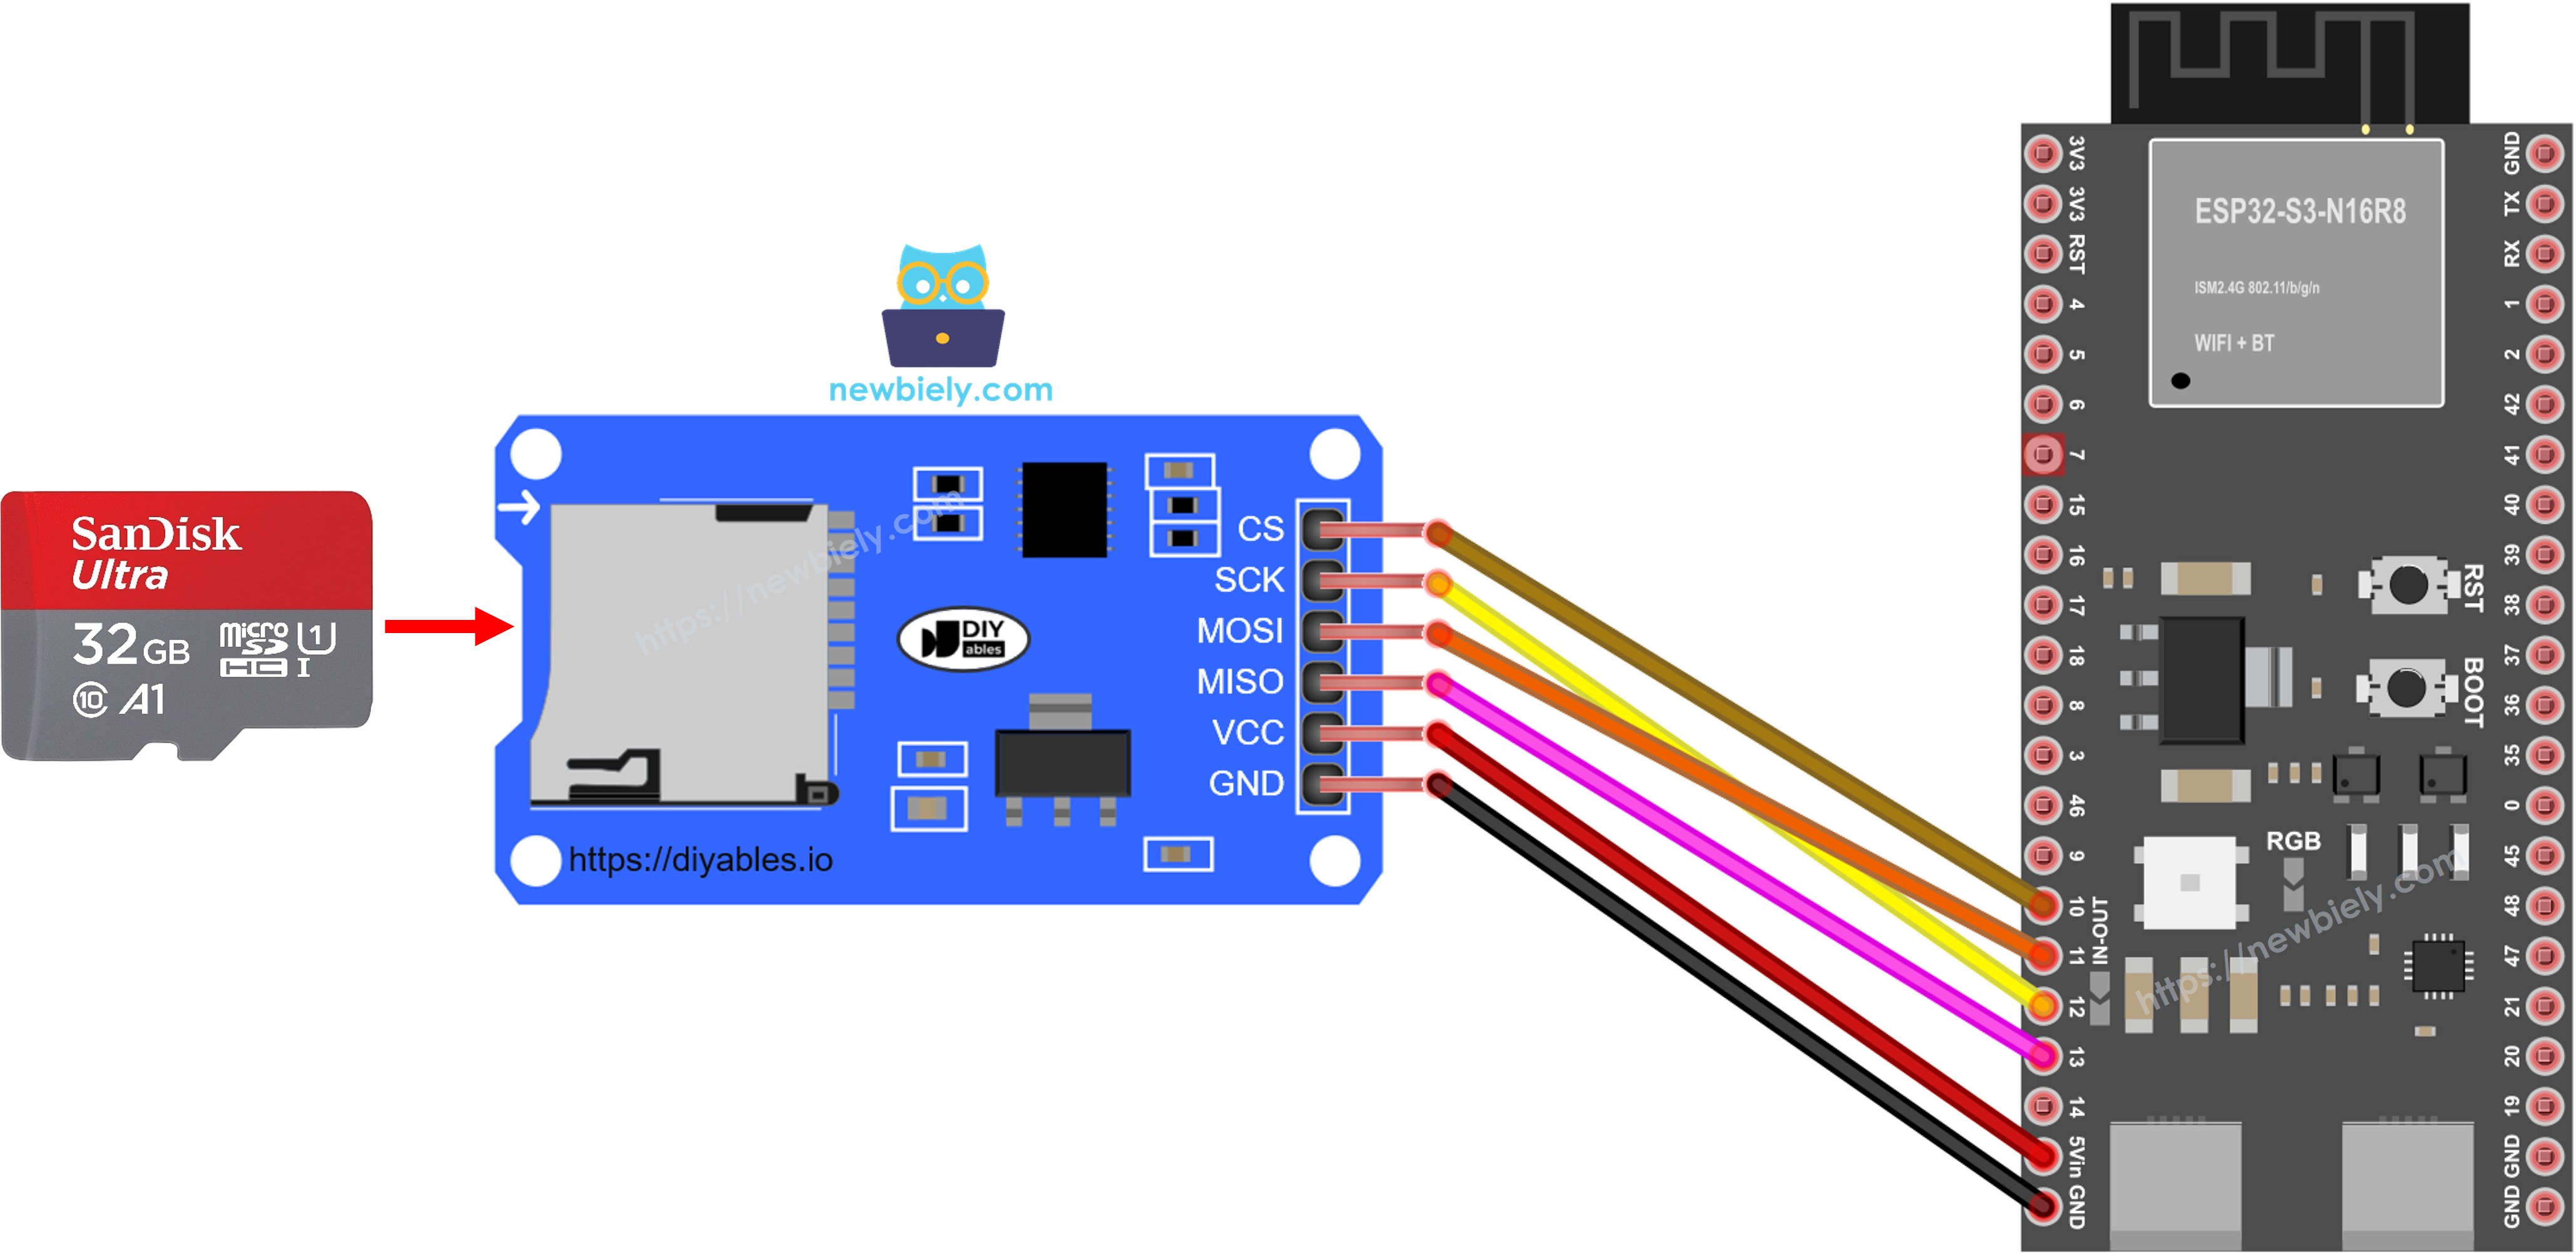
This image is created using Fritzing. Click to enlarge image
Safety Notes
Always ensure the Micro SD Card is fully seated in the module and the card is formatted as FAT16 or FAT32 before running any logging code, as an unformatted or loose card will prevent initialisation. Never remove the card while the ESP32 S3 is actively writing data, as doing so can corrupt the file system and destroy previously recorded log entries.
| Micro SD Module Pin | ESP32 S3 Pin |
|---|---|
| VCC | 5V |
| GND | GND |
| MISO | GPIO13 (MISO) |
| MOSI | GPIO11 (MOSI) |
| SCK | GPIO12 (SCK) |
| SS | GPIO10 (CS) |
| DS3231 Pin | ESP32 S3 Pin |
| VCC | 3.3V |
| GND | GND |
| SDA | GPIO8 (SDA) |
| SCL | GPIO9 (SCL) |
ESP32 S3 - Log Data with Timestamp to Micro SD Card
Code Overview
The following code reads values from two analog pins on every loop iteration and appends a timestamped CSV line to a single log file on the Micro SD Card. The date and time are fetched from the DS3231 RTC module, so each record carries accurate wall-clock information that makes the log useful for analysis long after collection. For simplicity, analog pin readings are used as the example dataset — the same pattern applies to any sensor you wire into the circuit.
ESP32 S3 Code
Detailed Instructions
- New to ESP32 S3? Complete our Getting Started with ESP32 S3 guide first.
- Prepare the SD Card: Format the Micro SD Card as FAT16 or FAT32, then insert it into the SD Card Module
- Wire the Circuit: Connect the Micro SD Card Module and DS3231 RTC module to the ESP32 S3 following the wiring diagram above
- Connect ESP32 S3: Plug the ESP32 S3 into your PC using the USB Type-C cable
- Open Arduino IDE: Launch Arduino IDE on your computer
- Select Board: Choose ESP32 S3 from the board menu
- Select Port: Choose the correct COM port for your ESP32 S3
- Open Serial Monitor: Open the Serial Monitor before uploading (Tools > Serial Monitor)
- Copy Code: Copy the code provided above
- Paste Code: Paste it into a new Arduino IDE sketch
- Upload: Click the Upload button to flash the code to your ESP32 S3
- View Results: Check the Serial Monitor to confirm the log is being written
- Read the Log: Detach the Micro SD Card, insert it into a USB SD Card Reader, connect it to your PC, and open log.txt to review the recorded entries
- Pro Tip: Always open Serial Monitor before uploading so you capture every initialisation message from the very first boot.
Serial Monitor Output
Expected output:
View the log on your PC:
- Detach the Micro SD Card from the Micro SD Card module
- Insert the Micro SD Card into a USB SD Card Reader
- Connect the USB SD Card Reader to your PC
- Open the log.txt file — it will look similar to the image below
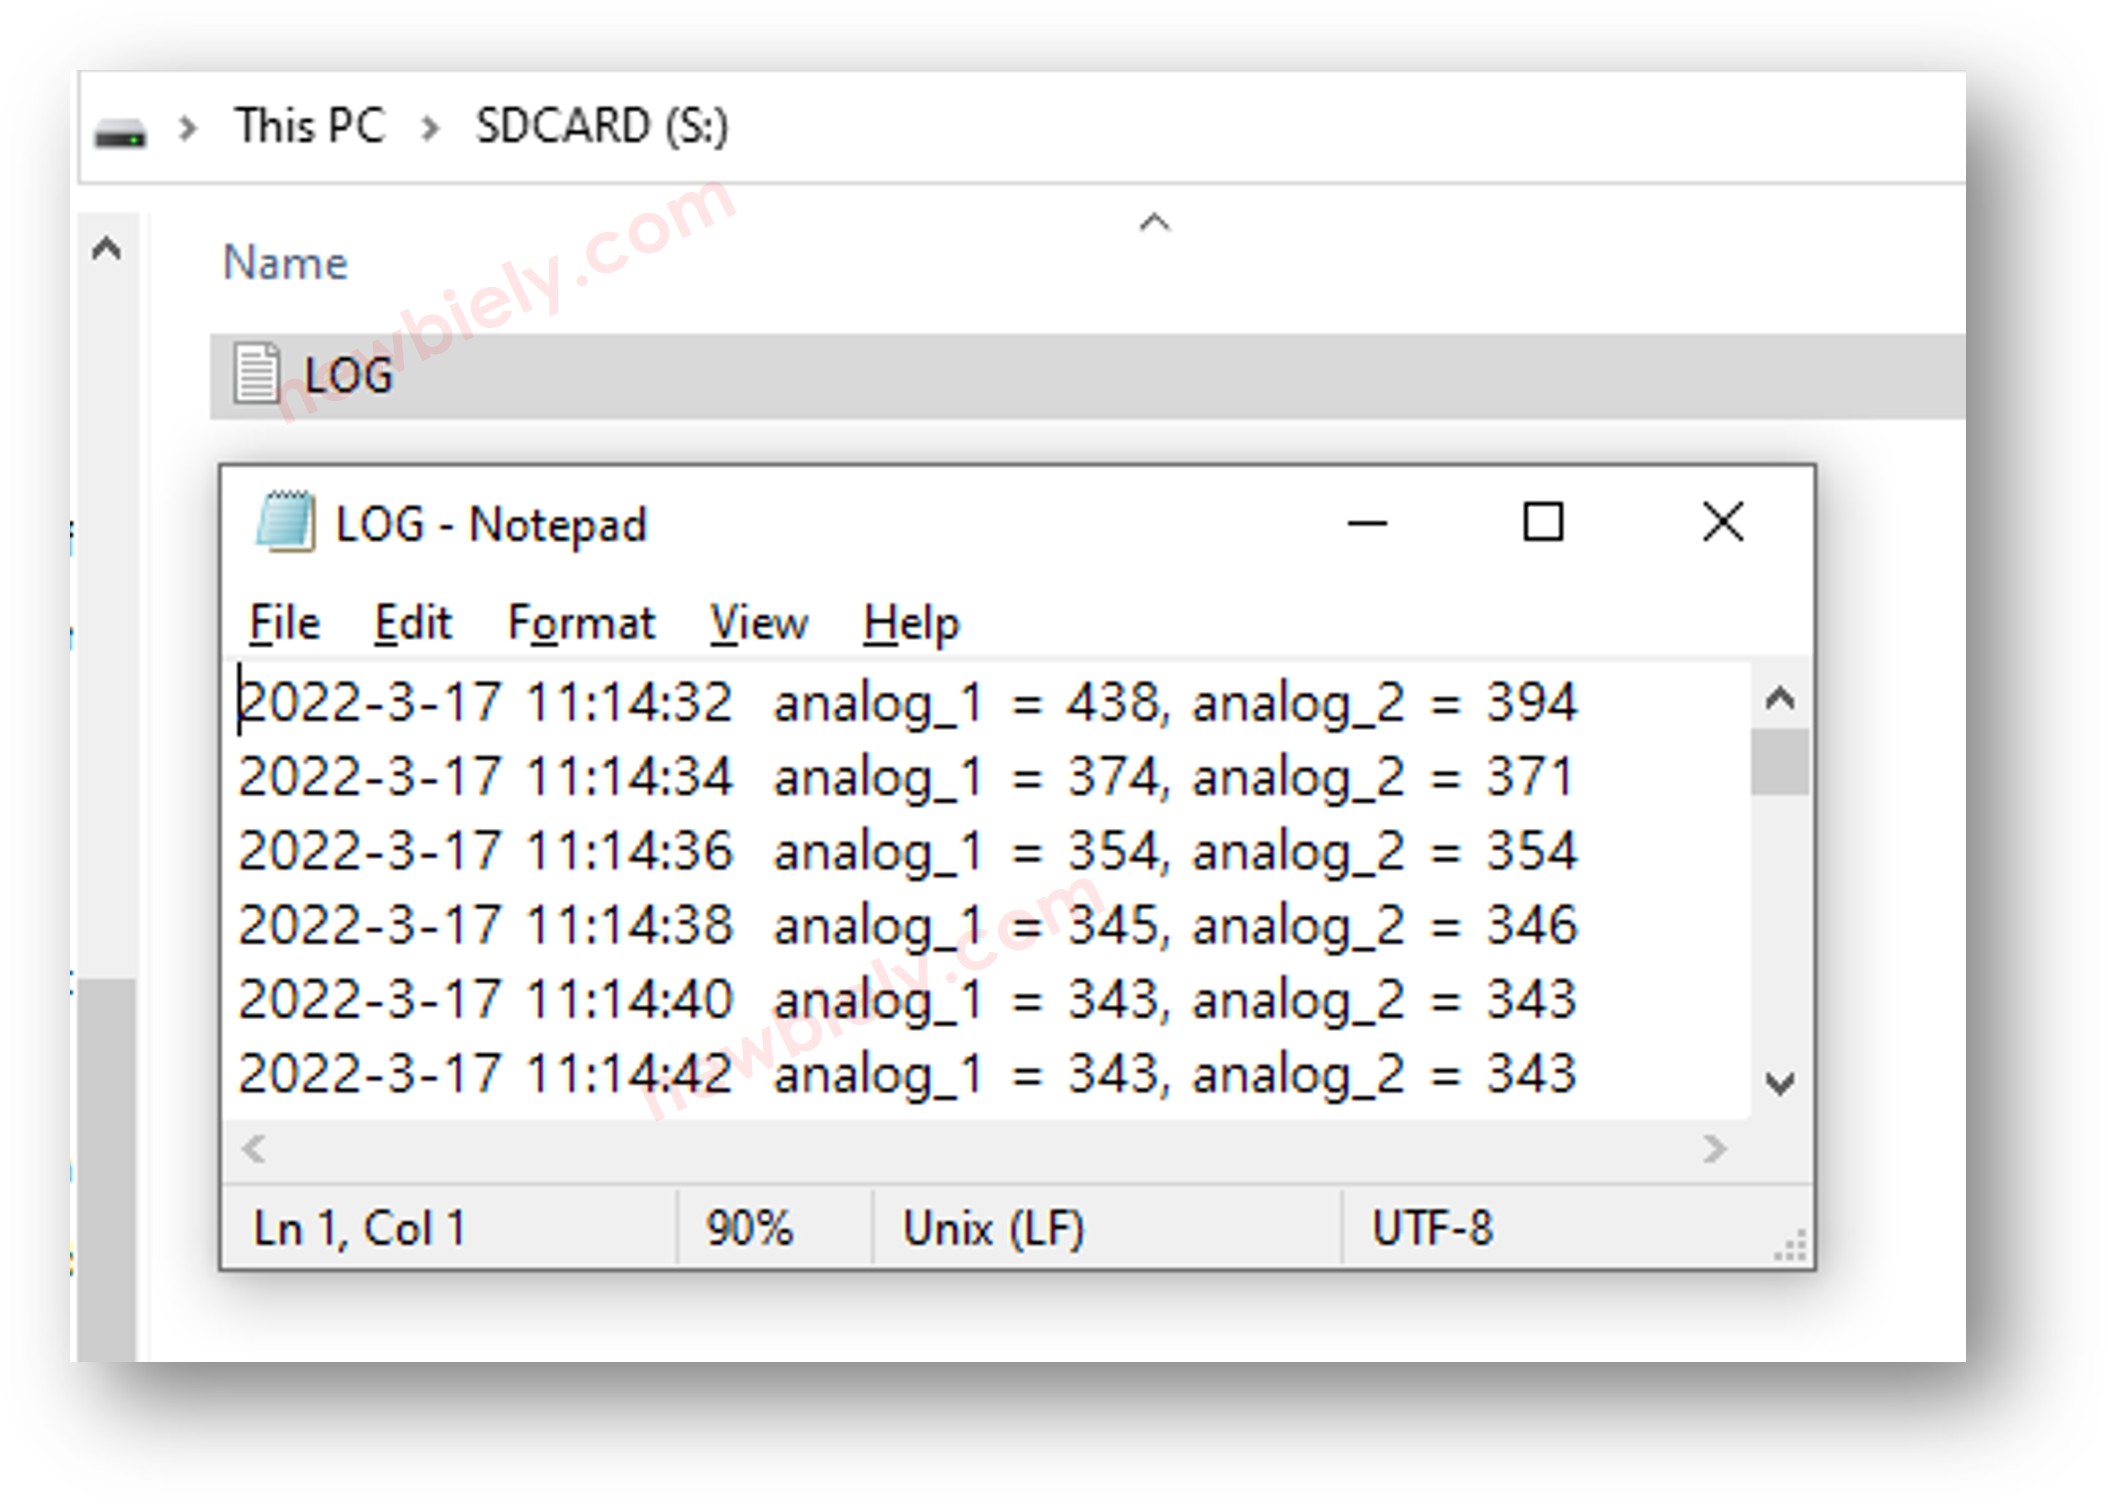
If you do not have a USB SD Card Reader, you can read the contents of the log file directly by uploading the following ESP32 S3 code.
ESP32 S3 - Log Data in Multiple Files
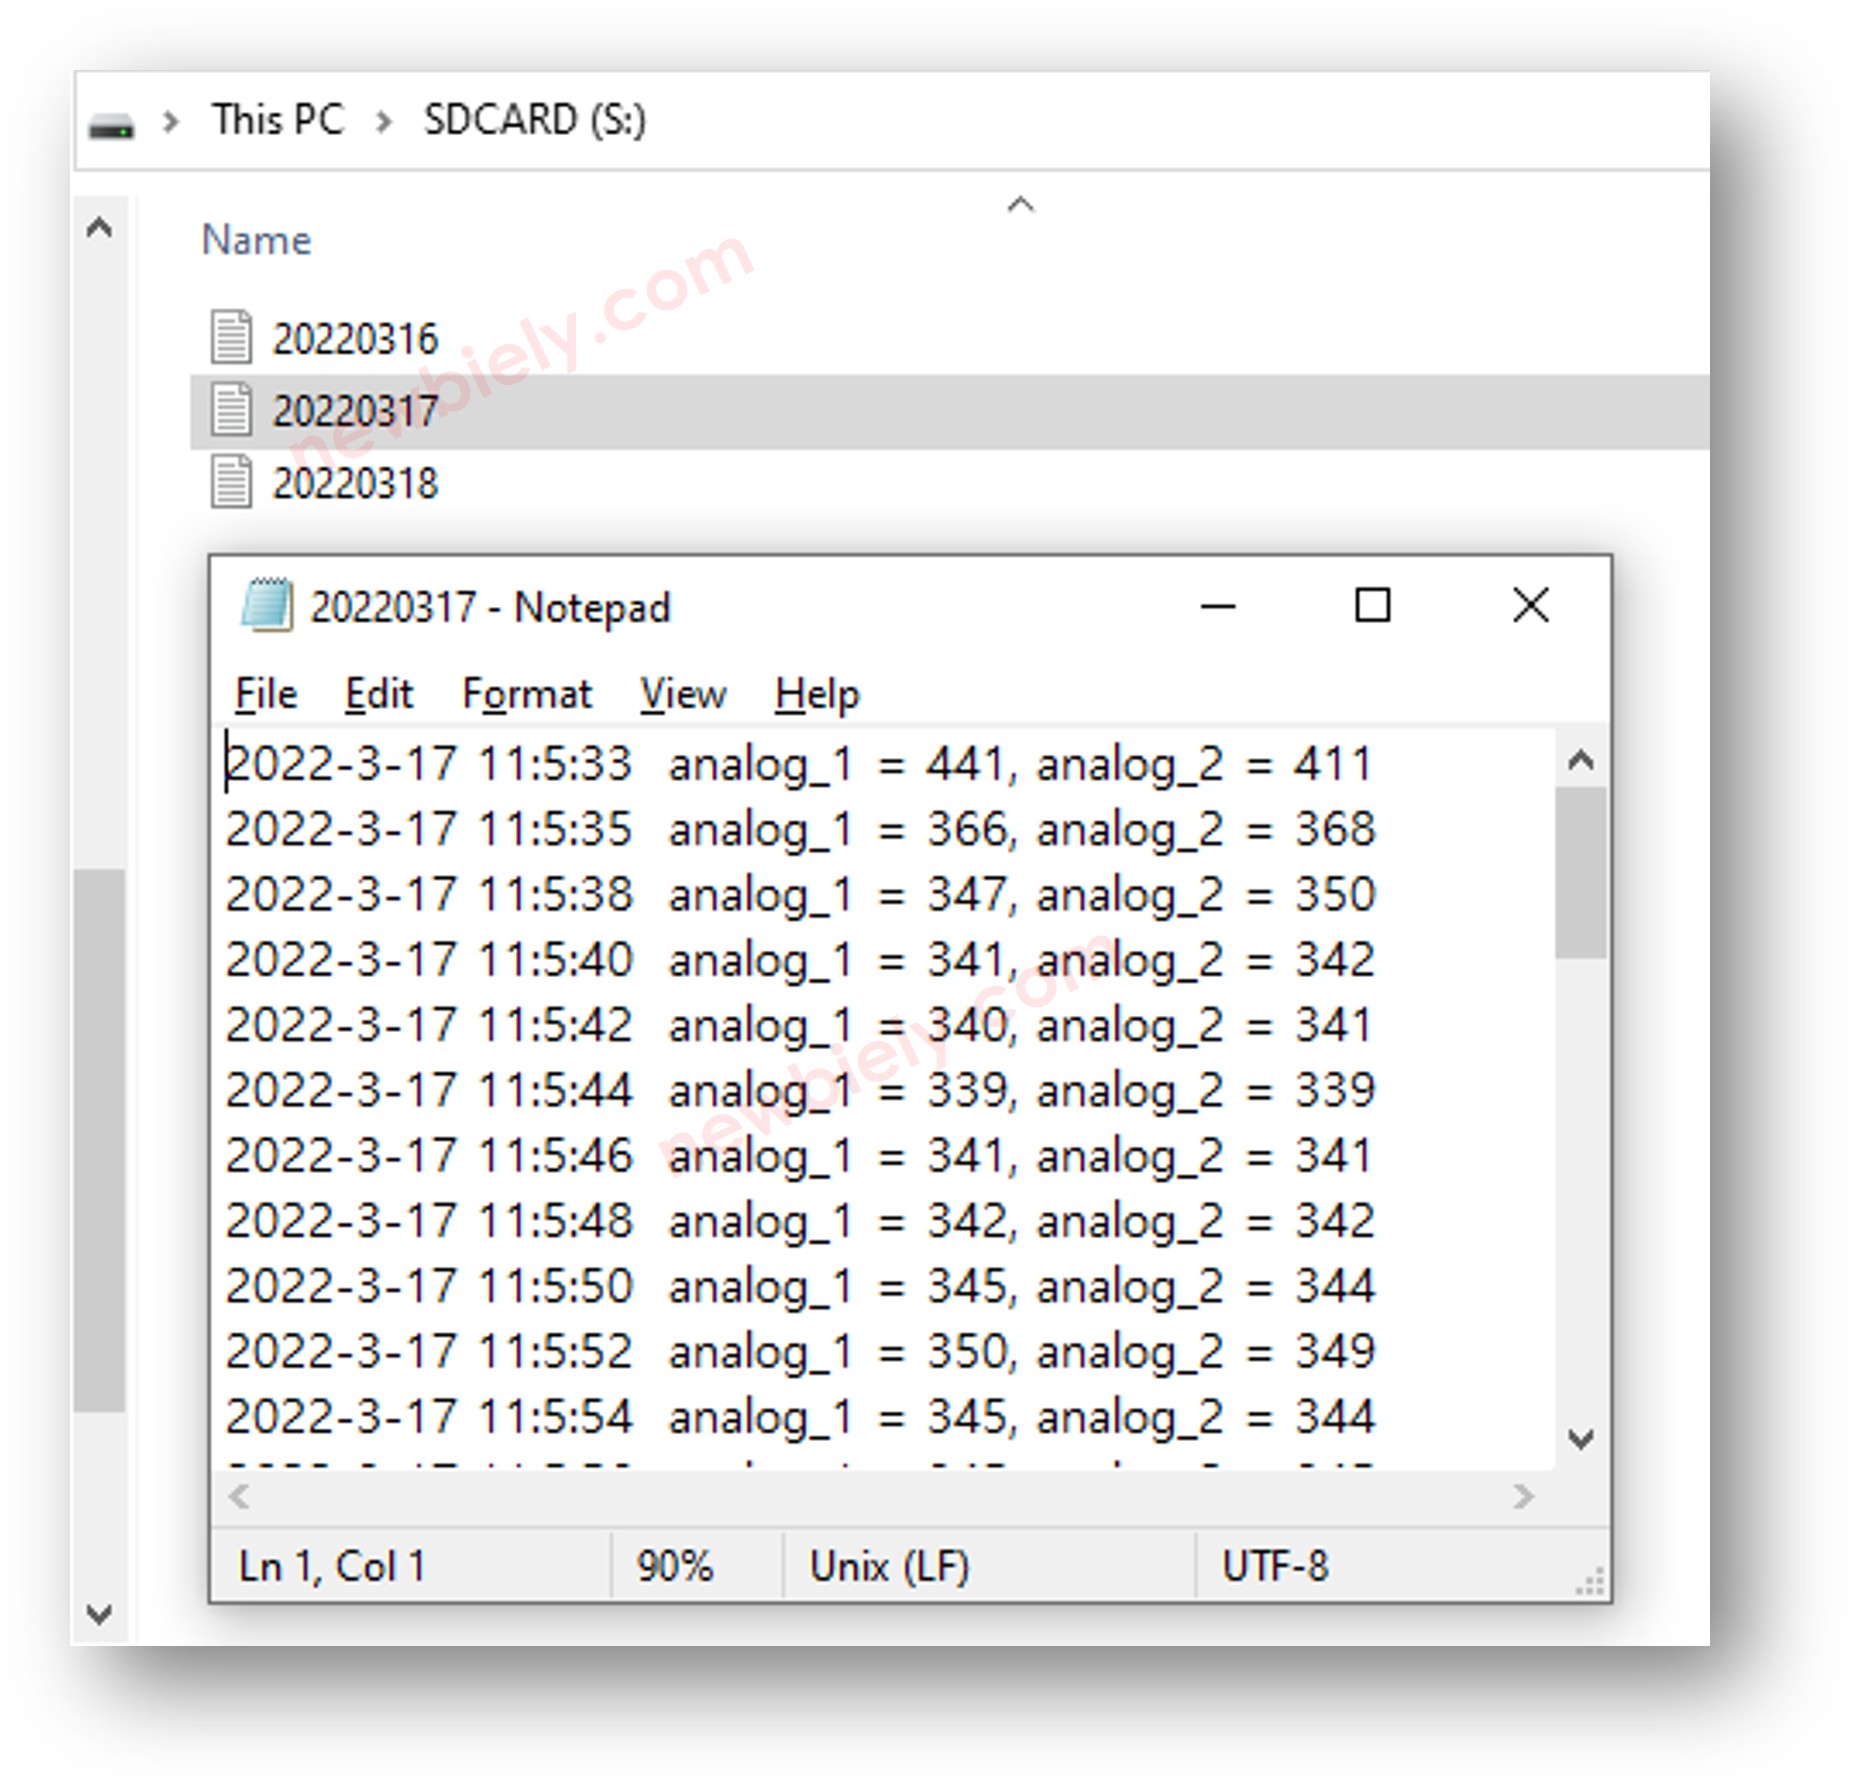
Writing all log entries to a single file causes the file to grow indefinitely and makes it difficult to locate entries from a specific date. The following code addresses this by creating one log file per day, with each filename set to the date in YYYYMMDD.txt format so files are easy to identify and sort.
Code Overview
The following code queries the DS3231 RTC module on every loop iteration to determine the current date, then opens or creates the matching daily log file and appends a timestamped record. When midnight passes and the date changes, the code automatically switches to a new file — keeping your logs neatly partitioned without any manual intervention.
ESP32 S3 Code
Detailed Instructions
- New to ESP32 S3? Complete our Getting Started with ESP32 S3 guide first.
- Prepare the SD Card: Format the Micro SD Card as FAT16 or FAT32, then insert it into the SD Card Module
- Wire the Circuit: Connect the Micro SD Card Module and DS3231 RTC module to the ESP32 S3 following the wiring diagram above
- Connect ESP32 S3: Plug the ESP32 S3 into your PC using the USB Type-C cable
- Upload Code: Copy, paste, and upload the multi-file logging code above
- Run Overnight: Let the ESP32 S3 run across midnight to observe automatic daily file rotation
- Read the Files: After a long run, remove the Micro SD Card, insert it into a USB SD Card Reader, and connect it to your PC — you will see one file per day as shown below
- Pro Tip: Set the RTC module to the correct time before your first long logging run so every timestamp is accurate from the very beginning.
Serial Monitor Output
Expected output while running:
Application Ideas
The ESP32 S3's processing power and built-in wireless connectivity make it an ideal platform for building long-running, timestamped data-logging systems in real-world environments.
- Environmental Monitor: Log temperature, humidity, and air-quality readings at regular intervals for indoor or outdoor climate studies.
- Access Control Log: Record every door-lock event with a precise timestamp to maintain a tamper-evident security audit trail.
- Agricultural Data Logger: Track soil moisture, light intensity, and temperature across growing seasons to optimise crop conditions.
- Industrial Sensor Recorder: Capture vibration, pressure, or current readings from machinery to support predictive maintenance programmes.
- Energy Consumption Tracker: Store daily power-usage statistics from a smart meter or current sensor for billing verification and efficiency analysis.
- Weather Station: Log barometric pressure, wind speed, and rainfall data with timestamps for local weather pattern analysis.
Video Tutorial
Watch the step-by-step video walkthrough for this ESP32 S3 project below.
Challenge Yourself
The logging foundations above are ready to extend — try these progressively demanding exercises to deepen your skills.
- Beginner: Modify the single-file logger to write a header row (e.g., Timestamp,Value1,Value2) as the very first line so the CSV file opens correctly in spreadsheet software.
- Beginner: Add a third data column to the log by reading a real sensor (such as a DHT11 temperature sensor) instead of an analog pin.
- Intermediate: Implement a maximum file-size check so the logger automatically creates a new file (e.g., log_001.txt, log_002.txt) when the current file exceeds 1 MB.
- Intermediate: Add a WiFi upload step that, once per hour, reads the current log file and POSTs its contents to a remote server or cloud storage bucket.
- Advanced: Build a self-healing logger that detects SD card initialisation failures, retries several times with back-off delays, and sends an alert via the Serial Monitor when the card cannot be reached.
- Advanced: Combine the multi-file daily logger with a web server so you can browse and download individual day files from a browser on your local network without removing the SD card.