Arduino Nano ESP32 - Web Server Password
In this guide, we'll learn how to create an Arduino Nano ESP32 web server with username and password protection for login. Prior to accessing any web pages on the ESP32, users will be prompted to input their username and password.
Hardware Preparation
Or you can buy the following kits:
| 1 | × | DIYables Sensor Kit (18 sensors/displays) |
Disclosure: Some of the links provided in this section are Amazon affiliate links. We may receive a commission for any purchases made through these links at no additional cost to you.
Additionally, some of these links are for products from our own brand, DIYables .
Additionally, some of these links are for products from our own brand, DIYables .
Overview of Arduino Nano ESP32 and Web Server
If you're not familiar with Arduino Nano ESP32 and Web Server (including pinout, how it works, and programming), you can learn about them through the following tutorials:
Arduino Nano ESP32 Code - Web server Username/Password
/*
* This Arduino Nano ESP32 code was developed by newbiely.com
*
* This Arduino Nano ESP32 code is made available for public use without any restriction
*
* For comprehensive instructions and wiring diagrams, please visit:
* https://newbiely.com/tutorials/arduino-nano-esp32/arduino-nano-esp32-web-server-password
*/
#include <DIYables_ESP32_WebServer.h>
// WiFi credentials
const char WIFI_SSID[] = "YOUR_WIFI_SSID";
const char WIFI_PASSWORD[] = "YOUR_WIFI_PASSWORD";
// Authentication credentials
const char* www_username = "admin";
const char* www_password = "esp32";
// Create web server instance
DIYables_ESP32_WebServer server;
// Main page handler
void handleRoot(WiFiClient& client, const String& method, const String& request, const QueryParams& params, const String& jsonData) {
server.sendResponse(client, "<html><body><h1>Login Successful!</h1><p>You are now logged in.</p></body></html>");
}
void setup() {
Serial.begin(9600);
delay(1000);
// Configure the main route
server.addRoute("/", handleRoot);
// Start server with WiFi connection (handles connection automatically)
server.begin(WIFI_SSID, WIFI_PASSWORD);
// Enable basic authentication
server.enableAuthentication(www_username, www_password, "Esp32");
Serial.print("IP Address: ");
Serial.println(WiFi.localIP());
Serial.println("Arduino Nano ESP32 Server ready with authentication enabled");
Serial.print("Username: ");
Serial.println(www_username);
Serial.print("Password: ");
Serial.println(www_password);
}
void loop() {
// Handle all client requests (including authentication)
server.handleClient();
}
Detailed Instructions
- If this is the first time you use ESP32, see how to setup environment for Arduino Nano ESP32 on Arduino IDE.
- Connect the Arduino Nano ESP32 board to your PC via a micro USB cable
- Open Arduino IDE on your PC.
- Select the Arduino Nano ESP32 board and COM port.
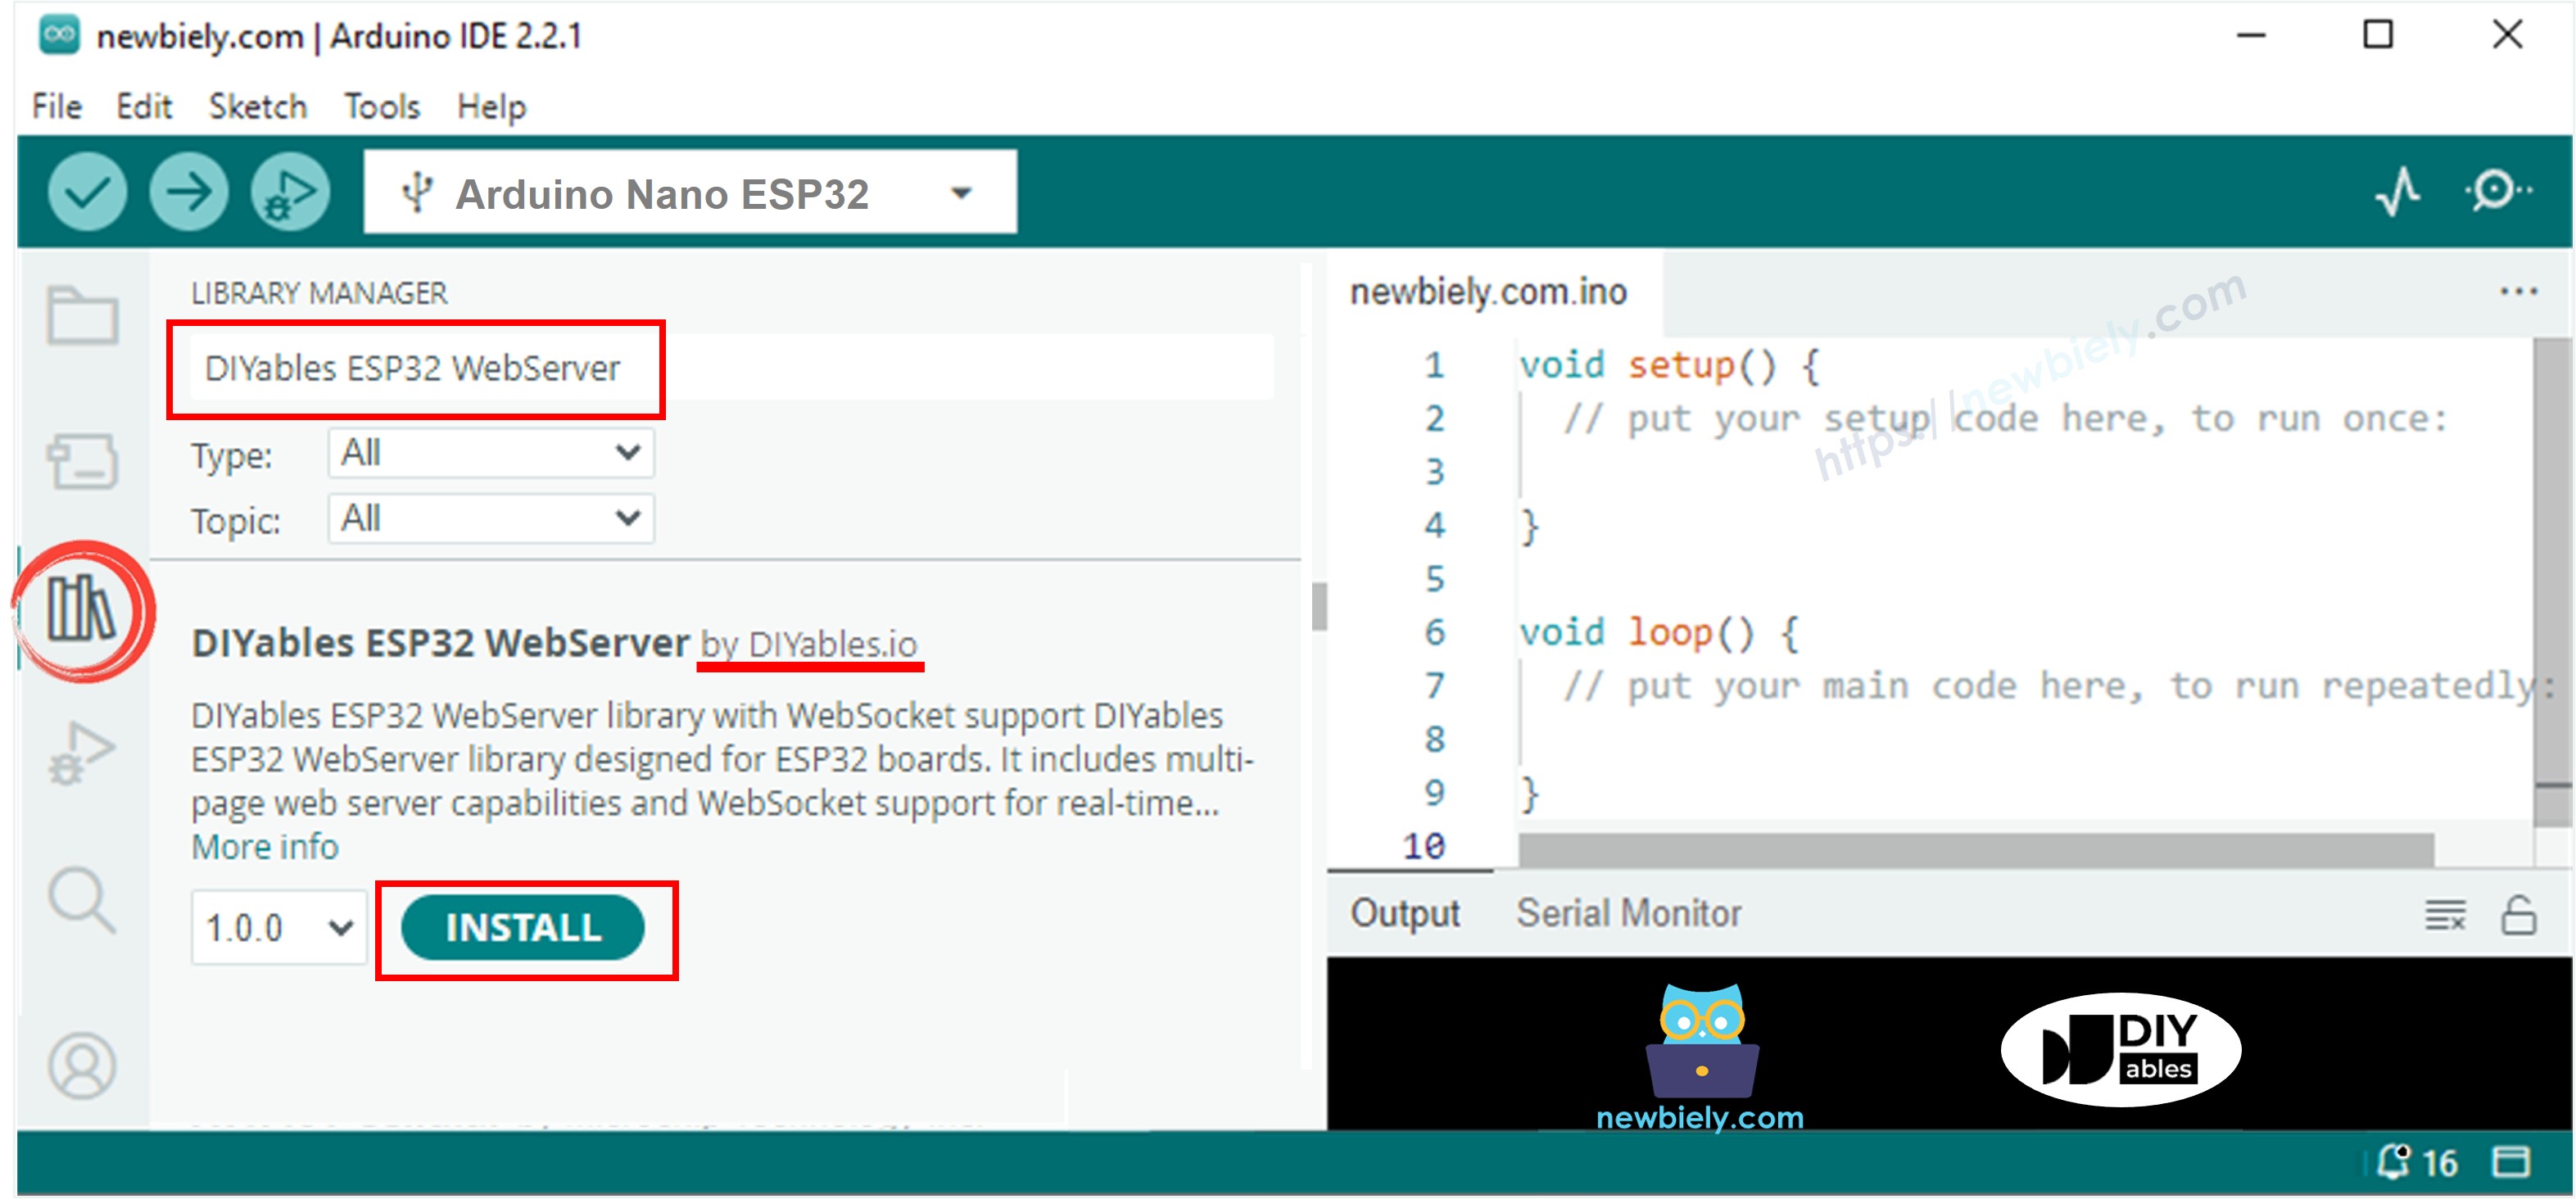
- Open the Library Manager by clicking on the Library Manager icon on the left navigation bar of Arduino IDE.
- Search “DIYables ESP32 WebServer”, then find the Web Server library created by DIYables.
- Click Install button to install the Web Server library.
- Copy the above code and open with Arduino IDE
- Change the wifi information (SSID and password) in the code to yours
- Click Upload button on Arduino IDE to upload code to ESP32
- Open the Serial Monitor
- Check out the result on Serial Monitor.
8
Serial.println("Hello World!");
Message (Enter to send message to 'Arduino Nano ESP32' on 'COM15')
New Line
9600 baud
Connecting to WiFi...
Connected to WiFi
Arduino Nano ESP32 Web Server's IP address: 192.168.0.3
- You will see an IP address on the Serial Monitor, for example: 192.168.0.3
- Type the IP address on the address bar of a web browser on your smartphone or PC.
- Please note that you need to change the 192.168.0.3 to the IP address you got on Serial Monitor.
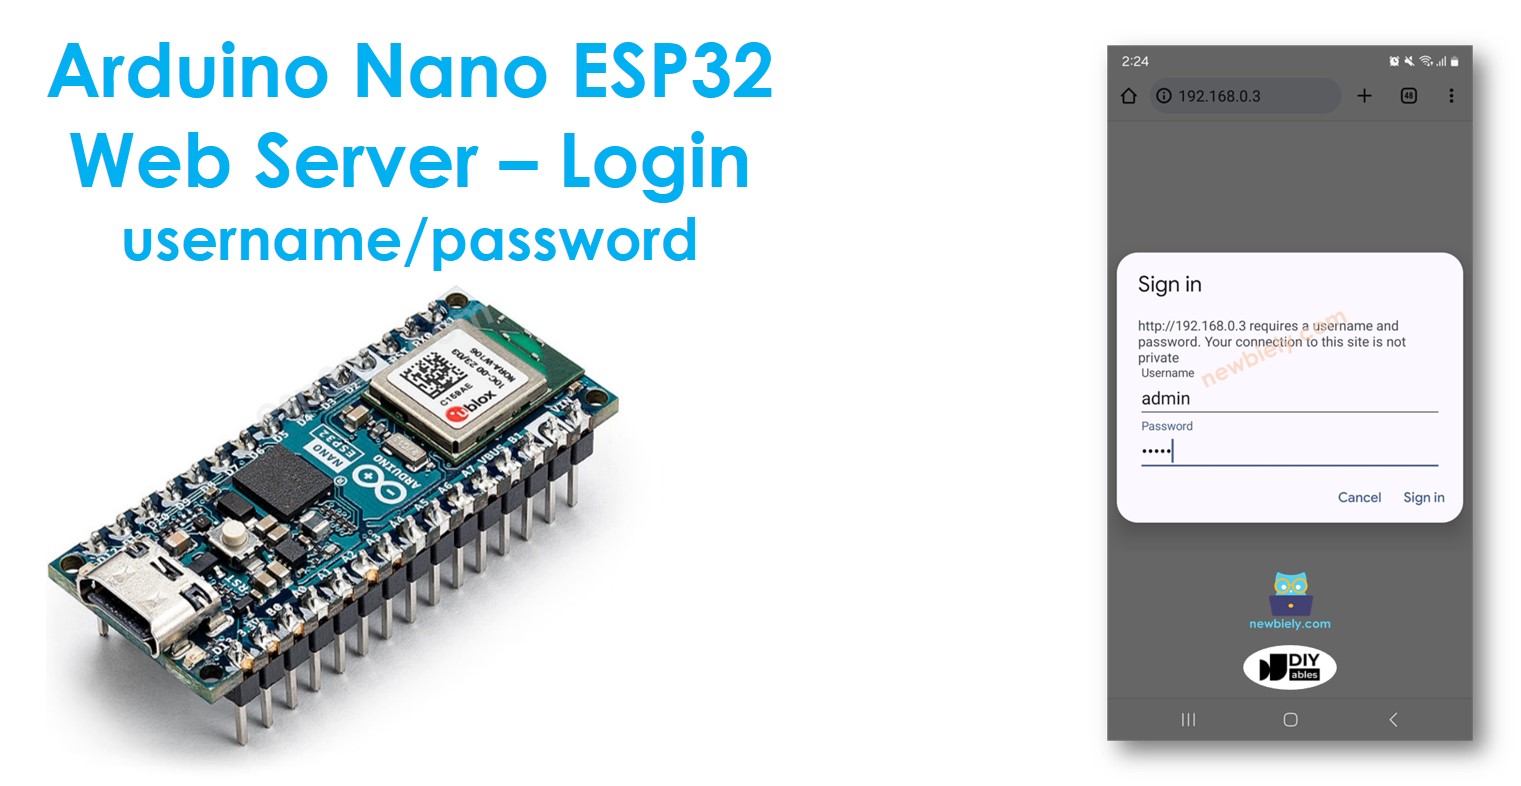
- You will see a page that promont you to input username/password.
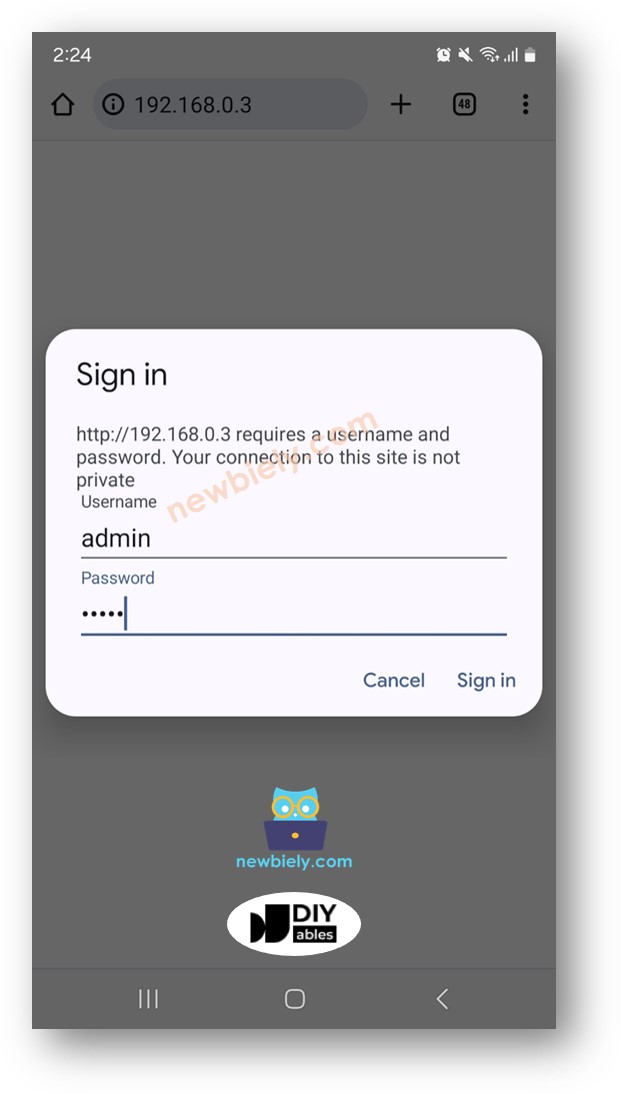
- Type username/password that are in the Arduino Nano ESP32 code, in this case: admin as username, esp32 as password
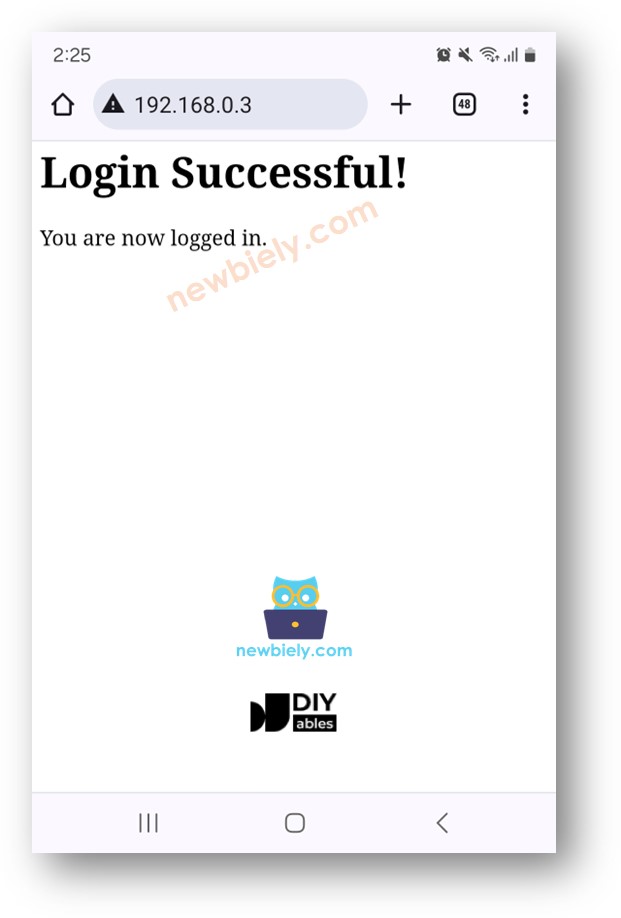
- If you input the username/password correctly, the web content of Arduino Nano ESP32 will be shown:
※ NOTE THAT:
- You can adjust the web username and password directly within the code by altering the values assigned to two variables: www_username and www_password.
- You have the option to customize this code by incorporating your own HTML, CSS, and JavaScript code for your webpage.
- It's worth noting that there is no HTML code within the code itself for the login form (username/password). Don't be surprised! Instead, the login form is generated dynamically by the Web Browser.
Advanced Knowledge
This section provides advanced insights into how the username/password system operates without HTML for the login form:
- Initially, when you input the IP address of the Arduino Nano ESP32 into a web browser, the browser sends an HTTP request to the Arduino Nano ESP32 without any username/password credentials.
- Upon receiving this request, the Arduino Nano ESP32 code checks if there are any username/password credentials provided. If not, the Arduino Nano ESP32 does not respond with the content of the requested page. Instead, it responds with an HTTP message containing headers instructing the browser to prompt the user for their username/password. Importantly, this response does not include HTML code for the login form.
- Upon receiving this response, the web browser interprets the HTTP headers, understanding the ESP32's request for username/password. Consequently, the browser dynamically generates a login form, allowing the user to input their credentials.
- The user then inputs their username/password into the form.
- The web browser includes the entered username/password within an HTTP request and sends it to the ESP32.
- The Arduino Nano ESP32 verifies the username/password included in the HTTP request. If correct, it returns the content of the requested page. If incorrect, it repeats the process, prompting the user to input the correct credentials again.
- Once the user inputs the correct username/password for the first time, subsequent requests do not require them to re-enter their credentials. This is because the web browser automatically saves the credentials, including them in subsequent requests.