Arduino Nano ESP32 - DHT22 - Relay
In this tutorial, we are going to learn how to use Arduino Nano ESP32 to control the relay based on the temperature read from DHT22 sensor.
Hardware Preparation
Or you can buy the following kits:
| 1 | × | DIYables Sensor Kit (18 sensors/displays) |
Additionally, some of these links are for products from our own brand, DIYables .
Overview of Relay and DHT22 Sensor
If you do not know about DHT22 temperature sensor and relay (pinout, how it works, how to program ...), learn about them in the following tutorials:
Wiring Diagram
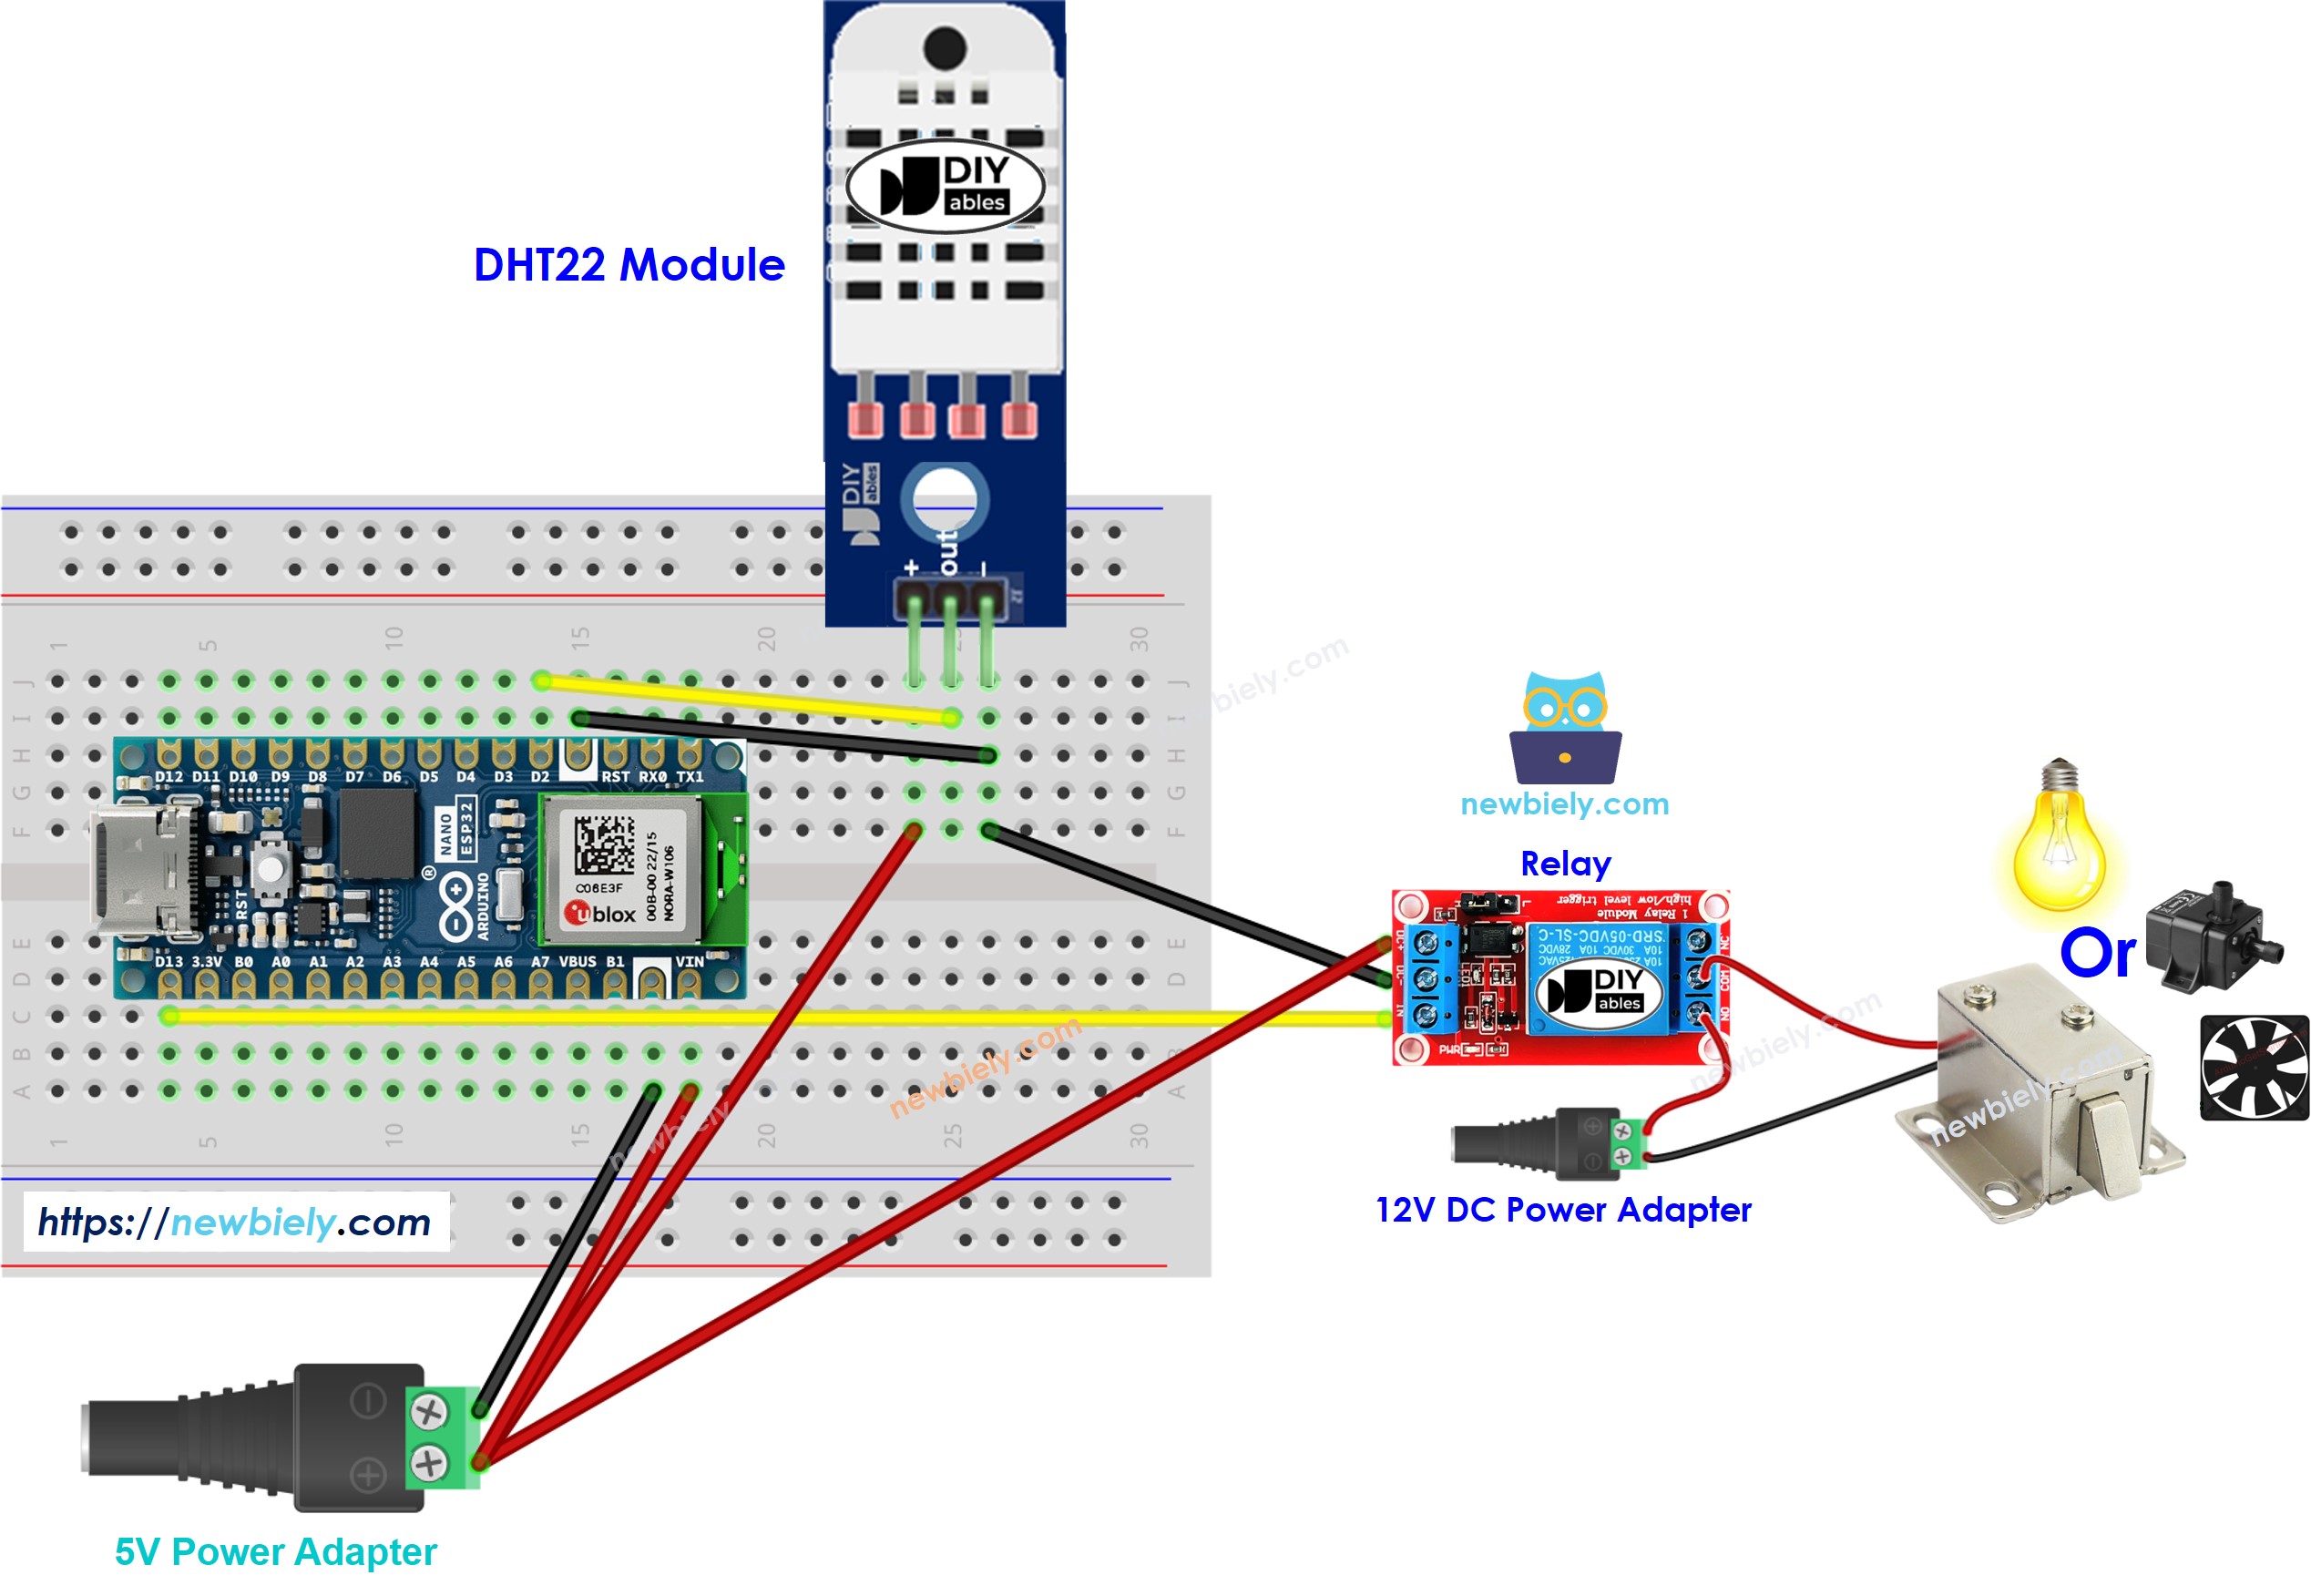
This image is created using Fritzing. Click to enlarge image
How System Works
- Arduino Nano ESP32 reads the temperature from the DHT22 sensor
- If the temperature exceeds an upper threshold, Arduino Nano ESP32 turn on the relay
- If the temperature falls below a lower threshold, Arduino Nano ESP32 turn off the relay
The above process is repeated infinitely in the loop.
If you want to turn on and turn off the relay when the temperature is above and below a specific value respectively, you just need to set the upper threshold and lower threshold to the same value.
Arduino Nano ESP32 Code
In the above codes, the Arduino Nano ESP32 turn on the relay when the temperature exceeds 25°C, and keep the relay on until the temperature is below 20°C
Detailed Instructions
To get started with Arduino Nano ESP32, follow these steps:
- If you are new to Arduino Nano ESP32, refer to the tutorial on how to set up the environment for Arduino Nano ESP32 in the Arduino IDE.
- Wire the components according to the provided diagram.
- Connect the Arduino Nano ESP32 board to your computer using a USB cable.
- Launch the Arduino IDE on your computer.
- Select the Arduino Nano ESP32 board and its corresponding COM port.
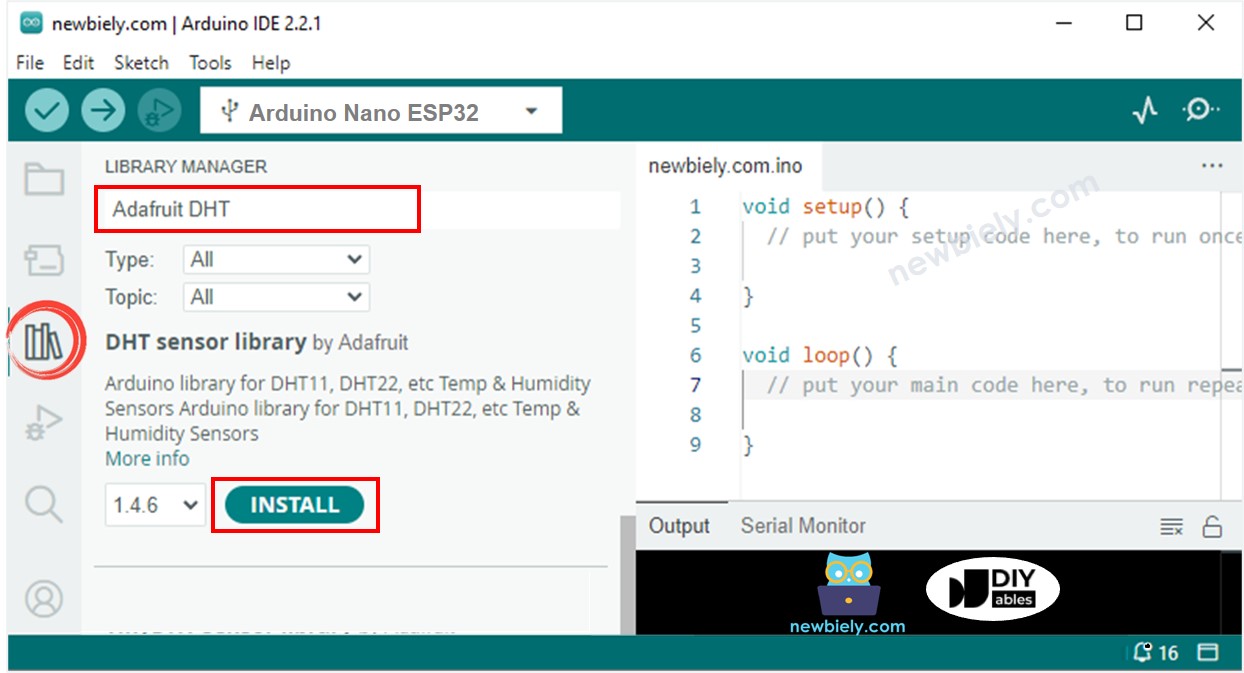
- Click to the Libraries icon on the left bar of the Arduino IDE.
- Search “DHT”, then find the DHT sensor library by Adafruit
- Click Install button to install the library.
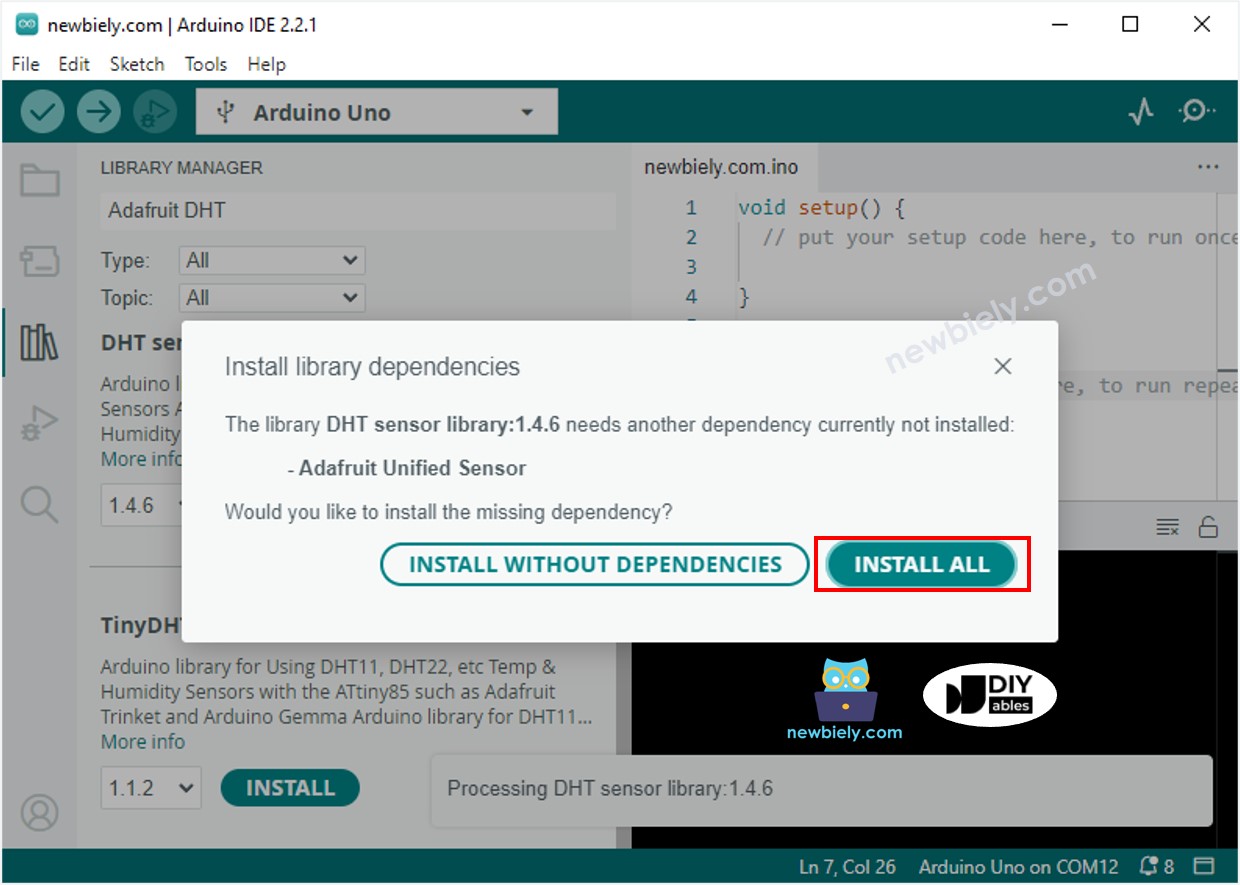
- You will be ased for intall some other library dependancies
- Click Install All button all library dependancies.
- Copy the above code corresponding to the sensor you have and open with Arduino IDE
- Click Upload button on Arduino IDE to upload code to ESP32
- Make enviroment around sensor hotter or colder
- See the state of the relay