Arduino Nano ESP32 - Temperature Sensor
This tutorial provides instructions on how to use Arduino Nano ESP32 to read the temperature from DS18B20 temperature sensor and print it to Serial Monitor.
Hardware Preparation
Or you can buy the following kits:
| 1 | × | DIYables Sensor Kit (18 sensors/displays) |
Additionally, some of these links are for products from our own brand, DIYables .
Buy Note: Many DS18B20 sensors available in the market are unreliable. We strongly recommend buying the sensor from the DIYables brand using the link provided above. We tested it, and it worked reliably.
Overview of One Wire Temperature Sensor - DS18B20
DS18B20 Temperature Sensor Pinout
DS18B20 temperature sensor has three pins:
- GND pin: connect this pin to GND (0V)
- VCC pin: connect this pin to VCC (5V or 3.3V)
- DATA pin: is 1-Wire Data Bus. It should be connected to a digital pin on Arduino Nano ESP32.
The DS18B20 sensor has two forms:
- TO-92 package (looks similar to a transistor)
- Waterproof probe. We use this form in this tutorial.

Connecting a DS18B20 temperature sensor with an Arduino often requires a pull-up resistor, which can be a hassle. However, some manufacturers have made the process simpler by offering a wiring adapter with a built-in pull-up resistor and a screw terminal block for easy connection.
Wiring Diagram between DS18B20 Temperature Sensor and Arduino Nano ESP32
- With breadboard
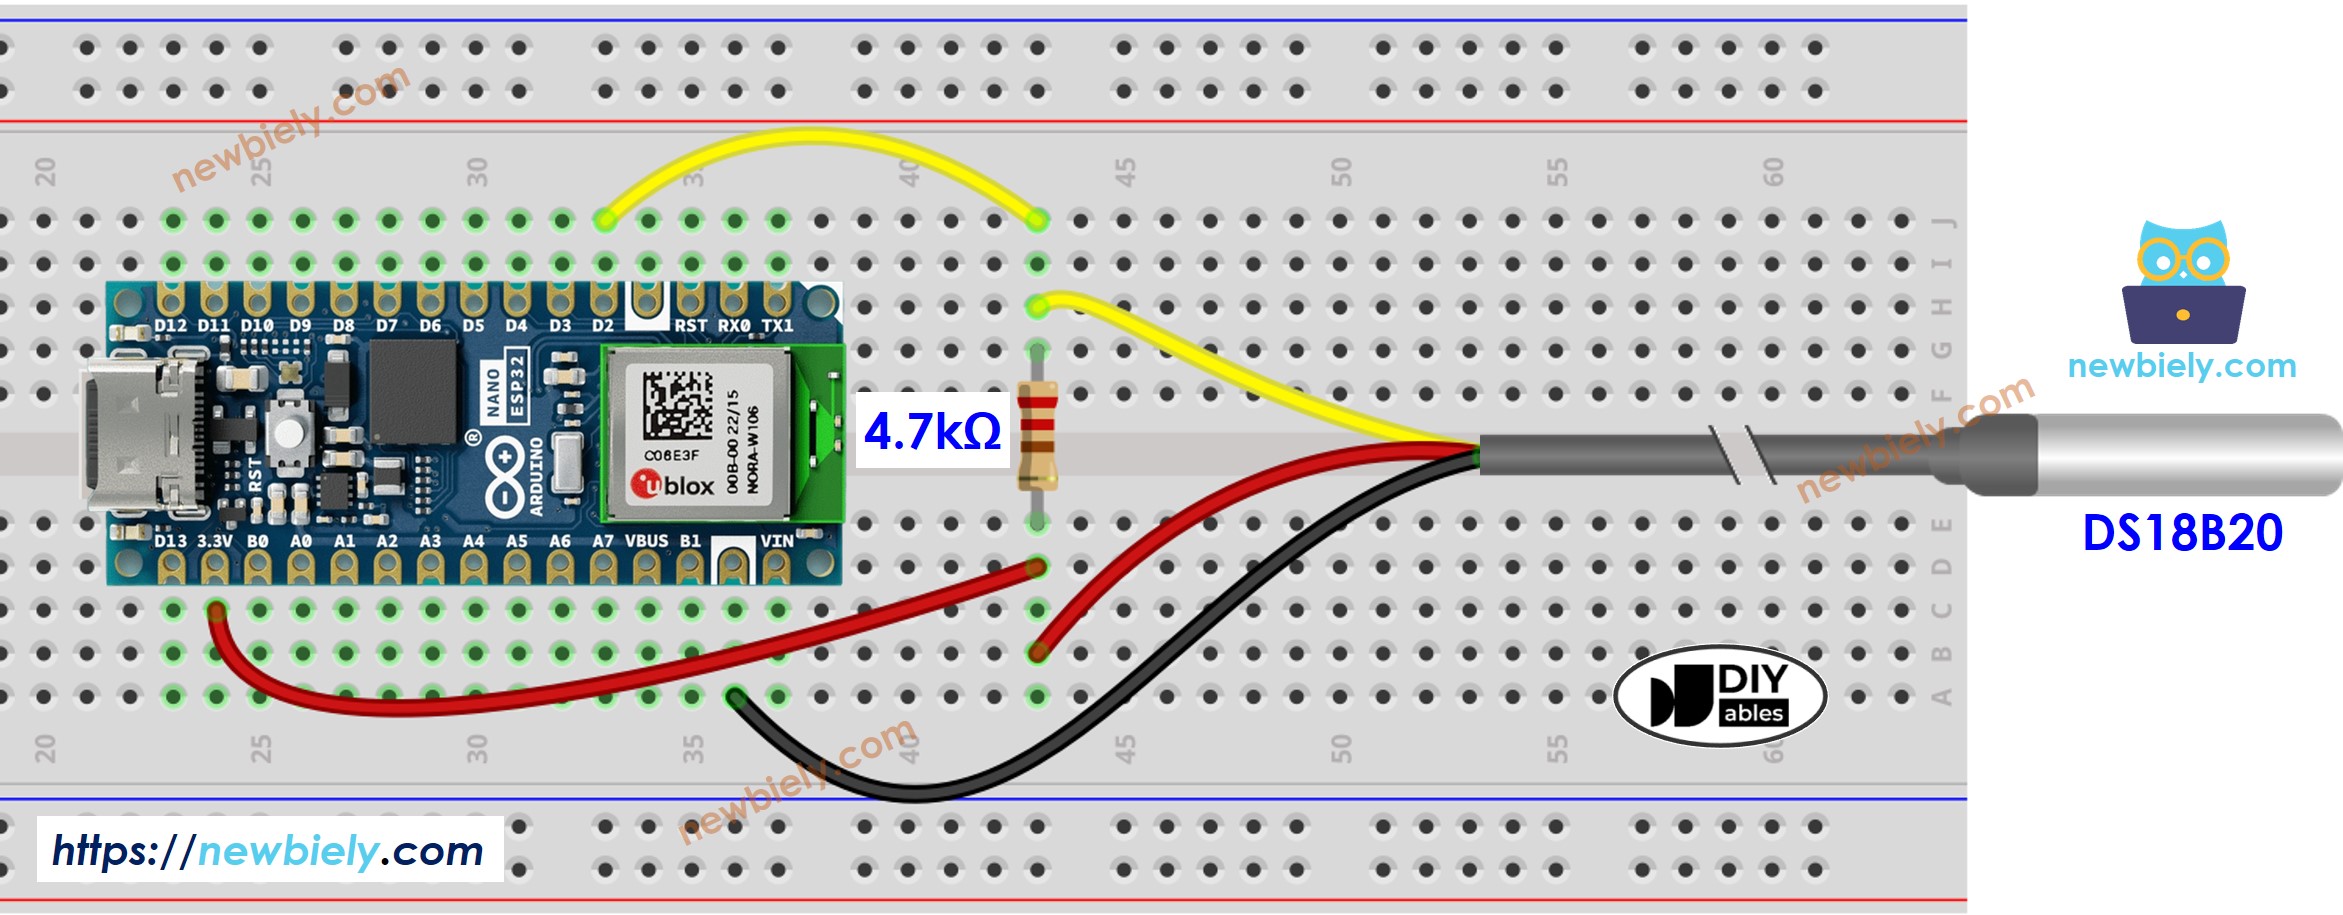
This image is created using Fritzing. Click to enlarge image
- Wiring diagram with adapter (recommended)
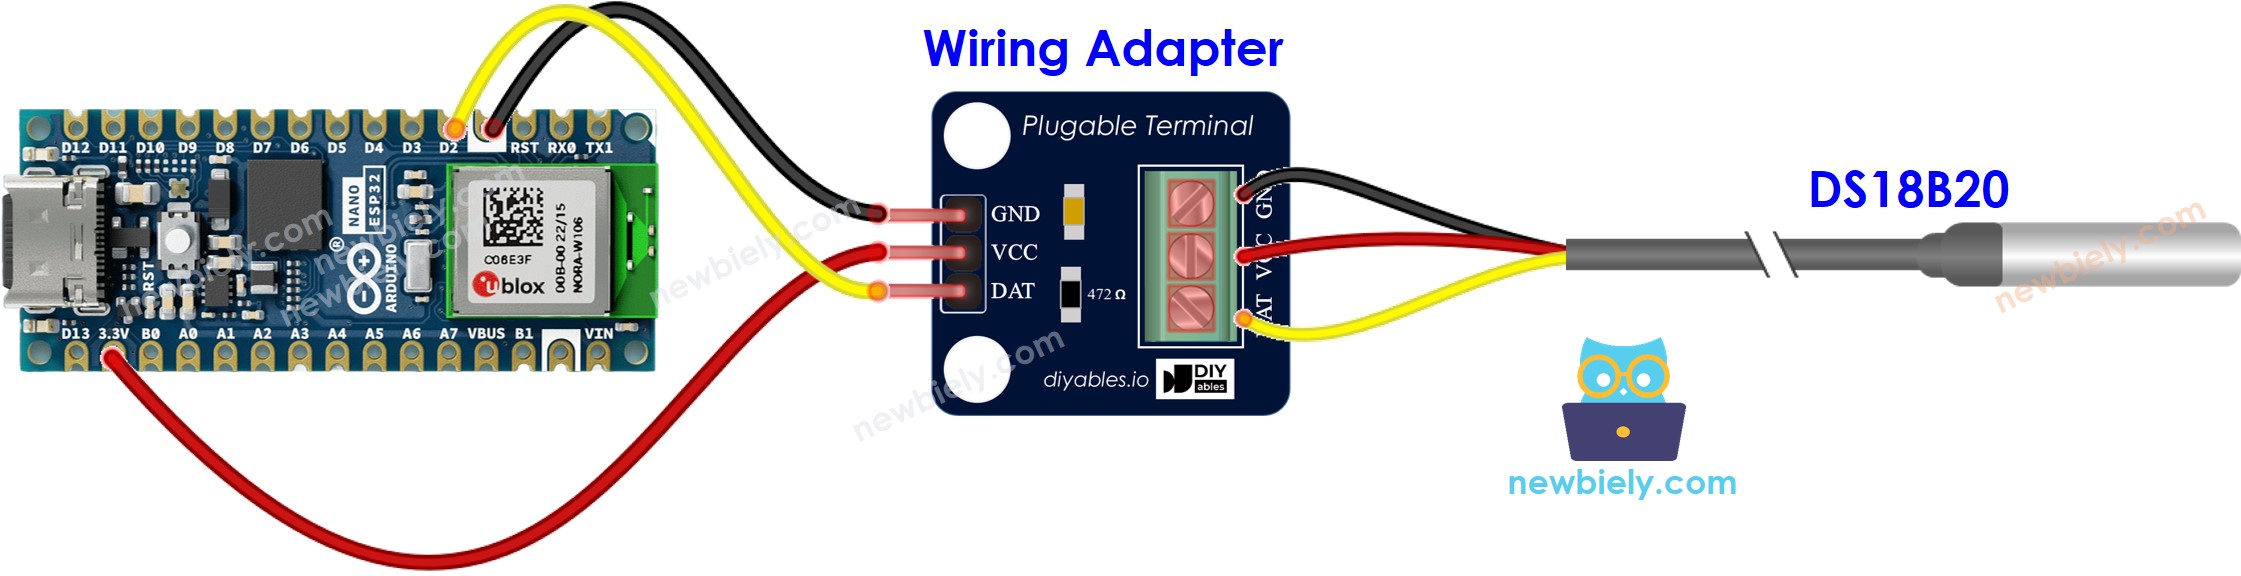
This image is created using Fritzing. Click to enlarge image
For ease of connection, it's advisable to purchase a DS18B20 sensor that comes with a wiring adapter equipped with a built-in resistor, eliminating the need for an additional resistor in the wiring.
Arduino Nano ESP32 Code
Detailed Instructions
To get started with Arduino Nano ESP32, follow these steps:
- If you are new to Arduino Nano ESP32, refer to the tutorial on how to set up the environment for Arduino Nano ESP32 in the Arduino IDE.
- Wire the components according to the provided diagram.
- Connect the Arduino Nano ESP32 board to your computer using a USB cable.
- Launch the Arduino IDE on your computer.
- Select the Arduino Nano ESP32 board and its corresponding COM port.
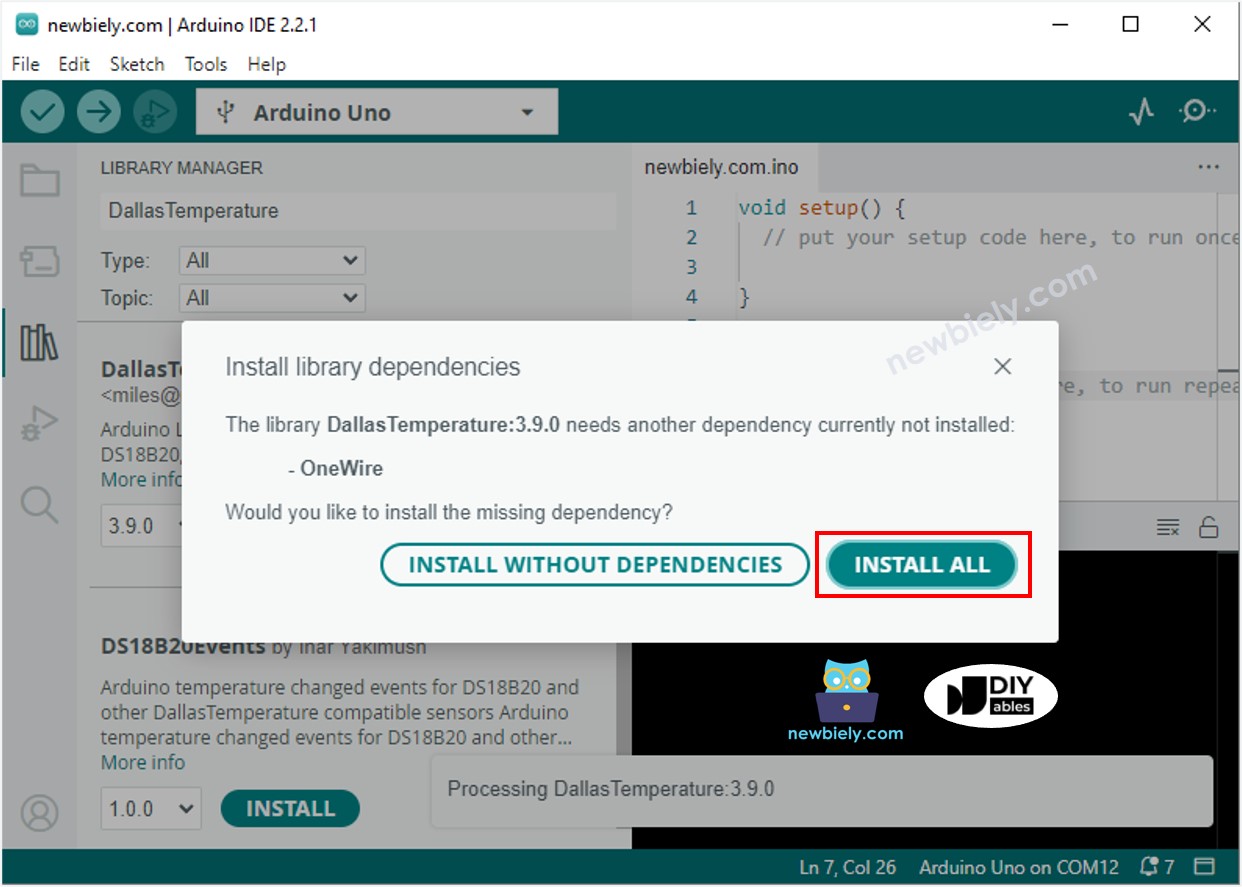
- Open the Library Manager by clicking on the Library Manager icon on the left navigation bar of Arduino IDE
- Type “DallasTemperature” on the search box, then look for the DallasTemperature library by Miles Burton.
- Click Install button to install DallasTemperature library.

- You will be asked to install the dependency. Click Install All button to install OneWire library.
- Copy the above code and paste it to Arduino IDE.
- Compile and upload code to Arduino Nano ESP32 board by clicking Upload button on Arduino IDE
- Make the sensor hotter or colder by gripping the DS18B20 temerature sensor on your hand, or embedding it on hot and cold water.
- Check out the result on the Serial Monitor. It looks like the below:.