Arduino Nano ESP32 - LCD 20x4
In this Arduino Nano ESP32 LCD 20x4 I2C tutorial, we will learn how to connect an LCD 20x4 (Liquid Crystal Display) to the Arduino Nano ESP32 board via I2C Interface.
Hardware Preparation
Or you can buy the following kits:
| 1 | × | DIYables Sensor Kit (18 sensors/displays) |
Additionally, some of these links are for products from our own brand, DIYables .
Buy Note: Alternatively, you can assemble the LCD I2C display using LCD 1602 Display and PCF8574 I2C Adapter Module.
Overview of LCD I2C 20x4
Pinout
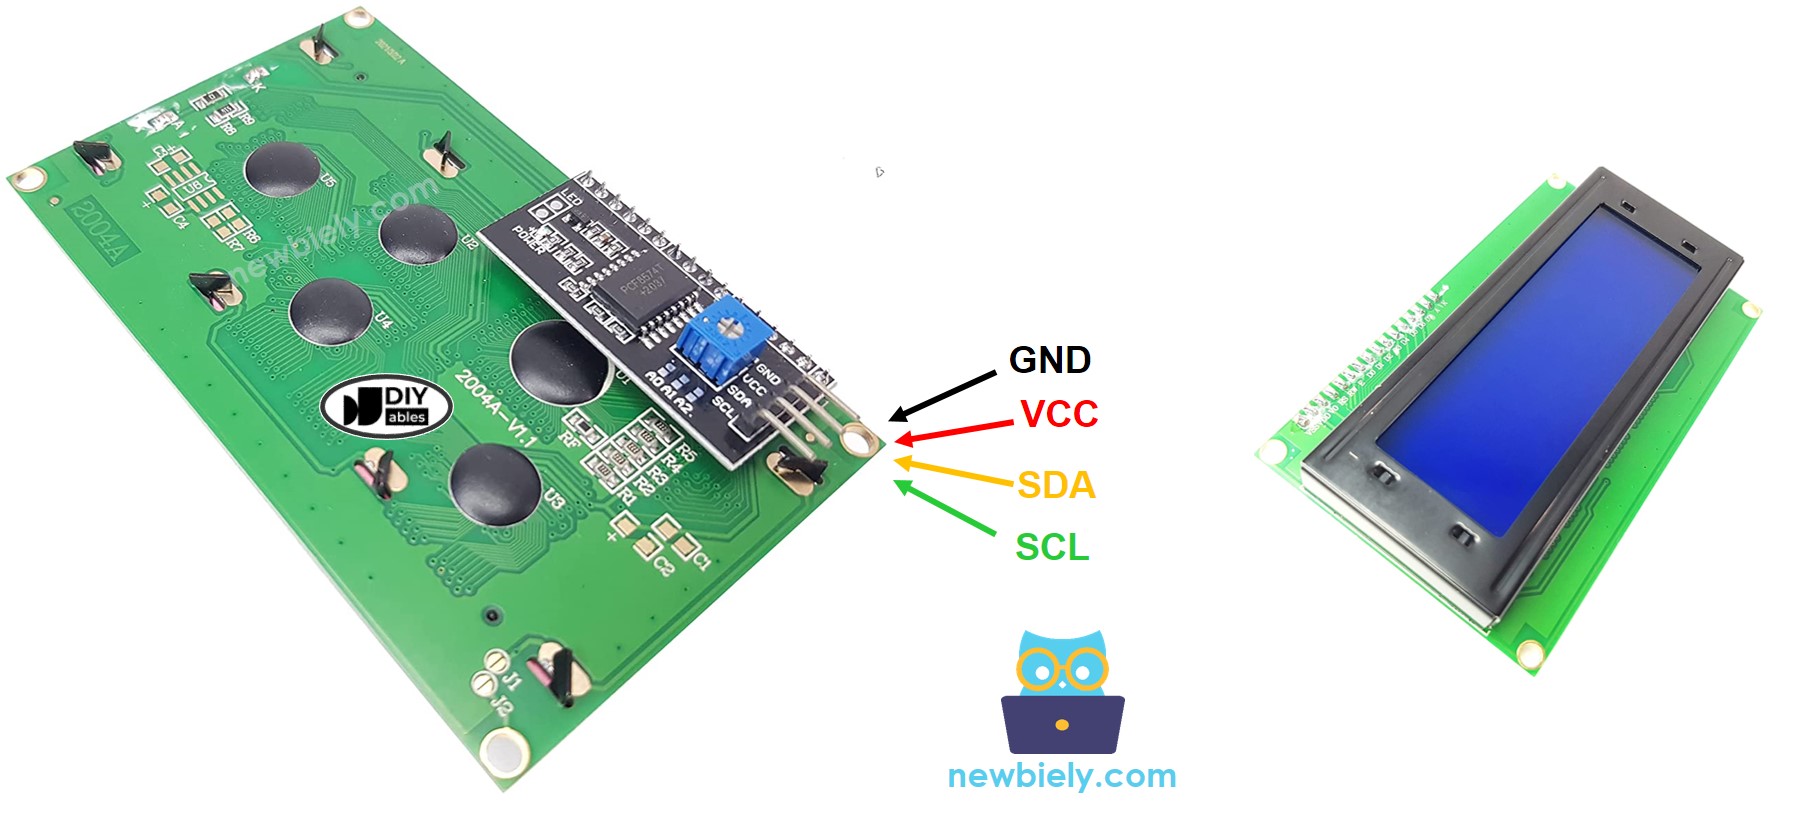
LCD 20x4 I2C uses I2C interface, so it has 4 pins:
- GND pin: needs to be connected to GND (0V).
- VCC pin: the power supply for the LCD, needs to be connected to VCC (5V).
- SDA pin: I2C data signal
- SCL pin: I2C clock signal
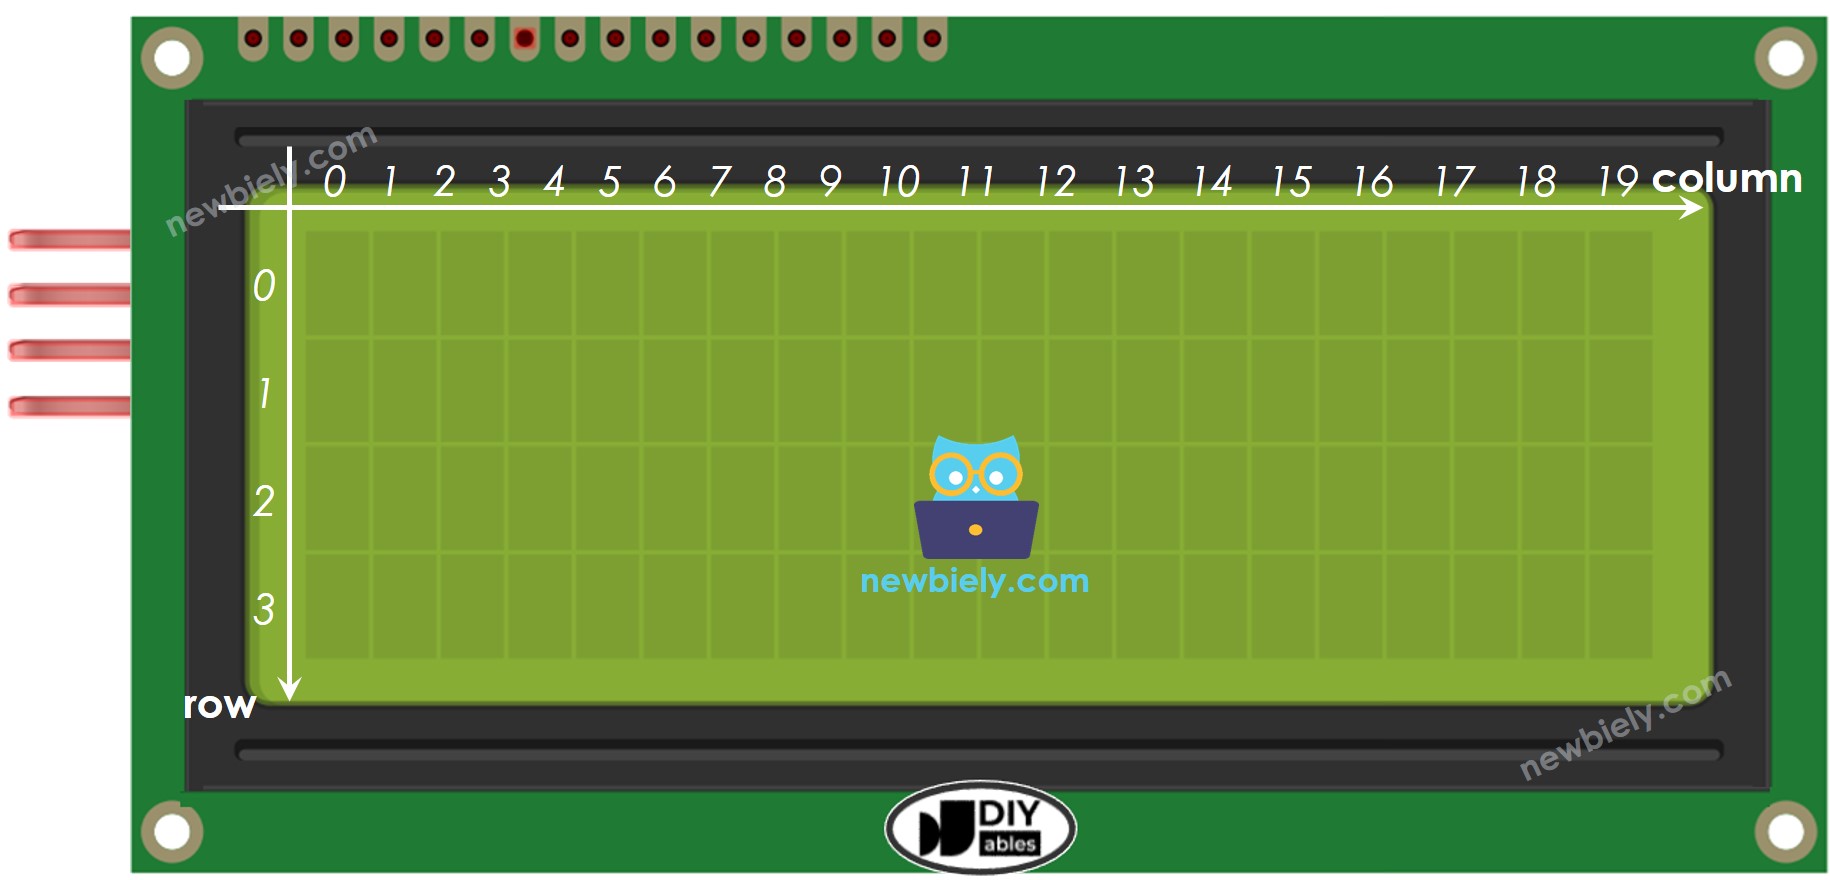
LCD Coordinate
LCD I2C 20x4 includes 20 columns and 4 rows. the conlums and rows are indexed from 0.
Wiring Diagram
- When powering the Arduino Nano ESP32 board via USB port.
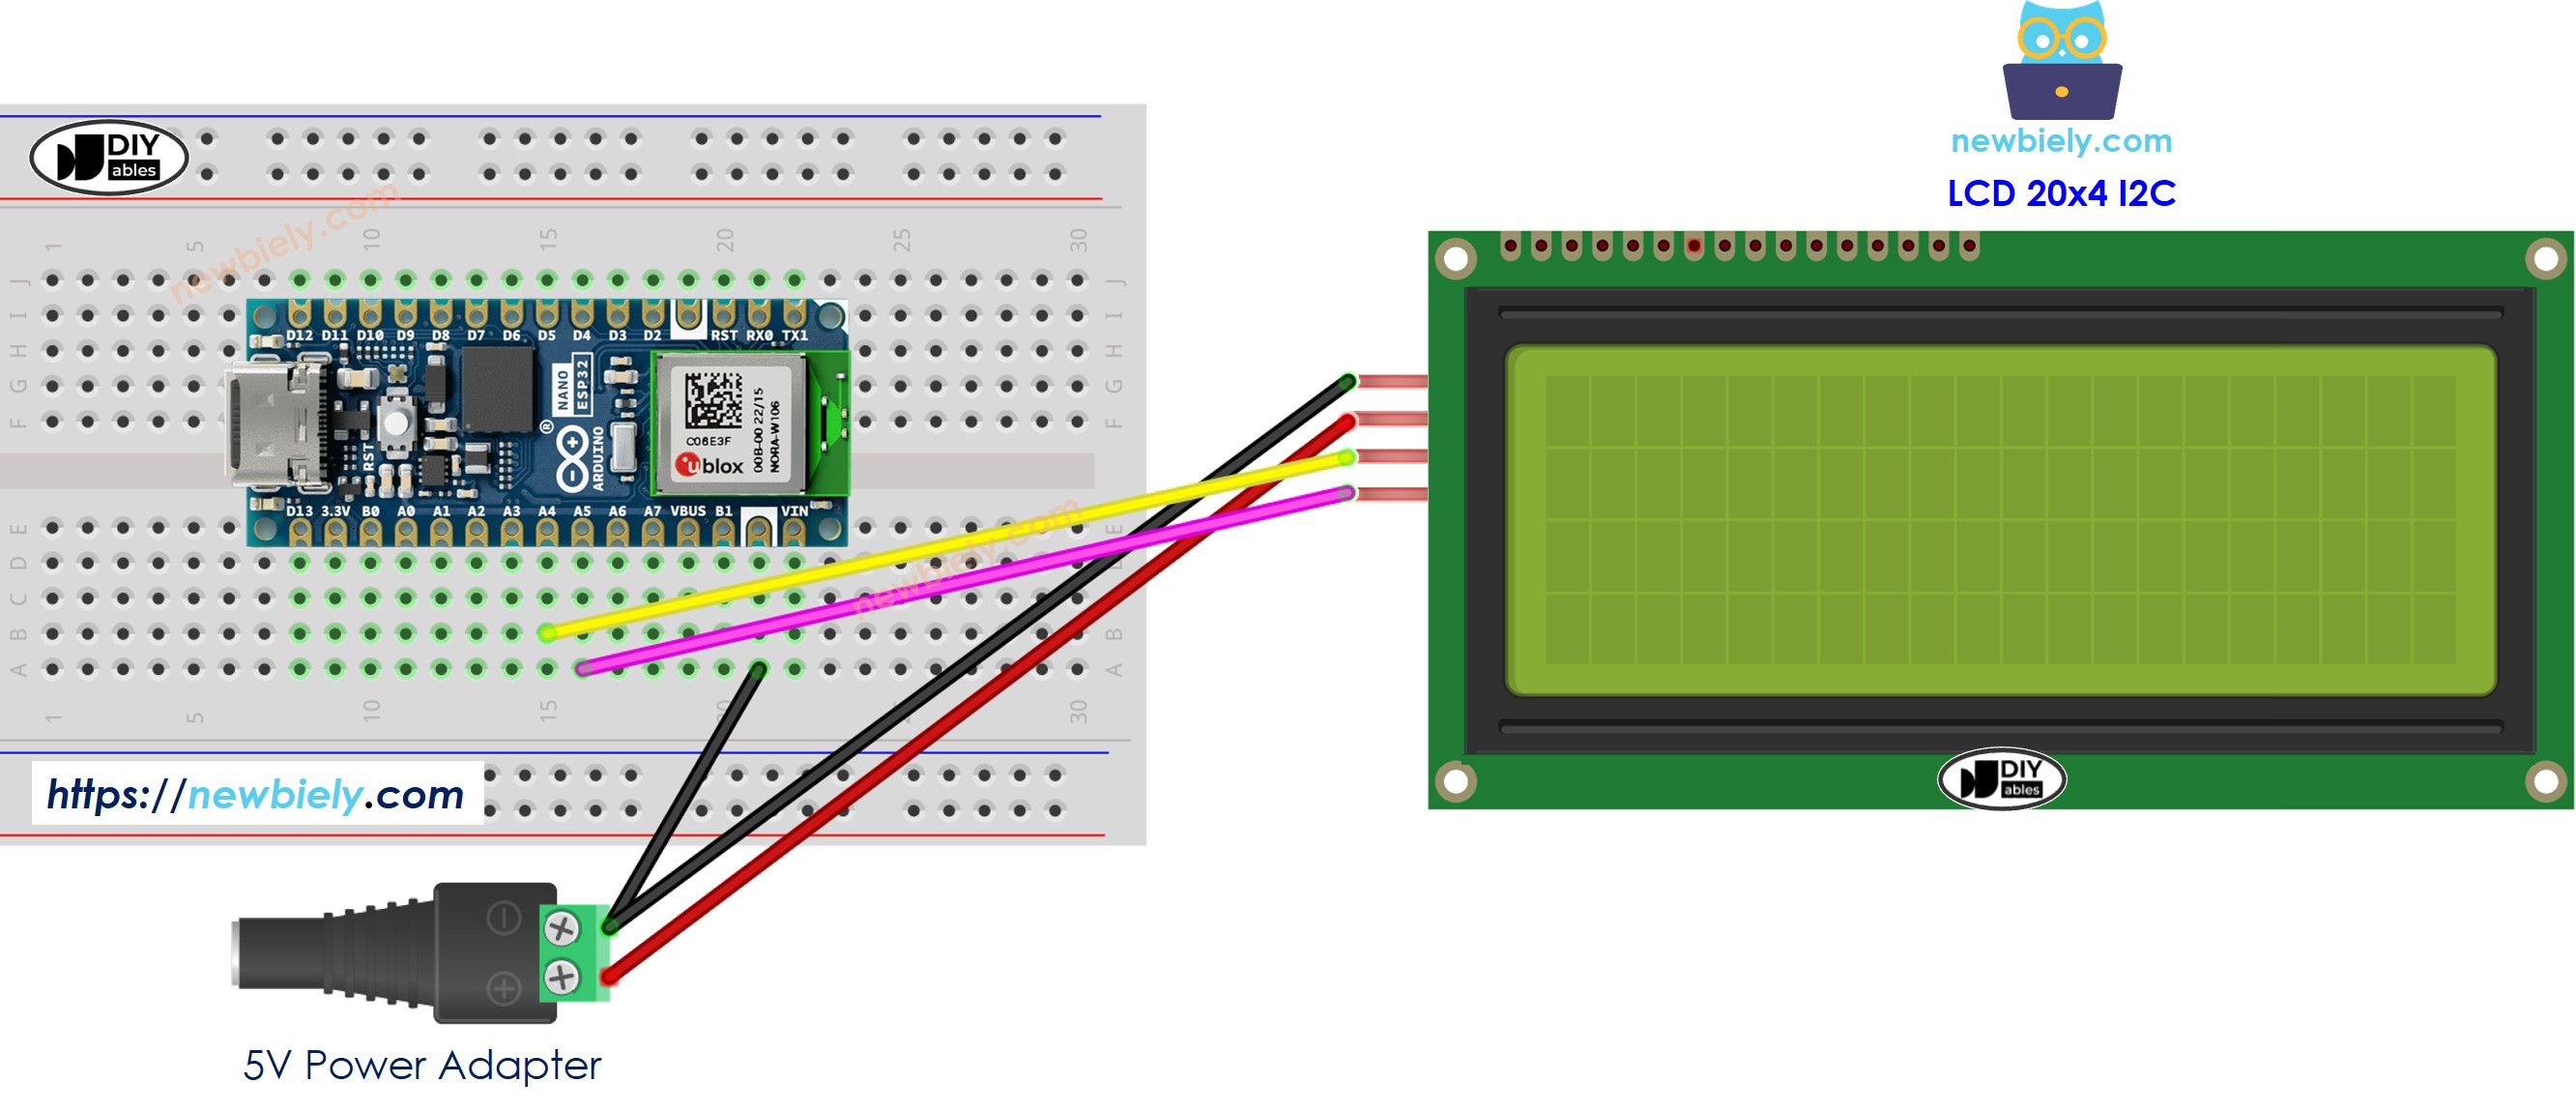
This image is created using Fritzing. Click to enlarge image
- When powering the Arduino Nano ESP32 board via Vin pin.

This image is created using Fritzing. Click to enlarge image
※ NOTE THAT:
When powering the Arduino Nano ESP32 through the USB port, it is possible to power the LCD display using the VBUS pin of the Arduino Nano ESP32, eliminating the need for an external power source. However, it is important to note that this approach may not work as the power provided by the VBUS pin might be insufficient for the proper functioning of the LCD display.
| LCD I2C | Arduino Nano ESP32 |
|---|---|
| VCC | 5V |
| GND | GND |
| SDA | A4 |
| SCL | A5 |
How To Program For LCD I2C
Thanks to the DIYables_LCD_I2C library, the using LCD is a piece of cake.
- Include the library:
- Declare a DIYables_LCD_I2C object with I2C address, the number of columns, the number of rows:
- Initialize the LCD.
- Move cursor to the desired position (column_index, row_index)
- Print a message to the LCD.
※ NOTE THAT:
The I2C address of LCD can vary according to the manufacturers. In the code, we used 0x27 that is specified by DIYables manufacturer
Arduino Nano ESP32 Code
Detailed Instructions
To get started with Arduino Nano ESP32, follow these steps:
- If you are new to Arduino Nano ESP32, refer to the tutorial on how to set up the environment for Arduino Nano ESP32 in the Arduino IDE.
- Wire the components according to the provided diagram.
- Connect the Arduino Nano ESP32 board to your computer using a USB cable.
- Launch the Arduino IDE on your computer.
- Select the Arduino Nano ESP32 board and its corresponding COM port.
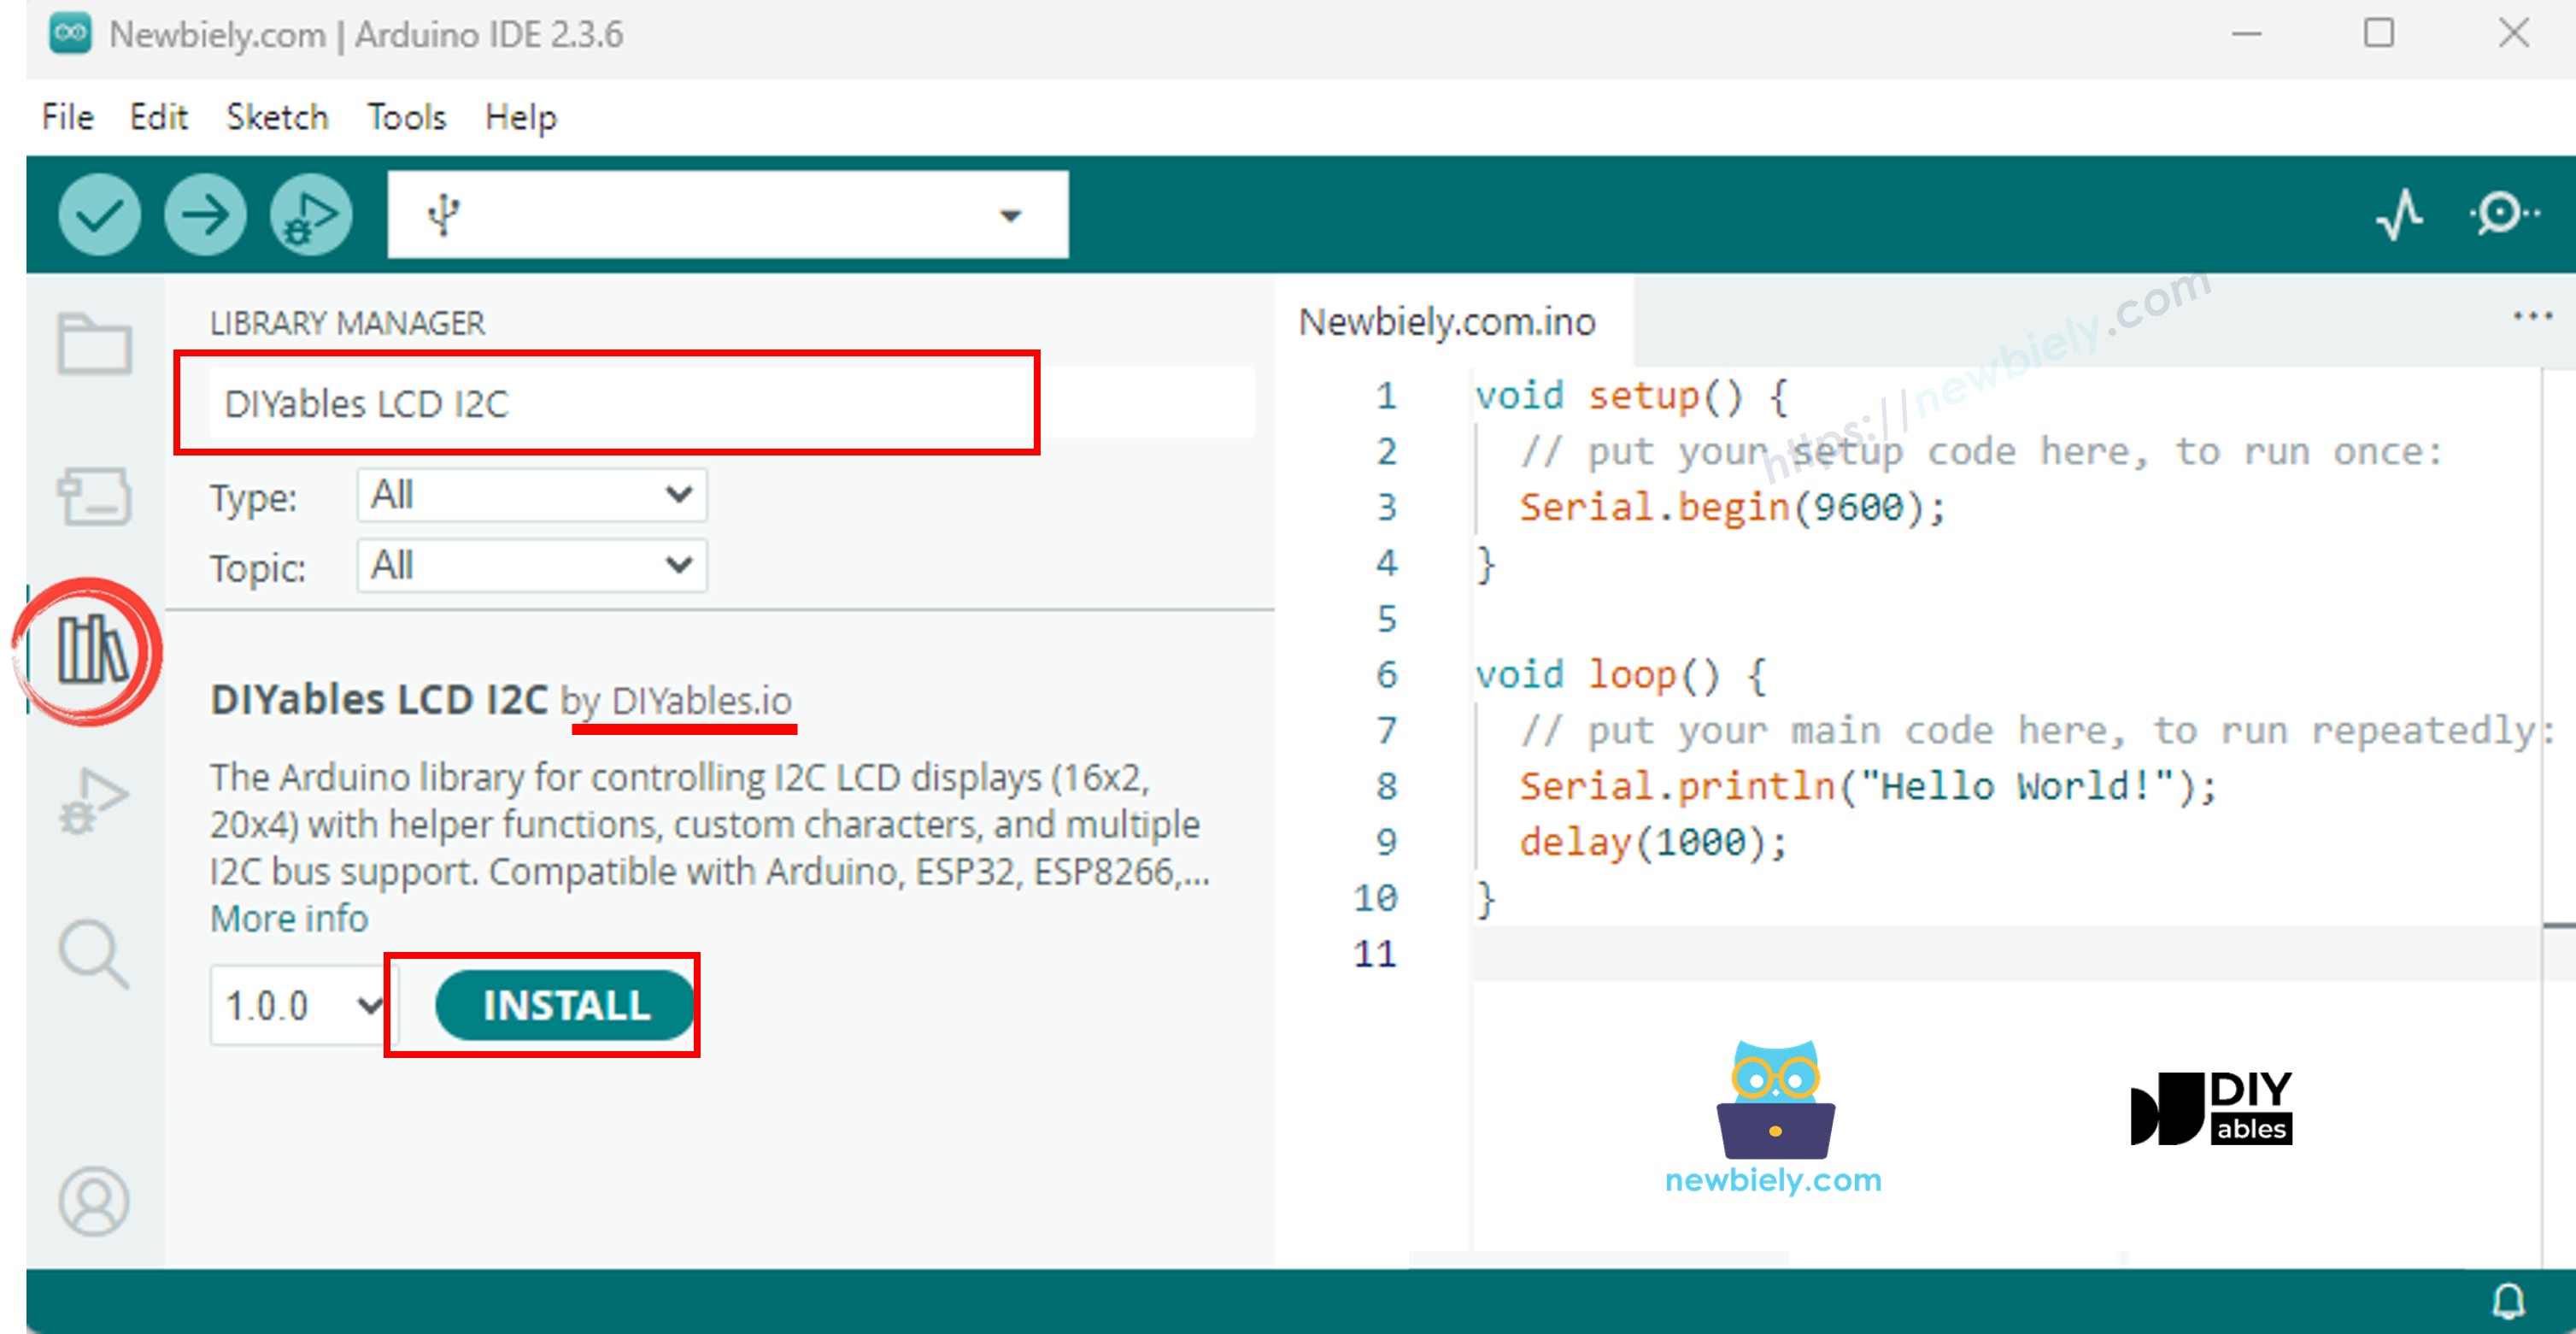
- Open the Library Manager by clicking on the Library Manager icon on the left navigation bar of Arduino IDE
- Search "DIYables LCD I2C", then find the DIYables_LCD_I2C library by DIYables
- Click Install button to install DIYables_LCD_I2C library.
- Copy the above code and open with Arduino IDE
- Click Upload button on Arduino IDE to upload code to Arduino Nano ESP32
- See the result on LCD
- Try modifying text and position