Arduino Nano ESP32 - TM1637 4-Digit 7-Segment Display
Welcome to this hands-on tutorial where we connect a TM1637 4-digit 7-segment display to an Arduino Nano ESP32. The Nano ESP32 is built around the ESP32-S3 chip, giving you Wi-Fi, Bluetooth Low Energy, and dual-core processing power - all packed into the familiar Nano form factor with a USB-C connector. The TM1637 module runs on 3.3V, so it pairs directly with the Nano ESP32 without any level shifting.
In this tutorial you will:
- Wire the TM1637 display to the Arduino Nano ESP32.
- Display integers, text, and temperature on the 7-segment display.
- Show time in HH:MM format with a blinking colon.
- Control individual digits and adjust brightness.
Hardware Preparation
Or you can buy the following kits:
| 1 | × | DIYables Sensor Kit (18 sensors/displays) |
Additionally, some of these links are for products from our own brand, DIYables .
Overview of the TM1637 Display Module
The TM1637 is a specialized LED driver IC that handles the multiplexing of four 7-segment digits on its own. Data transfer uses a 2-wire serial protocol through CLK and DIO pins. The chip stores display content in internal registers, so whatever you send to it stays on screen without the microcontroller having to refresh it continuously.
Module capabilities:
- 4 digits, each with 7 segments and a decimal point
- Colon separator between digit 1 and digit 2
- 8 brightness levels controlled by software
- 2-wire interface supporting 3.3V and 5V logic
- Nonvolatile display memory
| Function | Pin |
|---|---|
| CLK | Clock signal input |
| DIO | Data input/output |
| VCC | Power supply (3.3V or 5V) |
| GND | Ground |
Connect CLK and DIO to any available digital pins on the Nano ESP32. The examples use D2 and D4.
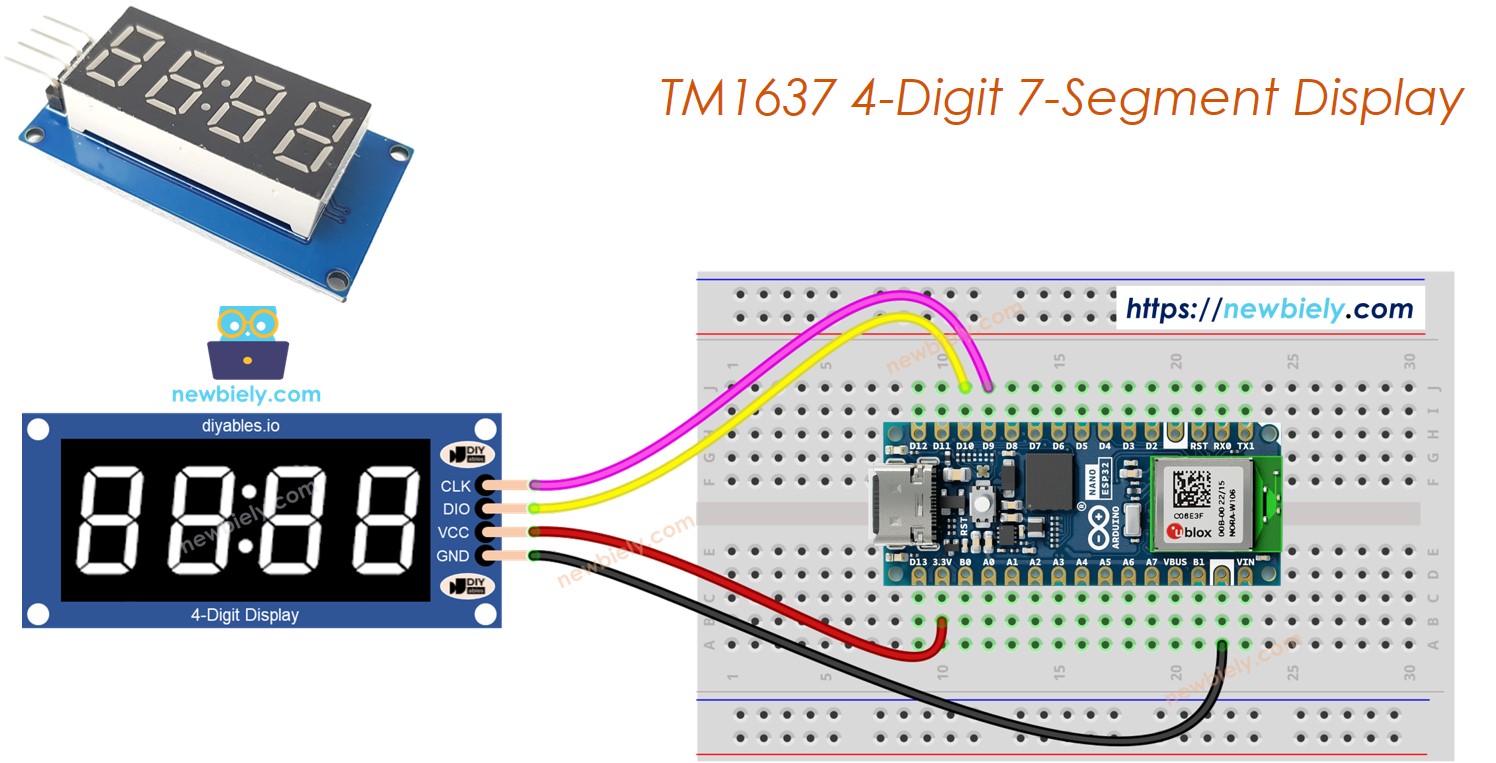
Wiring Diagram
Connect the TM1637 module to the Arduino Nano ESP32:
- CLK to D9
- DIO to D10
- VCC to 3.3V
- GND to GND
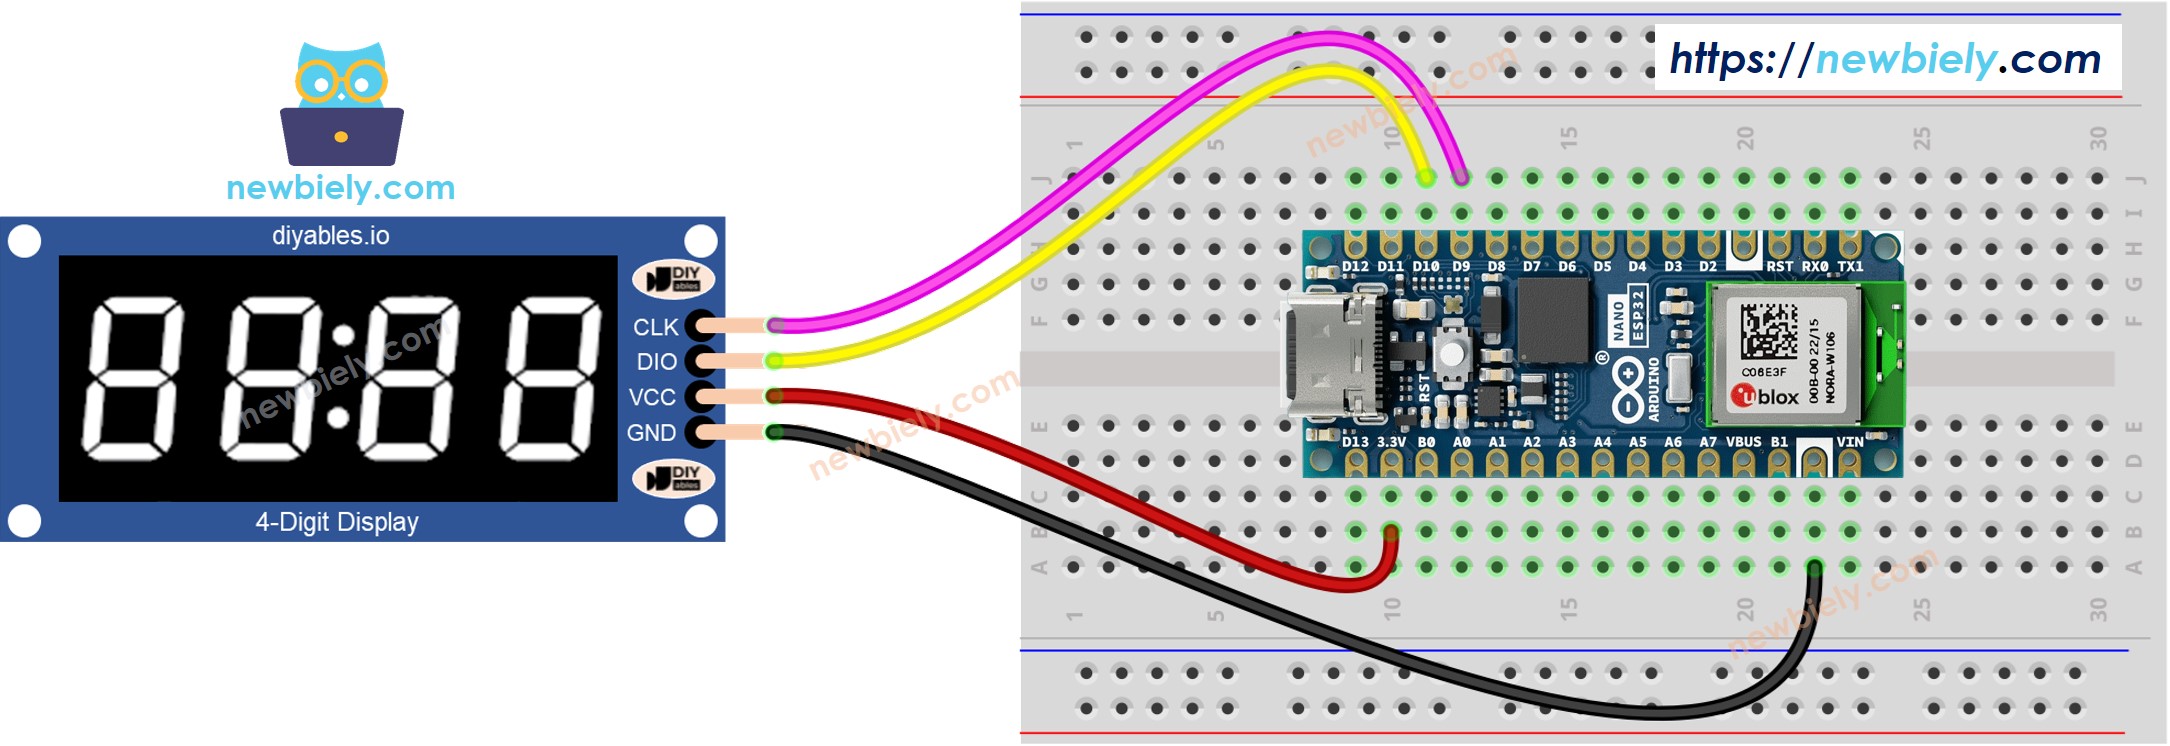
This image is created using Fritzing. Click to enlarge image
Library Setup
- Plug the Arduino Nano ESP32 into your computer through its USB-C port.
- Open Arduino IDE. Pick Arduino Nano ESP32 from the board list and select the right port.
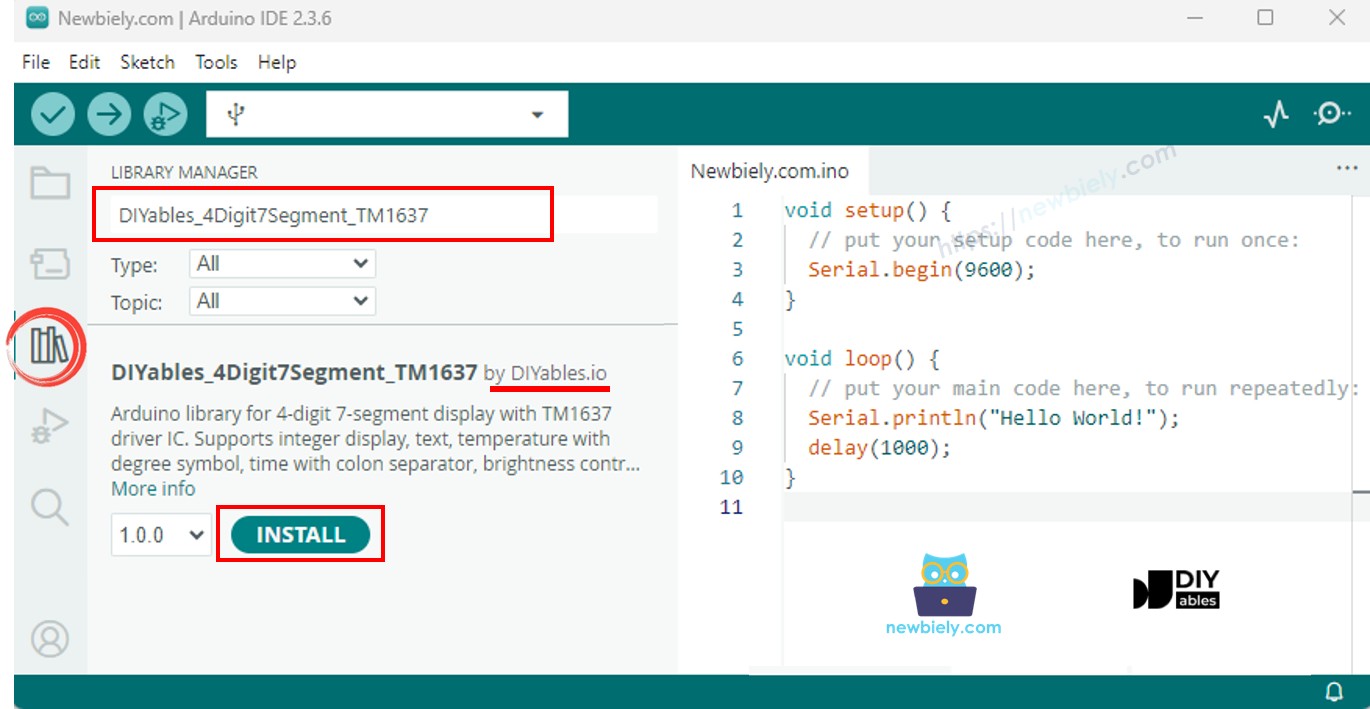
- Click the Libraries icon on the left sidebar.
- Type "DIYables_4Digit7Segment_TM1637" in the search field. Find the DIYables entry.
- Hit Install.
Self-contained library - nothing else to install.
Starter Sketch
The minimum code needed to get going with the DIYables_4Digit7Segment_TM1637 library:
Create the display object with the pin numbers, call begin(), and start writing data. The Nano ESP32 uses Dx pin labels which map to the ESP32-S3 GPIO numbers internally.
Tutorial - Display Integer Numbers
Put the display through its paces with various integer values - positive, negative, and zero-padded.
Hands-On
- Wire the TM1637 module to the Nano ESP32 as shown in the wiring diagram.
- Connect the Nano ESP32 to your computer via USB-C.
- In Arduino IDE, choose the board and port, paste the code, and click Upload.
- Open the Serial Monitor to observe the results.
The display cycles through 0, 42, 1234, -5, -123, 9999, and then shows "0042" with zero-padding.
Method Reference
| Method | Action | Syntax |
|---|---|---|
| print(int) | Display an integer (-999 to 9999) | display.print(1234) |
| print(int, true) | Display with leading zeros | display.print(42, true) |
| clear() | Clear all digits | display.clear() |
Tutorial - Display Text and Temperature
Put text strings and temperature readings on the display, including the degree symbol.
Hands-On
- Wire the module and upload the sketch.
- Open the Serial Monitor.
The display shows "HELP", "Hi", "COOL", "done", then "25°C" and "72°F".
Method Reference
| Method | Action | Syntax |
|---|---|---|
| print(const char*) | Display text (up to 4 chars) | display.print("HELP") |
| printTemperature(int, char) | Display temperature with degree/unit | display.printTemperature(25, 'C') |
| DEGREE | Degree symbol constant | display.DEGREE |
Tutorial - Display Time with Blinking Colon
Set up a clock-style display with the colon blinking at 500ms intervals.
Hands-On
- Upload and watch "12:30" with the colon toggling on and off.
Method Reference
| Method | Action | Syntax | |
|---|---|---|---|
| printTime(int, int) | Display time HH | MM with colon | display.printTime(12, 30) |
| printTime(int, int, bool) | Display time, control colon state | display.printTime(12, 30, false) |
Tutorial - Blink the Display
Create a blinking effect using off() and on() while keeping display content intact.
Hands-On
- Upload the code. "1234" blinks five times, then "HELP" blinks five times.
Method Reference
| Method | Action | Syntax |
|---|---|---|
| off() | Turn display off (data preserved) | display.off() |
| on() | Turn display back on | display.on() |
| setBrightness(int) | Set brightness 0-7 | display.setBrightness(4) |
Tutorial - Individual Digit Control
Set each digit position independently using numbers, characters, and the colon.
Hands-On
- Upload and observe the different digit and character combinations on the display.
Method Reference
| Method | Action | Syntax |
|---|---|---|
| setNumber(int, int) | Set digit 0-9 at position 0-3 | display.setNumber(0, 1) |
| setChar(int, char) | Set character at position 0-3 | display.setChar(0, 'H') |
| setColon(bool) | Control colon on/off | display.setColon(true) |
| setSegments(int, uint8_t) | Set raw segments at position 0-3 | display.setSegments(0, 0x76) |
Troubleshoot
| Issue | Possible Cause | Resolution |
|---|---|---|
| Display is blank | Wrong wiring or pin numbers | Verify CLK/DIO connections match code and VCC goes to 3.3V |
| Wrong characters | CLK and DIO swapped | Switch the two signal wires |
| Display too dim | Low brightness setting | Call setBrightness(7) for maximum |
| Library not found | Not installed | Install DIYables_4Digit7Segment_TM1637 from Library Manager |
| Upload fails | Board in wrong mode | Hold the BOOT button while pressing RESET, then retry upload |
Platform Support
The library is built entirely on Arduino standard APIs and supports all Arduino-compatible platforms (architectures=*).