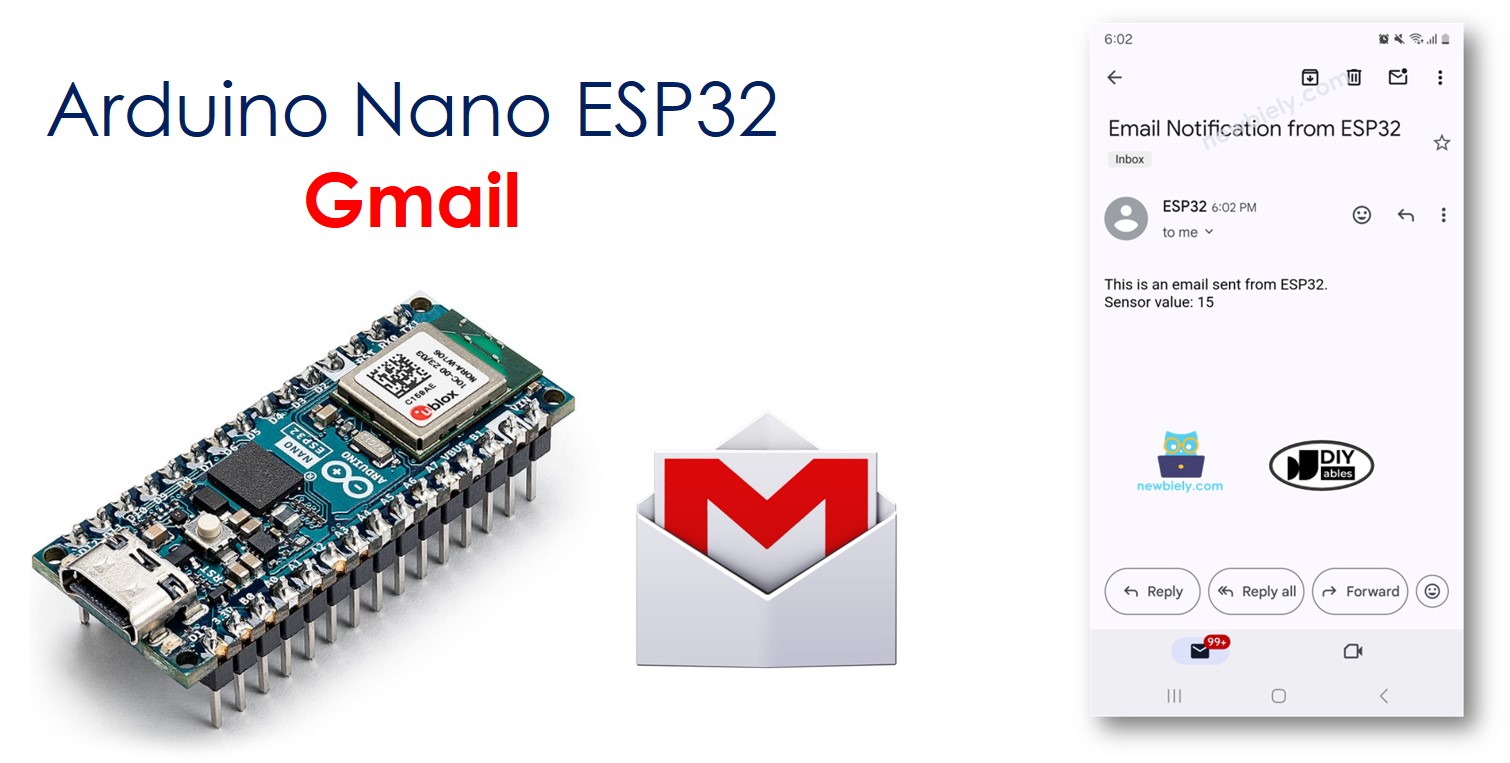
Arduino Nano ESP32 - Gmail
This guide will show you how to configure the Arduino Nano ESP32 to send an email through your Gmail account. You can send emails from your Gmail to any other email account.
Hardware Preparation
Or you can buy the following kits:
| 1 | × | DIYables Sensor Kit (30 sensors/displays) | |
| 1 | × | DIYables Sensor Kit (18 sensors/displays) |
Disclosure: Some of the links provided in this section are Amazon affiliate links. We may receive a commission for any purchases made through these links at no additional cost to you.
Additionally, some of these links are for products from our own brand, DIYables .
Additionally, some of these links are for products from our own brand, DIYables .
Pre-Preparation
To use the code, you need a Gmail account and a special app password. Here are the key points to remember:
- Create a new Gmail account specifically for testing, not your regular one, to avoid any issues.
- The password used in the Arduino Nano ESP32 code is not the same as your Gmail password. You need to obtain an "App Password" from your Google Account by following certain steps.
Here are the steps one by one:
- Create a new Gmail account.
- Log into the account you created.
- Go to your Google Account.
- Navigate to the "Security" section.
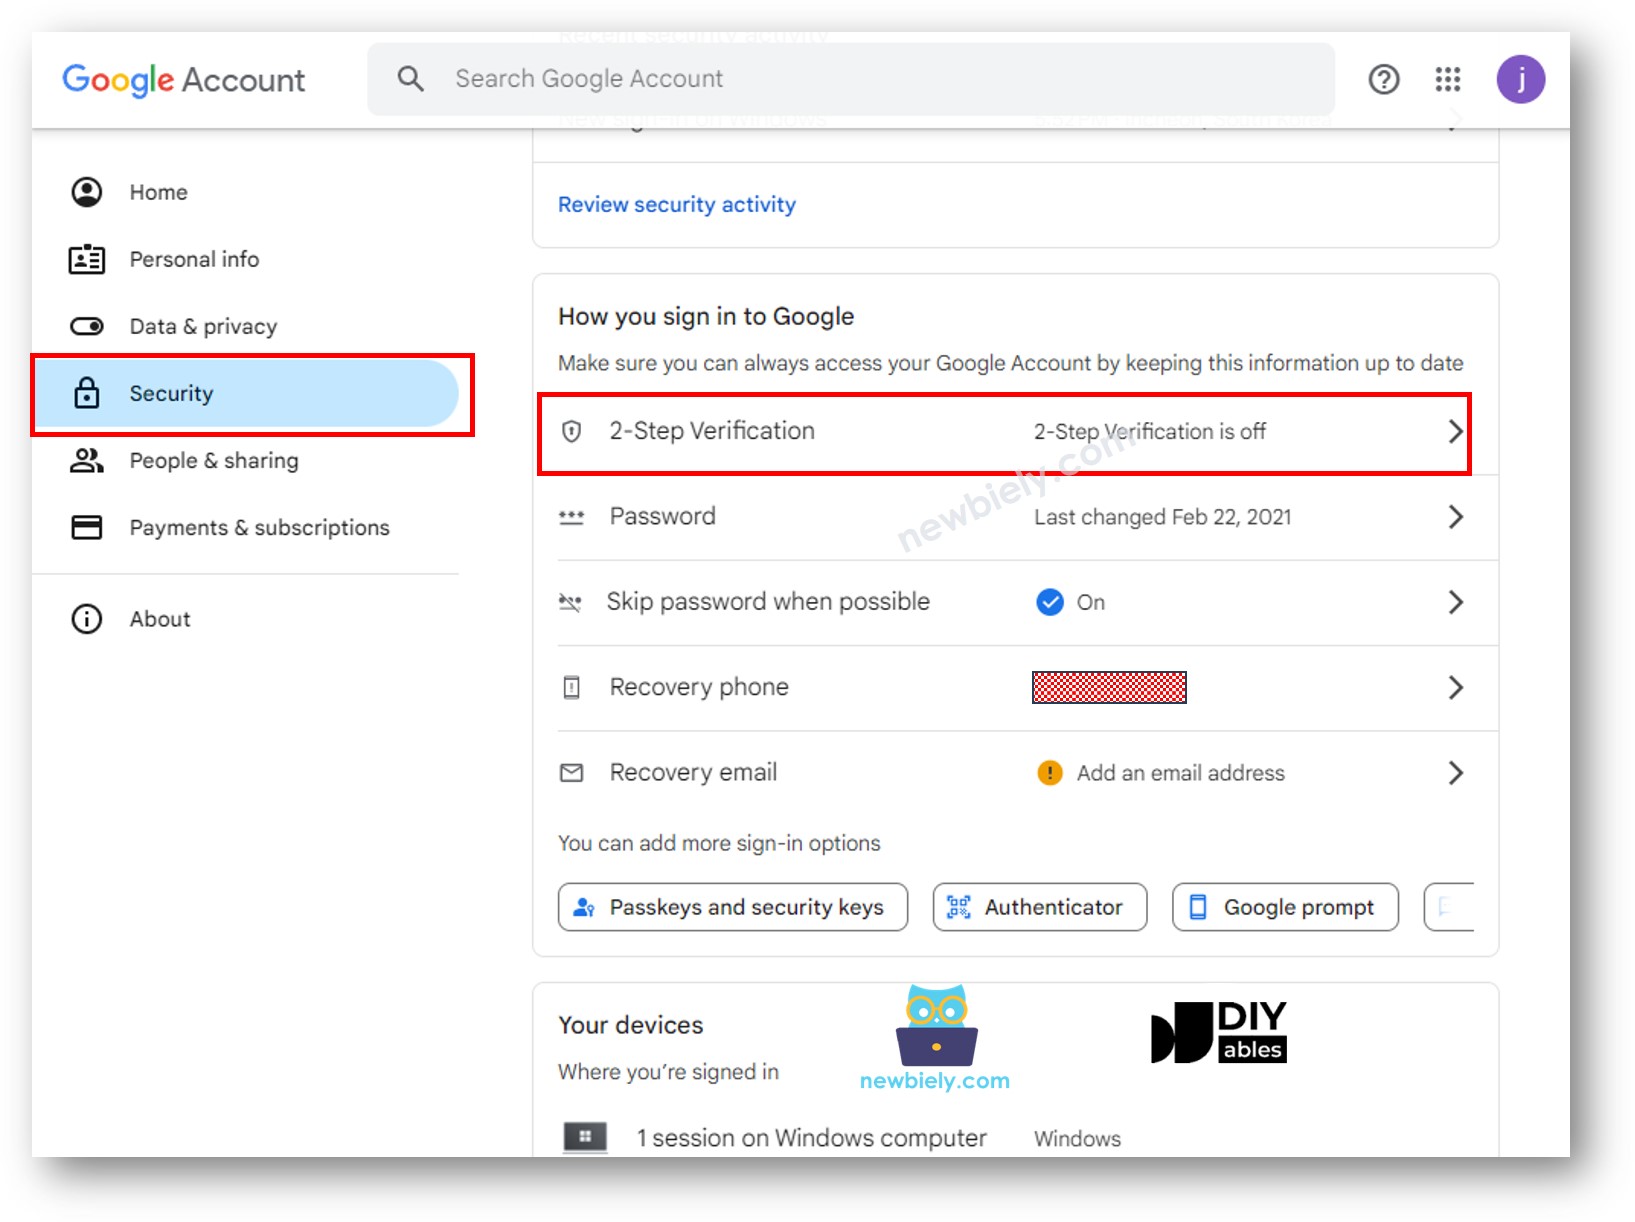
- Activate 2-Step Verification (It is necessary to enable 2-Step Verification before using app passwords).
- Visit the Google App Passwords website and create an app password. You can name it whatever you like.
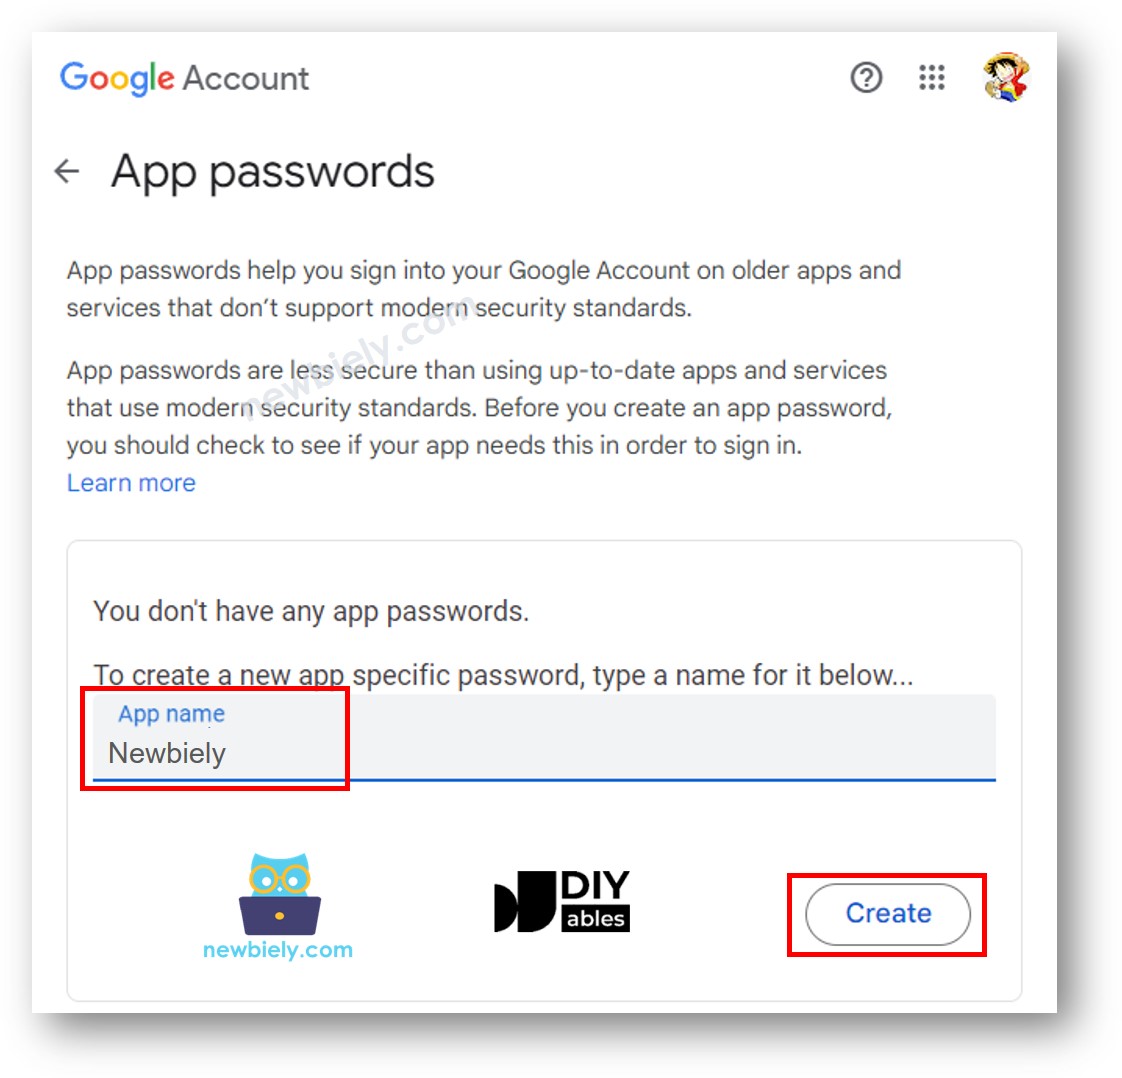
- Click the Create button. A 16-digit password will appear as follows:
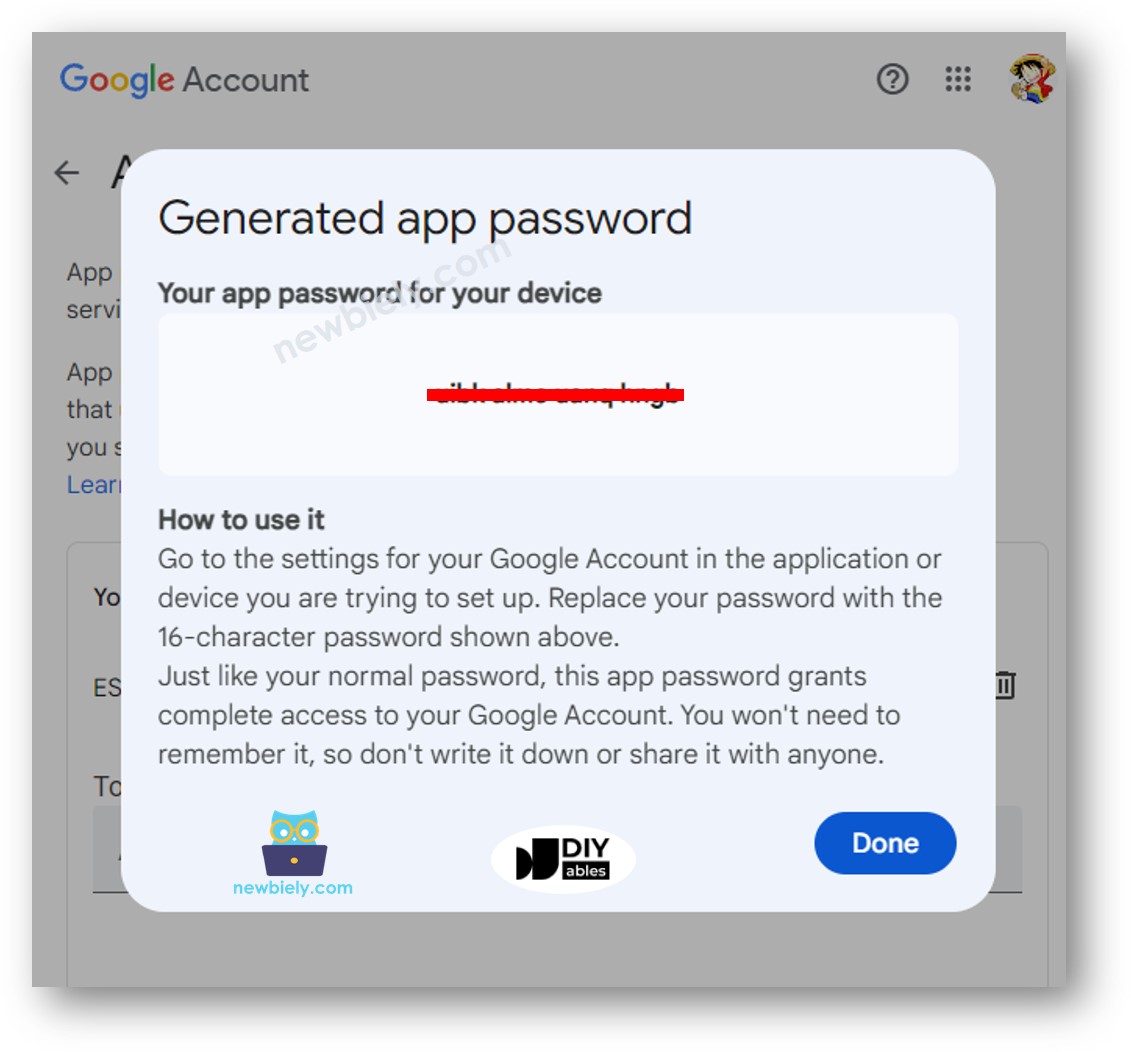
- Save this 16-digit number. You will need it for the Arduino Nano ESP32 code in the next step.
※ NOTE THAT:
Google's layout may be updated. If you can't locate "App Passwords" using the above steps, search for "How to get Google App Passwords" to get the latest instructions.
Arduino Nano ESP32 Code
/*
* This Arduino Nano ESP32 code was developed by newbiely.com
*
* This Arduino Nano ESP32 code is made available for public use without any restriction
*
* For comprehensive instructions and wiring diagrams, please visit:
* https://newbiely.com/tutorials/arduino-nano-esp32/arduino-nano-esp32-gmail
*/
#include <WiFi.h>
#include <ESP_Mail_Client.h>
#define WIFI_SSID "YOUR_WIFI_SSID" // CHANGE IT
#define WIFI_PASSWORD "YOUR_WIFI_PASSWORD" // CHANGE IT
// the sender email credentials
#define SENDER_EMAIL "xxxxxx@gmail.com" // CHANGE IT
#define SENDER_PASSWORD "xxxx xxxx xxxx xxxx" // CHANGE IT to your Google App password
#define RECIPIENT_EMAIL "xxxxxx@gmail.com" // CHANGE IT
#define SMTP_HOST "smtp.gmail.com"
#define SMTP_PORT 587
SMTPSession smtp;
void setup() {
Serial.begin(9600);
WiFi.begin(WIFI_SSID, WIFI_PASSWORD);
Serial.print("Connecting to Wi-Fi");
while (WiFi.status() != WL_CONNECTED) {
Serial.print(".");
delay(300);
}
Serial.println();
Serial.print("Connected with IP: ");
Serial.println(WiFi.localIP());
Serial.println();
String subject = "Email Notification from ESP32";
String textMsg = "This is an email sent from ESP32.\n";
textMsg += "Sensor value: ";
textMsg += "15"; // OR replace this value read from a sensor
gmail_send(subject, textMsg);
}
void loop() {
// YOUR OTHER CODE HERE
}
void gmail_send(String subject, String textMsg) {
// set the network reconnection option
MailClient.networkReconnect(true);
smtp.debug(1);
smtp.callback(smtpCallback);
Session_Config config;
// set the session config
config.server.host_name = SMTP_HOST;
config.server.port = SMTP_PORT;
config.login.email = SENDER_EMAIL;
config.login.password = SENDER_PASSWORD;
config.login.user_domain = F("127.0.0.1");
config.time.ntp_server = F("pool.ntp.org,time.nist.gov");
config.time.gmt_offset = 3;
config.time.day_light_offset = 0;
// declare the message class
SMTP_Message message;
// set the message headers
message.sender.name = F("ESP32");
message.sender.email = SENDER_EMAIL;
message.subject = subject;
message.addRecipient(F("To Whom It May Concern"), RECIPIENT_EMAIL);
message.text.content = textMsg;
message.text.transfer_encoding = "base64";
message.text.charSet = F("utf-8");
message.priority = esp_mail_smtp_priority::esp_mail_smtp_priority_low;
// set the custom message header
message.addHeader(F("Message-ID: <abcde.fghij@gmail.com>"));
// connect to the server
if (!smtp.connect(&config)) {
Serial.printf("Connection error, Status Code: %d, Error Code: %d, Reason: %s\n", smtp.statusCode(), smtp.errorCode(), smtp.errorReason().c_str());
return;
}
if (!smtp.isLoggedIn()) {
Serial.println("Not yet logged in.");
} else {
if (smtp.isAuthenticated())
Serial.println("Successfully logged in.");
else
Serial.println("Connected with no Auth.");
}
// start sending Email and close the session
if (!MailClient.sendMail(&smtp, &message))
Serial.printf("Error, Status Code: %d, Error Code: %d, Reason: %s\n", smtp.statusCode(), smtp.errorCode(), smtp.errorReason().c_str());
}
// callback function to get the Email sending status
void smtpCallback(SMTP_Status status) {
// print the current status
Serial.println(status.info());
// print the sending result
if (status.success()) {
Serial.println("----------------");
Serial.printf("Message sent success: %d\n", status.completedCount());
Serial.printf("Message sent failed: %d\n", status.failedCount());
Serial.println("----------------\n");
for (size_t i = 0; i < smtp.sendingResult.size(); i++) {
// get the result item
SMTP_Result result = smtp.sendingResult.getItem(i);
Serial.printf("Message No: %d\n", i + 1);
Serial.printf("Status: %s\n", result.completed ? "success" : "failed");
Serial.printf("Date/Time: %s\n", MailClient.Time.getDateTimeString(result.timestamp, "%B %d, %Y %H:%M:%S").c_str());
Serial.printf("Recipient: %s\n", result.recipients.c_str());
Serial.printf("Subject: %s\n", result.subject.c_str());
}
Serial.println("----------------\n");
// free the memory
smtp.sendingResult.clear();
}
}
Detailed Instructions
To get started with Arduino Nano ESP32, follow these steps:
- If you are new to Arduino Nano ESP32, refer to the tutorial on how to set up the environment for Arduino Nano ESP32 in the Arduino IDE.
- Connect the Arduino Nano ESP32 board to your computer using a USB cable.
- Launch the Arduino IDE on your computer.
- Select the Arduino Nano ESP32 board and its corresponding COM port.
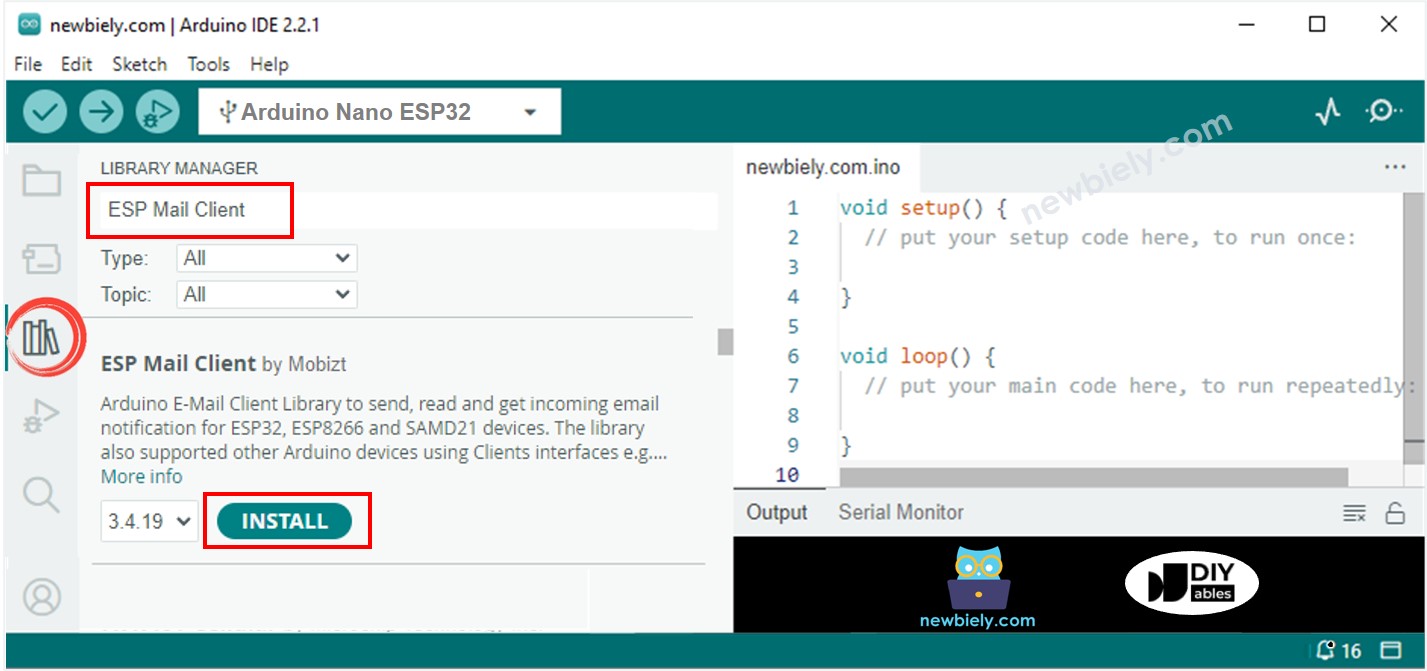
- Open the Library Manager by clicking Library Manager icon on the left in the Arduino IDE.
- Search for ESP Mail Client and find the library by Mobizt.
- Click Install button to install the ESP Mail Client library.
- Copy the above code and paste it into the Arduino IDE.
- Enter your WiFi network name and password where it says WIFI_SID and WIFI_PASSWORD.
- Put your email and password into the SENDER_EMAIL and SENDER_PASSWORD fields in the code.
- Update RECIPIENT_EMAIL to the email address where you want to receive messages. This can be your own email if necessary.
※ NOTE THAT:
- The sender's email should be a Gmail account.
- Use the App password given to you before as the password for the sender.
- The email of the person receiving it can be any kind of email.
- Press the Upload button in Arduino IDE to transfer code to the Arduino Nano ESP32.
- Open the Serial Monitor.
- Check the output on the Serial Monitor.
COM6
#### Message sent successfully
> C: message sent successfully
----------------
Message sent success: 1
Message sent failed: 0
----------------
Message No: 1
Status: success
Date/Time: May 27, 2024 04:42:50
Recipient: xxxxxx@gmail.com
Subject: Email Notification from Arduino Nano ESP32
----------------
Autoscroll
Clear output
9600 baud
Newline
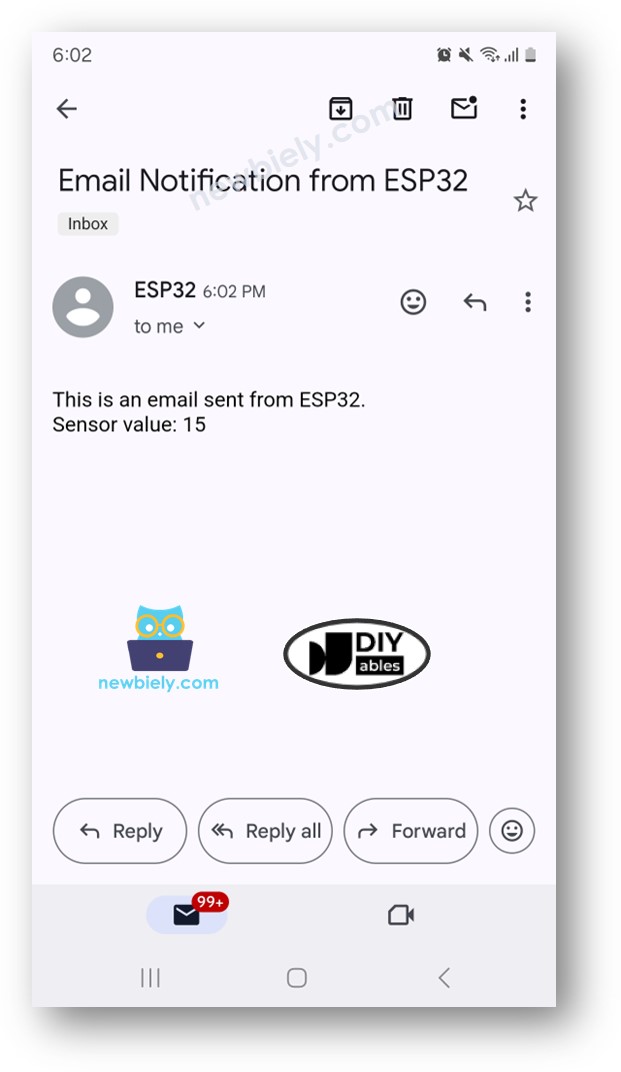
- Check out the email inbox of receiver. You will find an email similar to this:
