Arduino Nano ESP32 - Keypad
This tutorial provides instructions on how to use Arduino Nano ESP32 with keypad. In detail, we will learn:
- How to use keypad 3x4 with Arduino Nano ESP32
- How to use keypad 4x4 with Arduino Nano ESP32
- How to use the password inputted from keypad
Hardware Preparation
Or you can buy the following kits:
| 1 | × | DIYables Sensor Kit (18 sensors/displays) |
Additionally, some of these links are for products from our own brand, DIYables .
Overview of Keypad
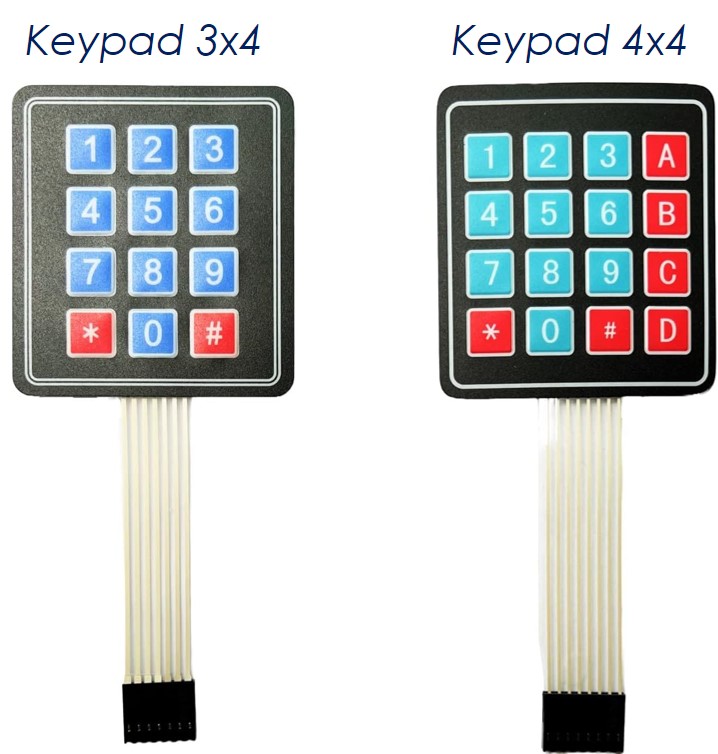
The keypad is composed of a group of buttons arranged in the matrix (rows and columns). A button represents for a key. There are many types of keypad. The keypad 3x4 (12 keys) and keypad 4x4 (16 keys) is two most common-used on DIY projects.
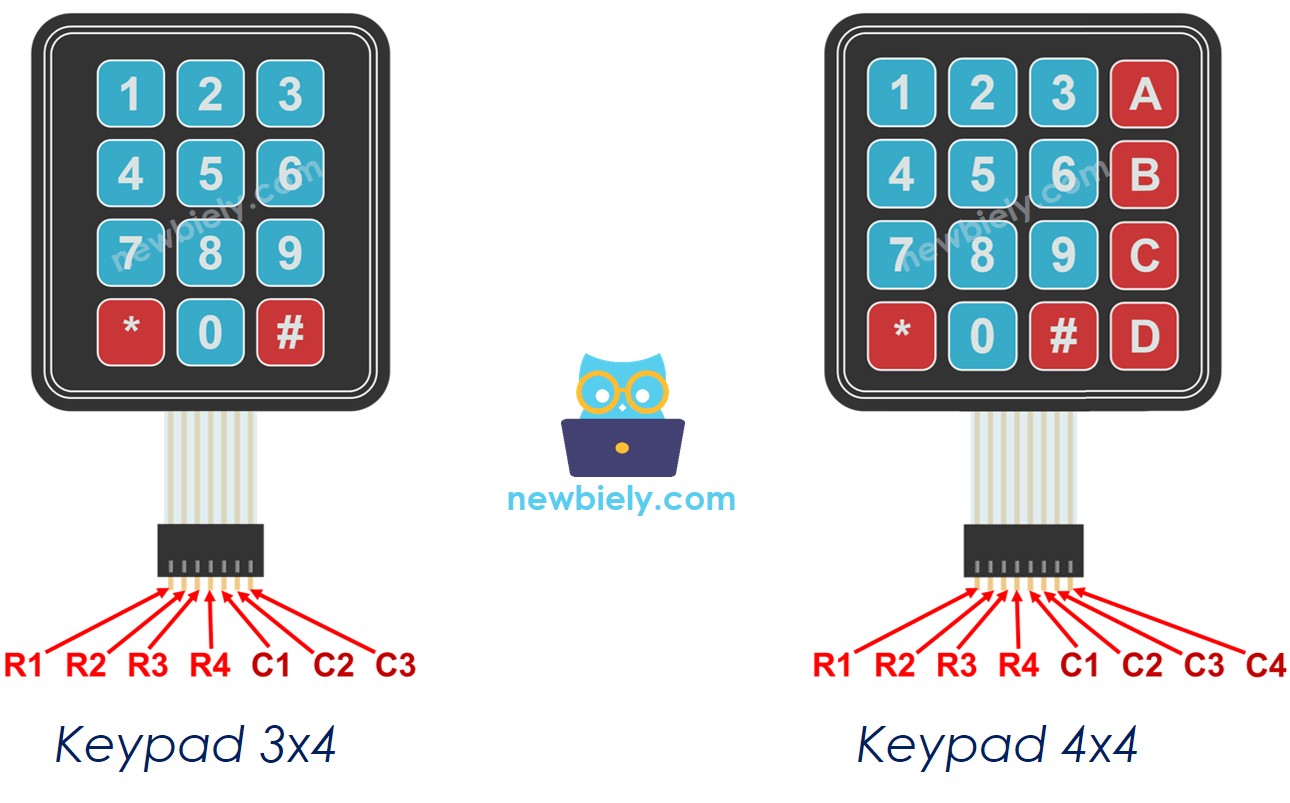
Keypad Pinout
Keypad pins are categorized into two groups: row and column.
- The keypad 3x4 has 7 pins:
- R1, R2, R3, R4: row-pins
- C1, C2, C3: column-pins
- The keypad 4x4 has 8 pins:
- R1, R2, R3, R4: row-pins
- C1, C2, C3, C4: column-pins
How Keypad Works
See how keypad works
Wiring Diagram between Keypad and Arduino Nano ESP32
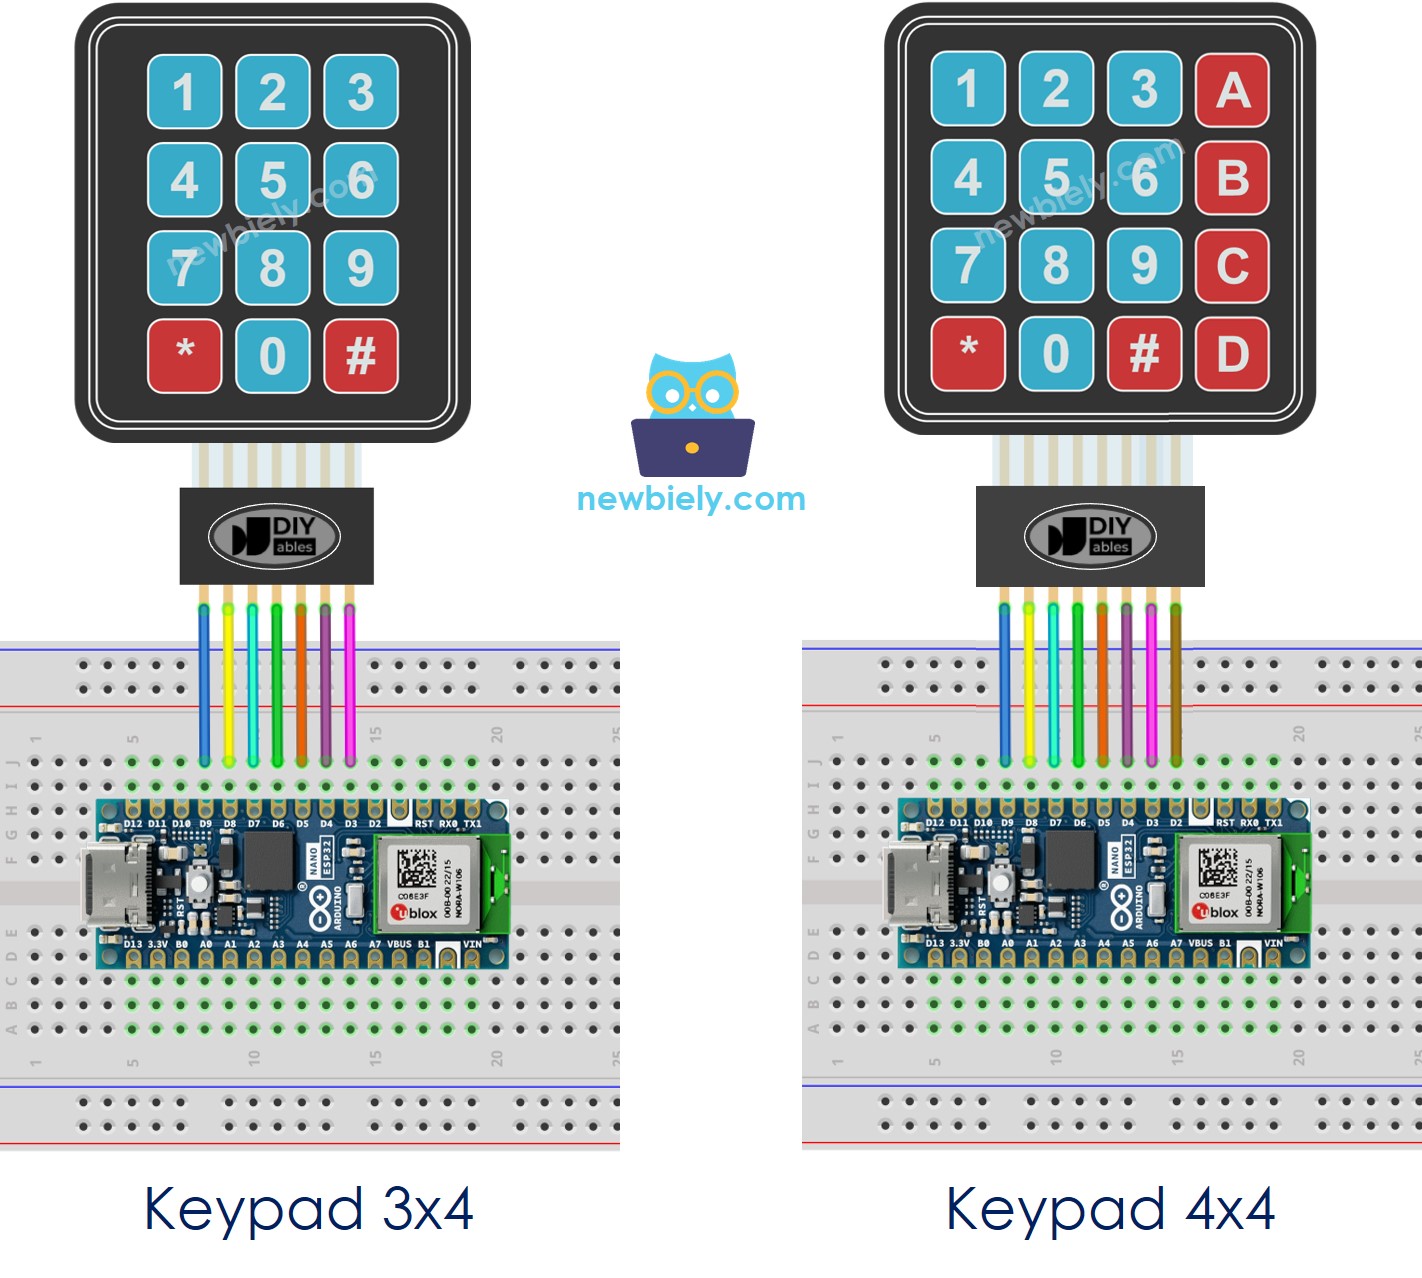
This image is created using Fritzing. Click to enlarge image
Arduino Nano ESP32 Code
Keypad 3x4
Keypad 4x4
Detailed Instructions
- If this is the first time you use Arduino Nano ESP32, see how to setup environment for Arduino Nano ESP32 on Arduino IDE.
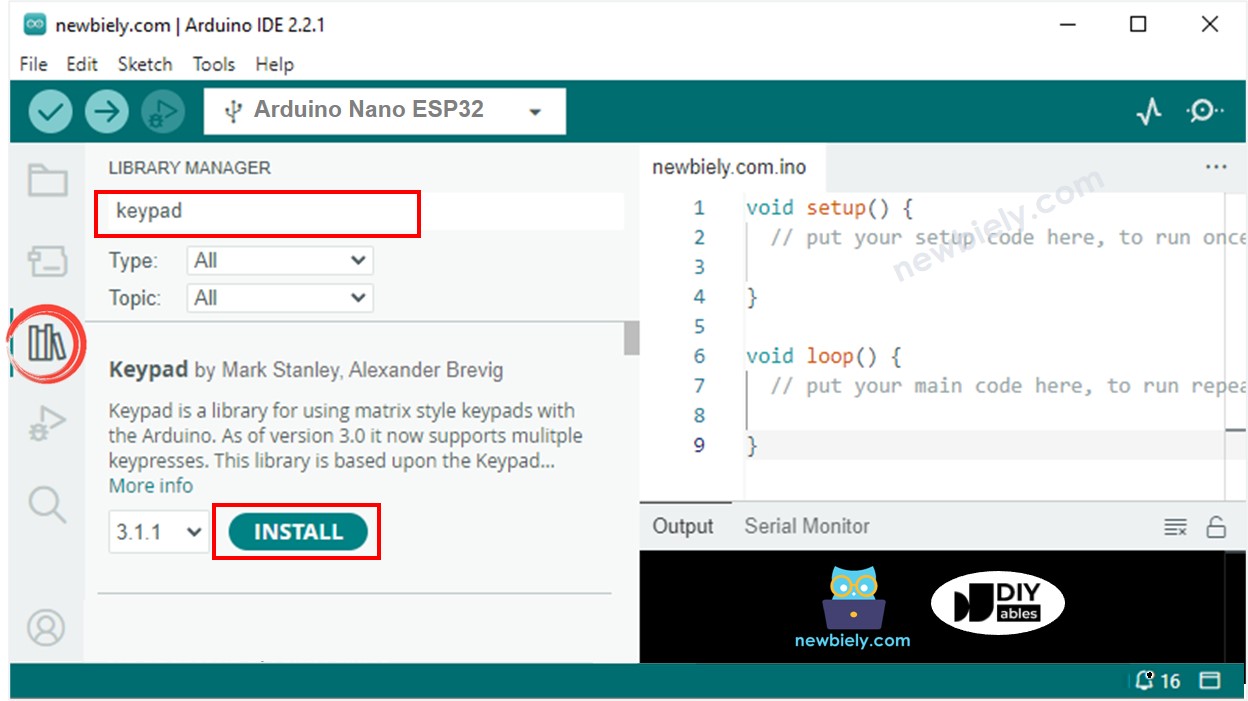
- Open the Library Manager by clicking on the Library Manager icon on the left navigation bar of Arduino IDE
- Type keypad on the search box, then look for the keypad library by Mark Stanley, Alexander Brevig
- Click Install button to install keypad library.
- Copy the above code and paste it to Arduino IDE.
- Compile and upload code to Arduino Nano ESP32 board by clicking Upload button on Arduino IDE
- Open Serial Monitor on Arduino IDE
- Press some keys on keypad
- See the result in Serial Monitor
Keypad and Password
The keypad is widely used to authenticate someone by password. In this tutorials, a valid password is pre-defined in the code. When an user inputs the password from keypad, it is compared with the pre-defined password:
- If matched, the access is granted.
- If not, the access is defined.
To use password with keypad, we specify two special keys:
- A key to start inputting the password. For example, key "*"
- A key to finish inputting the password. For example, key "#"
The password inputed from an user will be stored in a string, called the inputted password string. When a key is pressed:
- If an inputted key is "*", clear the inputted password string to start new password
- If an inputted key is NOT "*" or "#", add the key to the inputted password string.
- If an inputted key is "#", compare the inputted password string with the pre-defined password.
Keypad - Password Code
- Run above code
- Open Serial Monitor on Arduino IDE
- Press "123456" keys and press "#"
- Press "7890" keys and press "#"
- Check out the result on the Serial Monitor. It looks like the below: