Arduino Nano ESP32 - Force Sensor
The force sensor is called force sensitive resistor, the force sensing resistor, or FSR. This tutorial provides instructions on how to use Arduino Nano ESP32 with the force sensor. In detail, we will learn:
- How the force sensor works.
- How to connect the force sensor to Arduino Nano ESP32.
- How to program for Arduino Nano ESP32 to read value from a force sensor.
Hardware Preparation
Or you can buy the following kits:
| 1 | × | DIYables Sensor Kit (18 sensors/displays) |
Additionally, some of these links are for products from our own brand, DIYables .
Overview of Force Sensor
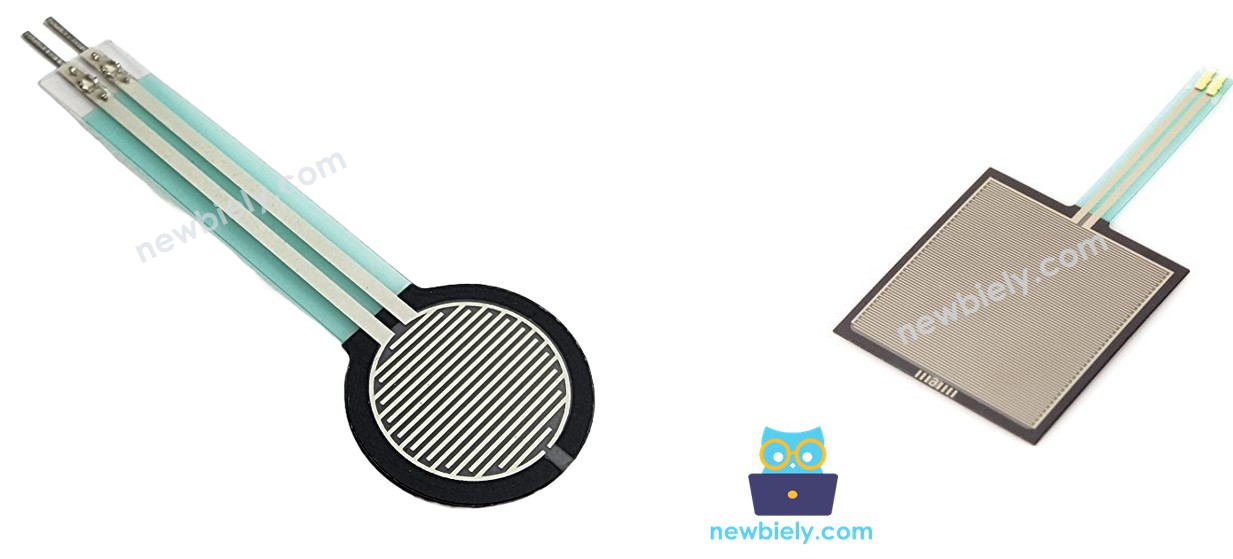
A force sensor is a resistor that its resistance is in inverse proportion to how much force it is given. The more force gives to the sensor, the smaller the sensor's resistance is. The force sensor is good for application that detects physical squeeze, pressure. However, it is not good for the application that finds how many pounds of weight
Force Sensor Pinout
A force sensor has two pins. Just like a resistor, we do NOT need to differentiate these pins.
Wiring Diagram between Force Sensor and Arduino Nano ESP32
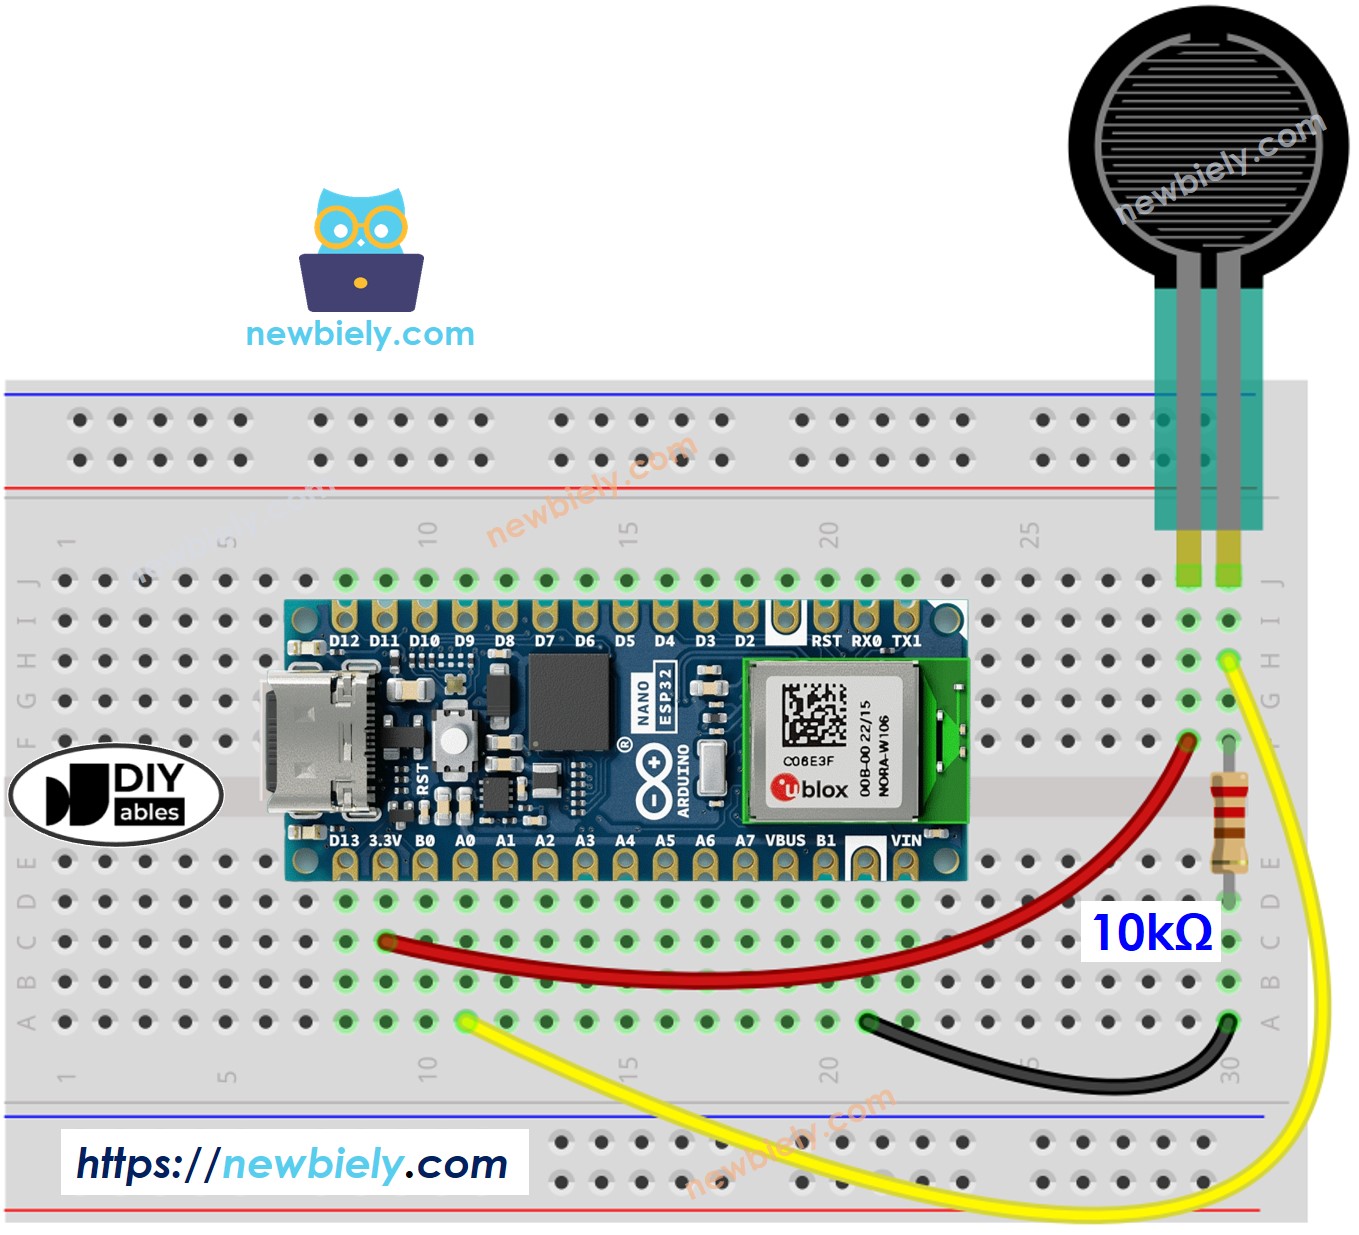
This image is created using Fritzing. Click to enlarge image
How To Program Force Sensor
The resistance is in proportion to voltage. We can use the ESP32's analog input pin to measure voltage.
By connecting a pin of the force sensor to an analog input pin, we can read the analog value from the pin ⇒ voltage ⇒ resistance ⇒ force (all í in relative value)
Arduino Nano ESP32 Code
Detailed Instructions
- If this is the first time you use Arduino Nano ESP32, see how to setup environment for Arduino Nano ESP32 on Arduino IDE.
- Copy the above code and paste it to Arduino IDE.
- Compile and upload code to Arduino Nano ESP32 board by clicking Upload button on Arduino IDE
- Press the force sensor
- Check out the result on the Serial Monitor. It looks like the below:.
※ NOTE THAT:
This tutorial uses the analogRead() function to read values from an ADC (Analog-to-Digital Converter) connected to a sensor or component. The Arduino Nano ESP32's ADC is suitable for projects that do not require high accuracy. However, for projects needing precise measurements, keep the following in mind:
- The Arduino Nano ESP32's ADC is not perfectly accurate and might require calibration for correct results. Each Arduino Nano ESP32 board can vary slightly, so calibration is necessary for each individual board.
- Calibration can be challenging, especially for beginners, and might not always yield the exact results you want.
For projects requiring high precision, consider using an external ADC (e.g ADS1115) with the Arduino Nano ESP32 or using another Arduino, such as the Arduino Uno R4 WiFi, which has a more reliable ADC. If you still want to calibrate the Arduino Nano ESP32's ADC, refer to the ESP32 ADC Calibration Driver.