Arduino Nano ESP32 - Web Server on SD Card

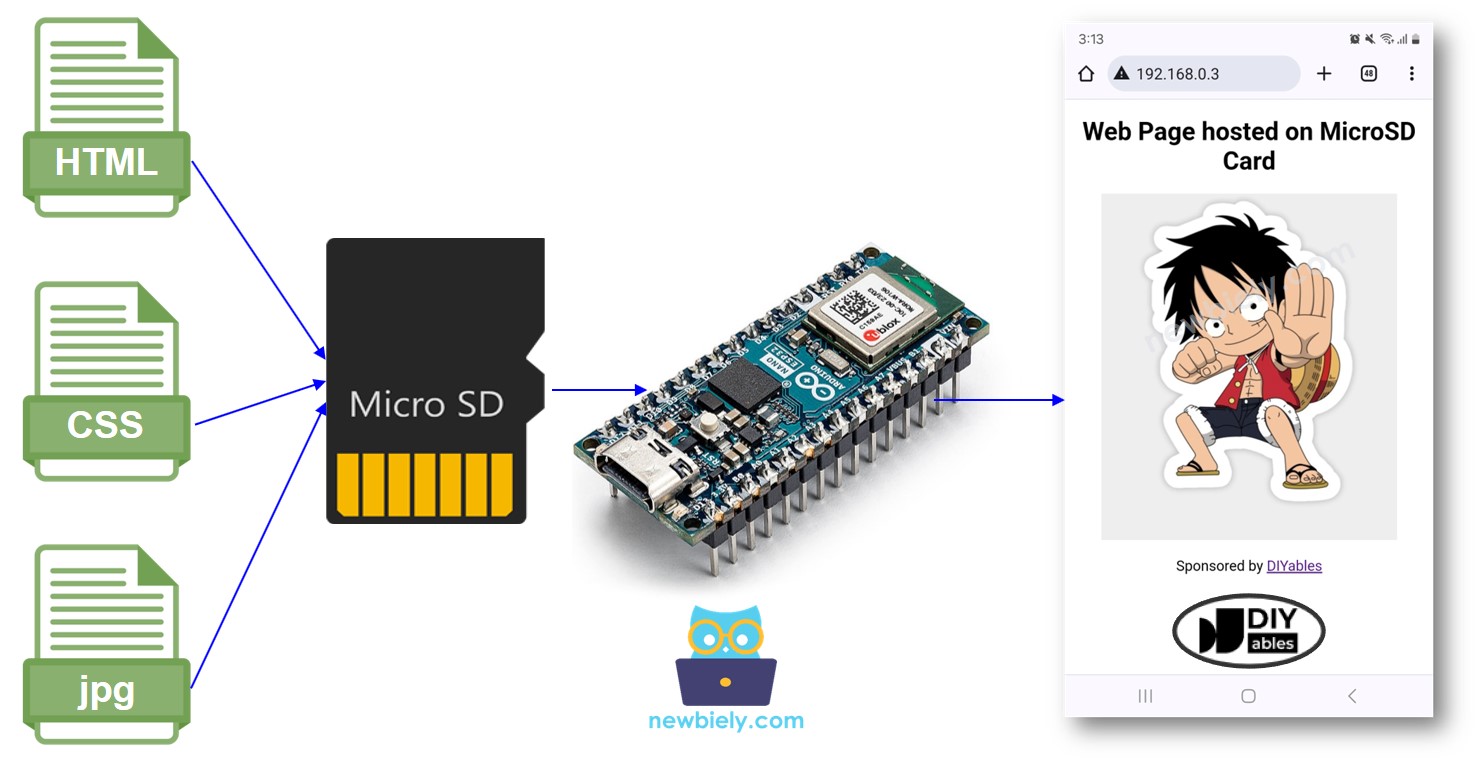
In this tutorial, we'll explore the process of creating an Arduino Nano ESP32 web server hosted on a MicroSD Card. All the necessary HTML, CSS, JavaScript, and image files will reside on the MicroSD Card.

Arduino Nano ESP32 web server on MicroSD Card

Hardware Preparation

1×Arduino Nano ESP32
1×USB Cable Type-C
1×Micro SD Card
1×Micro SD Card Module
1×Jumper Wires
1×Breadboard
1×USB 3.0 SD Card Reader
1×(Recommended) Screw Terminal Adapter for Arduino Nano

Or you can buy the following sensor kits:

1×DIYables Sensor Kit (30 sensors/displays)
1×DIYables Sensor Kit (18 sensors/displays)
Disclosure: Some of the links provided in this section are Amazon affiliate links. We may receive a commission for any purchases made through these links at no additional cost to you. We appreciate your support.

Overview of Arduino Nano ESP32 and Web Server

We have specific tutorials about Arduino Nano ESP32 and Web Server, MicroSD Card. Each tutorial contains detailed information and step-by-step instructions about hardware pinout, working principle, wiring connection to Arduino Nano ESP32, Arduino Nano ESP32 code... Learn more about them at the following links:

Wiring Diagram

The wiring diagram between Arduino Nano ESP32 and Micro SD Card Module

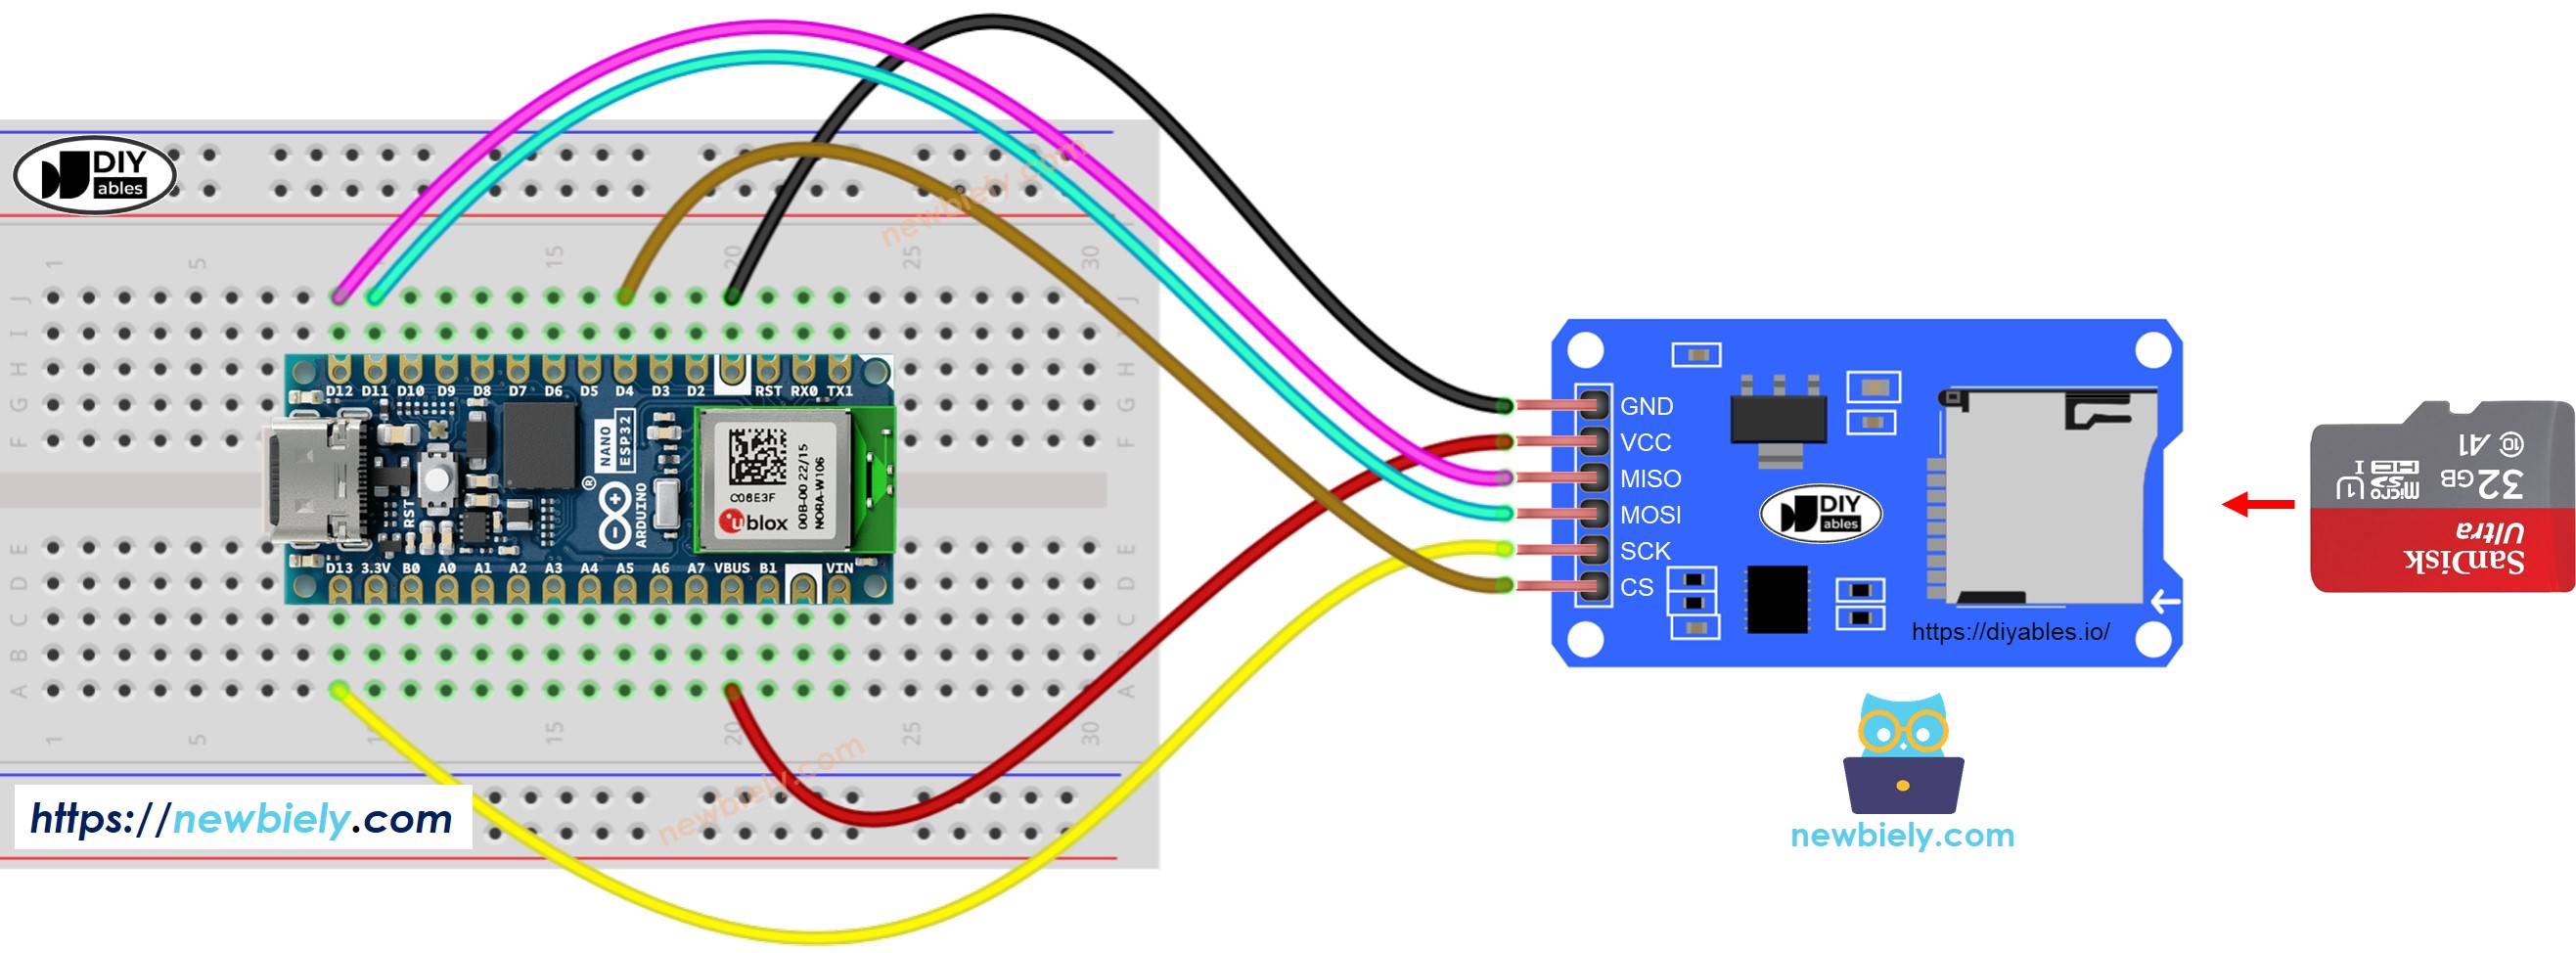
This image is created using Fritzing. Click to enlarge image

Copy HTML contents to MicroSD Card

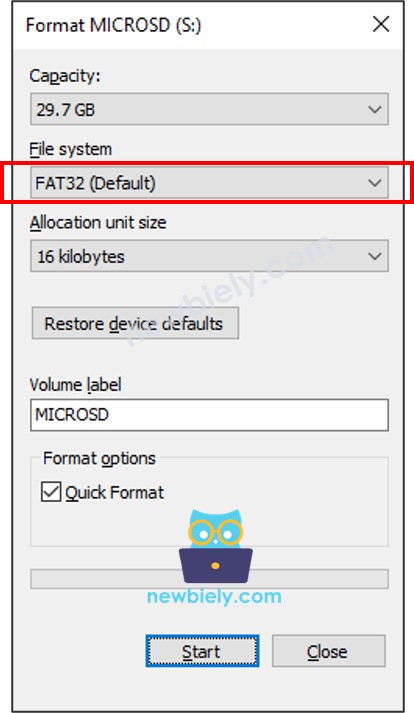
  • Please make sure that your Micro SD Card is formated on FAT32 format as below (on Windows OS, right mouse click → format):
Micro SD Card format FAT32
  • Create a HTML file index.html and add the following code:
<!DOCTYPE html> <html lang="en"> <head> <meta charset="UTF-8"> <meta name="viewport" content="width=device-width, initial-scale=1.0"> <title>Arduino Nano ESP32 Web Page</title> <link rel="icon" href="favicon.ico" type="image/x-icon"> <link rel="stylesheet" href="styles.css"> </head> <body> <div class="container"> <h1>Web Page hosted on MicroSD Card</h1> <img src="luffy.jpg" alt="A beautiful image"> <p>Sponsored by <a href="https://amazon.com/diyables">DIYables</a></p> </div> </body> </html>
  • Create a CSS file styles.css and add the following code:
body { font-family: Arial, sans-serif; margin: 0; padding: 0; background-color: white; } h1 { font-size: 28px; } .container { max-width: 800px; margin: 20px auto; text-align: center; } img { max-width: 80%; height: auto; display: block; margin: 20px auto; }
  • Prepare an image. This tutorial uses luffy.jpg, which is used in HTML code. You can download this image here:
luffy
  • (Optional) Prepare favicon image. This tutorial uses this favicon.ico
  • Put all files in the root directory of MicroSD Card, like below images:
Arduino Nano ESP32 HTML contents on microSD Card

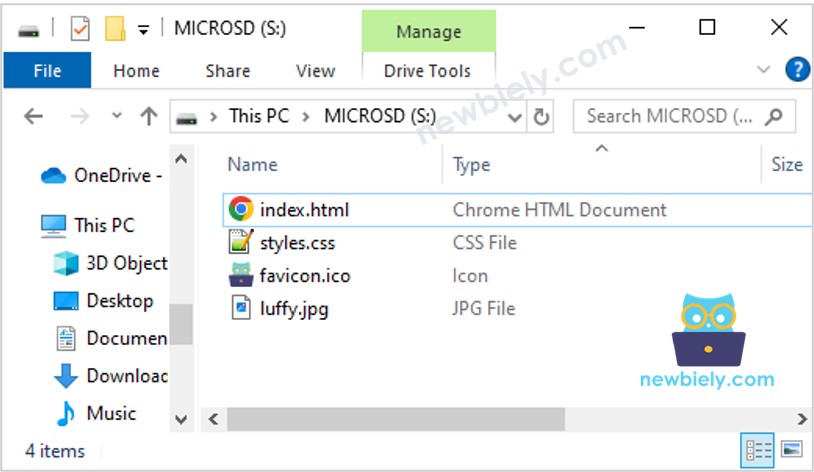
Please note that you can add other files such as JavaScript, txt, csv...

Arduino Nano ESP32 Code - Web server on MicroSD Card

/* * This Arduino Nano ESP32 code was developed by newbiely.com * * This Arduino Nano ESP32 code is made available for public use without any restriction * * For comprehensive instructions and wiring diagrams, please visit: * https://newbiely.com/tutorials/arduino-nano-esp32/arduino-nano-esp32-web-server-on-sd-card */ #include <WiFi.h> #include <ESPAsyncWebServer.h> #include <FS.h> #include <SD.h> #define PIN_SPI_CS D4 // The Arduino Nano ESP32 pin connected to the CS pin of SD card module // Replace with your network credentials const char* ssid = "YOUR_WIFI_SSID"; // CHANGE IT const char* password = "YOUR_WIFI_PASSWORD"; // CHANGE IT // Create AsyncWebServer object on port 80 AsyncWebServer server(80); void setup() { Serial.begin(9600); // Connect to Wi-Fi WiFi.begin(ssid, password); while (WiFi.status() != WL_CONNECTED) { delay(1000); Serial.println("Connecting to WiFi..."); } Serial.println("Connected to WiFi"); // Print the ESP32's IP address Serial.print("ESP32 Web Server's IP address: "); Serial.println(WiFi.localIP()); // init MicroSD Card if (!SD.begin(PIN_SPI_CS)) { while (1) { Serial.println(F("SD CARD FAILED, OR NOT PRESENT!")); delay(1000); } } server.on("/", HTTP_GET, [](AsyncWebServerRequest* request) { request->send(SD, "/index.html", "text/html"); }); server.serveStatic("/", SD, "/"); server.begin(); } void loop() { // Your code here }

Detailed Instructions

  • If this is the first time you use ESP32, see how to setup environment for Arduino Nano ESP32 on Arduino IDE.
  • Connect the Arduino Nano ESP32 board to your PC via a micro USB cable
  • Open Arduino IDE on your PC.
  • Select the right Arduino Nano ESP32 board (e.g. Arduino Nano ESP32 and COM port.
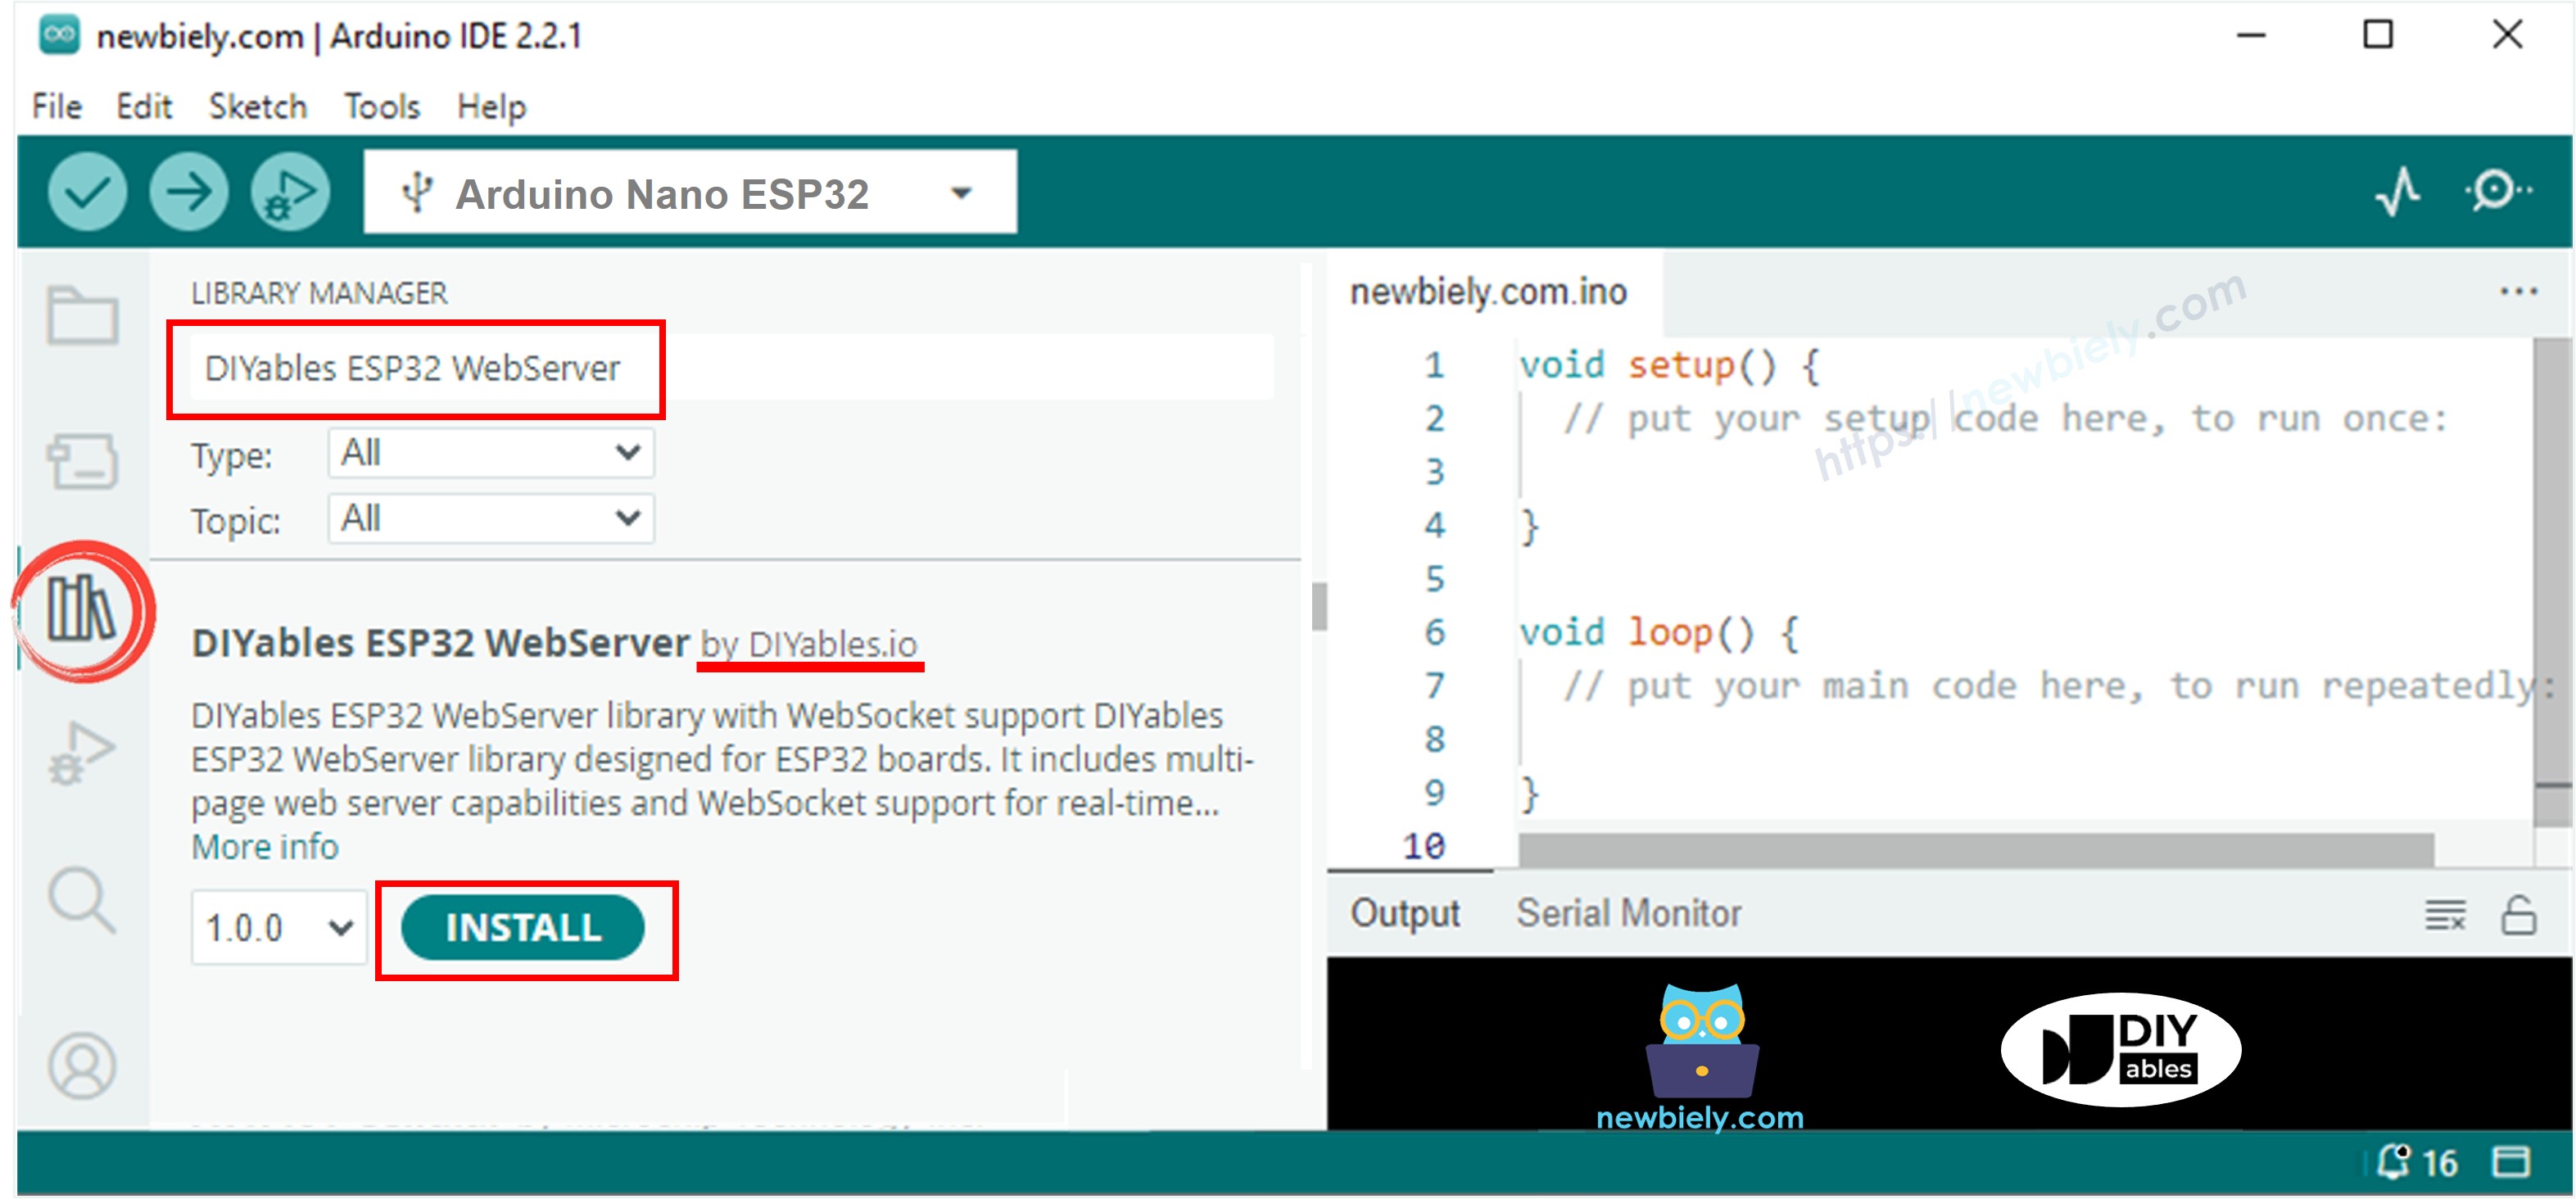
  • Open the Library Manager by clicking on the Library Manager icon on the left navigation bar of Arduino IDE.
  • Search “ESPAsyncWebServer”, then find the ESPAsyncWebServer created by lacamera.
  • Click Install button to install ESPAsyncWebServer library.
Arduino Nano ESP32 ESPAsyncWebServer library
  • You will be asked to install the dependency. Click Install All button.
Arduino Nano ESP32 ESPAsyncWebServer dependencies library
  • Copy the above code and open with Arduino IDE
  • Change the wifi information (SSID and password) in the code to yours
  • Click Upload button on Arduino IDE to upload code to ESP32
  • Open the Serial Monitor
  • Check out the result on Serial Monitor.
COM6
Send
Connecting to WiFi... Connected to WiFi Arduino Nano ESP32 Web Server's IP address: 192.168.0.3
Autoscroll Show timestamp
Clear output
9600 baud  
Newline  
  • Upon accessing the Serial Monitor, you'll encounter an IP address, such as: 192.168.0.3.
  • Enter the provided IP address into the address bar of a web browser on either your smartphone or PC.
  • Keep in mind to substitute '192.168.0.3' with the IP address displayed on the Serial Monitor.
  • Upon entering the IP address, a page will load HTML, CSS, and images from the SD Card.
Arduino Nano ESP32 Web page on SD Card
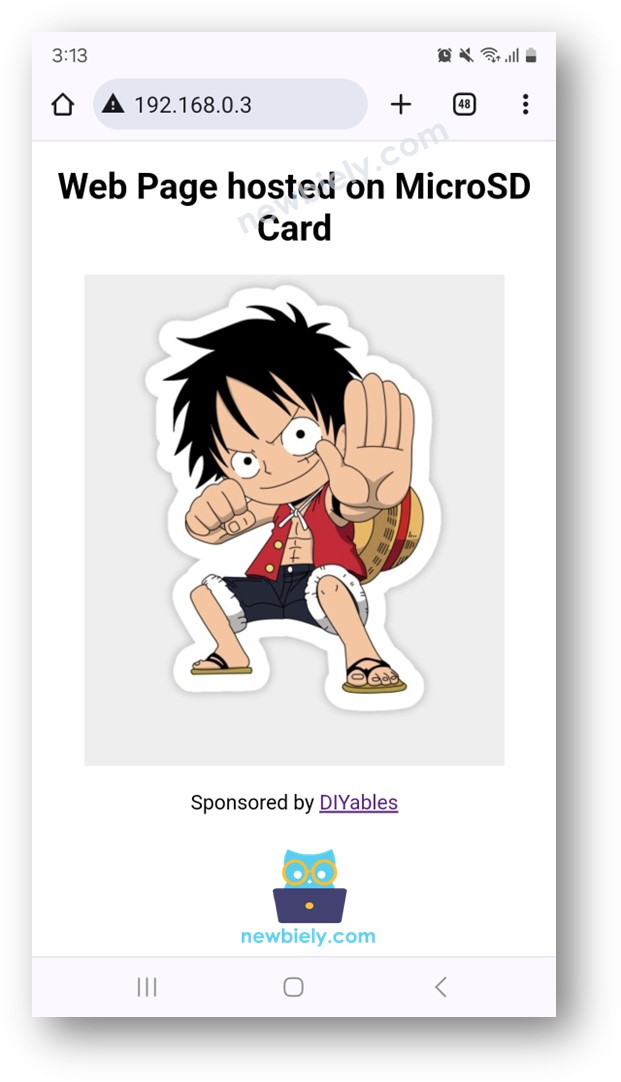
  • Upon inspection, you'll notice that the web browser successfully loads HTML, CSS, and images stored on the SD Card.

Feel free to customize the HTML, CSS code, and include additional images and JavaScript to craft your own unique web page.

※ OUR MESSAGES

  • As freelancers, We are AVAILABLE for HIRE. See how to outsource your project to us
  • Please feel free to share the link of this tutorial. However, Please do not use our content on any other websites. We invested a lot of effort and time to create the content, please respect our work!